
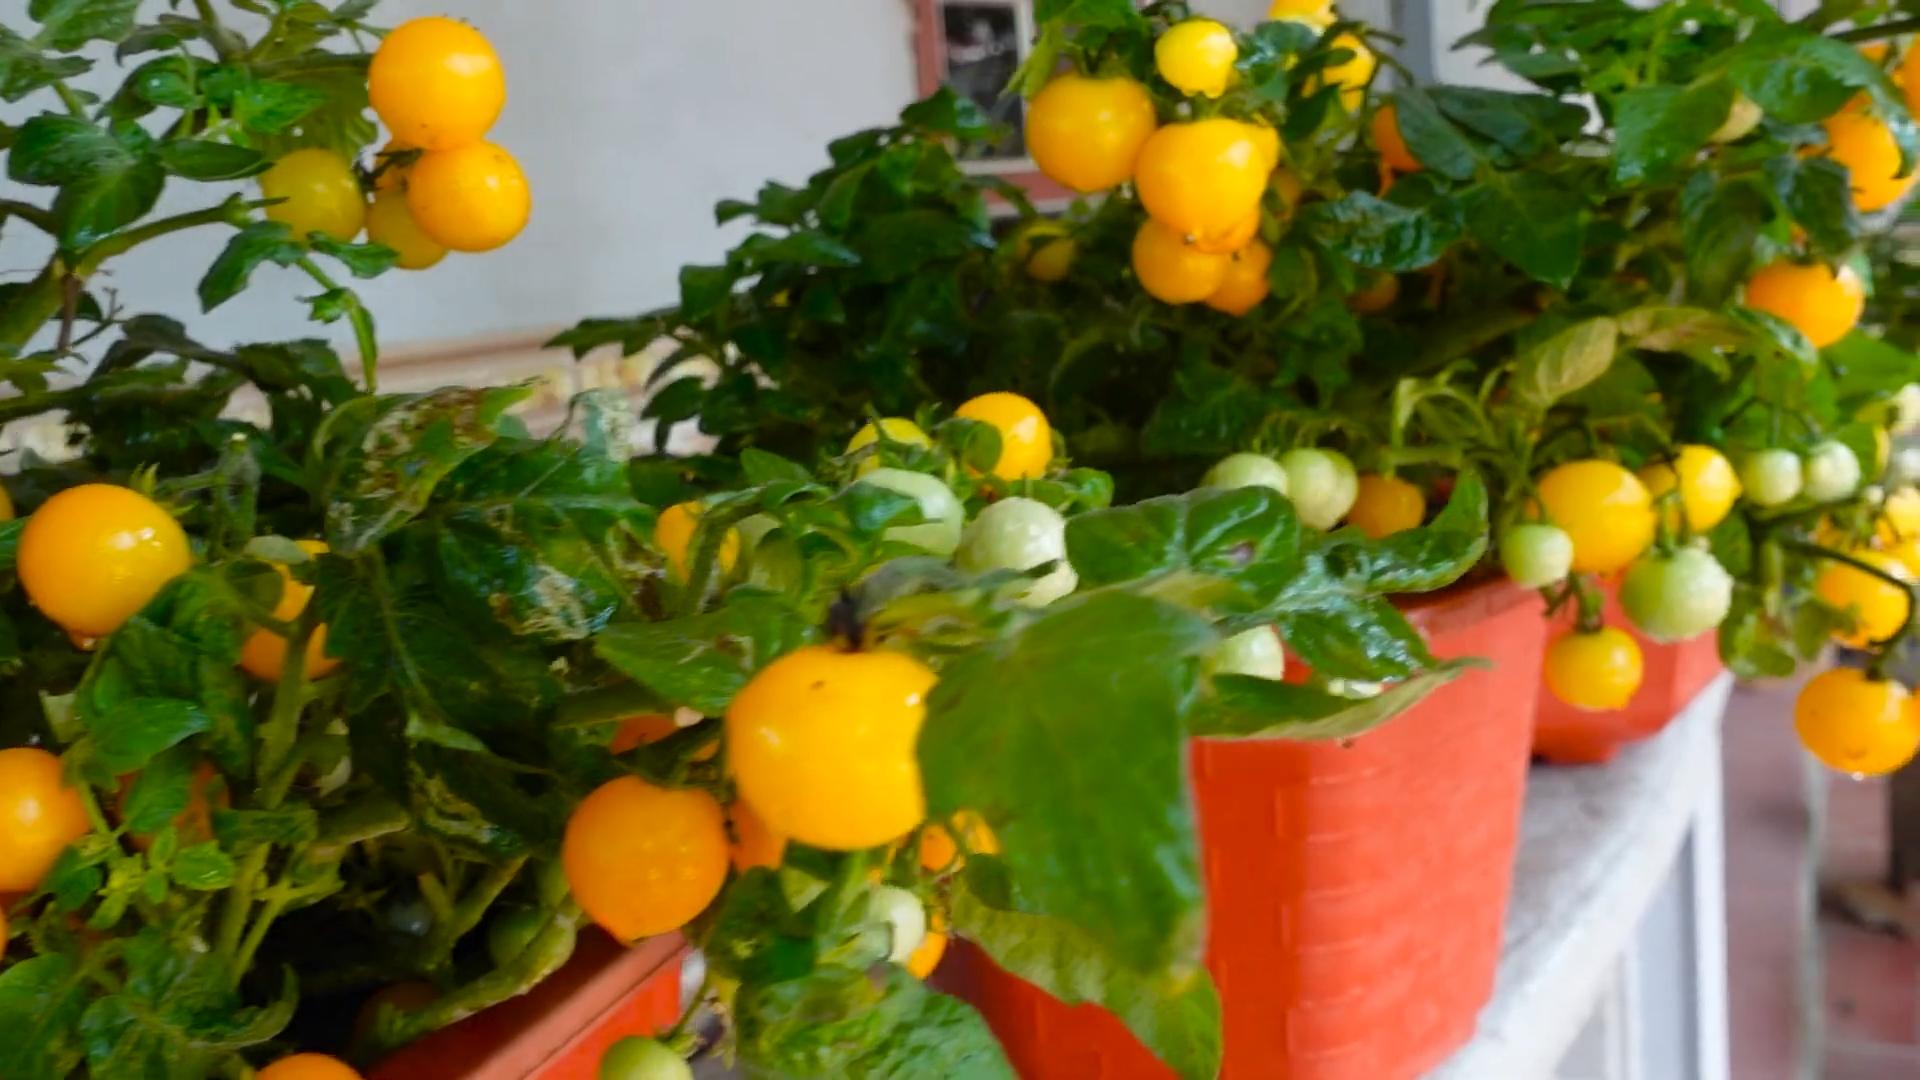
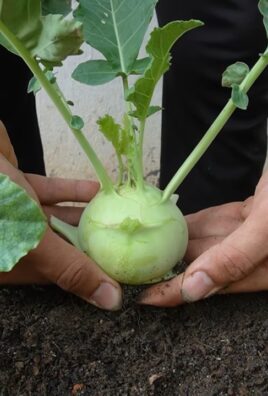
Balcony Cherry Tomato Growing – ever dreamt of plucking juicy, sun-ripened cherry tomatoes right from your own balcony? I know I have! There’s something incredibly satisfying about growing your own food, even in a small space. For centuries, urban dwellers have found creative ways to cultivate gardens, from window boxes overflowing with herbs to rooftop vegetable patches. This connection to nature, even in the heart of the city, is deeply ingrained in our history.
But let’s be honest, sometimes it feels like you need a sprawling garden and a green thumb the size of Texas to actually succeed. That’s where this DIY guide comes in! Forget the complicated gardening jargon and endless trips to the garden center. I’m going to share some simple, effective tricks and hacks that will have you harvesting baskets of sweet cherry tomatoes from your balcony in no time.
Why do you need this? Because fresh, homegrown tomatoes taste infinitely better than anything you can buy at the store. Plus, balcony cherry tomato growing is a fantastic way to de-stress, connect with nature, and impress your friends with your newfound gardening skills. So, grab your gardening gloves, and let’s get started on this exciting journey to a bountiful balcony harvest!
Growing Delicious Cherry Tomatoes on Your Balcony: A DIY Guide
Hey there, fellow balcony gardeners! Dreaming of fresh, juicy cherry tomatoes right outside your door? You’ve come to the right place! I’m going to walk you through everything you need to know to successfully grow a thriving cherry tomato plant on your balcony, even if you’re a complete beginner. Get ready for a summer filled with homegrown goodness!
Choosing the Right Cherry Tomato Variety
First things first, let’s talk about tomato varieties. Not all cherry tomatoes are created equal, especially when it comes to container gardening. Some are bushier, some are taller, and some are just plain tastier (in my humble opinion!). Here are a few of my personal favorites that do well in pots:
* ‘Tiny Tim’: As the name suggests, these are super compact and perfect for small balconies. They produce loads of tiny, sweet tomatoes.
* ‘Patio’: Another compact variety, ‘Patio’ tomatoes are known for their early yields and disease resistance.
* ‘Sungold’: These golden-orange cherry tomatoes are incredibly sweet and flavorful. They tend to be a bit taller, so you’ll need a good support system.
* ‘Sweet Million’: A classic choice, ‘Sweet Million’ produces tons of small, red tomatoes on long trusses. They’re prolific and reliable.
* ‘Black Cherry’: If you’re looking for something a little different, try ‘Black Cherry’. These dark, almost black tomatoes have a rich, complex flavor.
Gathering Your Supplies
Okay, now that we’ve picked our tomato superstar, let’s gather our supplies. Here’s what you’ll need:
* A large container: This is crucial! Cherry tomatoes need plenty of room to grow. I recommend a pot that’s at least 12-14 inches in diameter and depth. Bigger is generally better.
* High-quality potting mix: Don’t skimp on this! Use a well-draining potting mix specifically formulated for containers. Garden soil is too heavy and won’t drain properly.
* Tomato fertilizer: Tomatoes are heavy feeders, so you’ll need to fertilize them regularly. Look for a fertilizer that’s specifically designed for tomatoes, or a balanced fertilizer with a higher phosphorus content (the middle number on the fertilizer label).
* Tomato cage or stake: Most cherry tomato varieties will need support as they grow. A tomato cage or sturdy stake will help keep them upright and prevent them from toppling over.
* Watering can or hose: You’ll need a way to water your tomato plant regularly.
* Hand trowel: For planting and transplanting.
* Gardening gloves: To keep your hands clean and protected.
* Seeds or seedlings: You can start your tomatoes from seed or buy seedlings from a garden center. Seedlings are a quicker option, but starting from seed is more economical.
Starting from Seed (Optional)
If you’re feeling ambitious, you can start your cherry tomatoes from seed indoors about 6-8 weeks before the last expected frost. Here’s how:
1. Sow the seeds: Fill small seed starting trays or pots with seed starting mix. Sow the seeds about 1/4 inch deep and gently water them.
2. Provide warmth and light: Keep the soil moist and warm (around 70-75°F). You can use a heat mat to speed up germination. Place the trays under grow lights or in a sunny window.
3. Thin the seedlings: Once the seedlings have their first true leaves (the second set of leaves), thin them out so that only the strongest seedling remains in each cell.
4. Harden off the seedlings: Before transplanting the seedlings outdoors, you’ll need to harden them off. This means gradually exposing them to outdoor conditions over a period of 1-2 weeks. Start by placing them outside for a few hours each day, gradually increasing the amount of time they spend outdoors.
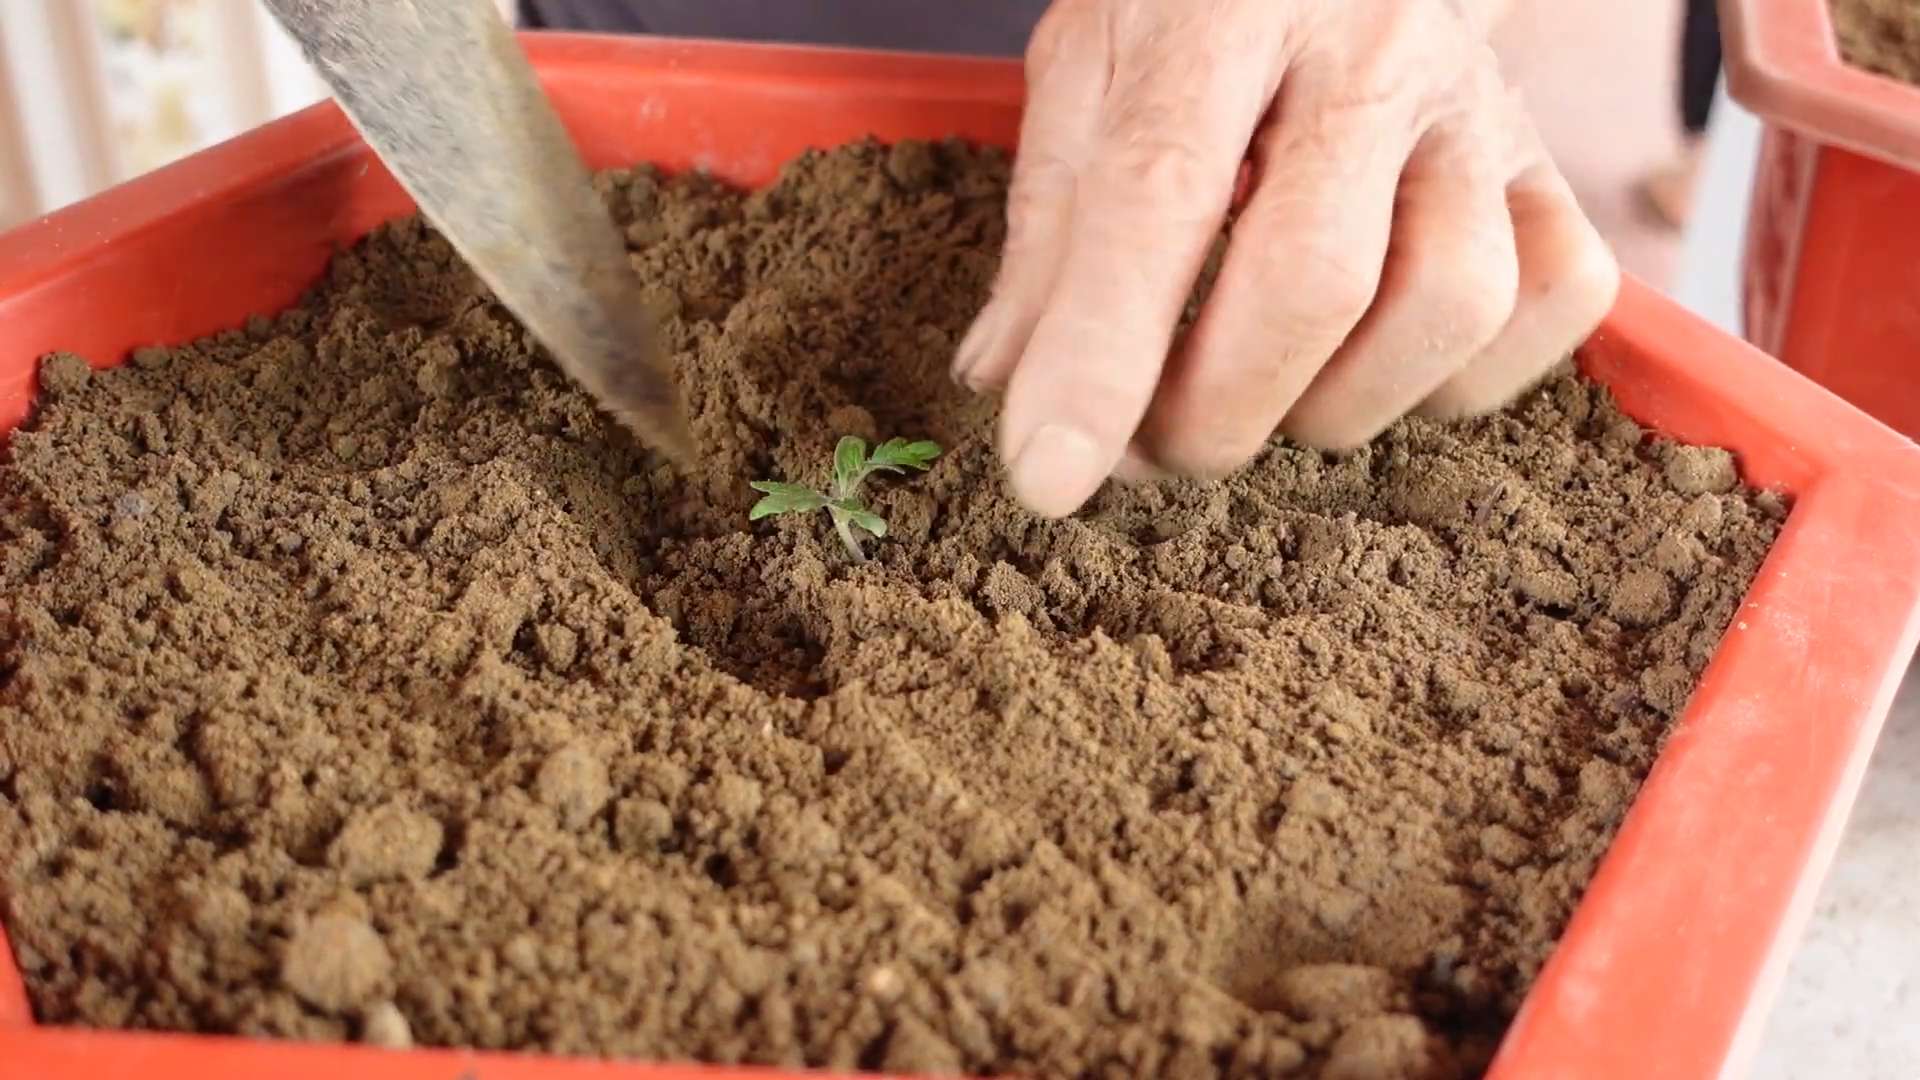
Planting Your Cherry Tomato Plant
Whether you’re starting from seed or using seedlings, the planting process is the same.
1. Prepare the container: Fill your container with potting mix, leaving a few inches of space at the top.
2. Dig a hole: Dig a hole in the center of the container that’s large enough to accommodate the root ball of your tomato plant.
3. Plant the tomato plant: Gently remove the tomato plant from its container and loosen the roots slightly. Place the plant in the hole and backfill with potting mix.
4. Bury the stem (optional): Tomatoes have the amazing ability to grow roots from their stems. You can bury the stem up to the first set of leaves to encourage a stronger root system.
5. Water thoroughly: Water the tomato plant thoroughly after planting.
6. Add support: Install a tomato cage or stake to provide support for the plant as it grows.
Caring for Your Cherry Tomato Plant
Now comes the fun part – watching your tomato plant grow and thrive! Here’s what you need to do to keep it happy and healthy:
1. Watering: Water your tomato plant regularly, especially during hot, dry weather. The soil should be consistently moist, but not soggy. Water deeply, allowing the water to soak into the soil. Avoid watering the leaves, as this can lead to fungal diseases. I usually water deeply every other day, but I always check the soil moisture first.
2. Fertilizing: Fertilize your tomato plant every 2-3 weeks with a tomato fertilizer. Follow the instructions on the fertilizer label. You can also use a liquid fertilizer for a quick boost.
3. Sunlight: Cherry tomatoes need at least 6-8 hours of sunlight per day. Place your container in a sunny spot on your balcony. If you don’t have enough sunlight, you can supplement with grow lights.
4. Pruning: Pruning can help improve air circulation and encourage fruit production. Remove any suckers (the small shoots that grow between the main stem and the branches) that appear below the first flower cluster. You can also remove any yellowing or diseased leaves.
5. Pest and disease control: Keep an eye out for pests and diseases. Common tomato pests include aphids, whiteflies, and tomato hornworms. You can control these pests with insecticidal soap or neem oil. Common tomato diseases include early blight, late blight, and blossom end rot. You can prevent these diseases by providing good air circulation, avoiding overhead watering, and using a fungicide if necessary. I like to inspect my plants regularly for any signs of trouble.
6. Pollination: Tomatoes are self-pollinating, but sometimes they need a little help, especially in enclosed spaces like balconies. You can hand-pollinate your tomatoes by gently shaking the flower clusters or using a small paintbrush to transfer pollen from one flower to another.
Dealing with Common Problems
Even with the best care, you might encounter some problems along the way. Here are a few common issues and how to deal with them:
* Blossom end rot: This is a condition where the bottom of the tomato turns black and leathery. It’s usually caused by a calcium deficiency. To prevent blossom end rot, make sure your soil is rich in calcium and water your plants consistently. You can also add calcium to the soil by using bone meal or crushed eggshells.
* Yellowing leaves: Yellowing leaves can be caused by a variety of factors, including overwatering, underwatering, nutrient deficiencies, and diseases. Check the soil moisture and adjust your watering accordingly. Fertilize your plants regularly to provide them with the nutrients they need. If you suspect a disease, treat it with a fungicide.
* Lack of fruit: If your tomato plant is not producing fruit, it could be due to a lack of pollination, insufficient sunlight, or extreme temperatures. Hand-pollinate your tomatoes, make sure they’re getting enough sunlight, and protect them from extreme heat or cold.
Harvesting Your Cherry Tomatoes
The best part of growing cherry tomatoes is, of course, harvesting them! Cherry tomatoes are usually ready to harvest about 60-80 days after planting. They should be fully colored and slightly soft to the touch. Gently twist the tomatoes off the vine.
Enjoy your homegrown cherry tomatoes in salads, snacks, or any other dish you can imagine! They’re so much more flavorful than store-bought tomatoes.
Extending the Growing Season
Want to keep enjoying fresh cherry tomatoes for as long as possible? Here are a few tips for extending the growing season:
* Start seeds indoors early: As mentioned earlier, starting seeds indoors allows you to get a head start on the growing season.
* Use a cold frame or greenhouse: A cold frame or greenhouse can protect your tomato plants from frost and extend the growing season by several weeks.
* Choose early-maturing varieties: Early-maturing varieties will produce fruit sooner, allowing you to harvest tomatoes before the first frost.
* Protect plants from frost:
Conclusion
So, there you have it! Transforming your balcony into a miniature tomato farm is not only achievable, but incredibly rewarding. We’ve walked you through the simple steps to successfully grow delicious, juicy cherry tomatoes right outside your door. Forget those bland, store-bought tomatoes – imagine the burst of fresh flavor you’ll experience with each bite of your own homegrown bounty.
This DIY balcony cherry tomato growing trick is a must-try for several reasons. First and foremost, it’s incredibly space-efficient. Even if you have a tiny balcony, you can still cultivate a thriving tomato plant. Second, it’s a fantastic way to connect with nature and experience the satisfaction of growing your own food. There’s something truly special about nurturing a plant from seed to harvest. Third, it’s a cost-effective way to enjoy fresh, organic tomatoes. You’ll save money at the grocery store and have the peace of mind knowing exactly what went into growing your food.
But the benefits don’t stop there. Growing cherry tomatoes on your balcony can also be a therapeutic and stress-relieving activity. Tending to your plants, observing their growth, and harvesting the fruits of your labor can be incredibly calming and fulfilling. Plus, it’s a great conversation starter and a unique way to add beauty and vibrancy to your outdoor space.
Ready to take your balcony garden to the next level? Consider these variations and suggestions:
* Experiment with different varieties: While we focused on cherry tomatoes, there are countless other tomato varieties that thrive in containers. Try growing grape tomatoes, Roma tomatoes, or even heirloom varieties for a unique flavor experience.
* Companion planting: Enhance your tomato plants’ growth and deter pests by planting companion herbs like basil, oregano, or marigolds in the same container.
* Vertical gardening: Maximize your balcony space by using vertical planters or hanging baskets to grow your cherry tomatoes. This is especially useful for small balconies.
* DIY self-watering system: Create a simple self-watering system using recycled plastic bottles to ensure your plants stay hydrated, especially during hot summer months.
* Add a trellis: As your cherry tomato plants grow, they may need support. A small trellis or tomato cage will help keep them upright and prevent the fruits from touching the ground.
Don’t be intimidated if you’re a beginner gardener. Growing cherry tomatoes on your balcony is a relatively easy and forgiving process. With a little bit of care and attention, you’ll be enjoying a bountiful harvest in no time.
We encourage you to give this DIY balcony cherry tomato growing trick a try. We’re confident that you’ll be amazed by the results. And once you’ve harvested your first batch of delicious cherry tomatoes, be sure to share your experience with us! Post photos of your balcony garden on social media using [Your Hashtag] and tell us about your favorite ways to enjoy your homegrown tomatoes. We can’t wait to see your success!
Frequently Asked Questions (FAQ)
What kind of soil is best for growing cherry tomatoes in containers?
The best soil for growing cherry tomatoes in containers is a well-draining potting mix specifically formulated for vegetables. Avoid using garden soil, as it can be too heavy and compact, hindering root growth and drainage. Look for a potting mix that contains ingredients like peat moss, perlite, and vermiculite, which provide good aeration and water retention. You can also amend your potting mix with compost to add nutrients and improve soil structure. A slightly acidic pH (around 6.0-6.8) is ideal for tomato growth.
How often should I water my balcony cherry tomato plants?
Watering frequency depends on several factors, including the size of your container, the weather conditions, and the stage of growth of your plant. Generally, you should water your cherry tomato plants when the top inch of soil feels dry to the touch. During hot, sunny weather, you may need to water them daily, or even twice a day. In cooler, cloudy weather, you may only need to water them every few days. Avoid overwatering, as this can lead to root rot. When you water, water deeply, ensuring that the entire root ball is moistened. Water at the base of the plant to avoid wetting the foliage, which can increase the risk of fungal diseases.
How much sunlight do cherry tomato plants need?
Cherry tomato plants need at least 6-8 hours of direct sunlight per day to thrive. Choose a location on your balcony that receives ample sunlight throughout the day. If your balcony doesn’t get enough direct sunlight, you can supplement with grow lights. Position the grow lights a few inches above the plants and keep them on for 12-16 hours per day. Rotate your plants regularly to ensure that all sides receive equal exposure to sunlight.
What kind of fertilizer should I use for my cherry tomato plants?
Cherry tomato plants are heavy feeders and require regular fertilization to produce a bountiful harvest. Use a balanced fertilizer specifically formulated for tomatoes or vegetables. Look for a fertilizer with an NPK ratio (nitrogen, phosphorus, potassium) of around 5-10-5 or 10-10-10. Start fertilizing your plants a few weeks after transplanting them into their containers. Follow the instructions on the fertilizer package for application rates and frequency. You can also use organic fertilizers like compost tea or fish emulsion. Avoid over-fertilizing, as this can lead to excessive foliage growth and reduced fruit production.
How do I prevent pests and diseases from affecting my cherry tomato plants?
There are several things you can do to prevent pests and diseases from affecting your cherry tomato plants. First, choose disease-resistant varieties. Second, provide good air circulation by spacing your plants properly and pruning away any crowded foliage. Third, water at the base of the plant to avoid wetting the foliage. Fourth, inspect your plants regularly for signs of pests or diseases. If you spot any problems, take action immediately. You can use organic pest control methods like insecticidal soap or neem oil to control pests. For fungal diseases, you can use copper fungicide or baking soda spray. Remove any infected leaves or plants to prevent the spread of disease.
When should I harvest my cherry tomatoes?
Cherry tomatoes are typically ready to harvest about 60-70 days after transplanting. The tomatoes should be fully colored (usually red, but depending on the variety), slightly soft to the touch, and easily detach from the vine. Harvest your tomatoes regularly to encourage continued fruit production. Overripe tomatoes can become mushy and attract pests. Store your harvested tomatoes at room temperature for the best flavor.
Can I grow cherry tomatoes indoors?
Yes, you can grow cherry tomatoes indoors, but it requires more effort than growing them outdoors. You’ll need to provide adequate light, either through a sunny window or with grow lights. You’ll also need to pollinate the flowers manually, as there won’t be any bees or other insects to do it for you. You can use a small paintbrush or cotton swab to transfer pollen from one flower to another. Indoor cherry tomato plants may also be more susceptible to pests and diseases, so it’s important to monitor them closely.
What do I do if my cherry tomato plant is not producing fruit?
There are several reasons why your cherry tomato plant may not be producing fruit. It could be due to lack of sunlight, improper watering, insufficient fertilization, or poor pollination. Make sure your plant is getting at least 6-8 hours of direct sunlight per day, water it regularly, and fertilize it with a balanced tomato fertilizer. If you suspect poor pollination, try hand-pollinating the flowers. You can also try shaking the plant gently to release pollen. If your plant is healthy and well-cared for, but still not producing fruit, it may be due to high temperatures. Tomato plants don’t set fruit well when temperatures are above 90 degrees Fahrenheit. In this case, you can try providing some shade during the hottest part of the day.
Leave a Comment