
Growing corn in soil bags might sound unconventional, but trust me, it’s a game-changer for home gardeners like us! Are you dreaming of sweet, juicy corn on the cob, but lack the sprawling acreage usually associated with cornfields? Well, fret no more! This DIY guide will unlock the secrets to cultivating a bountiful corn harvest, even if you only have a small patio, balcony, or tiny backyard.
Corn, a staple crop with roots stretching back thousands of years to ancient Mesoamerica, has nourished civilizations and played a vital role in countless cultures. From the sacred rituals of indigenous peoples to the family barbecues of today, corn holds a special place in our hearts and on our tables. But traditionally, growing corn required vast fields and specialized equipment.
That’s where this ingenious DIY trick comes in! Growing corn in soil bags offers a practical and space-saving solution for urban gardeners and anyone looking to maximize their yield. Imagine the satisfaction of harvesting your own homegrown corn, knowing you nurtured it from seed to table, all within the confines of a simple soil bag. Plus, it’s a fantastic way to reduce your carbon footprint and enjoy fresher, more flavorful produce. So, grab your gardening gloves, and let’s get started on this exciting journey to homegrown corn bliss!
Growing Corn in Soil Bags: A Bumper Crop on Your Patio!
Hey there, fellow gardening enthusiasts! Are you dreaming of sweet, juicy corn on the cob but lack the sprawling acreage usually associated with this tall, sun-loving plant? Don’t despair! I’m here to tell you that you can absolutely grow corn in soil bags, even if you only have a small patio or balcony. It’s a fun, surprisingly easy project, and the reward of fresh, homegrown corn is totally worth it. Let’s dive in!
What You’ll Need
Before we get started, let’s gather our supplies. This is what I’ve found works best:
* Large Soil Bags: I recommend using bags that are at least 20 gallons in size. The bigger, the better, as corn roots need plenty of room to spread. Look for bags specifically designed for growing, as they often have drainage holes already. If not, we’ll take care of that later.
* Potting Mix: Don’t skimp on the quality of your potting mix! A good mix will provide the nutrients and drainage your corn needs. I like to use a blend of compost, peat moss, and perlite.
* Corn Seeds: Choose a variety of corn that’s suitable for your climate and growing season. Sweet corn is a popular choice, but you can also grow popcorn or ornamental corn. Make sure you get non-GMO seeds for the best flavor and health.
* Slow-Release Fertilizer: Corn is a heavy feeder, so a slow-release fertilizer will provide a steady supply of nutrients throughout the growing season. Look for a fertilizer with a high nitrogen content, especially in the early stages of growth.
* Watering Can or Hose: Consistent watering is crucial for corn growth.
* Sharp Knife or Scissors: For creating drainage holes and opening the soil bags.
* Measuring Tape or Ruler: To ensure proper spacing between seeds.
* Optional: Stakes and Twine: For supporting the corn stalks as they grow tall. This is especially helpful in windy areas.
* Gardening Gloves: To keep your hands clean and protected.
Preparing the Soil Bags
This is a crucial step to ensure proper drainage and root development.
1. Choose Your Location: Corn needs at least 6-8 hours of direct sunlight per day, so pick a sunny spot for your soil bags. Make sure the location is also sheltered from strong winds, if possible.
2. Prepare the Bags: If your soil bags don’t already have drainage holes, you’ll need to create some. Use a sharp knife or scissors to cut several slits in the bottom of the bag, spaced about 6-8 inches apart. This will prevent the soil from becoming waterlogged.
3. Fluff the Soil: Gently massage the soil bag to loosen the soil and break up any large clumps. This will improve drainage and aeration.
4. Add Fertilizer: Mix the slow-release fertilizer into the top few inches of the soil, following the instructions on the fertilizer package. This will provide a boost of nutrients to your corn seedlings.
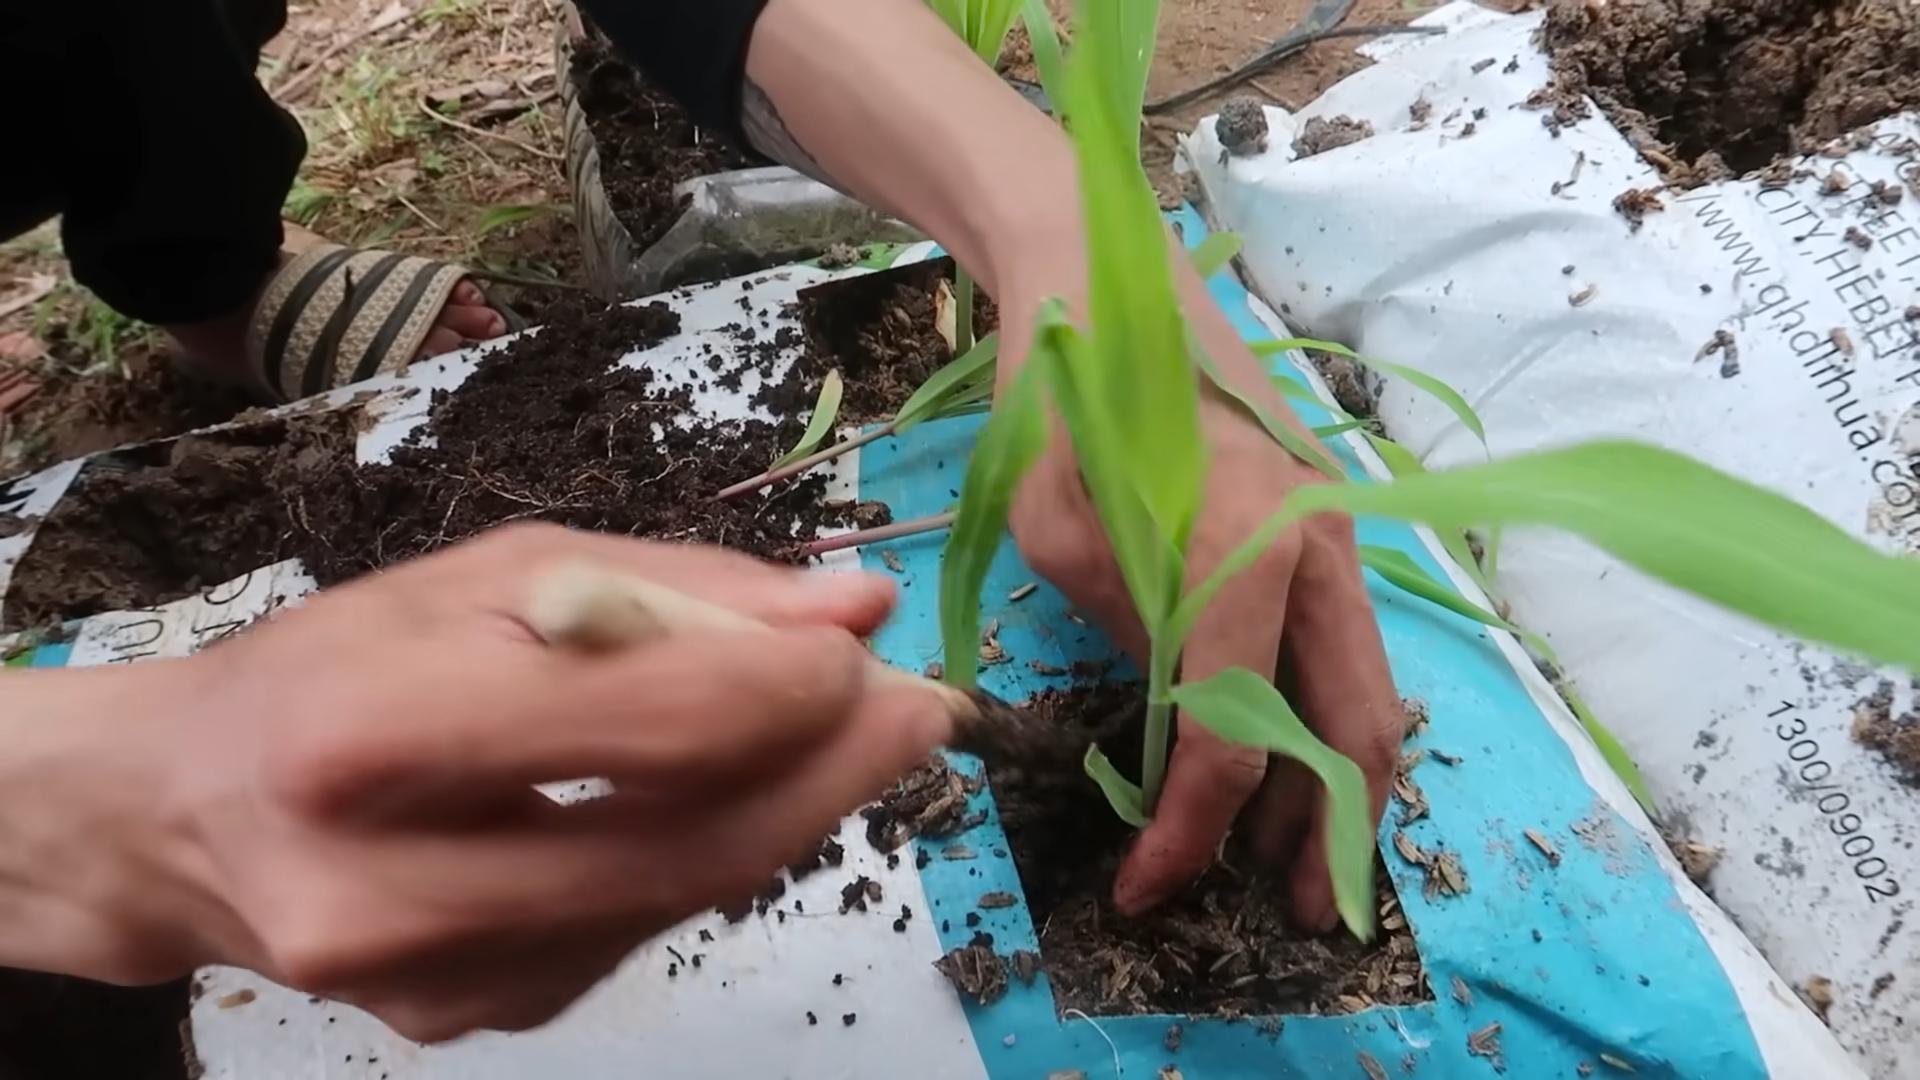
Planting the Corn Seeds
Now for the fun part! Getting those seeds in the ground (or, in this case, the bag).
1. Spacing is Key: Corn needs to be planted in blocks, rather than rows, to ensure proper pollination. I recommend planting the seeds about 6-8 inches apart in a grid pattern. This will allow the wind to carry pollen from one plant to another.
2. Planting Depth: Use your finger to create small holes about 1-2 inches deep.
3. Sow the Seeds: Place 2-3 corn seeds in each hole. This will increase your chances of germination.
4. Cover and Water: Gently cover the seeds with soil and water thoroughly. The soil should be moist but not soggy.
Caring for Your Corn Plants
Consistent care is essential for a successful corn harvest.
1. Watering: Corn needs consistent moisture, especially during germination and pollination. Water deeply whenever the top inch of soil feels dry to the touch. Avoid overwatering, as this can lead to root rot. I usually water every other day, but this will depend on the weather and your soil type.
2. Thinning: Once the seedlings emerge, thin them to one plant per hole. Choose the strongest, healthiest-looking seedling and snip off the others at the base. This will give the remaining plant plenty of room to grow.
3. Fertilizing: Corn is a heavy feeder, so you’ll need to fertilize it regularly throughout the growing season. I like to side-dress my corn plants with a nitrogen-rich fertilizer every 2-3 weeks. Simply sprinkle the fertilizer around the base of the plants and water it in.
4. Weeding: Keep the soil around your corn plants free of weeds. Weeds compete with the corn for nutrients and water.
5. Supporting the Stalks: As the corn plants grow taller, they may need support, especially in windy areas. You can use stakes and twine to tie the stalks to the stakes. This will prevent them from falling over. I usually wait until the stalks are about 3-4 feet tall before adding support.
6. Watch for Pests and Diseases: Keep an eye out for common corn pests, such as corn earworms and aphids. You can control these pests with organic insecticides or by hand-picking them off the plants. Also, watch for signs of diseases, such as corn smut and rust. If you notice any diseases, remove the affected plants immediately to prevent the disease from spreading.
Pollination: The Key to Corn on the Cob
Corn is wind-pollinated, meaning that the pollen from the tassels (the male flowers at the top of the plant) needs to be carried by the wind to the silks (the female flowers on the ears of corn).
1. Encourage Pollination: If you live in an area with little wind, you can help with pollination by gently shaking the corn stalks every day when the tassels are shedding pollen. This will help to distribute the pollen more evenly.
2. Hand-Pollination (If Necessary): If you’re still not seeing good pollination, you can try hand-pollinating the corn. Simply collect pollen from the tassels using a small brush and then brush it onto the silks.
Harvesting Your Corn
The moment we’ve all been waiting for!
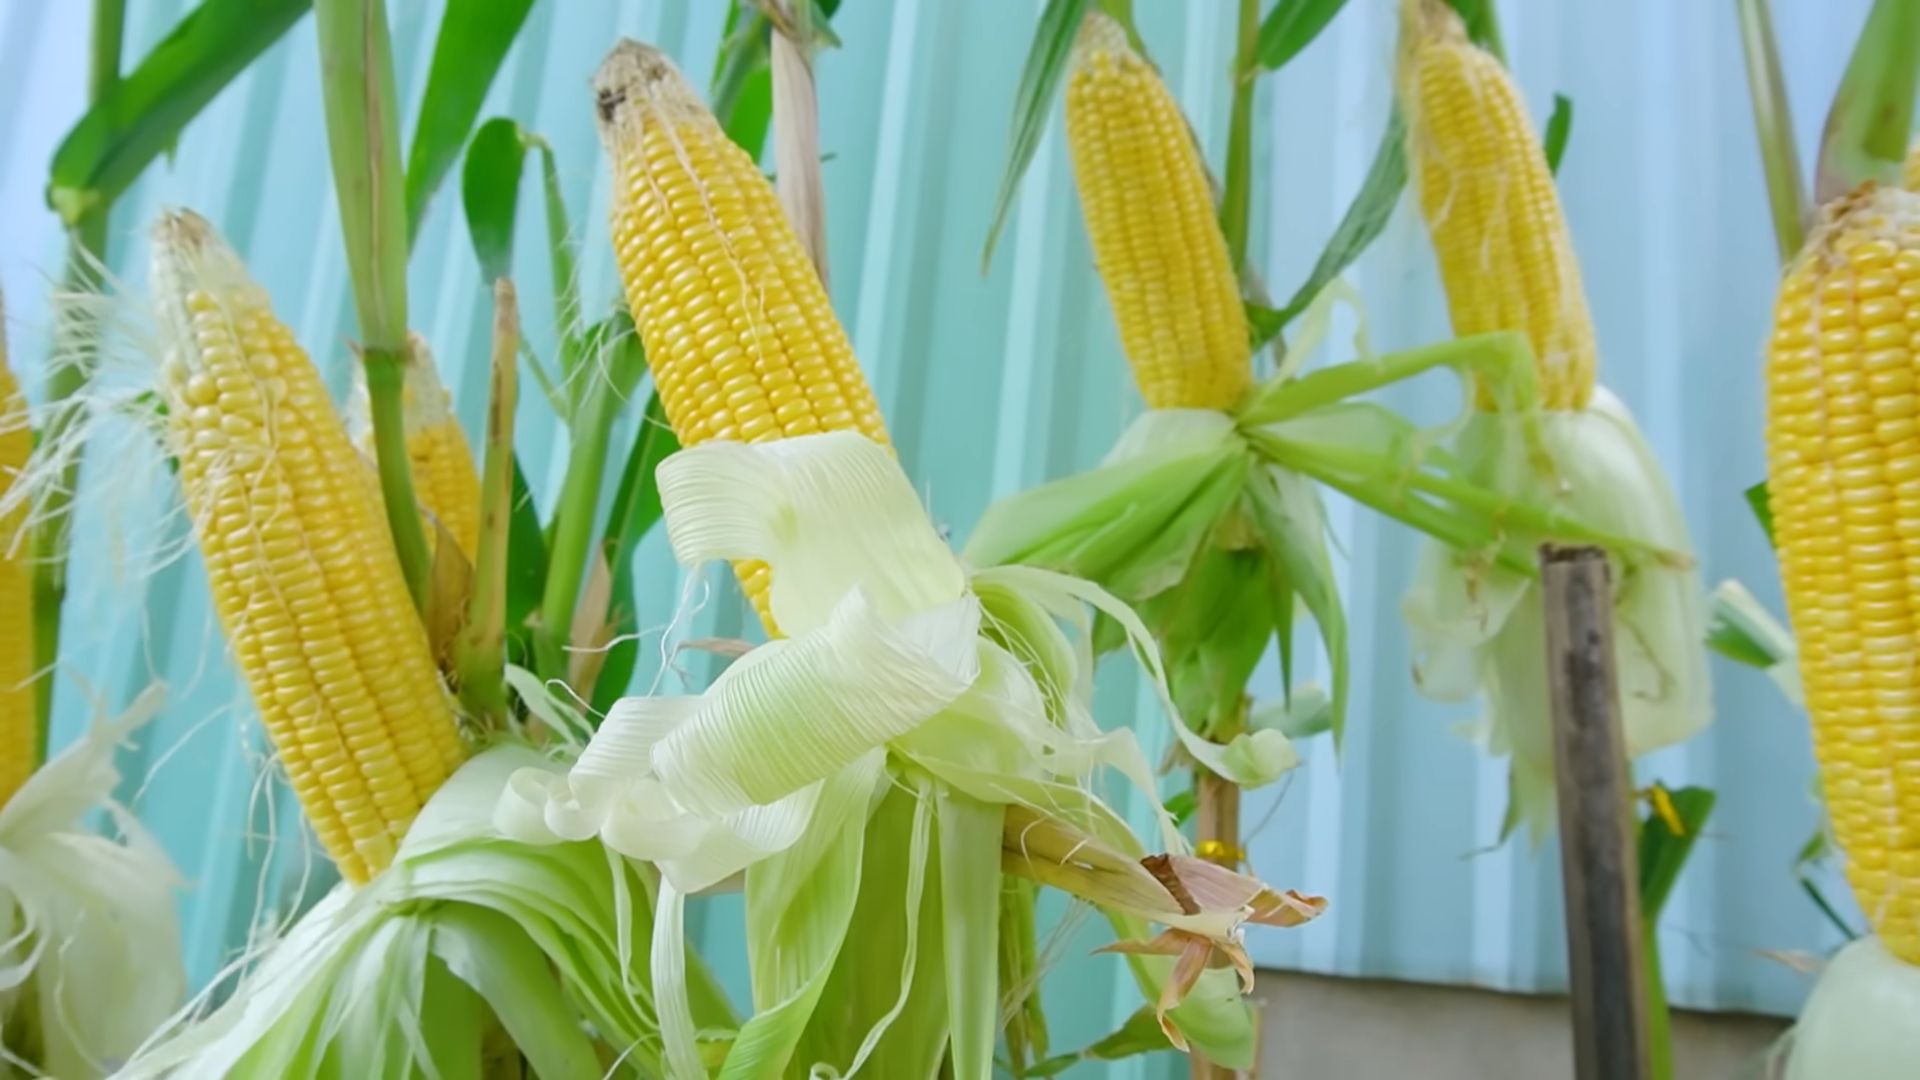
1. Timing is Everything: Corn is usually ready to harvest about 60-90 days after planting, depending on the variety. The silks will turn brown and dry, and the ears will feel plump and full.
2. Check for Ripeness: To check for ripeness, peel back a small portion of the husk and puncture a kernel with your fingernail. If the liquid that comes out is milky, the corn is ready to harvest. If the liquid is clear, the corn needs more time to ripen.
3. Harvesting: To harvest the corn, grasp the ear firmly and twist it downward. The ear should snap off easily from the stalk.
Troubleshooting
Even with the best planning, sometimes things don’t go exactly as expected. Here are a few common issues and how I deal with them:
* Poor Germination: If your corn seeds aren’t germinating, make sure the soil is moist but not soggy. Also, check the expiration date on the seed packet. Old seeds may have a lower germination rate. You can also try starting the seeds indoors in small pots and then transplanting them to the soil bags once they’ve sprouted.
* Yellowing Leaves: Yellowing leaves can be a sign of nutrient deficiency, especially nitrogen deficiency. Try fertilizing your corn plants with a nitrogen-rich fertilizer.
* Stunted Growth: Stunted growth can be caused by a variety of factors, including poor soil, lack of sunlight, and pests or diseases. Make sure your corn plants are getting enough sunlight and water, and check for any signs of pests or diseases.
* Poor Pollination: If you’re not getting good pollination, try hand-pollinating the corn or shaking the stalks to distribute the pollen.
Enjoying Your Homegrown Corn
Now that you’ve harvested your corn, it’s time to enjoy the fruits (or, rather, vegetables) of your labor! Freshly picked corn is incredibly sweet and flavorful. You can grill it, boil it, roast it, or even eat it raw. I love to grill my corn and then top it with butter, salt, and pepper. It’s the perfect summer treat!
Growing corn in soil bags is a rewarding and surprisingly easy project. With a little bit of care and attention, you can enjoy a bumper crop of fresh, homegrown corn, even if you only have a small space. So, what are you waiting for? Get out there and start planting! Happy gardening!
Conclusion
So, there you have it! Growing corn in soil bags isn’t just a quirky gardening experiment; it’s a game-changer for anyone with limited space, challenging soil conditions, or simply a desire for a more controlled and convenient growing environment. We’ve walked you through the process, highlighting the key steps and offering insights to ensure your success.
Why is this DIY trick a must-try? Because it democratizes corn cultivation. No longer is a sprawling field a prerequisite for enjoying the sweet, juicy rewards of homegrown corn. Soil bags offer a contained ecosystem, allowing you to meticulously manage soil quality, drainage, and nutrient levels – factors that can be difficult to control in traditional in-ground gardens. This method also significantly reduces weeding, as the enclosed environment limits weed seed germination. Plus, the portability of soil bags means you can chase the sun, moving your corn plants to the most optimal location throughout the day.
But the benefits extend beyond practicality. There’s a profound satisfaction in nurturing a plant from seed to harvest, especially when that plant yields something as delicious and versatile as corn. Imagine the pride you’ll feel serving up ears of corn grown right on your patio or balcony, knowing you played an integral role in bringing that food to your table.
Now, let’s talk about variations and suggestions. While we’ve focused on a general approach, feel free to experiment! Consider using different types of soil mixes to see which yields the best results in your specific climate. You could also try companion planting, adding herbs like basil or marigolds to the soil bags to deter pests and attract beneficial insects. Another exciting variation is to explore different corn varieties. While sweet corn is a popular choice, consider trying heirloom varieties for unique flavors and colors. Dent corn, for example, is excellent for making cornmeal, while flint corn is known for its hard kernels and vibrant colors.
Don’t be afraid to get creative with your soil bag setup. You can use repurposed feed bags, heavy-duty garbage bags, or even specialized grow bags designed for this purpose. Just ensure that your chosen container is durable, well-draining, and large enough to accommodate the mature corn plants. Remember to provide adequate support for your growing corn stalks, especially as they become laden with ears. Staking or caging can prevent them from toppling over in strong winds.
Ultimately, the success of growing corn in soil bags hinges on your willingness to experiment, adapt, and learn from your experiences. Each growing season will bring new insights and opportunities to refine your technique. So, embrace the challenge, get your hands dirty, and prepare to be amazed by the bounty you can produce in a relatively small space.
We wholeheartedly encourage you to try this DIY trick. It’s a rewarding and accessible way to enjoy fresh, homegrown corn, regardless of your gardening experience or available space. And most importantly, we want to hear about your journey! Share your successes, your challenges, and your tips with us and the wider gardening community. Post photos of your soil bag corn plants, describe the varieties you’re growing, and let us know what you’ve learned along the way. Together, we can unlock the full potential of this innovative gardening technique and inspire others to embrace the joy of growing their own food. Let’s cultivate a community of soil bag corn enthusiasts!
FAQ
What type of soil is best for growing corn in soil bags?
The ideal soil for growing corn in soil bags is a well-draining, nutrient-rich mix. A combination of equal parts compost, potting soil, and perlite or vermiculite works well. The compost provides essential nutrients, the potting soil offers a good base for root growth, and the perlite or vermiculite improves drainage and aeration. Avoid using heavy clay soil, as it can become waterlogged and hinder root development. You can also amend your soil with slow-release fertilizer specifically formulated for vegetables to provide a steady supply of nutrients throughout the growing season. Consider testing your soil’s pH level and adjusting it to be slightly acidic to neutral (around 6.0 to 7.0) for optimal corn growth.
How often should I water corn grown in soil bags?
Watering frequency depends on several factors, including the weather, the size of the soil bag, and the stage of corn growth. Generally, you should water deeply whenever the top inch of soil feels dry to the touch. During hot, dry periods, you may need to water daily, or even twice a day, especially when the corn plants are actively growing and producing ears. Ensure that the water drains freely from the bottom of the bag to prevent waterlogging. Overwatering can lead to root rot, while underwatering can stunt growth and reduce yields. A good rule of thumb is to check the soil moisture regularly and adjust your watering schedule accordingly. Using a moisture meter can be helpful in determining the soil’s moisture level accurately.
How much sunlight does corn need when grown in soil bags?
Corn requires at least 6-8 hours of direct sunlight per day to thrive. Choose a location for your soil bags that receives ample sunlight throughout the day. If you live in a particularly hot climate, some afternoon shade may be beneficial to prevent the plants from overheating. Insufficient sunlight can result in weak, leggy plants and reduced ear production. If you don’t have a naturally sunny location, consider using grow lights to supplement the sunlight. Rotate the soil bags periodically to ensure that all sides of the plants receive adequate sunlight.
What kind of fertilizer should I use for corn in soil bags?
Corn is a heavy feeder, so regular fertilization is essential for optimal growth and ear production. Use a balanced fertilizer with an NPK ratio (nitrogen, phosphorus, potassium) of around 10-10-10 or 14-14-14. Apply the fertilizer according to the package instructions, typically every 2-3 weeks during the growing season. You can also supplement with organic fertilizers such as compost tea or fish emulsion. Nitrogen is particularly important for leafy growth, phosphorus for root development, and potassium for ear formation. Consider side-dressing your corn plants with additional nitrogen fertilizer when they are about knee-high and again when the tassels appear.
How do I pollinate corn grown in soil bags?
Corn is wind-pollinated, meaning that pollen from the tassels (male flowers) needs to reach the silks (female flowers) on the ears. In a small garden or on a patio, natural wind pollination may not be sufficient. To ensure proper pollination, you can hand-pollinate your corn plants. Gently shake the tassels over the silks to release the pollen. You can also collect pollen from the tassels using a small brush and then apply it directly to the silks. Repeat this process every day for about a week, or until the silks start to turn brown. Proper pollination is crucial for developing full, well-filled ears of corn.
How many corn plants can I grow in one soil bag?
The number of corn plants you can grow in one soil bag depends on the size of the bag. A general guideline is to allow at least 12 inches of space between plants. For a standard 20-gallon soil bag, you can typically grow 2-3 corn plants. Overcrowding can lead to competition for resources, resulting in smaller plants and reduced yields. Ensure that each plant has enough space to develop a strong root system and access adequate sunlight, water, and nutrients. If you’re unsure, it’s always better to err on the side of caution and plant fewer plants per bag.
How do I deal with pests and diseases when growing corn in soil bags?
Growing corn in soil bags can help reduce the risk of pests and diseases compared to in-ground gardening, but it’s still important to be vigilant. Common corn pests include corn earworms, aphids, and spider mites. Regularly inspect your plants for signs of infestation and take action promptly. You can use organic pest control methods such as insecticidal soap, neem oil, or Bacillus thuringiensis (Bt). Diseases such as corn smut and leaf blight can also affect corn plants. Ensure good air circulation around the plants and avoid overhead watering to minimize the risk of fungal diseases. Remove any infected leaves or plants promptly to prevent the spread of disease.
When is the best time to harvest corn grown in soil bags?
The best time to harvest corn is when the silks have turned brown and dry, and the kernels are plump and milky. You can test the ripeness of the kernels by piercing one with your fingernail. If the liquid that comes out is milky, the corn is ready to harvest. If the liquid is clear, the corn is not yet ripe. If the liquid is thick and doughy, the corn is overripe. To harvest, gently pull the ear down and twist it off the stalk. Enjoy your freshly harvested corn as soon as possible for the best flavor and sweetness.
Leave a Comment