
Celery Growing Tips: Unlock the secrets to cultivating crisp, flavorful celery right in your own backyard! Have you ever dreamed of snipping fresh celery stalks for a healthy snack or adding that perfect crunch to your favorite soup, all without a trip to the grocery store? Well, dream no more! This DIY guide is your passport to a thriving celery patch, regardless of your gardening experience.
Celery, a staple in cuisines worldwide, boasts a history stretching back to ancient times. While its wild ancestors were valued more for medicinal purposes, the cultivated celery we know and love today emerged through centuries of careful breeding. From the elaborate gardens of Renaissance Europe to the modern-day vegetable patch, celery has held a place of honor.
But why bother growing your own celery? Store-bought celery can often lack that vibrant, fresh flavor and satisfying crunch. Plus, let’s be honest, it can be a bit pricey! With these simple, yet effective celery growing tips, you’ll not only save money but also enjoy the unparalleled taste of homegrown produce. I’m going to show you how to avoid common pitfalls, from choosing the right variety to mastering the art of blanching, ensuring a bountiful harvest of crisp, delicious celery. So, grab your gardening gloves, and let’s get started on this exciting journey to celery success!
Growing Celery From Kitchen Scraps: A Beginner’s Guide
Hey there, fellow gardening enthusiasts! Ever thought about turning your kitchen scraps into a thriving garden? Well, today, I’m going to show you how to grow celery from the base you usually toss in the compost. It’s surprisingly easy, super rewarding, and a fantastic way to reduce waste. Let’s get started!
What You’ll Need
Before we dive in, let’s gather our supplies. This is a pretty low-key project, so you probably have most of this stuff already:
* A celery stalk base (the part you usually cut off and discard). Make sure it’s firm and healthy-looking, not mushy or brown.
* A shallow dish or bowl.
* Water.
* A sunny windowsill or well-lit area.
* Potting soil.
* A pot or container (at least 6 inches in diameter).
* Optional: Rooting hormone (this can help, but isn’t essential).
Phase 1: Rooting Your Celery Base
This is where the magic begins! We’re going to coax those dormant cells into sprouting roots.
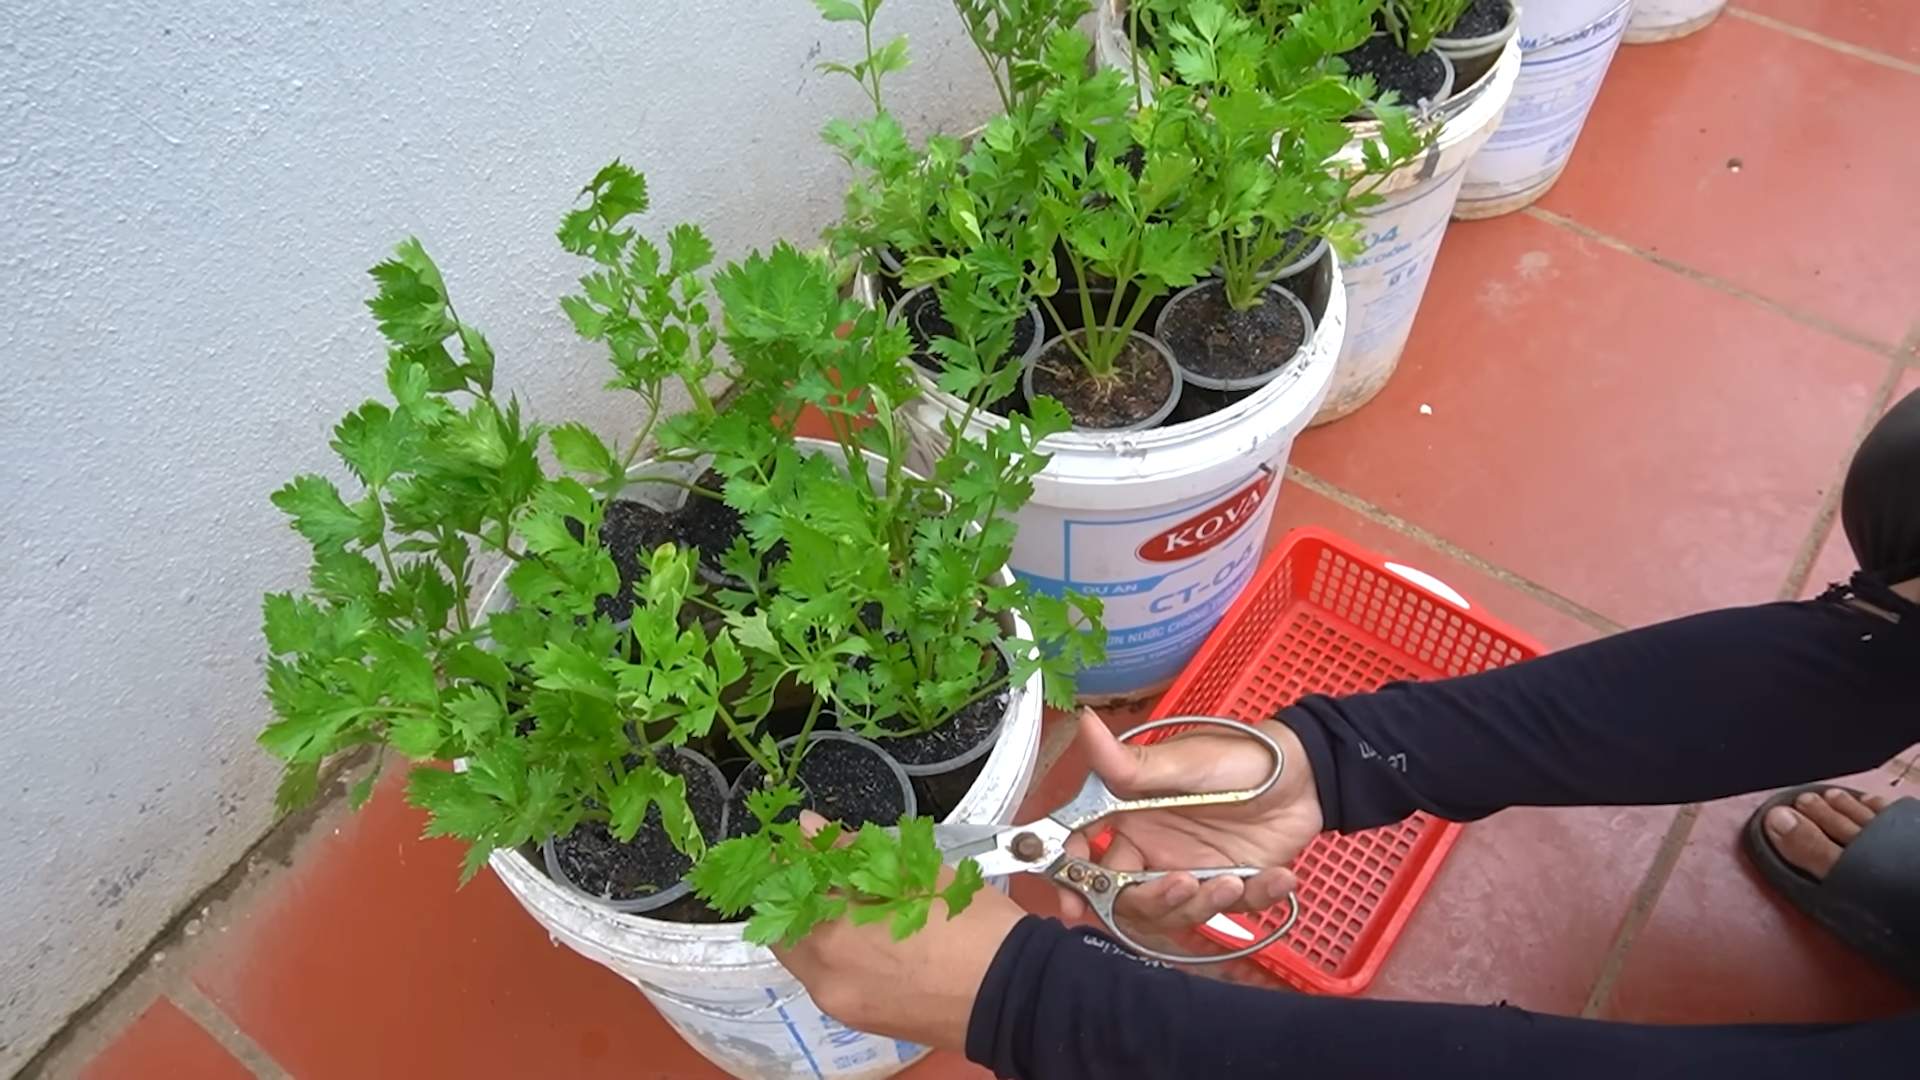
1. Prepare the Base: Carefully cut the celery stalk about 2 inches from the bottom. You want to keep the base intact, as this is where the new growth will emerge. Remove any loose or damaged outer stalks.
2. Place in Water: Fill your shallow dish with about an inch of water. Place the celery base, cut-side up, in the water. Make sure the water level doesn’t completely submerge the base; you just want the bottom to be in contact with the water.
3. Find a Sunny Spot: Place the dish on a sunny windowsill or in a well-lit area. Celery needs plenty of light to thrive.
4. Change the Water Regularly: This is crucial! Change the water every day or every other day to prevent bacteria growth and keep the water fresh. This will encourage healthy root development.
5. Observe and Wait: Within a few days (usually 5-7), you should start to see small roots emerging from the bottom of the celery base. You might also notice new green shoots sprouting from the top. This is a great sign!
6. Patience is Key: Let the roots grow to be about 1-2 inches long before moving on to the next phase. This might take another week or so. Don’t rush it!
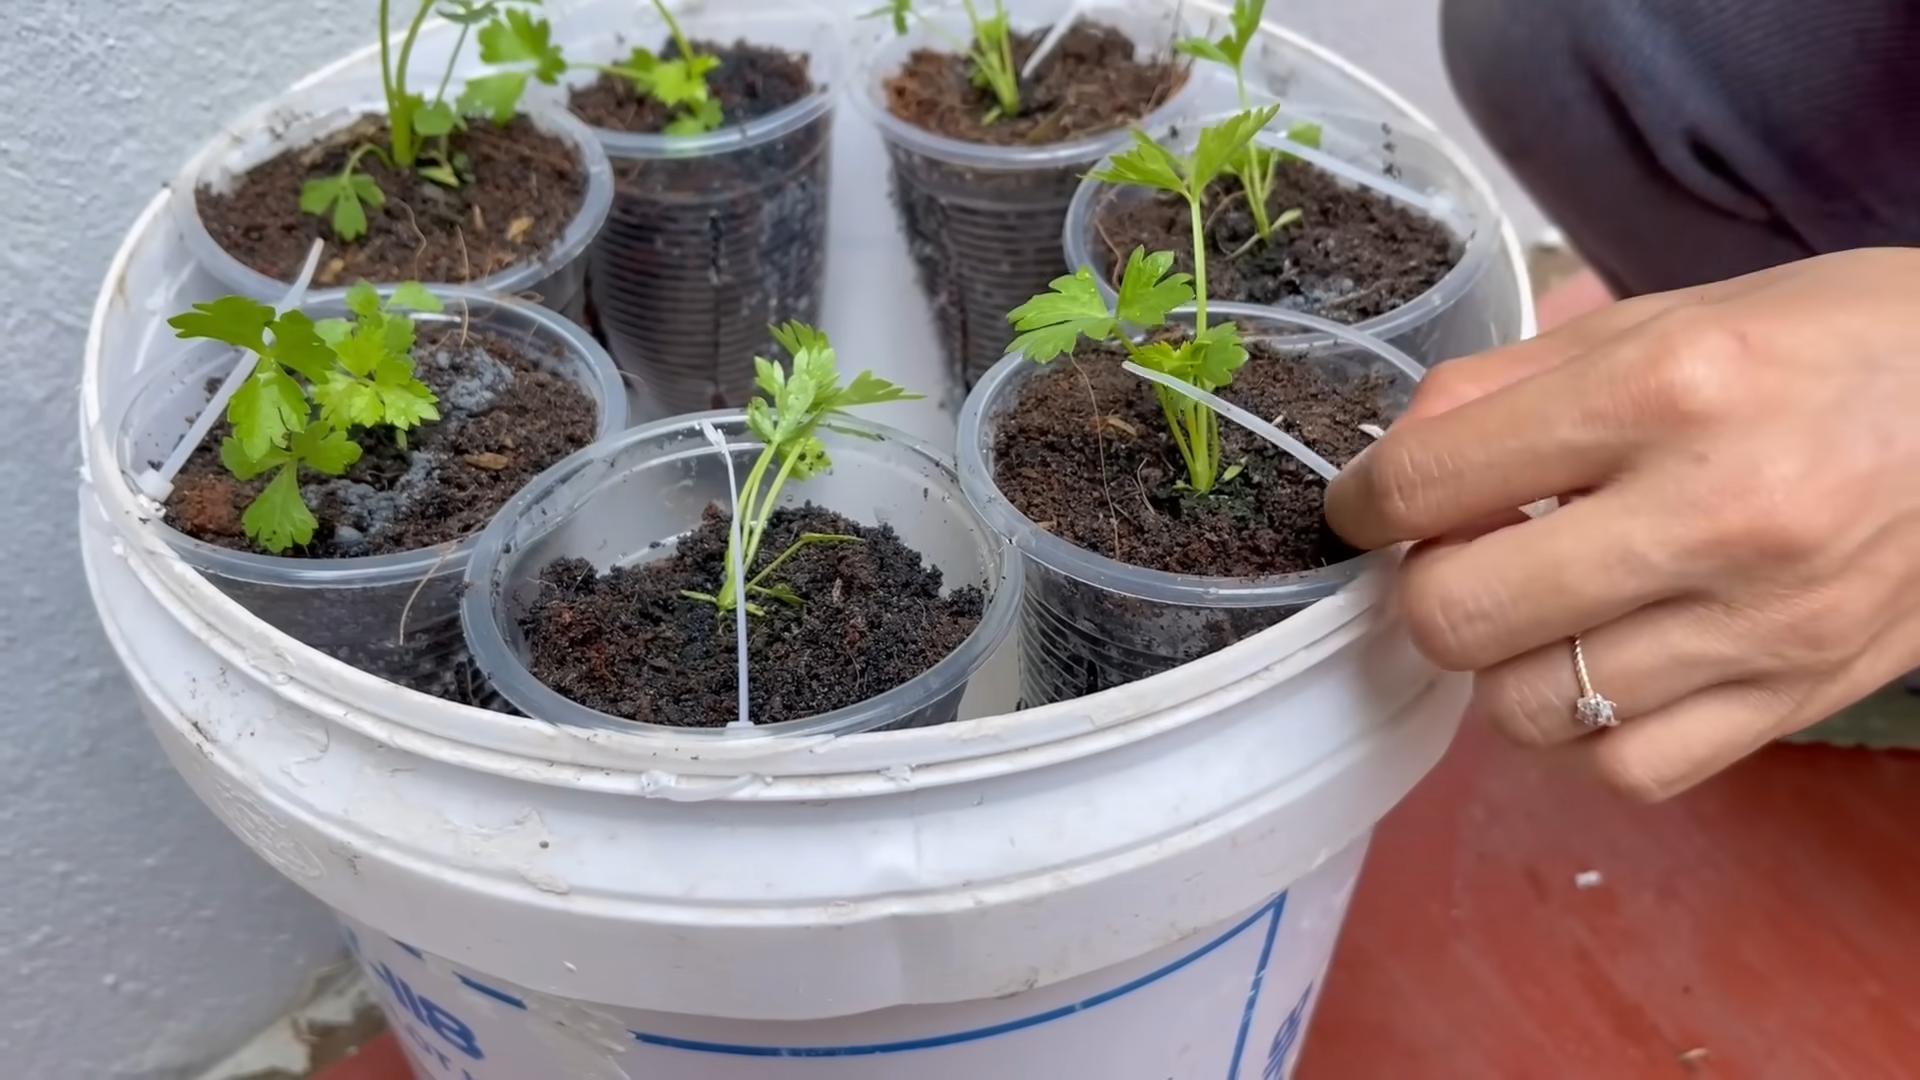
Phase 2: Planting Your Celery
Now that our celery has roots, it’s time to give it a proper home in some soil.
1. Prepare the Pot: Fill your pot with good-quality potting soil. Make sure the pot has drainage holes to prevent waterlogging.
2. Optional: Rooting Hormone: If you have rooting hormone, dip the roots of the celery base in it before planting. This can help with transplant shock and encourage further root growth.
3. Create a Hole: Make a hole in the center of the pot that’s large enough to accommodate the celery base and its roots.
4. Plant the Celery: Gently place the celery base into the hole, making sure the roots are spread out. Cover the roots with soil, leaving the top of the base (where the green shoots are emerging) exposed.
5. Water Thoroughly: Water the soil thoroughly until water drains out of the drainage holes. This helps settle the soil and provides the celery with the moisture it needs.
Phase 3: Caring for Your Celery Plant
Now that your celery is planted, it’s time to provide it with the care it needs to grow into a healthy, productive plant.
1. Sunlight: Celery needs at least 6 hours of sunlight per day. If you don’t have a sunny spot indoors, you might need to supplement with a grow light.
2. Watering: Celery loves moisture, so keep the soil consistently moist but not waterlogged. Water deeply whenever the top inch of soil feels dry to the touch.
3. Fertilizing: Feed your celery plant with a balanced liquid fertilizer every 2-3 weeks. Follow the instructions on the fertilizer packaging.
4. Temperature: Celery prefers cooler temperatures, ideally between 60-70掳F (15-21掳C). Avoid exposing it to extreme heat or cold.
5. Pest Control: Keep an eye out for pests like aphids and slugs. If you spot any, treat them with an appropriate insecticide or organic pest control method.
6. Blanching (Optional): Blanching celery stalks makes them milder and less bitter. About two weeks before harvesting, you can blanch the stalks by wrapping them with newspaper or cardboard, leaving the top exposed to sunlight.
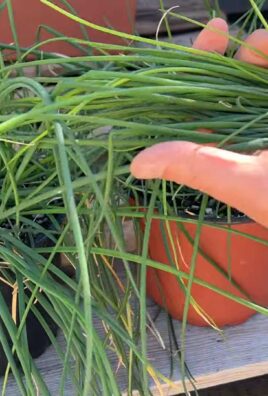
7. Harvesting: You can start harvesting celery stalks when they are about 6-8 inches long. Simply cut the outer stalks near the base of the plant. The plant will continue to produce new stalks.
Troubleshooting
Sometimes, things don’t go exactly as planned. Here are a few common problems you might encounter and how to fix them:
* Yellowing Leaves: This could be a sign of overwatering, underwatering, or nutrient deficiency. Check the soil moisture and adjust your watering accordingly. Fertilize the plant if necessary.
* Slow Growth: This could be due to insufficient sunlight, poor soil, or lack of nutrients. Make sure your celery plant is getting enough light and fertilize it regularly.
* Pests: Inspect your plant regularly for pests and treat them promptly.
* Rotting Base: This is usually caused by overwatering or poor drainage. Make sure your pot has drainage holes and avoid letting the soil stay soggy.
Tips for Success
Here are a few extra tips to help you grow the best celery possible:
* Start with a Healthy Base: The healthier the celery base, the better your chances of success. Choose a firm, crisp base with no signs of damage or decay.
* Use Good-Quality Potting Soil: Don’t skimp on the soil! Good-quality potting soil provides the nutrients and drainage that your celery plant needs.
* Provide Consistent Moisture: Celery needs consistent moisture to thrive. Water regularly and don’t let the soil dry out completely.
* Be Patient: Growing celery from kitchen scraps takes time and patience. Don’t get discouraged if you don’t see results immediately. Just keep providing the plant with the care it needs, and you’ll eventually be rewarded with a bountiful harvest.
* Consider Your Climate: Celery is a cool-season crop, so it grows best in cooler temperatures. If you live in a hot climate, you might need to provide some shade during the hottest part of the day.
* Successive Planting: To have a continuous supply of celery, start new bases every few weeks. This way, you’ll always have fresh celery on hand.
* Enjoy the Process: Growing celery from kitchen scraps is a fun and rewarding experience. Enjoy the process and don’t be afraid to experiment!
Why Grow Celery From Scraps?
You might be wondering, “Why bother growing celery from scraps when I can just buy it at the store?” Well, there are several good reasons:
* Reduce Waste: It’s a great way to reduce food waste and give new life to something you would normally throw away.
* Save Money: Growing your own celery can save you money on groceries.
* It’s Fun: It’s a fun and rewarding gardening project that’s perfect for beginners.
* Fresh, Organic Celery: You’ll have access to fresh, organic celery that you grew yourself.
* Educational: It’s a great way to learn about plant propagation and gardening.
Beyond the Basics: Growing Celery Outdoors
While this guide focuses on growing celery indoors, you can also transplant your rooted celery base outdoors if you live in a suitable climate. Here’s what you need to know:
* Timing: Transplant your celery outdoors in the spring after the last frost.
* Location: Choose a location that gets at least 6 hours of sunlight per day and has well-drained soil.
* Soil Preparation: Amend the soil with compost or other organic matter to improve its fertility and drainage.
* Spacing: Space celery plants about 6-8 inches apart.
* Watering: Water regularly, especially during dry periods.
* Mulching: Mulch around the plants to help retain moisture and suppress weeds.
* Pest Control: Keep an eye out for pests and diseases and treat them promptly.
Celery Varieties
While you’re growing from scraps, you won’t know the exact variety of celery you’re growing. However, if you decide to grow celery from seed in the future, here are a few popular varieties to consider:
* ‘Utah
Conclusion
So, there you have it! Mastering these simple yet effective celery growing tips can transform your gardening experience and bring the crisp, refreshing taste of homegrown celery to your table. No more relying solely on store-bought stalks that may lack the vibrant flavor and satisfying crunch of freshly harvested celery. This isn’t just about growing vegetables; it’s about connecting with nature, understanding the growing process, and enjoying the fruits (or rather, vegetables!) of your labor.
The beauty of these celery growing tips lies in their adaptability. Whether you’re a seasoned gardener with acres of land or a city dweller with a small balcony, you can adapt these techniques to suit your space and resources. Consider experimenting with different celery varieties to discover your favorite flavor profile. Some prefer the classic Pascal celery, known for its robust flavor, while others might enjoy the sweeter, more tender Golden Self-Blanching variety.
Don’t be afraid to get creative with your growing methods. Hydroponics, raised beds, or even container gardening can all be successful approaches to cultivating celery. The key is to provide the right conditions: consistent moisture, nutrient-rich soil, and protection from extreme temperatures. Remember, patience is a virtue when it comes to gardening. Celery can take a bit of time to mature, but the reward of harvesting your own crisp, flavorful stalks is well worth the wait.
Beyond the basic techniques, consider exploring companion planting to enhance your celery’s growth and deter pests. Planting marigolds nearby can help repel nematodes, while onions and garlic can deter aphids. These natural pest control methods are not only effective but also contribute to a healthier and more sustainable garden ecosystem.
Furthermore, think about the various ways you can utilize your homegrown celery. Of course, it’s a fantastic addition to salads, soups, and stews. But have you ever tried juicing it for a refreshing and nutritious beverage? Or using the leaves to add a burst of flavor to your homemade stocks and broths? The possibilities are endless!
We wholeheartedly encourage you to put these celery growing tips into practice and embark on your own celery-growing adventure. Don’t be discouraged if you encounter challenges along the way. Gardening is a learning process, and every mistake is an opportunity to grow (pun intended!).
Most importantly, we want to hear about your experiences! Share your successes, your challenges, and any unique tips or tricks you discover along the way. Connect with fellow gardeners online, exchange ideas, and inspire others to embrace the joy of growing their own food. Together, we can create a community of passionate gardeners who are committed to cultivating healthy, sustainable, and delicious produce. So, grab your seeds, prepare your soil, and get ready to experience the satisfaction of harvesting your own homegrown celery. Happy gardening!
Frequently Asked Questions (FAQ)
Here are some frequently asked questions about growing celery, designed to help you succeed in your gardening endeavors:
What is the best time of year to plant celery?
Celery is a cool-season crop, so the best time to plant it depends on your climate. In regions with mild winters, you can start seeds indoors in late winter or early spring for transplanting outdoors after the last frost. In areas with hot summers, it’s best to start seeds indoors in late summer for a fall harvest. Aim for a growing season where temperatures remain consistently between 60掳F and 70掳F (15掳C and 21掳C) for optimal growth.
How much sunlight does celery need?
Celery thrives in full sun, requiring at least six hours of direct sunlight per day. However, in regions with intense summer heat, providing some afternoon shade can help prevent bolting (premature flowering) and keep the plants from drying out. If you’re growing celery indoors, use grow lights to supplement natural sunlight and ensure adequate light exposure.
What type of soil is best for growing celery?
Celery prefers rich, well-drained soil that is high in organic matter. Amend your soil with compost, aged manure, or other organic materials to improve its fertility and drainage. The ideal soil pH for celery is between 6.0 and 6.8. Conduct a soil test to determine your soil’s pH and nutrient levels, and adjust accordingly.
How often should I water celery?
Consistent moisture is crucial for celery growth. Water your celery plants deeply and regularly, especially during hot, dry weather. Aim to keep the soil consistently moist but not waterlogged. Mulching around the plants can help retain moisture and suppress weeds. Consider using a drip irrigation system or soaker hose to deliver water directly to the roots.
What are some common pests and diseases that affect celery?
Celery can be susceptible to various pests and diseases, including aphids, celery leaf tiers, carrot weevils, early blight, and pink rot. Regularly inspect your plants for signs of infestation or disease. Use organic pest control methods, such as insecticidal soap or neem oil, to control pests. Ensure good air circulation around the plants to prevent fungal diseases. Remove any infected leaves or plants promptly to prevent the spread of disease.
How do I blanch celery?
Blanching celery involves excluding light from the stalks to make them more tender and less bitter. You can blanch celery by hilling soil around the stalks, wrapping them with newspaper or cardboard, or using blanching collars. Start blanching about two to three weeks before harvest.
When is celery ready to harvest?
Celery is typically ready to harvest when the stalks are about 6-8 inches long and the plant is about 12-18 inches tall. You can harvest individual stalks as needed or harvest the entire plant at once. To harvest, simply cut the stalks at the base of the plant with a sharp knife.
Can I grow celery in containers?
Yes, celery can be successfully grown in containers. Choose a large container that is at least 12 inches deep and wide. Use a high-quality potting mix that is rich in organic matter. Ensure the container has good drainage. Water regularly and fertilize every two to three weeks with a balanced liquid fertilizer.
What are some good companion plants for celery?
Good companion plants for celery include onions, garlic, marigolds, and nasturtiums. Onions and garlic can help deter aphids, while marigolds can repel nematodes. Nasturtiums can attract beneficial insects that prey on pests. Avoid planting celery near parsley, as they can compete for nutrients.
How can I store celery after harvesting?
To store celery after harvesting, wrap the stalks in a damp paper towel and place them in a plastic bag in the refrigerator. Celery can typically be stored for up to two weeks using this method. You can also freeze celery for longer storage. To freeze celery, wash and chop the stalks, then blanch them in boiling water for two minutes. Cool the celery in ice water, drain well, and freeze in airtight containers or freezer bags.


Leave a Comment