
Growing potatoes in containers might sound like a daunting task reserved for seasoned gardeners with sprawling acres, but I’m here to tell you it’s surprisingly simple and incredibly rewarding, even if you only have a small balcony or patio! Forget the image of back-breaking labor in a vast field; we’re bringing the potato patch to you, one container at a time.
Potatoes have been a staple food source for centuries, with their cultivation dating back to the Inca civilization in the Andes Mountains. From humble beginnings, they’ve become a global phenomenon, nourishing populations worldwide. But did you know you can skip the traditional garden plot and still enjoy the taste of freshly harvested, homegrown potatoes?
In today’s fast-paced world, many of us crave a connection to nature and a sense of self-sufficiency. Growing potatoes in containers offers just that! It’s a fantastic way to enjoy fresh, organic produce without the commitment of a large garden. Plus, it’s a fun and educational activity for the whole family. This DIY guide will walk you through every step, from choosing the right container and seed potatoes to harvesting your delicious bounty. Get ready to experience the joy of digging up your own homegrown potatoes – it’s an experience you won’t soon forget!
Growing Potatoes in Containers: A Bumper Crop on Your Patio!
Hey there, fellow gardening enthusiasts! I’m so excited to share my tried-and-true method for growing potatoes in containers. Forget sprawling gardens – you can have a fantastic potato harvest right on your balcony, patio, or even a sunny windowsill! This method is perfect for small spaces and makes harvesting a breeze. Let’s get digging (pun intended!) into how to grow your own delicious spuds.
Choosing the Right Container and Seed Potatoes
Before we get our hands dirty, let’s talk about the essentials. The right container and seed potatoes are crucial for success.
* Container Size: Bigger is better! I recommend a container that’s at least 15 gallons in size. Think large buckets, trash cans (with drainage holes, of course!), or even grow bags. The deeper the container, the more potatoes you’ll be able to harvest. A good rule of thumb is at least 18 inches deep and 18 inches in diameter.
* Container Material: Plastic, metal, or fabric containers all work well. Just make sure whatever you choose has adequate drainage. Fabric grow bags are great because they allow for excellent aeration and drainage, preventing root rot.
* Seed Potatoes: Don’t use potatoes from the grocery store! They’re often treated to prevent sprouting. Instead, purchase certified seed potatoes from a reputable garden center or online supplier. These are disease-free and specifically grown for planting.
* Choosing a Variety: Consider what kind of potatoes you like to eat. Red potatoes, Yukon Golds, Russets – the choice is yours! Some varieties are better suited for container growing than others. Look for “early” or “mid-season” varieties, as they tend to mature faster. I’ve had great success with Yukon Gold and fingerling potatoes in containers.
* Chitting (Sprouting) Your Seed Potatoes: This is an optional but highly recommended step. “Chitting” simply means encouraging your seed potatoes to sprout before planting. Place them in a cool, bright location (but not direct sunlight) for a week or two. You’ll see small “eyes” or sprouts starting to emerge. This gives your potatoes a head start and can result in an earlier harvest.
Preparing Your Container and Planting
Now for the fun part – getting our hands dirty!
1. Drill Drainage Holes: If your container doesn’t already have them, drill plenty of drainage holes in the bottom. Potatoes need well-draining soil to thrive.
2. Add a Layer of Gravel (Optional): I like to add a layer of gravel or small stones to the bottom of my containers to further improve drainage. This isn’t strictly necessary, but it can be helpful, especially if you tend to overwater.
3. Prepare Your Soil Mix: Use a well-draining potting mix. A mix of equal parts compost, peat moss (or coconut coir), and perlite or vermiculite works well. Avoid using garden soil, as it can be too heavy and compact in containers.
4. Fill the Container Partially: Fill the container with about 4-6 inches of your prepared soil mix.
5. Cut the Seed Potatoes (If Necessary): If your seed potatoes are large (bigger than an egg), you can cut them into smaller pieces. Make sure each piece has at least one or two “eyes” or sprouts. Let the cut pieces air dry for a day or two to allow the cut surfaces to callous over. This helps prevent rot.
6. Plant the Seed Potatoes: Place the seed potato pieces (or whole small seed potatoes) on top of the soil, with the sprouts facing upwards. Space them about 8-10 inches apart if you’re planting multiple pieces in the same container.
7. Cover with Soil: Cover the seed potatoes with another 4-6 inches of soil.
8. Water Thoroughly: Water the container well until water drains out of the bottom.
Hilling and Ongoing Care
“Hilling” is a crucial technique for growing potatoes in containers. It encourages the plant to produce more potatoes along the stem.
1. Monitor Growth: As the potato plants grow, they’ll start to emerge from the soil.
2. Hilling: When the stems reach about 6-8 inches tall, it’s time to “hill” them. Add more soil mix to the container, covering the stems up to about half their height. Leave the top leaves exposed.
3. Repeat Hilling: Continue hilling every few weeks as the plants grow, until you’ve filled the container almost to the top. This encourages the plants to produce more potatoes along the buried stems.
4. Watering: Potatoes need consistent moisture, especially during tuber formation. Water deeply whenever the top inch of soil feels dry to the touch. Avoid overwatering, as this can lead to rot.
5. Fertilizing: Feed your potato plants with a balanced fertilizer every few weeks. Look for a fertilizer with a ratio of 10-10-10 or something similar. You can also use organic fertilizers like compost tea or fish emulsion.
6. Sunlight: Potatoes need at least 6-8 hours of sunlight per day. Place your containers in a sunny location.
7. Pest Control: Keep an eye out for pests like aphids, potato beetles, and flea beetles. Handpick them off the plants or use an organic insecticide if necessary. I’ve found that neem oil is effective against many common garden pests.
8. Support (Optional): If your potato plants get very tall and leggy, you may need to provide some support. You can use stakes or a tomato cage to keep them from falling over.
Harvesting Your Potatoes
The most rewarding part! Knowing when to harvest is key.
1. Timing: The timing of your harvest will depend on the variety of potatoes you’re growing. Generally, early varieties are ready to harvest in about 70-80 days, while mid-season varieties take 90-100 days.
2. Signs of Maturity: Look for these signs that your potatoes are ready to harvest:
* The plants will start to flower.
* The foliage will begin to turn yellow and die back.
* You can gently dig around the edges of the container to check the size of the potatoes.
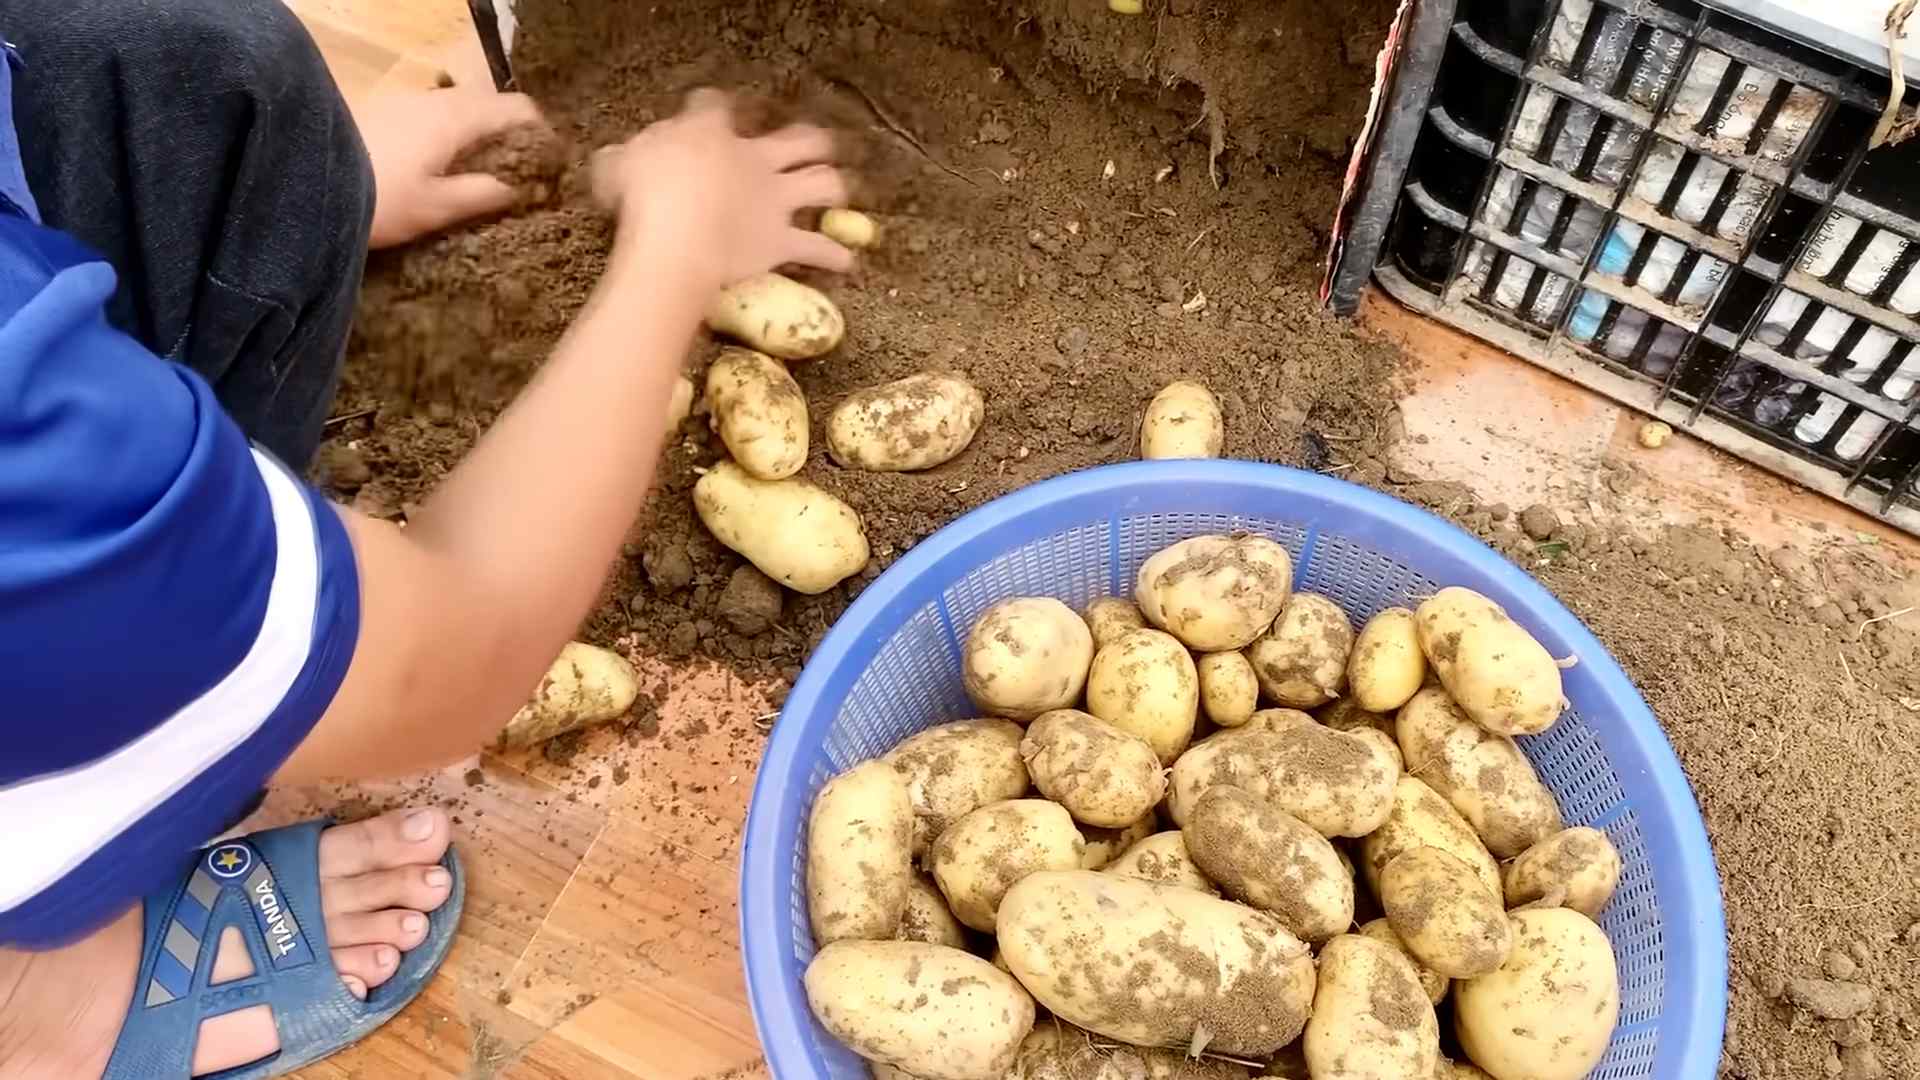
3. Harvesting: There are two ways to harvest your container potatoes:
* Partial Harvest: You can reach into the container and carefully dig out some of the larger potatoes while leaving the smaller ones to continue growing. This is a great way to enjoy fresh potatoes throughout the season.
* Full Harvest: Once the foliage has completely died back, you can dump the entire contents of the container onto a tarp or into a wheelbarrow. Sift through the soil and collect all the potatoes.
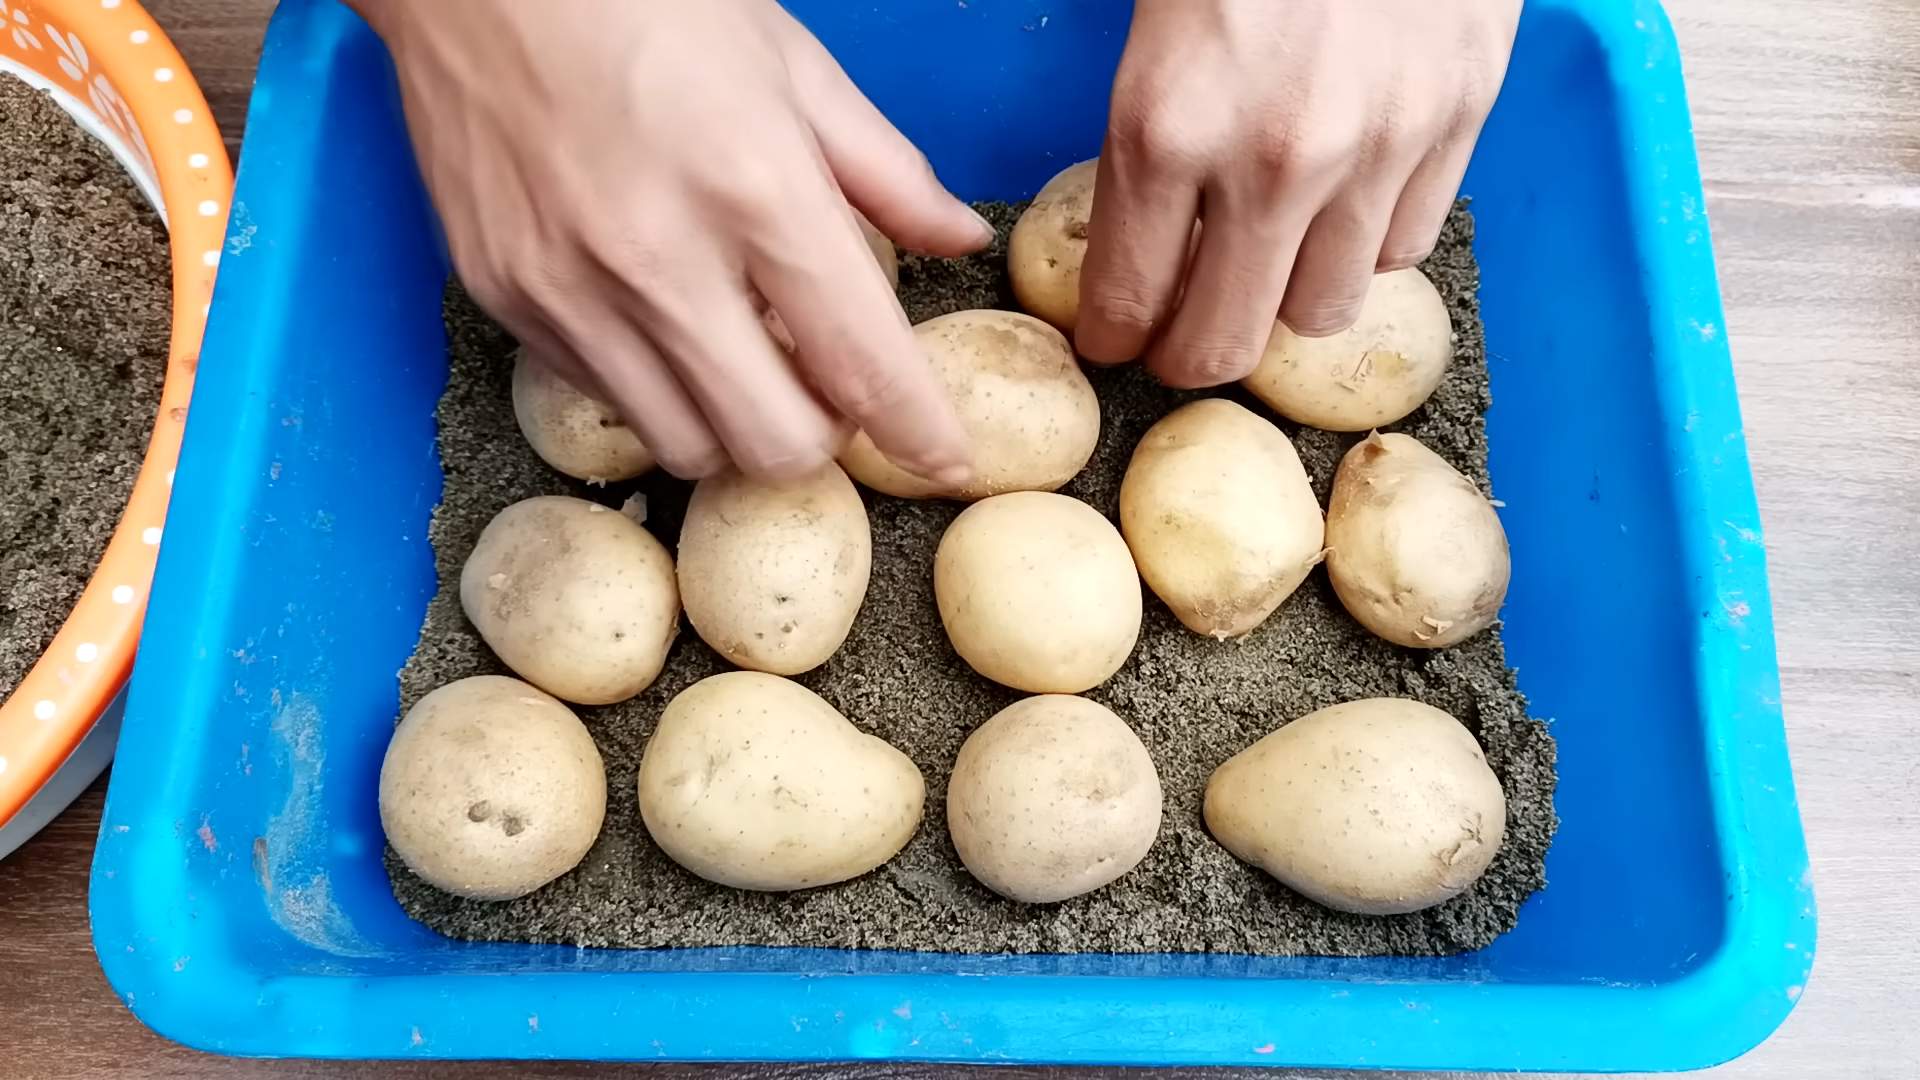
4. Curing (Optional): If you plan to store your potatoes for an extended period, it’s best to cure them first. Spread the potatoes out in a cool, dark, and well-ventilated place for about a week. This allows the skins to harden and helps prevent rot.
5. Storage: Store your cured potatoes in a cool, dark, and dry place. A root cellar is ideal, but a basement or garage can also work. Avoid storing potatoes near apples or onions, as they can cause them to spoil more quickly.
Troubleshooting
Even with the best planning, things can sometimes go wrong. Here are a few common problems and how to fix them:
* Potato Scab: This is a common fungal disease that causes rough, scabby patches on the potato skins. It’s more common in alkaline soils. To prevent potato scab, make sure your soil is slightly acidic (pH 6.0-6.5). You can also add sulfur to the soil to lower the pH.
* Root Rot: This is caused by overwatering and poor drainage. Make sure your container has plenty of drainage holes and avoid overwatering.
* Pests: As mentioned earlier, keep an eye out for pests and take action promptly.
* Lack of Potatoes: If your plants are growing well but not producing many potatoes, it could be due to a lack of sunlight, insufficient hilling, or poor soil fertility. Make sure your plants are getting enough sunlight, hill them regularly, and fertilize them as needed.
Extra Tips for Success
* Rotate Your Crops: Don’t plant potatoes in the same container year after year. Rotate them with other crops to prevent soilborne diseases.
* Use Organic Practices: Avoid using synthetic pesticides and fertilizers. Opt for organic alternatives whenever possible.
* Experiment: Don’t be afraid to try different varieties of potatoes and different growing techniques. Gardening is all about learning and experimenting!
* Enjoy the Process: Growing your own potatoes is a rewarding experience. Take the time to enjoy the process and appreciate the fruits (or rather, vegetables!) of your labor.
Growing potatoes in containers is a fantastic way to
Conclusion
So, there you have it! Growing potatoes in containers is not just a gardening trend; it’s a game-changer for anyone with limited space, a desire for fresh, homegrown produce, or simply a love for a rewarding DIY project. We’ve walked you through the process, from selecting the right container and seed potatoes to nurturing your plants and harvesting your bounty.
Why is this a must-try? Because it puts the power of fresh, delicious potatoes directly into your hands, regardless of whether you have a sprawling garden or just a sunny balcony. Imagine the satisfaction of digging into your own container-grown potatoes, knowing exactly where they came from and how they were grown. The taste difference alone is worth the effort – these potatoes are bursting with flavor, unlike anything you’ll find in the supermarket.
But the benefits extend beyond just taste. Container gardening offers unparalleled control over your growing environment. You can easily move your potato plants to chase the sun, protect them from unexpected frosts, and ensure they receive the perfect amount of water and nutrients. Plus, it’s a fantastic way to get kids involved in gardening, teaching them about where their food comes from and fostering a love for the natural world.
Looking for variations? Absolutely! Experiment with different potato varieties to find your favorites. Try growing colorful potatoes like purple or red varieties for a visually stunning harvest. You can also add companion plants to your containers, such as marigolds to deter pests or herbs like basil to enhance flavor. Consider using different types of containers, from traditional pots to repurposed buckets or even grow bags, to see what works best for you. The possibilities are endless!
And speaking of possibilities, don’t be afraid to get creative with your soil mix. While a standard potting mix works well, you can also incorporate compost, aged manure, or other organic matter to boost fertility and drainage. Just remember to avoid using soil directly from your garden, as it may contain pests or diseases that could harm your potato plants.
Ultimately, growing potatoes in containers is a fun, rewarding, and accessible way to enjoy fresh, homegrown produce. It’s a project that can be adapted to suit any space, skill level, or budget. So, what are you waiting for? Grab a container, some seed potatoes, and get ready to embark on your own potato-growing adventure!
We’re confident that you’ll be amazed by the results. And we want to hear all about it! Share your experiences, tips, and photos with us in the comments below. Let’s build a community of container potato growers and inspire others to discover the joy of homegrown goodness. Happy growing! Let us know how your **growing potatoes in containers** journey goes!
Frequently Asked Questions (FAQ)
What kind of potatoes are best for container growing?
Choosing the right potato variety is crucial for success in container gardening. Opt for early-maturing or “new” potato varieties, as they tend to be smaller and more compact, making them well-suited for container environments. Some excellent choices include:
* **Yukon Gold:** A popular all-purpose potato with a creamy texture and buttery flavor.
* **Red Norland:** A classic red potato with thin skin and a slightly sweet taste.
* **Fingerling Potatoes (e.g., Russian Banana, French Fingerling):** These elongated potatoes are known for their unique shape and nutty flavor.
* **Irish Cobbler:** An early-season white potato with excellent flavor and texture.
Avoid late-maturing varieties like Russet Burbank, as they require a longer growing season and more space than containers typically provide.
How big of a container do I need for growing potatoes?
The size of your container will depend on the potato variety you choose and the number of seed potatoes you plant. As a general rule, aim for a container that is at least 15-20 gallons in size. This will provide ample space for the potato plants to develop a healthy root system and produce a good yield.
For a single seed potato, a 15-gallon container is usually sufficient. If you plan to plant multiple seed potatoes in the same container, opt for a larger size, such as a 20-gallon or larger container. You can also use grow bags, which are specifically designed for container gardening and offer excellent drainage and aeration.
How often should I water my container potato plants?
Watering is essential for healthy potato growth, especially in containers. The frequency of watering will depend on factors such as the weather, the size of your container, and the type of soil you’re using.
As a general guideline, water your potato plants deeply whenever the top inch of soil feels dry to the touch. Avoid overwatering, as this can lead to root rot. During hot, dry weather, you may need to water your plants daily. In cooler, wetter weather, you may only need to water them every few days.
A good way to check if your plants need water is to stick your finger into the soil. If the soil feels dry, it’s time to water. If it feels moist, wait a day or two and check again.
What kind of soil should I use for growing potatoes in containers?
The ideal soil for container-grown potatoes is a well-draining, nutrient-rich potting mix. Avoid using soil directly from your garden, as it may contain pests or diseases that could harm your potato plants.
A good potting mix will typically consist of a blend of peat moss, perlite, and vermiculite. You can also add compost, aged manure, or other organic matter to boost fertility and drainage.
Make sure the soil is loose and airy, allowing for good root development. Avoid using heavy, clay-based soils, as they can become waterlogged and suffocate the roots.
How much sunlight do container potato plants need?
Potato plants need at least 6-8 hours of direct sunlight per day to thrive. Choose a location for your containers that receives plenty of sunlight throughout the day.
If you live in a particularly hot climate, you may need to provide some afternoon shade to prevent the plants from overheating. You can do this by moving the containers to a shadier location or by using shade cloth.
If you don’t have access to a sunny location, you can also grow potatoes indoors using grow lights. However, you’ll need to provide a strong, full-spectrum light source to ensure healthy growth.
How do I “hill” my potato plants in containers?
“Hilling” is the process of adding more soil around the stems of your potato plants as they grow. This encourages the plants to produce more potatoes along the buried stems.
To hill your potato plants in containers, start by filling the container about one-third full with soil. Plant your seed potatoes and water them well. As the plants grow, gradually add more soil to the container, covering the stems up to the bottom set of leaves.
Continue hilling the plants every few weeks until the container is almost full. Be careful not to bury the leaves, as this can prevent them from photosynthesizing.
When and how do I harvest my container potatoes?
The harvest time for container potatoes will depend on the variety you’re growing and the weather conditions. Generally, early-maturing varieties can be harvested in about 70-80 days after planting.
To check if your potatoes are ready to harvest, gently dig around the base of the plant and feel for potatoes. If the potatoes are the size you want, you can harvest them.
To harvest, simply tip the container over and carefully remove the potatoes from the soil. Be gentle to avoid bruising or damaging the potatoes.
You can also harvest “new” potatoes earlier in the season, when they are still small and tender. These potatoes have a delicate flavor and are perfect for boiling or steaming.
What are some common pests and diseases that affect container potato plants?
Container potato plants can be susceptible to various pests and diseases, including:
* **Potato beetles:** These insects can defoliate potato plants and reduce yields.
* **Aphids:** These small, sap-sucking insects can weaken plants and transmit diseases.
* **Fungal diseases (e.g., early blight, late blight):** These diseases can cause leaf spots, stem lesions, and tuber rot.
To prevent pests and diseases, choose disease-resistant potato varieties, practice good sanitation, and monitor your plants regularly for signs of trouble. If you spot pests or diseases, take action promptly to control them. Organic pest control methods, such as insecticidal soap or neem oil, can be effective for controlling many common pests. For fungal diseases, consider using a copper-based fungicide.
Can I grow potatoes in containers indoors?
Yes, you can grow potatoes in containers indoors, but it requires providing adequate light and ventilation. You’ll need a strong, full-spectrum grow light to mimic sunlight and ensure healthy growth. Position the grow light about 6-12 inches above the plants and keep it on for 14-16 hours per day.
Good ventilation is also essential to prevent fungal diseases. Make sure the room is well-ventilated or use a fan to circulate air around the plants.
Growing potatoes indoors can be a fun and rewarding project, especially during the winter months. However, it may not be as productive as growing them outdoors in a sunny location.
Leave a Comment