
Growing Cucumbers at Home can seem daunting, but trust me, with a few clever tricks and a little DIY spirit, you can be harvesting crisp, refreshing cucumbers from your own backyard in no time! Imagine biting into a juicy cucumber you nurtured from seed – the taste is simply unmatched. For centuries, cucumbers have been cultivated across the globe, from their origins in India to their adoption by ancient Romans and Greeks, who prized them for their cooling properties.
But let’s face it, not everyone has a sprawling garden. That’s where these DIY hacks come in! Whether you’re dealing with limited space, pesky pests, or simply want to maximize your yield, I’ve got you covered. I’m going to share some simple, effective techniques that will transform your cucumber-growing experience.
Why do you need these tricks? Because growing cucumbers at home shouldn’t be a struggle! These tips will help you overcome common challenges, save money on store-bought produce, and enjoy the satisfaction of growing your own food. Plus, who doesn’t love a good DIY project? So, grab your gardening gloves, and let’s get started on this exciting journey to cucumber success!
Growing Cucumbers at Home: A Beginner’s Guide
Hey there, fellow gardening enthusiasts! I’m so excited to share my experiences and tips for growing delicious, crisp cucumbers right in your own backyard (or even on your balcony!). Trust me, there’s nothing quite like the satisfaction of harvesting your own homegrown cucumbers. Let’s dive in!
Choosing Your Cucumber Variety
Before we get our hands dirty, it’s crucial to pick the right cucumber variety for your space and preferences. There are two main types: slicing cucumbers (for salads and snacking) and pickling cucumbers (for, well, pickles!).
* Slicing Cucumbers: These are typically longer and have smoother skin. Some popular varieties include ‘Marketmore 76’, ‘Straight Eight’, and ‘English Cucumbers’ (which are often seedless).
* Pickling Cucumbers: These are shorter, stubbier, and often have bumpy skin. ‘National Pickling’ and ‘Boston Pickling’ are classic choices.
* Bush Varieties: If you’re short on space, consider bush varieties like ‘Spacemaster’ or ‘Bush Champion’. These are compact and perfect for containers.
I personally love growing ‘Marketmore 76’ for its reliability and great flavor in salads. But experiment and find what works best for you!
Getting Started: Seeds vs. Seedlings
You have two options for starting your cucumber plants: from seeds or from seedlings (small plants you buy at a nursery).
* Starting from Seeds: This is the more economical option, and it gives you more control over the entire growing process. However, it requires a bit more patience and attention.
* Starting from Seedlings: This is a quicker and easier option, especially for beginners. You’ll get a head start on the growing season, but you’ll have fewer variety choices.
I usually start my cucumbers from seeds indoors about 3-4 weeks before the last expected frost. This gives them a good head start and protects them from early spring chills.
Step-by-Step Guide: Planting Your Cucumbers
Okay, let’s get down to the nitty-gritty! Here’s a detailed guide to planting your cucumbers, whether you’re starting from seeds or seedlings.
1. Preparing the Soil
Cucumbers are heavy feeders, meaning they need nutrient-rich soil to thrive.
* Choose a sunny spot: Cucumbers need at least 6-8 hours of sunlight per day.
* Amend the soil: Mix in plenty of compost or well-rotted manure to improve drainage and fertility. I usually add a generous amount of compost to my garden beds before planting.
* Check the pH: Cucumbers prefer a soil pH between 6.0 and 7.0. You can test your soil with a home testing kit or send a sample to your local agricultural extension office.
* Ensure good drainage: Cucumbers don’t like soggy soil. If your soil is heavy clay, consider adding sand or perlite to improve drainage.
2. Starting Seeds Indoors (Optional)
If you’re starting from seeds indoors, follow these steps:
1. Use seed-starting trays or small pots: Fill them with a seed-starting mix.
2. Sow seeds ½ inch deep: Plant 2-3 seeds per cell or pot.
3. Water gently: Keep the soil moist but not soggy.
4. Provide warmth: Cucumber seeds germinate best at temperatures between 70-80°F (21-27°C). You can use a heat mat to speed up germination.
5. Provide light: Once the seedlings emerge, place them under grow lights or in a sunny window.
6. Thin seedlings: Once the seedlings have their first true leaves (the second set of leaves), thin them to one plant per cell or pot. Choose the strongest, healthiest seedling.
3. Transplanting Seedlings (or Direct Sowing Seeds)
Whether you’re transplanting seedlings you started indoors or direct sowing seeds outdoors, follow these steps:
1. Harden off seedlings (if applicable): Gradually acclimate your seedlings to outdoor conditions by exposing them to increasing amounts of sunlight and wind over a period of 7-10 days. This will help them avoid transplant shock.
2. Choose a planting method: You can plant cucumbers in rows or hills.
* Rows: Space plants 12-18 inches apart in rows that are 3-4 feet apart.
* Hills: Create small mounds of soil (hills) that are about 1 foot in diameter and 3-4 feet apart. Plant 2-3 seeds or seedlings per hill.
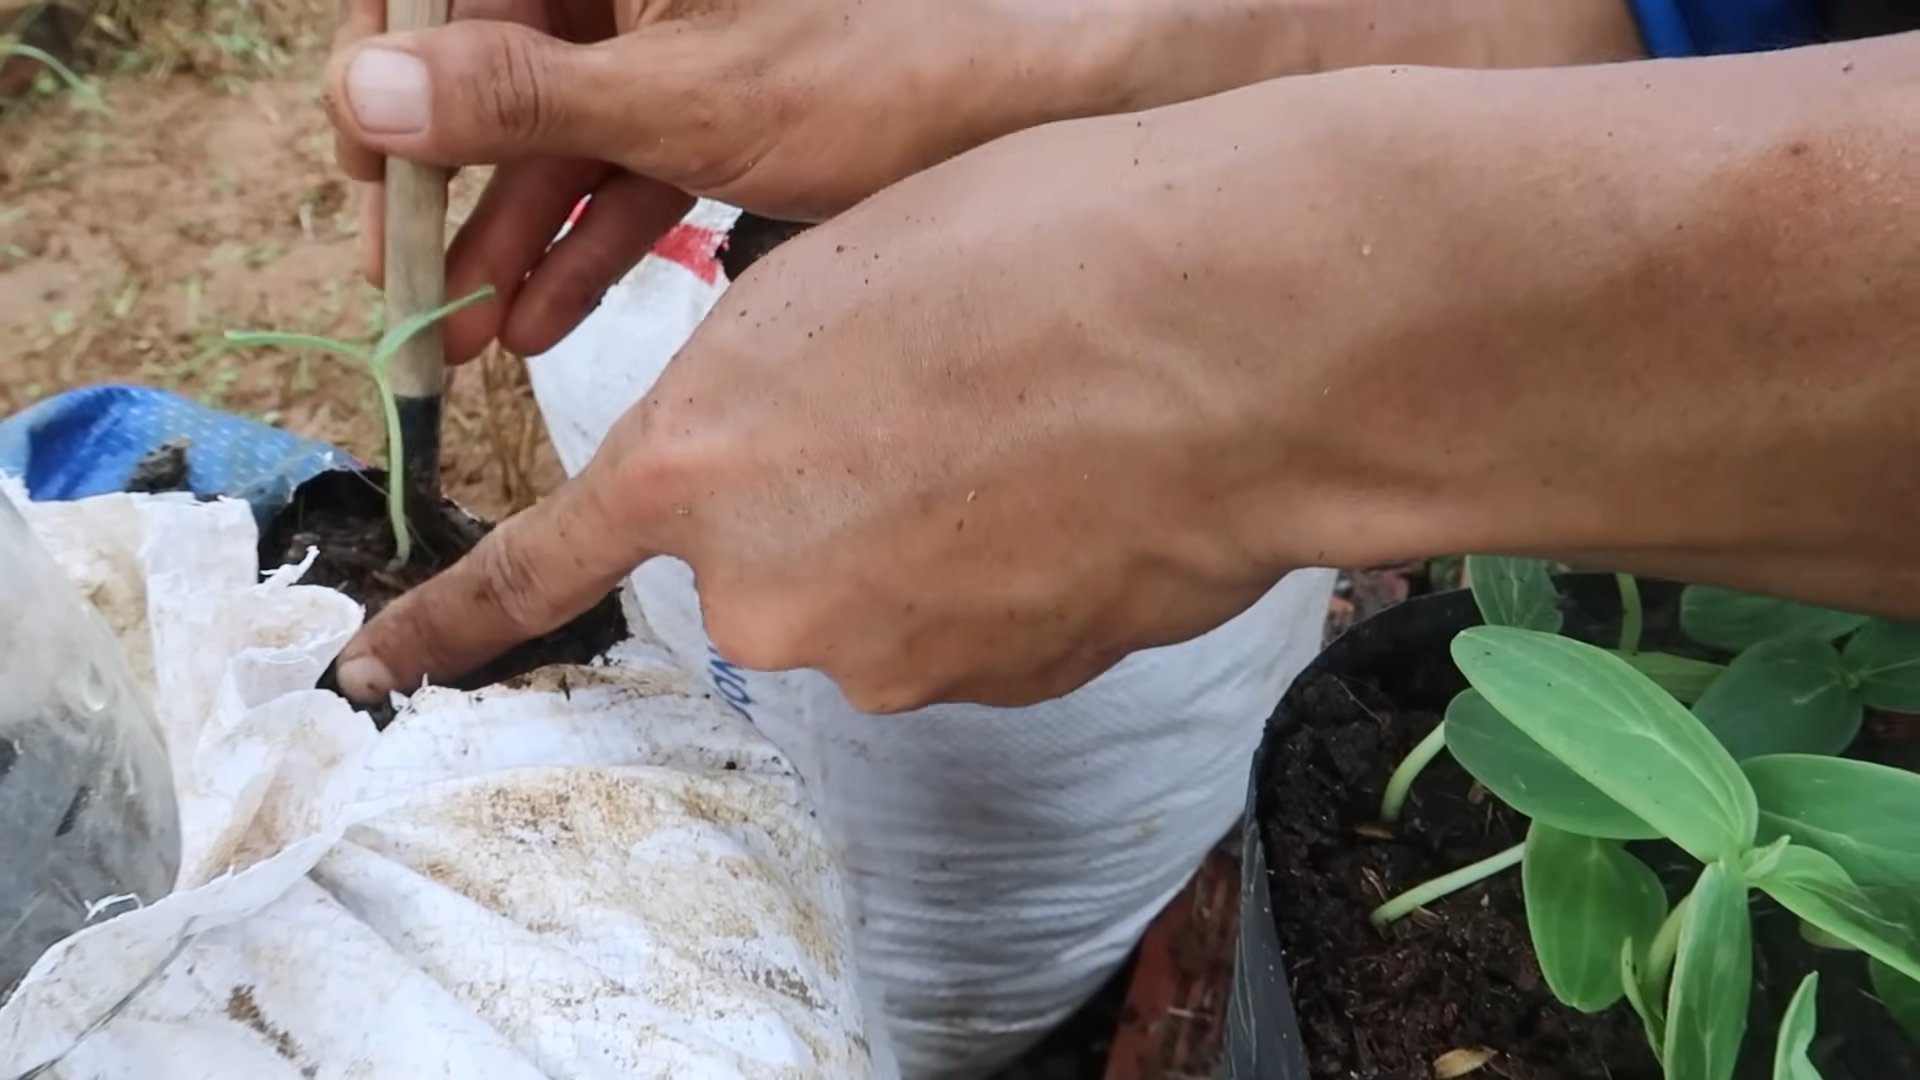
3. Dig holes: Dig holes that are slightly larger than the root ball of your seedlings (or ½ inch deep for seeds).
4. Plant carefully: Gently remove the seedlings from their containers and place them in the holes. If direct sowing, place the seeds in the holes.
5. Backfill with soil: Gently fill the holes with soil and pat it down lightly.
6. Water thoroughly: Water the plants well after planting.
7. Mulch: Apply a layer of mulch around the plants to help retain moisture, suppress weeds, and regulate soil temperature. I like to use straw or shredded leaves.
Providing Support: Trellising Your Cucumbers
Cucumbers are vines, so they need support to grow properly. Trellising them not only saves space but also improves air circulation, reduces disease, and makes harvesting easier.
* Choose a trellis: There are many different types of trellises you can use, including A-frame trellises, vertical trellises, and even tomato cages.
* Install the trellis: Install the trellis before the cucumber plants start to vine.
* Train the vines: As the cucumber vines grow, gently guide them onto the trellis and tie them loosely with twine or plant ties.
I’ve found that A-frame trellises work really well for my garden. They’re sturdy and provide plenty of support for the vines.
Caring for Your Cucumber Plants
Once your cucumbers are planted and trellised, it’s important to provide them with proper care to ensure a bountiful harvest.
1. Watering
Cucumbers need consistent moisture, especially during hot weather.
* Water deeply and regularly: Water deeply at the base of the plants, avoiding getting the leaves wet. Aim for about 1 inch of water per week.
* Water in the morning: This allows the leaves to dry out during the day, which helps prevent fungal diseases.
* Use a soaker hose or drip irrigation: These methods deliver water directly to the roots, minimizing water waste and reducing the risk of disease.
2. Fertilizing
Cucumbers are heavy feeders, so they need regular fertilization.
* Fertilize every 2-3 weeks: Use a balanced fertilizer (e.g., 10-10-10) or a fertilizer specifically formulated for vegetables.
* Side-dress with compost: You can also side-dress your cucumber plants with compost every few weeks to provide them with a slow-release source of nutrients.
* Avoid over-fertilizing: Over-fertilizing can lead to excessive foliage growth and reduced fruit production.
3. Pest and Disease Control
Cucumbers are susceptible to a variety of pests and diseases.
Hey there, fellow gardening enthusiasts! I’m so excited to share my experiences and tips for growing delicious, crisp cucumbers right in your own backyard (or even on your balcony!). Trust me, there’s nothing quite like the satisfaction of harvesting your own homegrown cucumbers. Let’s dive in!
Choosing Your Cucumber Variety
Before we get our hands dirty, it’s crucial to pick the right cucumber variety for your space and preferences. There are two main types: slicing cucumbers (for salads and snacking) and pickling cucumbers (for, well, pickles!).
* Slicing Cucumbers: These are typically longer and have smoother skin. Some popular varieties include ‘Marketmore 76’, ‘Straight Eight’, and ‘English Cucumbers’ (which are often seedless).
* Pickling Cucumbers: These are shorter, stubbier, and often have bumpy skin. ‘National Pickling’ and ‘Boston Pickling’ are classic choices.
* Bush Varieties: If you’re short on space, consider bush varieties like ‘Spacemaster’ or ‘Bush Champion’. These are compact and perfect for containers.
I personally love growing ‘Marketmore 76’ for its reliability and great flavor in salads. But experiment and find what works best for you!
Getting Started: Seeds vs. Seedlings
You have two options for starting your cucumber plants: from seeds or from seedlings (small plants you buy at a nursery).
* Starting from Seeds: This is the more economical option, and it gives you more control over the entire growing process. However, it requires a bit more patience and attention.
* Starting from Seedlings: This is a quicker and easier option, especially for beginners. You’ll get a head start on the growing season, but you’ll have fewer variety choices.
I usually start my cucumbers from seeds indoors about 3-4 weeks before the last expected frost. This gives them a good head start and protects them from early spring chills.
Step-by-Step Guide: Planting Your Cucumbers
Okay, let’s get down to the nitty-gritty! Here’s a detailed guide to planting your cucumbers, whether you’re starting from seeds or seedlings.
1. Preparing the Soil
Cucumbers are heavy feeders, meaning they need nutrient-rich soil to thrive.
* Choose a sunny spot: Cucumbers need at least 6-8 hours of sunlight per day.
* Amend the soil: Mix in plenty of compost or well-rotted manure to improve drainage and fertility. I usually add a generous amount of compost to my garden beds before planting.
* Check the pH: Cucumbers prefer a soil pH between 6.0 and 7.0. You can test your soil with a home testing kit or send a sample to your local agricultural extension office.
* Ensure good drainage: Cucumbers don’t like soggy soil. If your soil is heavy clay, consider adding sand or perlite to improve drainage.
2. Starting Seeds Indoors (Optional)
If you’re starting from seeds indoors, follow these steps:
1. Use seed-starting trays or small pots: Fill them with a seed-starting mix.
2. Sow seeds ½ inch deep: Plant 2-3 seeds per cell or pot.
3. Water gently: Keep the soil moist but not soggy.
4. Provide warmth: Cucumber seeds germinate best at temperatures between 70-80°F (21-27°C). You can use a heat mat to speed up germination.
5. Provide light: Once the seedlings emerge, place them under grow lights or in a sunny window.
6. Thin seedlings: Once the seedlings have their first true leaves (the second set of leaves), thin them to one plant per cell or pot. Choose the strongest, healthiest seedling.
3. Transplanting Seedlings (or Direct Sowing Seeds)
Whether you’re transplanting seedlings you started indoors or direct sowing seeds outdoors, follow these steps:
1. Harden off seedlings (if applicable): Gradually acclimate your seedlings to outdoor conditions by exposing them to increasing amounts of sunlight and wind over a period of 7-10 days. This will help them avoid transplant shock.
2. Choose a planting method: You can plant cucumbers in rows or hills.
* Rows: Space plants 12-18 inches apart in rows that are 3-4 feet apart.
* Hills: Create small mounds of soil (hills) that are about 1 foot in diameter and 3-4 feet apart. Plant 2-3 seeds or seedlings per hill.
3. Dig holes: Dig holes that are slightly larger than the root ball of your seedlings (or ½ inch deep for seeds).
4. Plant carefully: Gently remove the seedlings from their containers and place them in the holes. If direct sowing, place the seeds in the holes.
5. Backfill with soil: Gently fill the holes with soil and pat it down lightly.
6. Water thoroughly: Water the plants well after planting.
7. Mulch: Apply a layer of mulch around the plants to help retain moisture, suppress weeds, and regulate soil temperature. I like to use straw or shredded leaves.
Providing Support: Trellising Your Cucumbers
Cucumbers are vines, so they need support to grow properly. Trellising them not only saves space but also improves air circulation, reduces disease, and makes harvesting easier.
* Choose a trellis: There are many different types of trellises you can use, including A-frame trellises, vertical trellises, and even tomato cages.
* Install the trellis: Install the trellis before the cucumber plants start to vine.
* Train the vines: As the cucumber vines grow, gently guide them onto the trellis and tie them loosely with twine or plant ties.
I’ve found that A-frame trellises work really well for my garden. They’re sturdy and provide plenty of support for the vines.
Caring for Your Cucumber Plants
Once your cucumbers are planted and trellised, it’s important to provide them with proper care to ensure a bountiful harvest.
1. Watering
Cucumbers need consistent moisture, especially during hot weather.
* Water deeply and regularly: Water deeply at the base of the plants, avoiding getting the leaves wet. Aim for about 1 inch of water per week.
* Water in the morning: This allows the leaves to dry out during the day, which helps prevent fungal diseases.
* Use a soaker hose or drip irrigation: These methods deliver water directly to the roots, minimizing water waste and reducing the risk of disease.
2. Fertilizing
Cucumbers are heavy feeders, so they need regular fertilization.
* Fertilize every 2-3 weeks: Use a balanced fertilizer (e.g., 10-10-10) or a fertilizer specifically formulated for vegetables.
* Side-dress with compost: You can also side-dress your cucumber plants with compost every few weeks to provide them with a slow-release source of nutrients.
* Avoid over-fertilizing: Over-fertilizing can lead to excessive foliage growth and reduced fruit production.
3. Pest and Disease Control
Cucumbers are susceptible to a variety of pests and diseases.
* Common pests: Cucumber beetles, aphids, squash bugs, and spider mites.
* Common diseases: Powdery mildew, downy mildew, and bacterial wilt.
* Prevention is key: Practice good garden hygiene, such as removing diseased leaves and weeds, to help prevent pest and disease problems.
* Use organic pest control methods: If you do encounter pests or diseases, try using organic pest control methods, such as insecticidal soap, neem oil, or Bacillus thuringiensis (Bt).
I’ve had good luck using neem oil to control aphids and spider mites on my cucumber plants.
4. Pruning
Pruning cucumbers can help improve air circulation, reduce disease, and increase fruit production.
* Remove suckers: Suckers are small shoots that grow from the base of the plant. Remove them to encourage the plant to focus its energy on producing fruit.
* Remove yellowing leaves: Remove any yellowing or diseased leaves to prevent the spread of disease.
* Pinch off the tips of the vines: Pinching off the tips of the vines can encourage the plant to produce more side shoots, which will result in more fruit.
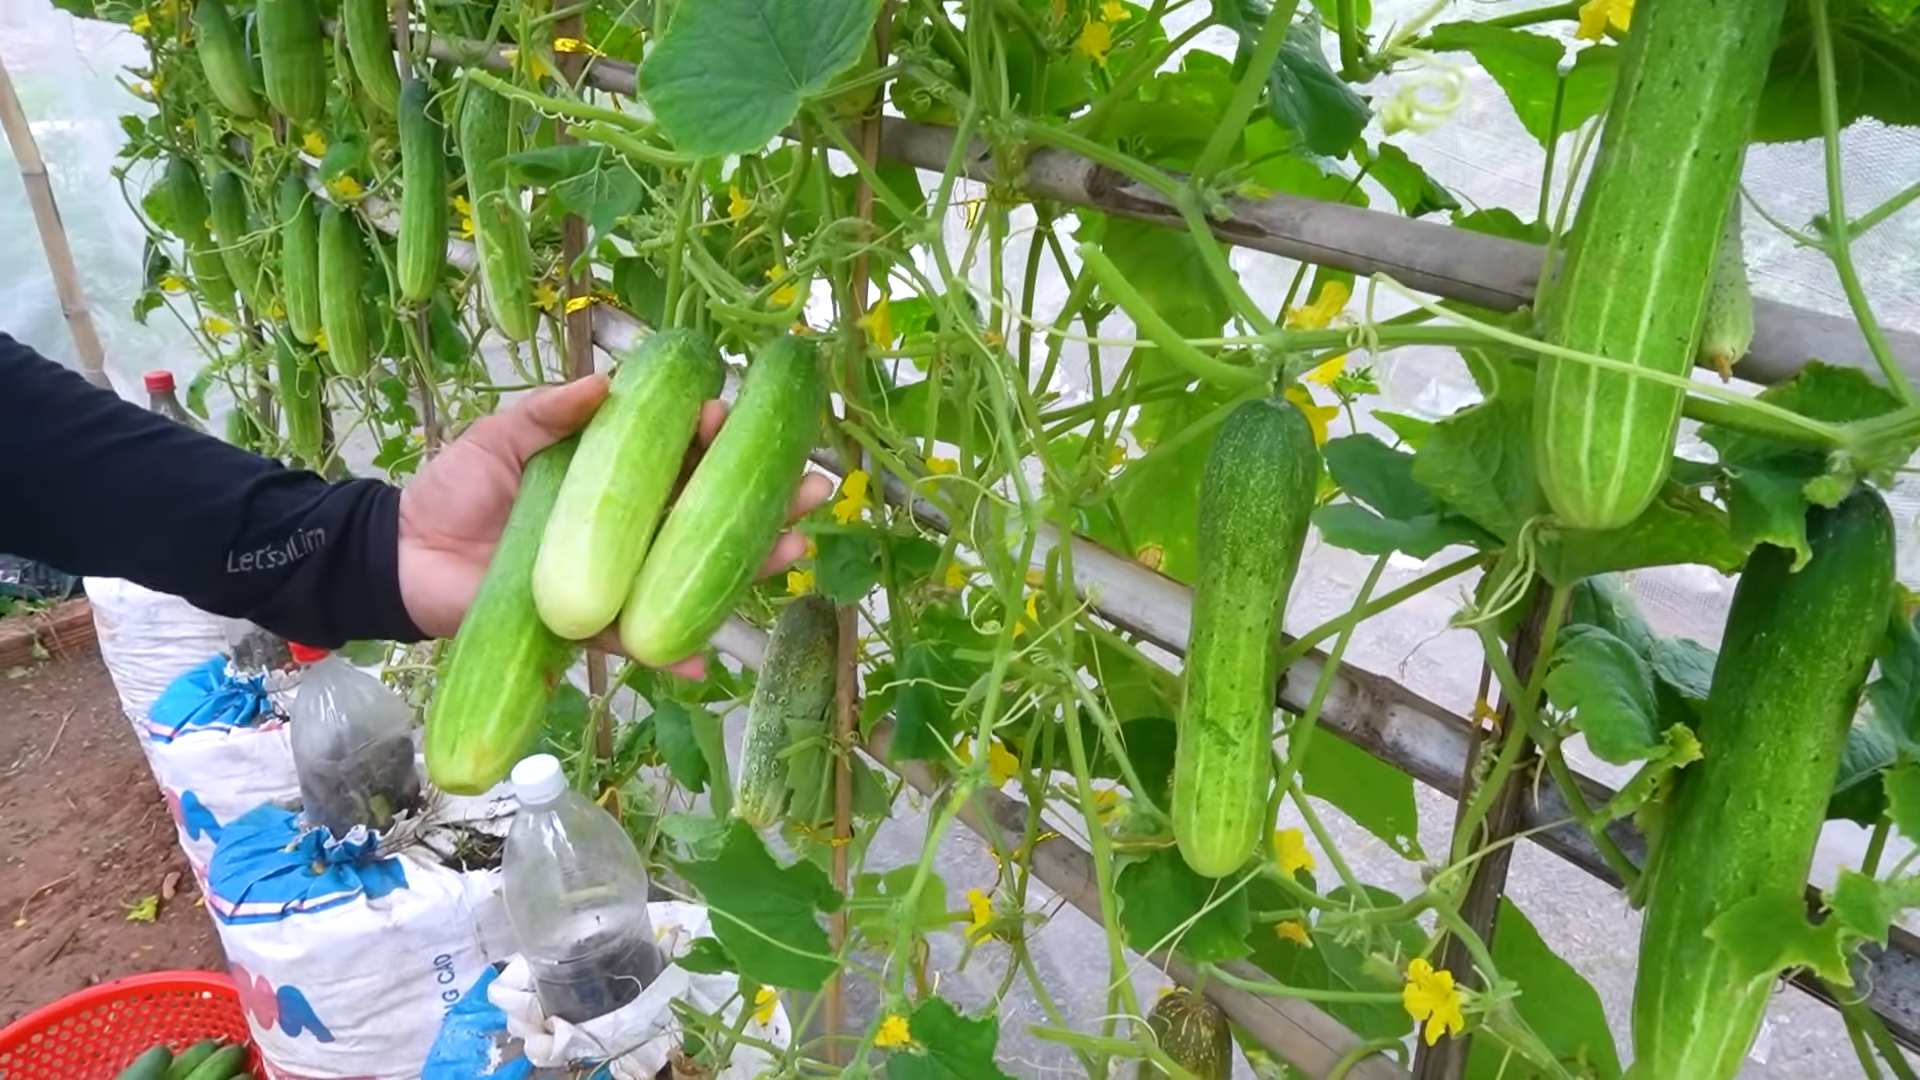
Harvesting Your Cucumbers
The moment you’ve been waiting for! Harvesting your cucumbers is the most rewarding part of the process.
* Harvest when they’re the right size: Harvest cucumbers when they’re the right size for their variety. Slicing cucumbers are typically harvested when they’re 6-8 inches long, while pickling cucumbers are harvested when they
Conclusion
So, there you have it! Growing cucumbers at home isn’t just a gardening project; it’s an investment in fresh, flavorful produce and a rewarding connection with nature. We’ve explored the essential steps, from selecting the right cucumber varieties and preparing the soil to providing adequate support and managing pests. The beauty of this DIY endeavor lies in its adaptability. You can tailor the process to fit your specific space, climate, and preferences.
Why is this a must-try? Because store-bought cucumbers simply can’t compare to the crisp, vibrant taste of a freshly picked, homegrown cucumber. Imagine biting into a cucumber still warm from the sun, its flavor bursting with freshness. Plus, you have complete control over the growing process, ensuring that your cucumbers are free from harmful pesticides and chemicals. You’re not just growing cucumbers; you’re cultivating a healthier lifestyle.
Consider these variations to personalize your cucumber-growing experience:
* **Vertical Gardening:** If space is limited, embrace vertical gardening techniques. Train your cucumber vines to climb trellises, fences, or even repurposed ladders. This not only saves space but also improves air circulation and reduces the risk of fungal diseases.
* **Container Gardening:** No garden? No problem! Cucumbers thrive in containers as long as they’re large enough (at least 5 gallons) and provide adequate drainage. Choose bush varieties for container gardening, as they tend to be more compact.
* **Companion Planting:** Enhance your cucumber patch by incorporating companion plants. Marigolds deter pests, while dill attracts beneficial insects. Basil is said to improve the flavor of cucumbers.
* **Pickling Cucumbers:** If you’re a fan of pickles, dedicate a portion of your cucumber crop to pickling varieties. These cucumbers are smaller and have a firmer texture, making them ideal for pickling.
* **Experiment with Varieties:** Don’t be afraid to try different cucumber varieties. Explore Armenian cucumbers, lemon cucumbers, or even exotic varieties like the crystal apple cucumber. Each variety offers a unique flavor and texture.
Growing cucumbers at home is more than just a hobby; it’s a journey of discovery. You’ll learn about plant life cycles, soil science, and the delicate balance of the ecosystem. You’ll also develop a deeper appreciation for the food you eat.
We wholeheartedly encourage you to embark on this rewarding adventure. Start small, be patient, and don’t be afraid to experiment. The satisfaction of harvesting your own cucumbers is unparalleled.
Now, we want to hear from you! Have you tried growing cucumbers at home? What challenges did you face? What tips and tricks did you discover? Share your experiences in the comments below. Let’s create a community of cucumber enthusiasts and learn from each other. Your insights could inspire others to take the plunge and experience the joy of homegrown cucumbers. Let us know what **growing cucumbers** has been like for you!
Frequently Asked Questions (FAQ)
What are the best cucumber varieties to grow at home?
The “best” variety depends on your climate, space, and intended use. For slicing, consider ‘Marketmore 76’ or ‘Straight Eight’. For pickling, ‘National Pickling’ is a popular choice. Bush varieties like ‘Spacemaster’ are ideal for containers. Armenian cucumbers are known for their mild flavor and thin skin. Research varieties that are well-suited to your region and growing conditions.
How much sunlight do cucumbers need?
Cucumbers need at least 6-8 hours of direct sunlight per day to thrive. Choose a sunny location in your garden or on your patio. If you’re growing cucumbers indoors, supplement with grow lights if necessary. Insufficient sunlight can lead to stunted growth and reduced fruit production.
What kind of soil is best for cucumbers?
Cucumbers prefer well-drained, fertile soil with a pH between 6.0 and 7.0. Amend your soil with compost or other organic matter to improve drainage and fertility. Avoid heavy clay soils, as they can become waterlogged. A soil test can help you determine the pH and nutrient levels of your soil.
How often should I water my cucumber plants?
Cucumbers need consistent moisture, especially during hot weather. Water deeply and regularly, aiming to keep the soil consistently moist but not waterlogged. Water at the base of the plants to avoid wetting the foliage, which can increase the risk of fungal diseases. Mulching around the plants can help retain moisture.
How do I prevent pests and diseases from attacking my cucumber plants?
Prevention is key. Choose disease-resistant varieties, practice crop rotation, and maintain good air circulation. Inspect your plants regularly for signs of pests or diseases. Common pests include aphids, cucumber beetles, and squash bugs. Common diseases include powdery mildew and downy mildew. Use organic pest control methods, such as insecticidal soap or neem oil, to control pests. Apply fungicides if necessary to treat diseases.
When should I harvest my cucumbers?
Harvest cucumbers when they are the desired size and color. Check the seed packet or plant tag for specific harvesting instructions. Overripe cucumbers can become bitter and seedy. Harvest regularly to encourage continued fruit production. Use a sharp knife or pruning shears to cut the cucumbers from the vine, leaving a short stem attached.
How do I store cucumbers after harvesting?
Store cucumbers in the refrigerator for up to a week. Wrap them in plastic wrap or place them in a plastic bag to prevent them from drying out. Avoid storing cucumbers near ethylene-producing fruits, such as bananas and tomatoes, as this can cause them to ripen too quickly.
Can I grow cucumbers indoors?
Yes, you can grow cucumbers indoors, but it requires more effort. Choose bush varieties, provide adequate sunlight or grow lights, and ensure proper pollination. You may need to hand-pollinate the flowers using a small paintbrush.
What are some common problems when growing cucumbers and how can I fix them?
* **Yellowing leaves:** Could be caused by overwatering, underwatering, nutrient deficiencies, or diseases. Adjust watering practices, fertilize appropriately, and treat any diseases.
* **Lack of fruit:** Could be caused by insufficient pollination, lack of sunlight, or nutrient deficiencies. Hand-pollinate the flowers, provide more sunlight, and fertilize with a balanced fertilizer.
* **Bitter cucumbers:** Could be caused by inconsistent watering, high temperatures, or stress. Water consistently, provide shade during hot weather, and avoid stressing the plants.
How do I encourage more cucumber production?
Regular harvesting is crucial. The more you pick, the more the plant will produce. Ensure adequate sunlight, water, and nutrients. Prune the vines to encourage branching and fruit development. Consider using a fertilizer specifically formulated for fruiting vegetables.
What are the benefits of growing my own cucumbers?
The benefits are numerous! You get fresher, more flavorful cucumbers, free from harmful pesticides. You have control over the growing process, ensuring that your cucumbers are grown sustainably. You save money on groceries. And you experience the satisfaction of harvesting your own food. Plus, **growing cucumbers** is a fun and rewarding hobby!
Leave a Comment