
Professional cleaning tactics aren’t just for the pros anymore! Have you ever walked into a hotel room and thought, “Wow, this is spotless! How do they do it?” Or maybe you’ve envied the gleaming floors and dust-free surfaces in a friend’s impeccably clean home. Well, I’m here to tell you that achieving that level of clean is totally within your reach, and you don’t need to break the bank hiring a cleaning service.
For centuries, cultures around the world have valued cleanliness, associating it with health, prosperity, and even spiritual well-being. Think of the elaborate bathing rituals of ancient Rome or the meticulous cleaning practices in traditional Japanese homes. While our methods have evolved, the desire for a clean and comfortable living space remains a universal human need.
In today’s busy world, who has time to spend hours scrubbing and dusting? That’s where these professional cleaning tactics come in. I’m going to share some of the best-kept secrets and DIY hacks that professional cleaners use to get sparkling results in less time and with less effort. From tackling stubborn stains to organizing your cleaning supplies like a pro, these tips will transform your cleaning routine and leave you with a home you’ll love to live in. Get ready to ditch the overwhelm and embrace a cleaner, happier you!
DIY Deep Cleaning: Turn Your Home into a Sparkling Sanctuary
Okay, let’s face it, professional cleaning services can be expensive. But who says you can’t achieve that same level of clean yourself? I’m going to walk you through some professional cleaning tactics that you can easily implement at home. Get ready to roll up your sleeves and transform your living space!
Section 1: Gathering Your Arsenal of Cleaning Supplies
Before we dive into the nitty-gritty, let’s make sure you have all the right tools. Trust me, having everything organized beforehand will save you tons of time and frustration.
* Microfiber Cloths: These are your best friends. They’re super absorbent, lint-free, and perfect for almost any surface. Buy a bunch!
* All-Purpose Cleaner: Choose a good quality all-purpose cleaner that’s effective on various surfaces. I personally prefer eco-friendly options.
* Glass Cleaner: Streak-free windows and mirrors are a must!
* Bathroom Cleaner: Specifically designed to tackle soap scum, mildew, and hard water stains.
* Toilet Bowl Cleaner: For obvious reasons.
* Disinfectant Spray: Essential for killing germs and bacteria, especially in high-touch areas.
* Baking Soda: A natural and versatile cleaner, great for scrubbing and deodorizing.
* White Vinegar: Another natural powerhouse, perfect for descaling, removing odors, and cleaning glass.
* Dish Soap: For washing dishes, of course, but also useful for general cleaning.
* Sponges: Get a variety of sponges, including non-scratch scrub sponges for tougher jobs.
* Scrub Brush: For scrubbing grout, tiles, and other hard-to-reach areas.
* Toilet Brush: A must-have for cleaning the toilet bowl.
* Rubber Gloves: Protect your hands from harsh chemicals and keep them clean.
* Spray Bottles: For diluting cleaners and creating your own DIY solutions.
* Vacuum Cleaner: A good vacuum cleaner is essential for removing dust, dirt, and debris from floors and carpets.
* Mop and Bucket: For cleaning hard floors.
* Squeegee: For cleaning windows and shower doors.
* Old Toothbrush: Perfect for cleaning grout and other small, hard-to-reach areas.
* Magic Eraser: These are amazing for removing scuff marks and stains.
Section 2: The Top-Down Approach: Dusting Like a Pro
Professional cleaners always start from the top and work their way down. This prevents dust and debris from falling onto already cleaned surfaces.
1. Ceiling Fans and Light Fixtures: Use a duster with an extension pole to reach ceiling fans and light fixtures. Make sure the fan is turned off! For light fixtures, you can also use a damp microfiber cloth.
2. Crown Molding and Trim: Dust along the crown molding and trim with a duster or a damp cloth.
3. Walls: Use a microfiber cloth attached to a mop or broom handle to dust the walls. For stubborn stains, you can use a damp sponge with a mild detergent.
4. Shelves and Furniture: Remove everything from shelves and furniture and dust them thoroughly. Don’t forget to dust the undersides of shelves and furniture.
5. Window Blinds and Curtains: Dust window blinds with a duster or a damp cloth. Vacuum curtains with the upholstery attachment of your vacuum cleaner. You can also wash curtains according to the care instructions.
Section 3: Kitchen Domination: Cleaning and Sanitizing
The kitchen is often the dirtiest room in the house, so let’s tackle it with a vengeance!
1. Clear the Counters: Remove everything from the countertops so you can clean them thoroughly.
2. Clean the Countertops: Spray the countertops with all-purpose cleaner and wipe them down with a microfiber cloth. For stubborn stains, you can use a baking soda paste.
3. Clean the Sink: Scrub the sink with dish soap and a sponge. Rinse thoroughly. For stainless steel sinks, you can use a stainless steel cleaner to remove water spots and fingerprints.
4. Clean the Stove Top: Remove the grates and burner caps from the stove top. Soak them in hot, soapy water. Scrub the stove top with a sponge and all-purpose cleaner. Rinse thoroughly. Once the grates and burner caps are clean and dry, replace them.
5. Clean the Oven: This is a big one! For a self-cleaning oven, follow the manufacturer’s instructions. For a non-self-cleaning oven, you can use a commercial oven cleaner or a DIY baking soda paste. To make a baking soda paste, mix 1/2 cup of baking soda with 3 tablespoons of water. Spread the paste on the inside of the oven and let it sit overnight. The next day, scrub the oven with a sponge and rinse thoroughly.
6. Clean the Microwave: Heat a cup of water with a few tablespoons of vinegar in the microwave for 5 minutes. This will loosen any stuck-on food. Carefully remove the cup and wipe down the inside of the microwave with a sponge.
7. Clean the Refrigerator: Remove all the food from the refrigerator. Throw away any expired or spoiled items. Wipe down the shelves and drawers with a sponge and all-purpose cleaner. Rinse thoroughly.
8. Clean the Dishwasher: Run an empty dishwasher cycle with a cup of white vinegar in the top rack. This will help to remove any buildup and odors.
9. Clean the Floors: Sweep or vacuum the kitchen floor. Then, mop the floor with a mop and bucket filled with hot water and all-purpose cleaner.
Section 4: Bathroom Bliss: Scrubbing Away Grime
The bathroom is another area that requires special attention. Let’s get it sparkling clean!
1. Clean the Toilet: Flush the toilet and add toilet bowl cleaner to the bowl. Let it sit for a few minutes, then scrub with a toilet brush. Flush again. Wipe down the outside of the toilet with a disinfectant spray.
2. Clean the Shower and Tub: Spray the shower and tub with bathroom cleaner. Let it sit for a few minutes, then scrub with a sponge or scrub brush. Rinse thoroughly. For stubborn soap scum, you can use a baking soda paste or a commercial soap scum remover. Use a squeegee after each shower to prevent water spots and mildew.
3. Clean the Sink and Countertop: Spray the sink and countertop with all-purpose cleaner and wipe them down with a microfiber cloth. For stubborn stains, you can use a baking soda paste.
4. Clean the Mirror: Spray the mirror with glass cleaner and wipe it down with a microfiber cloth.
5. Clean the Floors: Sweep or vacuum the bathroom floor. Then, mop the floor with a mop and bucket filled with hot water and all-purpose cleaner.
Section 5: Floor Care: Vacuuming and Mopping Like a Pro
Clean floors make a huge difference in the overall cleanliness of your home.
1. Vacuuming: Vacuum all carpets and rugs thoroughly. Pay special attention to high-traffic areas. Use the attachments of your vacuum cleaner to clean upholstery, curtains, and hard-to-reach areas.
2. Mopping: Sweep or vacuum hard floors to remove any loose dirt and debris. Then, mop the floors with a mop and bucket filled with hot water and all-purpose cleaner. Be sure to wring out the mop thoroughly to avoid leaving streaks. For wood floors, use a wood floor cleaner specifically designed for wood.
Section 6: Window Wonders: Achieving Streak-Free Shine
Sparkling windows can brighten up any room.
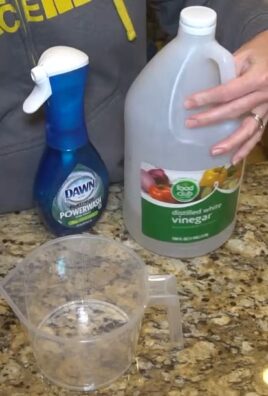
1. Prepare Your Solution: Mix equal parts white vinegar and water in a spray bottle. You can also add a few drops of dish soap.
2. Spray and Wipe: Spray the window with the cleaning solution. Use a clean microfiber cloth or a squeegee to wipe the window clean. If using a squeegee, overlap each stroke slightly to avoid streaks.
3. Dry the Edges: Use a cl
Okay, let’s face it, professional cleaning services can be expensive. But who says you can’t achieve that same level of clean yourself? I’m going to walk you through some professional cleaning tactics that you can easily implement at home. Get ready to roll up your sleeves and transform your living space!
Section 1: Gathering Your Arsenal of Cleaning Supplies
Before we dive into the nitty-gritty, let’s make sure you have all the right tools. Trust me, having everything organized beforehand will save you tons of time and frustration.
* Microfiber Cloths: These are your best friends. They’re super absorbent, lint-free, and perfect for almost any surface. Buy a bunch!
* All-Purpose Cleaner: Choose a good quality all-purpose cleaner that’s effective on various surfaces. I personally prefer eco-friendly options.
* Glass Cleaner: Streak-free windows and mirrors are a must!
* Bathroom Cleaner: Specifically designed to tackle soap scum, mildew, and hard water stains.
* Toilet Bowl Cleaner: For obvious reasons.
* Disinfectant Spray: Essential for killing germs and bacteria, especially in high-touch areas.
* Baking Soda: A natural and versatile cleaner, great for scrubbing and deodorizing.
* White Vinegar: Another natural powerhouse, perfect for descaling, removing odors, and cleaning glass.
* Dish Soap: For washing dishes, of course, but also useful for general cleaning.
* Sponges: Get a variety of sponges, including non-scratch scrub sponges for tougher jobs.
* Scrub Brush: For scrubbing grout, tiles, and other hard-to-reach areas.
* Toilet Brush: A must-have for cleaning the toilet bowl.
* Rubber Gloves: Protect your hands from harsh chemicals and keep them clean.
* Spray Bottles: For diluting cleaners and creating your own DIY solutions.
* Vacuum Cleaner: A good vacuum cleaner is essential for removing dust, dirt, and debris from floors and carpets.
* Mop and Bucket: For cleaning hard floors.
* Squeegee: For cleaning windows and shower doors.
* Old Toothbrush: Perfect for cleaning grout and other small, hard-to-reach areas.
* Magic Eraser: These are amazing for removing scuff marks and stains.
Section 2: The Top-Down Approach: Dusting Like a Pro
Professional cleaners always start from the top and work their way down. This prevents dust and debris from falling onto already cleaned surfaces.
1. Ceiling Fans and Light Fixtures: Use a duster with an extension pole to reach ceiling fans and light fixtures. Make sure the fan is turned off! For light fixtures, you can also use a damp microfiber cloth.
2. Crown Molding and Trim: Dust along the crown molding and trim with a duster or a damp cloth.
3. Walls: Use a microfiber cloth attached to a mop or broom handle to dust the walls. For stubborn stains, you can use a damp sponge with a mild detergent.
4. Shelves and Furniture: Remove everything from shelves and furniture and dust them thoroughly. Don’t forget to dust the undersides of shelves and furniture.
5. Window Blinds and Curtains: Dust window blinds with a duster or a damp cloth. Vacuum curtains with the upholstery attachment of your vacuum cleaner. You can also wash curtains according to the care instructions.
Section 3: Kitchen Domination: Cleaning and Sanitizing
The kitchen is often the dirtiest room in the house, so let’s tackle it with a vengeance!
1. Clear the Counters: Remove everything from the countertops so you can clean them thoroughly.
2. Clean the Countertops: Spray the countertops with all-purpose cleaner and wipe them down with a microfiber cloth. For stubborn stains, you can use a baking soda paste.
3. Clean the Sink: Scrub the sink with dish soap and a sponge. Rinse thoroughly. For stainless steel sinks, you can use a stainless steel cleaner to remove water spots and fingerprints.
4. Clean the Stove Top: Remove the grates and burner caps from the stove top. Soak them in hot, soapy water. Scrub the stove top with a sponge and all-purpose cleaner. Rinse thoroughly. Once the grates and burner caps are clean and dry, replace them.
5. Clean the Oven: This is a big one! For a self-cleaning oven, follow the manufacturer’s instructions. For a non-self-cleaning oven, you can use a commercial oven cleaner or a DIY baking soda paste. To make a baking soda paste, mix 1/2 cup of baking soda with 3 tablespoons of water. Spread the paste on the inside of the oven and let it sit overnight. The next day, scrub the oven with a sponge and rinse thoroughly.
6. Clean the Microwave: Heat a cup of water with a few tablespoons of vinegar in the microwave for 5 minutes. This will loosen any stuck-on food. Carefully remove the cup and wipe down the inside of the microwave with a sponge.
7. Clean the Refrigerator: Remove all the food from the refrigerator. Throw away any expired or spoiled items. Wipe down the shelves and drawers with a sponge and all-purpose cleaner. Rinse thoroughly.
8. Clean the Dishwasher: Run an empty dishwasher cycle with a cup of white vinegar in the top rack. This will help to remove any buildup and odors.
9. Clean the Floors: Sweep or vacuum the kitchen floor. Then, mop the floor with a mop and bucket filled with hot water and all-purpose cleaner.
Section 4: Bathroom Bliss: Scrubbing Away Grime
The bathroom is another area that requires special attention. Let’s get it sparkling clean!
1. Clean the Toilet: Flush the toilet and add toilet bowl cleaner to the bowl. Let it sit for a few minutes, then scrub with a toilet brush. Flush again. Wipe down the outside of the toilet with a disinfectant spray.
2. Clean the Shower and Tub: Spray the shower and tub with bathroom cleaner. Let it sit for a few minutes, then scrub with a sponge or scrub brush. Rinse thoroughly. For stubborn soap scum, you can use a baking soda paste or a commercial soap scum remover. Use a squeegee after each shower to prevent water spots and mildew.
3. Clean the Sink and Countertop: Spray the sink and countertop with all-purpose cleaner and wipe them down with a microfiber cloth. For stubborn stains, you can use a baking soda paste.
4. Clean the Mirror: Spray the mirror with glass cleaner and wipe it down with a microfiber cloth.
5. Clean the Floors: Sweep or vacuum the bathroom floor. Then, mop the floor with a mop and bucket filled with hot water and all-purpose cleaner.
Section 5: Floor Care: Vacuuming and Mopping Like a Pro
Clean floors make a huge difference in the overall cleanliness of your home.
1. Vacuuming: Vacuum all carpets and rugs thoroughly. Pay special attention to high-traffic areas. Use the attachments of your vacuum cleaner to clean upholstery, curtains, and hard-to-reach areas.
2. Mopping: Sweep or vacuum hard floors to remove any loose dirt and debris. Then, mop the floors with a mop and bucket filled with hot water and all-purpose cleaner. Be sure to wring out the mop thoroughly to avoid leaving streaks. For wood floors, use a wood floor cleaner specifically designed for wood.
Section 6: Window Wonders: Achieving Streak-Free Shine
Sparkling windows can brighten up any room.
1. Prepare Your Solution: Mix equal parts white vinegar and water in a spray bottle. You can also add a few drops of dish soap.
2. Spray and Wipe: Spray the window with the cleaning solution. Use a clean microfiber cloth or a squeegee to wipe the window clean. If using a squeegee, overlap each stroke slightly to avoid streaks.
3. Dry the Edges: Use a clean, dry microfiber cloth to dry the edges of the window.
Section 7: Little Details, Big Impact: Don’t Forget These Areas!
These often-overlooked areas can make a big difference in the overall cleanliness of your home.
* Light Switches and Doorknobs: Wipe down light switches and doorknobs with a disinfectant spray to kill germs.
* Remote Controls: Remove the batteries from the remote controls and wipe them down with a disinfectant wipe.
* Electronics Screens: Use a microfiber cloth to gently wipe down electronics screens. Avoid using harsh chemicals or cleaners.
* Baseboards: Wipe down baseboards with a damp cloth to remove dust and dirt.
* Trash Cans: Empty trash cans regularly and clean them with soap and water. You can also use a disinfectant spray to kill
Conclusion
So, there you have it! Mastering these professional cleaning tactics isn’t just about achieving a spotless home; it’s about reclaiming your time, reducing stress, and creating a healthier, more enjoyable living space. We’ve armed you with the secrets the pros use, from the power of microfiber cloths to the strategic approach of cleaning from top to bottom.
But why is this DIY approach a must-try? Because it’s empowering. You’re no longer reliant on expensive cleaning services or harsh chemicals. You’re in control, using readily available supplies and proven techniques to achieve professional-level results. Think of the satisfaction of knowing you’ve created a sparkling clean environment, all thanks to your own efforts and a little know-how.
Beyond the basic techniques, there’s room for personalization. For instance, if you’re sensitive to strong scents, consider using essential oils like lemon or lavender in your cleaning solutions for a naturally fresh aroma. You can also adapt the cleaning schedule to fit your lifestyle. Maybe you prefer a quick daily tidy-up followed by a more thorough cleaning session once a week. Or perhaps you’re a weekend warrior who tackles everything at once. The beauty of these professional cleaning tactics is their adaptability.
Don’t be afraid to experiment! Try different combinations of cleaning solutions, explore new tools, and find what works best for your home and your preferences. For example, if you have stubborn hard water stains in your bathroom, try using a paste of baking soda and vinegar. For greasy kitchen surfaces, a mixture of dish soap and hot water can work wonders.
We truly believe that incorporating these professional cleaning tactics into your routine will transform your cleaning experience. It’s not just about cleaning; it’s about creating a more organized, efficient, and enjoyable home life.
Now, it’s your turn! We encourage you to put these tips into practice and see the difference for yourself. Start with one room, master the techniques, and then move on to the next. Remember, consistency is key. Even a few minutes of cleaning each day can make a huge difference in the long run.
And most importantly, we want to hear about your experience! Share your before-and-after photos, your favorite cleaning hacks, and any challenges you encounter in the comments below. Let’s create a community of DIY cleaning enthusiasts who are passionate about creating clean and healthy homes. Your insights could inspire others and help them achieve their cleaning goals. So, go ahead, give these professional cleaning tactics a try and let us know what you think! We’re excited to see your sparkling results!
Frequently Asked Questions (FAQ)
What are the most essential tools for implementing these professional cleaning tactics?
The foundation of professional cleaning lies in having the right tools. Microfiber cloths are a must-have; they’re far more effective at trapping dirt and dust than traditional cloths and are reusable, making them an eco-friendly choice. A good quality vacuum cleaner with various attachments is also crucial for tackling different surfaces. Invest in a sturdy mop and bucket, and consider a steam cleaner for deep cleaning floors and sanitizing surfaces. Don’t forget about smaller tools like scrub brushes, sponges, and spray bottles for your cleaning solutions. Having a well-stocked cleaning caddy will keep everything organized and easily accessible.
How often should I be cleaning different areas of my home using these tactics?
The frequency of cleaning depends on your lifestyle and the usage of different areas. High-traffic areas like kitchens and bathrooms require more frequent attention. Aim to wipe down kitchen counters and sinks daily, and clean bathrooms at least once a week. Vacuuming or sweeping floors should also be done regularly, ideally every few days. Less frequently used areas like guest rooms or storage spaces can be cleaned less often, perhaps once a month or as needed. Creating a cleaning schedule can help you stay organized and ensure that no area is neglected. Remember, consistency is more important than marathon cleaning sessions.
Are these professional cleaning tactics safe for all surfaces in my home?
While many of these tactics are generally safe, it’s always wise to test cleaning solutions on an inconspicuous area first, especially on delicate surfaces like wood or marble. Avoid using abrasive cleaners on surfaces that can scratch easily. Always read the labels of cleaning products and follow the manufacturer’s instructions. For natural stone surfaces, use pH-neutral cleaners specifically designed for stone. When in doubt, consult a professional cleaner or refer to the manufacturer’s guidelines for your specific surfaces.
Can I use natural cleaning solutions instead of commercial products with these tactics?
Absolutely! Many natural cleaning solutions are just as effective as commercial products and are a safer, more eco-friendly option. Vinegar, baking soda, lemon juice, and essential oils are all excellent natural cleaning agents. For example, vinegar can be used to clean windows, remove hard water stains, and deodorize drains. Baking soda is a great abrasive cleaner for scrubbing surfaces and absorbing odors. Lemon juice can be used to disinfect and add a fresh scent. Just be sure to research the appropriate uses and dilutions for each natural ingredient.
How can I make cleaning less of a chore and more enjoyable?
Cleaning doesn’t have to be a dreaded task. Make it more enjoyable by listening to your favorite music or podcast while you clean. Break down large cleaning tasks into smaller, more manageable chunks. Reward yourself after completing a cleaning session. Involve other members of your household to share the workload. And remember, a clean and organized home can have a positive impact on your mood and well-being.
What are some common cleaning mistakes to avoid when using these professional cleaning tactics?
One common mistake is using too much cleaning product. More isn’t always better, and excessive product can leave behind residue or damage surfaces. Another mistake is not allowing cleaning solutions enough time to dwell before wiping them away. This is especially important for disinfectants, which need time to kill germs. Avoid mixing different cleaning products together, as this can create dangerous fumes. And finally, don’t forget to ventilate your home while cleaning to prevent the buildup of fumes.
How do I deal with stubborn stains that don’t come out easily?
Stubborn stains often require a targeted approach. Identify the type of stain and research the best method for removing it. For example, grease stains can be treated with dish soap, while coffee stains can be removed with a paste of baking soda and water. Pre-treating stains before washing clothes or cleaning surfaces can also improve your chances of success. If all else fails, consider consulting a professional cleaner for advice.
How can I maintain a clean home between deep cleaning sessions?
Maintaining a clean home is all about establishing good habits. Make it a habit to wipe up spills immediately, put things away after using them, and do a quick tidy-up each day. Encourage everyone in your household to participate in these habits. Consider implementing a “one in, one out” rule to prevent clutter from accumulating. And don’t underestimate the power of a quick daily sweep or vacuum to keep floors clean.
How do I properly disinfect surfaces using these professional cleaning tactics?
Disinfecting surfaces is crucial for killing germs and preventing the spread of illness. Use a disinfectant cleaner that is EPA-registered and follow the manufacturer’s instructions carefully. Apply the disinfectant to the surface and allow it to dwell for the recommended amount of time before wiping it away. Pay special attention to high-touch surfaces like doorknobs, light switches, and countertops. Remember to wear gloves and ventilate the area while disinfecting.
What are some tips for cleaning pet-related messes and odors?
Pet messes and odors can be challenging to deal with, but with the right approach, you can keep your home clean and fresh. Clean up accidents immediately to prevent staining and odor buildup. Use an enzymatic cleaner specifically designed for pet messes, as these cleaners break down the organic compounds that cause odors. Vacuum regularly to remove pet hair and dander. And consider investing in an air purifier to help eliminate pet odors from the air.
Leave a Comment