
Grow Snap Peas Indoors? Absolutely! Imagine plucking fresh, crisp snap peas right from your indoor garden, even when the weather outside is frightful. Forget those bland, store-bought veggies – we’re talking about a burst of homegrown sweetness at your fingertips. For centuries, humans have cultivated gardens, adapting techniques to suit their environments. From ancient Roman greenhouses to modern-day hydroponics, the desire to nurture life and enjoy fresh produce has always been a driving force.
But let’s be honest, not everyone has access to a sprawling outdoor garden. Apartment dwellers, city folk, and those with limited mobility often miss out on the joy of gardening. That’s where the magic of indoor gardening comes in! And that’s why I’m so excited to share these simple, effective DIY tricks to help you grow snap peas indoors successfully.
This isn’t just about having a pretty plant; it’s about enjoying fresh, healthy food, reducing your carbon footprint, and experiencing the therapeutic benefits of nurturing life. Plus, who wouldn’t want to impress their friends with their green thumb skills? So, grab your seeds, some soil, and let’s get started on this exciting indoor gardening adventure!
Growing Snap Peas Indoors: A Complete DIY Guide
Hey there, fellow plant enthusiasts! Ever dreamt of enjoying fresh, crunchy snap peas even when the weather outside is frightful? Well, dream no more! I’m going to walk you through the process of growing your very own snap peas indoors. It’s easier than you might think, and the reward of harvesting those sweet pods in the middle of winter is absolutely worth it.
Choosing the Right Variety and Setting Up
Before we dive into the nitty-gritty, let’s talk about choosing the right snap pea variety and getting your growing space ready. Not all snap peas are created equal, especially when it comes to indoor growing.
* Bush Varieties are Best: Opt for bush or dwarf varieties. These tend to stay more compact and are better suited for container gardening. Some great choices include ‘Sugar Ann,’ ‘Sugar Snap,’ and ‘Little Marvel.’ These varieties don’t require as much vertical space as vining types.
* Sunlight is Key: Snap peas need at least 6-8 hours of direct sunlight per day. A south-facing window is ideal. If you don’t have enough natural light, don’t worry! You can supplement with grow lights.
* Container Selection: Choose a container that’s at least 6-8 inches deep and wide. Good drainage is crucial to prevent root rot. I prefer using fabric pots because they allow for excellent aeration and drainage.
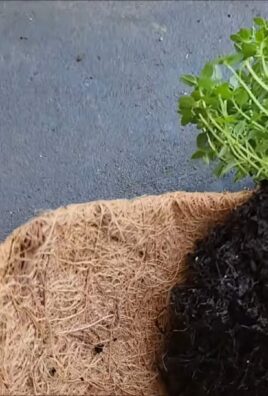
* Soil Matters: Use a well-draining potting mix. A mix of potting soil, perlite, and vermiculite works wonders. Avoid using garden soil, as it can compact and hinder drainage.
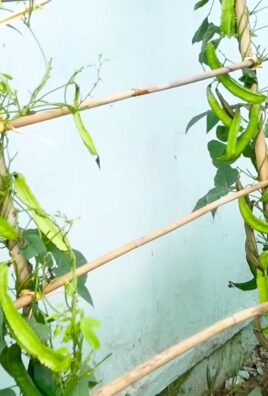
* Support System: Even bush varieties benefit from some support. A small trellis, bamboo stakes, or even just some sturdy twigs stuck into the soil will do the trick. This helps keep the plants upright and prevents them from sprawling.
Step-by-Step Planting Guide
Alright, let’s get our hands dirty! Here’s a step-by-step guide to planting your snap peas:
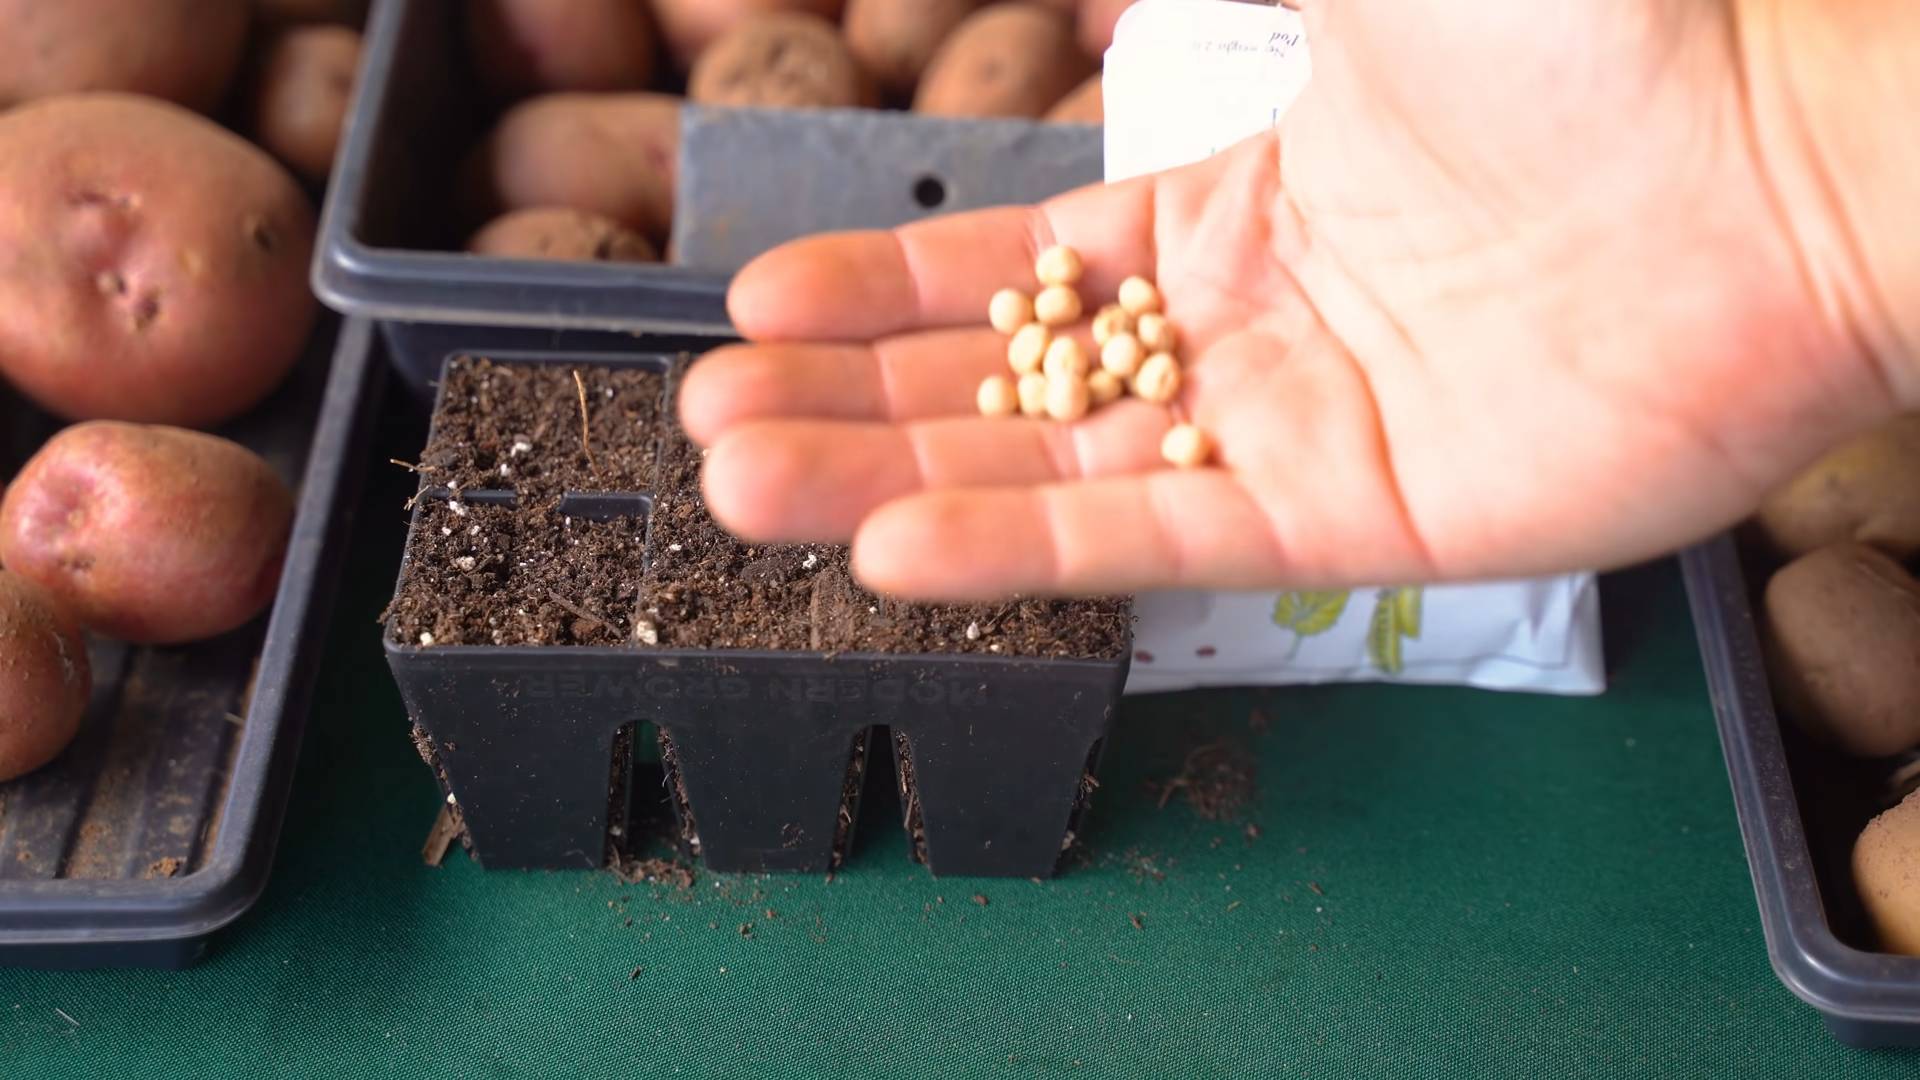
1. Soak the Seeds: Before planting, soak your snap pea seeds in lukewarm water for 12-24 hours. This helps soften the seed coat and encourages faster germination. I usually put them in a small bowl and leave them on the counter overnight.
2. Prepare the Container: Fill your chosen container with the well-draining potting mix, leaving about an inch of space at the top. Gently pat down the soil to remove any large air pockets.
3. Sow the Seeds: Make small holes about 1 inch deep and 2 inches apart. Place one seed in each hole and cover with soil. You can plant multiple seeds in a single container, but don’t overcrowd them.
4. Water Thoroughly: Water the soil gently but thoroughly until water drains out of the bottom of the container. This ensures that the soil is evenly moist.
5. Provide Support: Insert your chosen support system (trellis, stakes, etc.) into the container near the seedlings. This will give them something to climb as they grow.
6. Find the Right Spot: Place the container in a sunny location or under grow lights. If using grow lights, position them about 6-12 inches above the seedlings.
7. Maintain Moisture: Keep the soil consistently moist but not waterlogged. Check the soil moisture daily and water when the top inch feels dry to the touch.
Caring for Your Indoor Snap Peas
Now that your snap peas are planted, it’s time to nurture them and watch them grow! Here’s what you need to do to keep them happy and healthy:
* Watering: As mentioned before, consistent moisture is key. Avoid letting the soil dry out completely, but also avoid overwatering, which can lead to root rot. I usually water every 2-3 days, but this will depend on the temperature and humidity in your home.
* Fertilizing: Snap peas are relatively light feeders, but they still benefit from regular fertilization. Use a balanced liquid fertilizer diluted to half strength every 2-3 weeks. Look for a fertilizer with an NPK ratio of around 10-10-10.
* Pruning: Pinch off any yellowing or dead leaves to encourage healthy growth. You can also prune the tips of the vines to encourage branching and bushier growth.
* Pest Control: Keep an eye out for common pests like aphids and spider mites. If you spot any pests, treat them with insecticidal soap or neem oil. I prefer to use organic pest control methods whenever possible.
* Pollination: Snap peas are self-pollinating, but you can help them along by gently shaking the plants or using a small paintbrush to transfer pollen from one flower to another. This is especially important if you’re growing them indoors, where there are no bees or other pollinators.
* Temperature: Snap peas prefer cooler temperatures, ideally between 60-70°F (15-21°C). Avoid placing them near heat sources, such as radiators or vents.
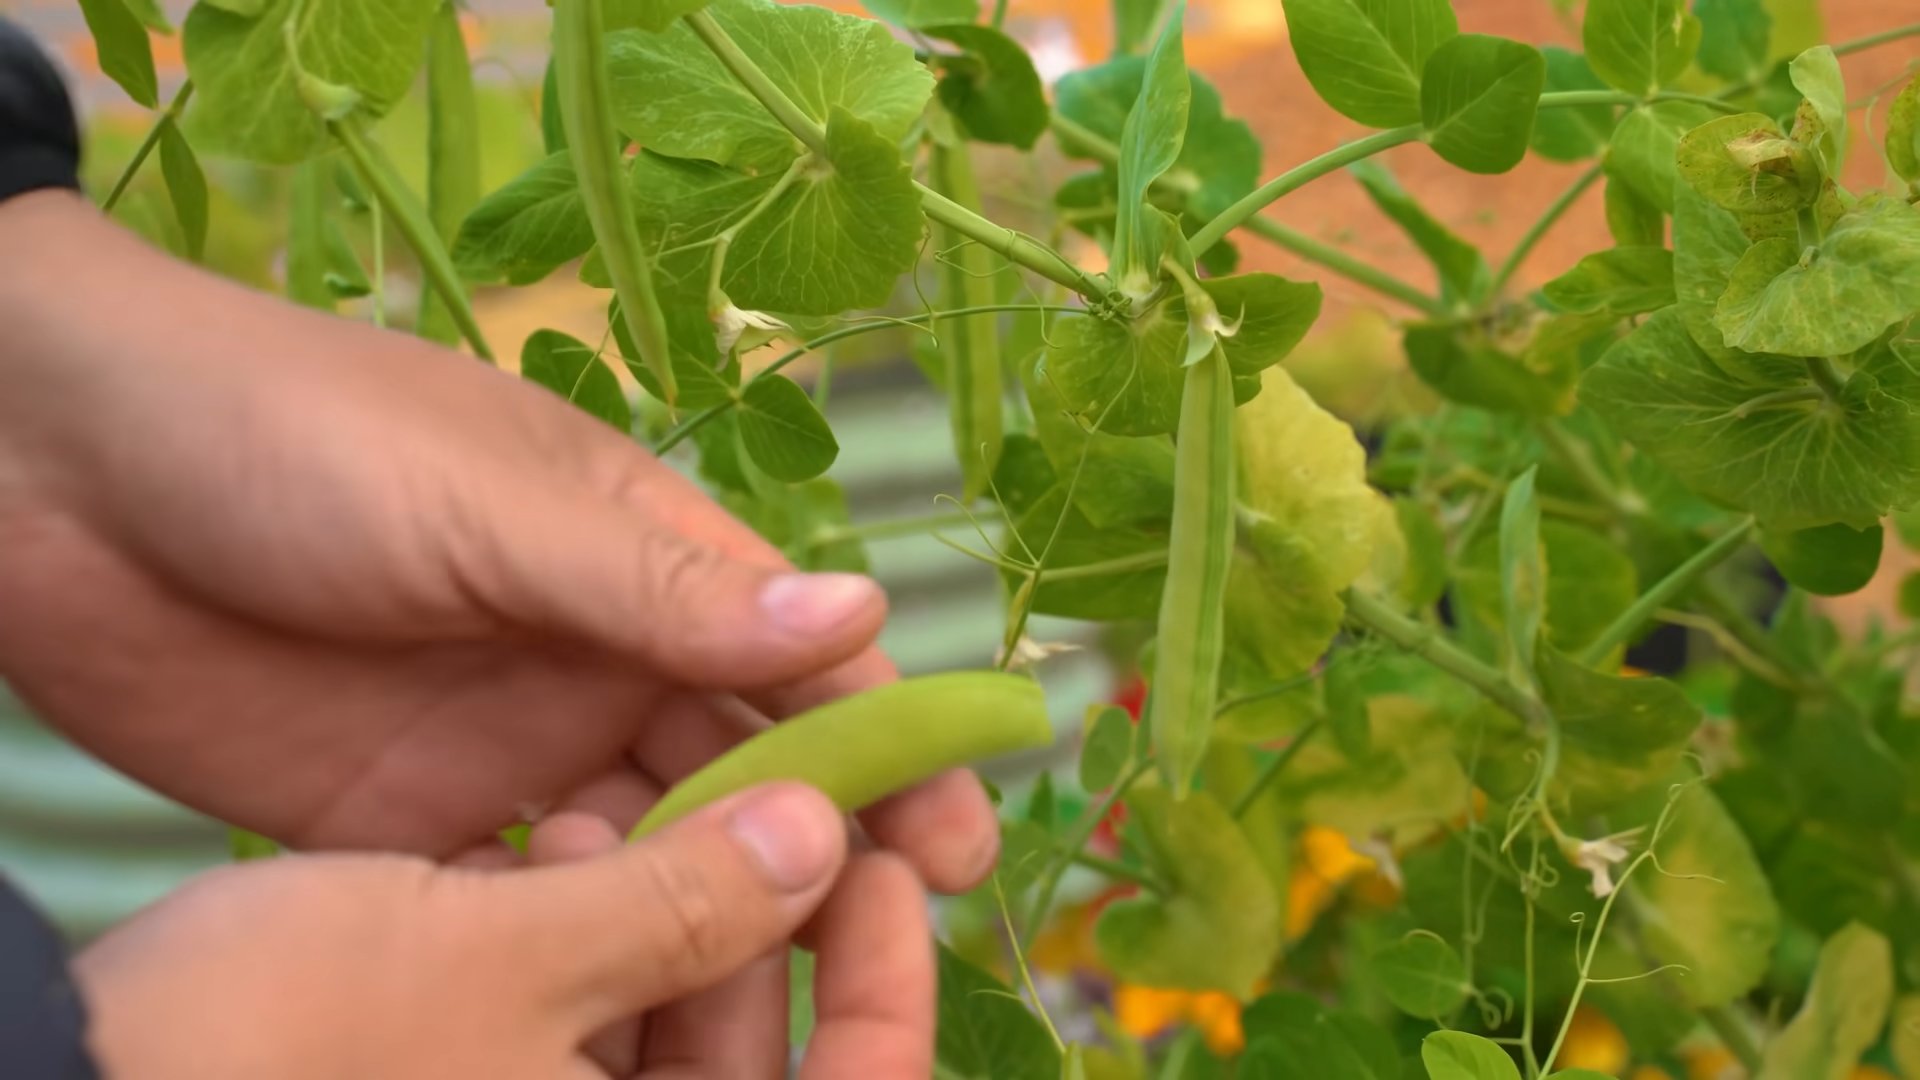
Harvesting Your Bounty
The best part of growing snap peas is, of course, harvesting them! Here’s how to know when they’re ready to pick:
1. Timing is Everything: Snap peas are typically ready to harvest about 60-70 days after planting.
2. Look for Plump Pods: The pods should be plump and filled with peas, but not overly large or tough.
3. Snap Test: The pods should snap easily when bent. If they’re too flexible, they’re not quite ready.
4. Harvest Regularly: Harvest your snap peas regularly to encourage continued production. The more you pick, the more they’ll produce!
5. Gentle Harvesting: Use scissors or pruning shears to cut the pods from the vine, being careful not to damage the plant.
Troubleshooting Common Issues
Even with the best care, you might encounter some challenges along the way. Here are some common issues and how to address them:
* Yellowing Leaves: This could be a sign of overwatering, underwatering, or nutrient deficiency. Check the soil moisture and adjust your watering schedule accordingly. If the soil is consistently moist, reduce watering. If it’s dry, water more frequently. You can also try fertilizing with a balanced fertilizer.
* Lack of Flowers: This could be due to insufficient sunlight, over-fertilization with nitrogen, or temperatures that are too high. Make sure your plants are getting enough sunlight and avoid using fertilizers that are high in nitrogen. Try to keep the temperature in the ideal range of 60-70°F (15-21°C).
* Pest Infestations: As mentioned earlier, keep an eye out for common pests like aphids and spider mites. Treat them with insecticidal soap or neem oil. You can also try introducing beneficial insects, such as ladybugs, to your growing area.
* Powdery Mildew: This is a fungal disease that can affect snap peas, especially in humid conditions. Improve air circulation around your plants and avoid overhead watering. You can also treat powdery mildew with a fungicide.
* Poor Germination: If your seeds aren’t germinating, make sure they’re fresh and viable. You can also try scarifying the seeds by gently rubbing them with sandpaper before soaking them. This helps break down the seed coat and encourages germination.
Extending Your Harvest
Want to keep those snap peas coming? Here are a few tips for extending your harvest:
* Succession Planting: Plant new seeds every 2-3 weeks to ensure a continuous supply of snap peas.
* Choose Heat-Tolerant Varieties: If you live in a warmer climate, choose heat-tolerant varieties that can withstand higher temperatures.
* Provide Shade: During the hottest part of the day, provide some shade for your plants to prevent them from overheating.
* Water Deeply: Water deeply and less frequently to encourage deep root growth, which will make your plants more resilient to drought and heat.
Growing snap peas indoors is a rewarding experience that allows you to enjoy fresh, delicious produce year-round. With a little bit of care and attention, you can have a thriving indoor garden that provides you with a steady supply of these crunchy treats. So, get planting and enjoy the fruits (or rather, vegetables) of your labor! Happy gardening!
Conclusion
So, there you have it! Growing snap peas indoors might seem like a whimsical dream, but with a little know-how and a touch of patience, you can enjoy the sweet, crisp taste of homegrown snap peas even when the weather outside is frightful. This DIY trick isn’t just about having fresh produce at your fingertips; it’s about connecting with nature, learning a new skill, and experiencing the satisfaction of nurturing something from seed to harvest.
Why is this a must-try? Because it offers a unique blend of benefits. Imagine adding freshly picked snap peas to your winter salads, stir-fries, or simply enjoying them as a healthy snack. Think about the joy of watching your little ones marvel at the growing vines and the tiny pods forming. And consider the environmental impact – reducing your reliance on store-bought produce that has traveled miles to reach your plate.
But the beauty of this DIY project lies in its adaptability. Feel free to experiment with different varieties of snap peas. Some, like ‘Sugar Ann,’ are bushier and better suited for smaller spaces, while others, like ‘Sugar Snap,’ will require more vertical support. You can also play around with different potting mixes. While a standard potting mix works well, adding some compost or worm castings can give your snap peas an extra boost of nutrients.
Consider using different types of supports for your vines. A simple trellis made from bamboo stakes and twine works wonders, but you could also get creative with repurposed materials like old ladders or even decorative branches. The possibilities are endless!
And don’t forget about lighting! While a sunny windowsill can work in some cases, supplementing with grow lights, especially during the darker months, will significantly improve your yields. LED grow lights are energy-efficient and provide the full spectrum of light that your snap peas need to thrive.
Ultimately, growing snap peas indoors is a rewarding experience that brings a touch of spring into your home, no matter the season. It’s a chance to get your hands dirty, learn something new, and enjoy the delicious fruits (or rather, vegetables) of your labor.
We wholeheartedly encourage you to give this DIY trick a try. Start small, experiment, and don’t be afraid to make mistakes. Gardening is a journey of learning and discovery, and every failure is an opportunity to grow (pun intended!).
And most importantly, we want to hear about your experiences! Share your photos, tips, and challenges in the comments below. Let’s create a community of indoor snap pea growers and inspire others to embrace the joy of homegrown goodness. Let us know what **growing snap peas indoors** has been like for you!
Frequently Asked Questions (FAQ)
1. What are the best varieties of snap peas to grow indoors?
The best varieties for indoor growing are typically bushier types that don’t require extensive vertical space. ‘Sugar Ann’ is a popular choice because it’s compact and produces early. ‘Snowbird’ is another good option, known for its dwarf size and sweet flavor. ‘Sugar Snap’ can also be grown indoors, but it will require more vertical support and space. Consider the size of your growing area and the amount of light available when choosing a variety.
2. How much light do snap peas need when grown indoors?
Snap peas need at least 6-8 hours of direct sunlight per day. If you don’t have a south-facing window that provides sufficient light, you’ll need to supplement with grow lights. LED grow lights are a great option because they are energy-efficient and provide the full spectrum of light that plants need to thrive. Position the grow lights a few inches above the plants and adjust as they grow taller.
3. What kind of soil should I use for growing snap peas indoors?
A well-draining potting mix is essential for growing snap peas indoors. You can use a standard potting mix or create your own by combining equal parts of potting soil, perlite, and vermiculite. Adding some compost or worm castings to the mix will provide extra nutrients for your plants. Avoid using garden soil, as it can be too heavy and may contain pests or diseases.
4. How often should I water my indoor snap peas?
Water your snap peas regularly, keeping the soil consistently moist but not waterlogged. Check the soil moisture by sticking your finger about an inch deep. If the soil feels dry, it’s time to water. Water deeply, allowing the excess water to drain out of the bottom of the pot. Avoid overwatering, as this can lead to root rot.
5. How do I support my snap pea vines indoors?
Snap peas are climbing plants and need support to grow properly. You can use a variety of supports, such as a trellis, bamboo stakes, or even a tomato cage. Install the support system when the plants are young, so they can easily attach themselves to it. As the vines grow, gently guide them onto the support.
6. How long does it take for snap peas to mature indoors?
Snap peas typically take 50-60 days to mature from seed to harvest. However, the exact time can vary depending on the variety, growing conditions, and amount of light. You can start harvesting the pods when they are plump and the peas inside are well-developed.
7. How do I harvest snap peas indoors?
Harvest snap peas when the pods are plump and the peas inside are well-developed. Use scissors or pruning shears to cut the pods from the vine, being careful not to damage the plant. Harvest regularly to encourage continued production.
8. What are some common problems when growing snap peas indoors, and how can I prevent them?
Some common problems include aphids, powdery mildew, and root rot. To prevent aphids, inspect your plants regularly and treat any infestations with insecticidal soap. To prevent powdery mildew, ensure good air circulation and avoid overwatering. To prevent root rot, use well-draining soil and avoid overwatering.
9. Can I grow snap peas indoors year-round?
Yes, you can grow snap peas indoors year-round, as long as you provide them with adequate light, water, and nutrients. You may need to adjust your growing conditions depending on the season. For example, you may need to supplement with grow lights during the winter months.
10. Are there any specific fertilizer requirements for indoor snap peas?
Snap peas benefit from regular fertilization. Use a balanced fertilizer, such as a 10-10-10, diluted to half strength. Fertilize every 2-3 weeks, following the instructions on the fertilizer label. Avoid over-fertilizing, as this can burn the roots. You can also supplement with compost tea or worm castings to provide additional nutrients.
Leave a Comment