
Sponge Cleaning Hacks: Are you tired of your kitchen sponge smelling funky and looking like it’s seen better days? I know I am! We all rely on these little workhorses to keep our homes clean, but let’s be honest, they can quickly become breeding grounds for bacteria and grime. But don’t worry, you don’t have to keep tossing them out every week!
For generations, sponges have been a staple in households worldwide, evolving from natural sea sponges to the synthetic versions we know and love today. Their absorbent nature and scrubbing power make them indispensable for tackling everything from dirty dishes to grimy countertops. But with constant use comes the inevitable build-up of food particles, grease, and, yes, even mold.
That’s where these amazing sponge cleaning hacks come in! I’m going to share some simple, effective, and budget-friendly DIY tricks to keep your sponges fresh, clean, and ready to tackle any mess. Not only will these hacks save you money by extending the life of your sponges, but they’ll also help you maintain a healthier home environment. Who knew a simple sponge could be so powerful with the right care? Let’s dive in and discover the secrets to a sparkling clean sponge!
DIY Sponge Cleaning Hacks: Extend the Life of Your Kitchen Companion!
Hey everyone! Let’s face it, sponges are the unsung heroes of our kitchens. They tackle everything from greasy pans to sticky countertops. But they can also become breeding grounds for bacteria if we’re not careful. I’m going to share some of my favorite DIY sponge cleaning hacks to keep your sponges fresh, effective, and lasting longer. Get ready to say goodbye to stinky sponges!
Hack 1: The Microwave Sanitization Method
This is probably the quickest and easiest way to give your sponge a good clean. It’s perfect for a daily refresh.
What you’ll need:
* Your dirty sponge
* Water
* Microwave-safe bowl or plate
Step-by-step instructions:
1. Rinse Thoroughly: Start by rinsing your sponge really well under running water. Get rid of any loose food particles or debris. You want to start with a relatively clean sponge for this method.
2. Soak in Water: Place the rinsed sponge in a microwave-safe bowl or on a microwave-safe plate. Add enough water to completely submerge the sponge. Make sure the sponge is fully saturated.
3. Microwave on High: Pop the bowl or plate into the microwave and heat on high for 2 minutes. Important: Keep a close eye on it! Sometimes sponges can get *really* hot and might even start to melt if microwaved for too long, especially if they have any metallic scrubbing surfaces.
4. Let it Cool (Carefully!): Once the microwave stops, let the bowl sit for a few minutes to cool down. The water and the sponge will be incredibly hot, so be extremely careful when handling them. I usually wait about 5 minutes before even attempting to touch it.
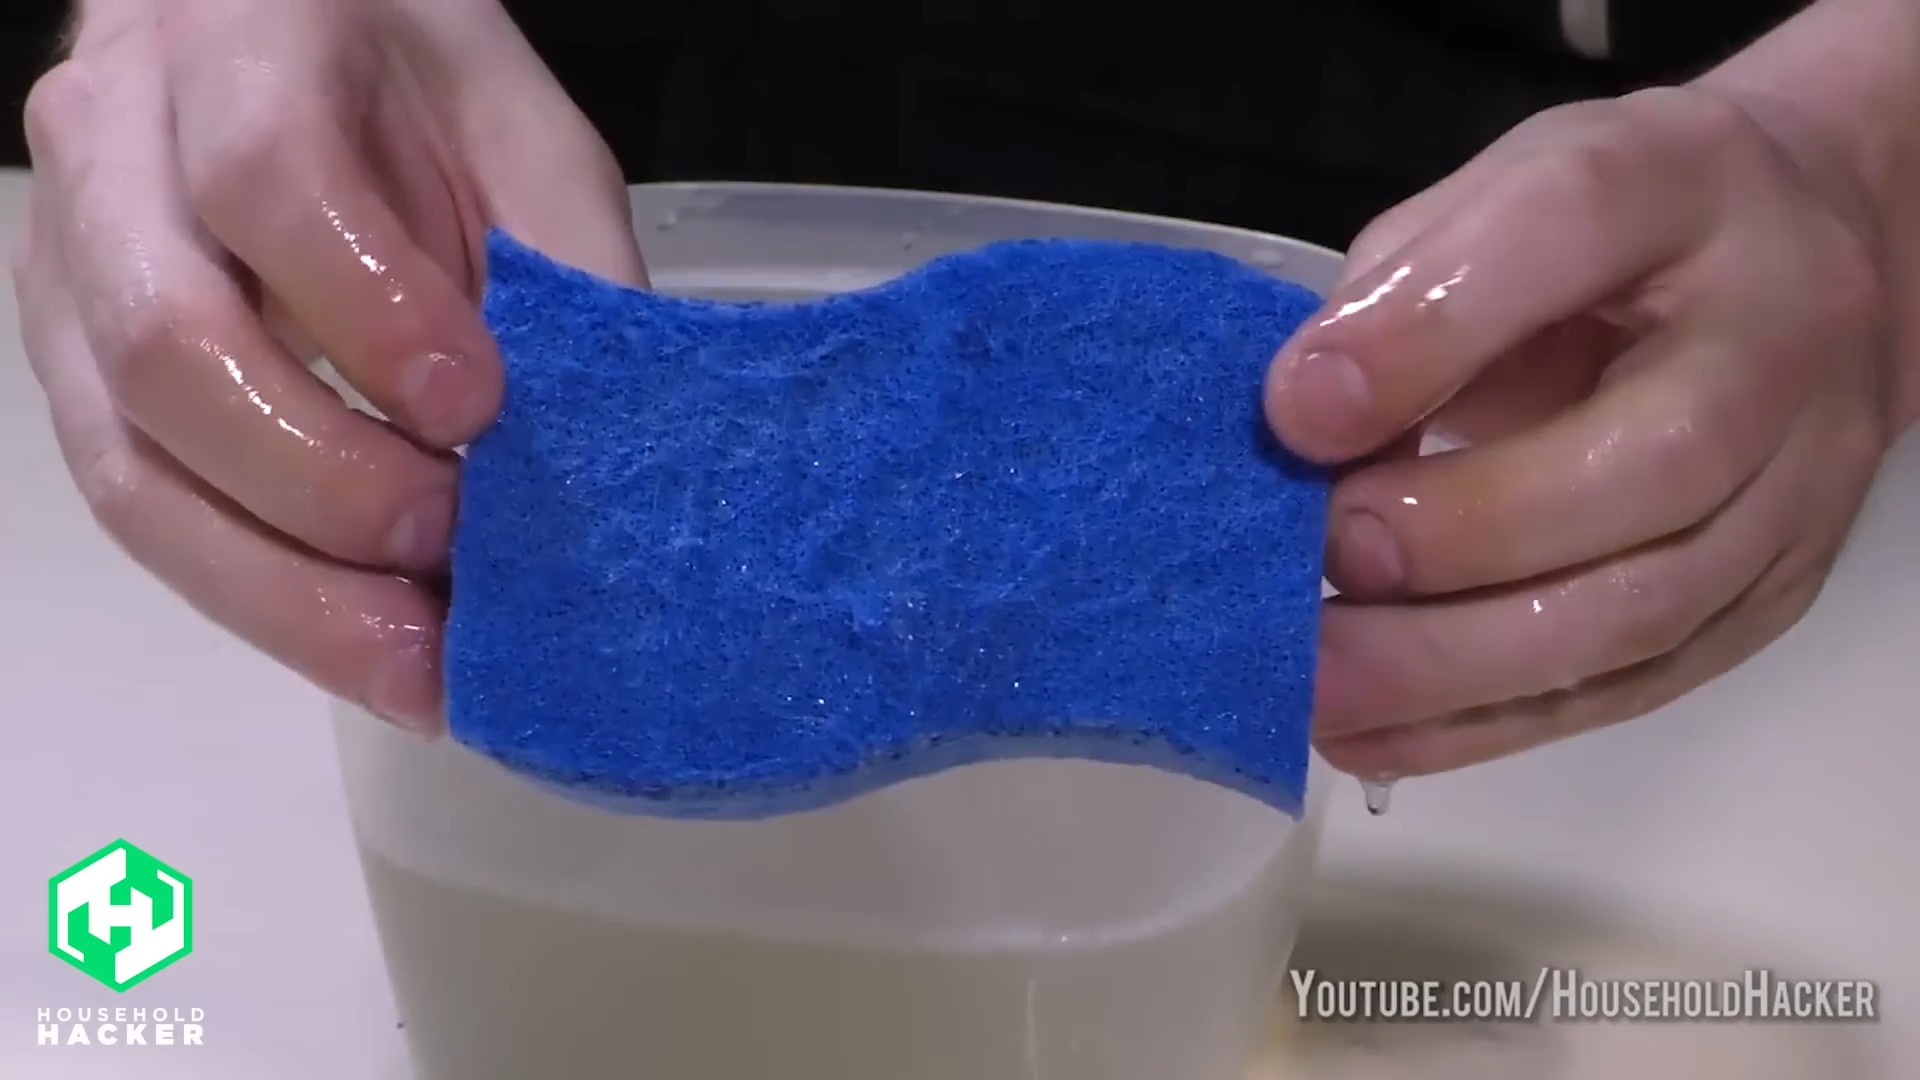
5. Squeeze and Dry: Carefully remove the bowl from the microwave. Using tongs or wearing oven mitts, squeeze out all the excess water from the sponge. Let it air dry completely. I usually place mine on a sponge holder or a wire rack to ensure proper ventilation.
Why this works: The microwave’s heat kills a significant portion of the bacteria lurking in your sponge. The water helps to distribute the heat evenly and prevent the sponge from drying out and potentially catching fire.
Hack 2: The Bleach Solution Soak
This method is a bit stronger and is great for sponges that are particularly grimy or have a lingering odor.
What you’ll need:
* Your dirty sponge
* Bleach (unscented)
* Water
* Bowl or sink
Step-by-step instructions:
1. Rinse First: As with the microwave method, start by rinsing your sponge thoroughly under running water to remove any loose debris.
2. Prepare the Bleach Solution: In a bowl or sink, mix 3/4 cup of bleach with one gallon of cold water. Important: Always use cold water when mixing bleach, as hot water can cause it to release harmful fumes. Also, never mix bleach with ammonia or other cleaning products, as this can create toxic gases.
3. Soak the Sponge: Submerge the sponge completely in the bleach solution. Make sure it’s fully saturated.
4. Let it Soak: Allow the sponge to soak in the bleach solution for at least 5 minutes, but no more than 10 minutes. Soaking it for too long can damage the sponge.
5. Rinse Thoroughly: After soaking, rinse the sponge *extremely* well under running water. You want to make sure all traces of bleach are gone. I usually rinse it for a good minute or two, squeezing it repeatedly to remove any residual bleach.
6. Air Dry: Squeeze out the excess water and let the sponge air dry completely.
Why this works: Bleach is a powerful disinfectant that kills a wide range of bacteria and viruses. The soaking process allows the bleach to penetrate deep into the sponge’s pores, ensuring a thorough cleaning.
Caution: Always wear gloves when working with bleach to protect your skin. Make sure to work in a well-ventilated area.
Hack 3: The Vinegar Soak
If you’re looking for a more natural alternative to bleach, vinegar is a great option. It’s a natural disinfectant and deodorizer.
What you’ll need:
* Your dirty sponge
* White vinegar
* Water (optional)
* Bowl or sink
Step-by-step instructions:
1. Rinse the Sponge: Start by rinsing your sponge under running water to remove any loose food particles.
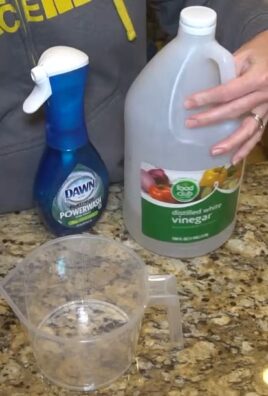
2. Prepare the Vinegar Solution: You have two options here: You can use undiluted white vinegar for a stronger cleaning, or you can dilute it with water. If you’re using undiluted vinegar, simply pour enough into a bowl or sink to completely submerge the sponge. If you’re diluting it, mix equal parts white vinegar and water.
3. Soak the Sponge: Submerge the sponge completely in the vinegar solution.
4. Let it Soak: Allow the sponge to soak for at least one hour, or even overnight for a really deep clean.
5. Rinse Thoroughly: After soaking, rinse the sponge thoroughly under running water. The vinegar smell will dissipate as it dries.
6. Air Dry: Squeeze out the excess water and let the sponge air dry completely.
Why this works: Vinegar is a natural acid that helps to kill bacteria and break down grease and grime. It’s also a great deodorizer, so it can help to eliminate any lingering odors in your sponge.
Hack 4: The Dishwasher Cycle
Did you know you can clean your sponges in the dishwasher? It’s a super convenient way to sanitize them while you’re already running a load of dishes.
What you’ll need:
* Your dirty sponge
* Dishwasher
Step-by-step instructions:
1. Rinse the Sponge: As always, start by rinsing your sponge under running water to remove any loose food particles.
2. Place in Dishwasher: Place the sponge in the top rack of your dishwasher. Make sure it’s secured so it doesn’t fall down and interfere with the spray arms. I usually wedge mine between some glasses or plates.
3. Run a Normal Cycle: Run your dishwasher on a normal cycle with your regular dish soap.
4. Let it Dry: Once the cycle is complete, remove the sponge and let it air dry completely.
Why this works: The hot water and detergent in the dishwasher effectively kill bacteria and remove grime from the sponge.
Important: Avoid using the heated drying cycle, as this can damage the sponge.
Hack 5: The Baking Soda Paste
This hack is great for removing stubborn stains and odors from your sponges.
What you’ll need:
* Your dirty sponge
* Baking soda
* Water
Step-by-step instructions:
1. Rinse the Sponge: Start by rinsing your sponge under running water.
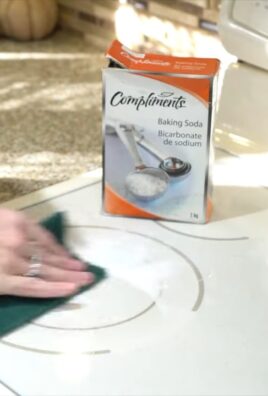
2. Make a Baking Soda Paste: In a small bowl, mix baking soda with a little bit of water to create a thick paste.
3. Apply the Paste: Apply the baking soda paste to the sponge, focusing on any stained or smelly areas.
4. Let it Sit: Let the paste sit on the sponge for at least 30 minutes, or even longer for stubborn stains.
5. Rinse Thoroughly: Rinse the sponge thoroughly under running water until all traces of the baking soda paste are gone.
6. Air Dry: Squeeze out the excess water and let the sponge air dry completely.
Why this works: Baking soda is a natural abrasive and deodorizer. It helps to scrub away stains and absorb odors.
Bonus Tip: Proper Sponge Storage
Cleaning your sponges is important, but so is storing them properly. Here are a few tips:
* Squeeze out excess water after each use: This helps to prevent bacteria from growing.
* Store your sponge in a well-ventilated area: This allows it to dry completely between uses. I love using a sponge holder that allows air to circulate around the sponge.
* Replace your sponge regularly: Even with regular cleaning, sponges will eventually wear out and become less effective. I recommend replacing your sponge every 1-2 weeks, or sooner if it starts to smell or look worn.
By following these DIY sponge cleaning hacks and storage tips, you can keep your sponges fresh, effective, and lasting longer. Happy cleaning!

Conclusion
So, there you have it! These sponge cleaning hacks aren’t just about saving a few bucks; they’re about extending the life of a kitchen essential, reducing waste, and ensuring a cleaner, healthier home. We’ve explored several methods, from the microwave zap to the vinegar soak, each offering a unique approach to banishing bacteria and grime.
But why is this a must-try? Because your kitchen sponge is a breeding ground for germs, often harboring more bacteria than your toilet seat! Regularly cleaning your sponge isn’t just good practice; it’s essential for preventing the spread of illness and maintaining a hygienic cooking environment. Think about it: you use your sponge to clean dishes, countertops, and even sometimes to wipe up spills. If that sponge is teeming with bacteria, you’re essentially spreading those germs around your kitchen.
Beyond the health benefits, these hacks are incredibly convenient. Most of them require minimal effort and utilize items you likely already have in your pantry. No need to run to the store for expensive cleaning solutions when you can effectively sanitize your sponge with vinegar, baking soda, or even just a quick spin in the dishwasher.
Ready to take your sponge cleaning to the next level? Consider these variations:
* Essential Oil Boost: Add a few drops of tea tree or lemon essential oil to your vinegar soak for an extra antibacterial punch and a refreshing scent.
* Baking Soda Paste Power: For stubborn stains or grime, create a paste of baking soda and water and scrub it into your sponge before microwaving or soaking.
* Dish Soap Deep Clean: Before any of these methods, give your sponge a thorough rinse and squeeze out excess water. Then, saturate it with dish soap and massage it to loosen any trapped food particles. This pre-cleaning step will enhance the effectiveness of the sanitizing process.
* Sunlight Sanitization: After cleaning, let your sponge air dry in direct sunlight. The UV rays from the sun can help kill any remaining bacteria.
Ultimately, the best sponge cleaning hack is the one you’ll consistently use. Experiment with these methods and find the one that fits seamlessly into your cleaning routine. Remember, consistency is key! Aim to clean your sponge at least every other day, or even daily if you use it frequently.
We’re confident that these sponge cleaning hacks will revolutionize your kitchen hygiene. But don’t just take our word for it! Try them out for yourself and see the difference they make. We encourage you to share your experiences, tips, and variations in the comments below. Let’s create a community of clean sponge enthusiasts! What worked best for you? Did you discover any new and innovative ways to keep your sponge sparkling clean? We can’t wait to hear from you! Let us know if you have any other sponge cleaning hacks that you would like to share.
FAQ
What is the best way to clean a kitchen sponge?
There isn’t a single “best” way, as effectiveness can depend on your preferences and the level of grime. However, consistently using any of the methods mentioned – microwaving, vinegar soak, dishwasher cycle, or baking soda treatment – will significantly reduce bacteria. The key is to choose a method you’ll actually stick to regularly. For heavily soiled sponges, a combination of methods might be necessary, such as a pre-soak in soapy water followed by a vinegar soak and then a microwave cycle.
How often should I clean my kitchen sponge?
Ideally, you should clean your kitchen sponge every day or every other day. If you use it frequently or for particularly messy tasks, daily cleaning is recommended. Think of it like brushing your teeth – the more often you do it, the better! A quick rinse and squeeze after each use is also helpful in preventing the buildup of food particles and bacteria.
Can I really microwave my sponge to clean it?
Yes, microwaving your sponge is an effective way to kill bacteria. However, it’s crucial to follow the instructions carefully. First, make sure your sponge is thoroughly wet. A dry sponge can catch fire in the microwave. Microwave it on high for 1-2 minutes. Let it cool slightly before handling, as it will be hot. Be aware that microwaving can sometimes cause the sponge to degrade faster, so monitor its condition.
Is it safe to use bleach to clean my sponge?
While bleach is a powerful disinfectant, it’s not always the best option for cleaning sponges. Bleach can be harsh on the sponge material, causing it to break down more quickly. It can also leave behind a residue that can be harmful if it comes into contact with food. If you choose to use bleach, dilute it properly (usually 1 part bleach to 9 parts water) and rinse the sponge thoroughly afterwards. Always wear gloves when handling bleach.
How do I know when it’s time to replace my kitchen sponge?
Even with regular cleaning, sponges eventually wear out and become less effective. If your sponge starts to smell bad, even after cleaning, or if it’s falling apart, it’s time to replace it. A good rule of thumb is to replace your sponge every 1-2 weeks, depending on how frequently you use it. Consider switching to a more durable alternative, such as silicone scrubbers, which are easier to clean and last longer.
What are some alternatives to traditional kitchen sponges?
There are several alternatives to traditional kitchen sponges that are more hygienic and sustainable. These include:
* Silicone Scrubbers: These are non-porous and easy to clean, making them less likely to harbor bacteria. They can be sanitized in the dishwasher.
* Dishcloths: Washcloths can be washed and dried in the washing machine, making them a more hygienic option. Be sure to change them frequently.
* Wooden Dish Brushes: These brushes have natural bristles that are effective at scrubbing dishes. They can be cleaned with soap and water and allowed to air dry.
* Loofah Sponges: Natural loofah sponges are biodegradable and can be composted after use. They are also more abrasive than traditional sponges, making them good for scrubbing tough messes.
Can I use these cleaning methods on other types of sponges, like those used for cleaning cars or bathrooms?
While the basic principles of these cleaning methods can be applied to other types of sponges, it’s important to consider the specific materials and potential contaminants involved. For example, sponges used for cleaning cars may contain traces of chemicals from car cleaning products. Similarly, bathroom sponges may harbor different types of bacteria and mold. It’s best to use separate sponges for different cleaning tasks and to clean them accordingly. For sponges used with harsh chemicals, consider replacing them more frequently.
My sponge smells bad even after cleaning. What should I do?
If your sponge still smells bad after cleaning, it’s likely that bacteria have deeply penetrated the material. In this case, it’s best to replace the sponge. However, you can try a more aggressive cleaning method before discarding it. Soak the sponge in a solution of equal parts white vinegar and water overnight. Then, microwave it for 2 minutes and let it cool before rinsing thoroughly. If the smell persists, it’s time for a new sponge.
Are there any environmental considerations when it comes to cleaning and replacing sponges?
Yes, traditional sponges are often made from synthetic materials that are not biodegradable. This means they contribute to landfill waste. To be more environmentally conscious, consider using natural sponges, such as sea sponges or loofahs, which are biodegradable. You can also look for sponges made from recycled materials. When it’s time to dispose of your sponge, consider cutting it into small pieces and adding it to your compost bin (if it’s made from natural materials).
Leave a Comment