
Growing Malabar Spinach can seem intimidating, but trust me, it’s easier than you think! Have you ever dreamed of stepping into your backyard and harvesting vibrant, leafy greens for a delicious and nutritious meal? Well, that dream can become a reality with this simple DIY guide. For centuries, Malabar Spinach, also known as Poi Saag in some cultures, has been a staple in Asian and African cuisines, prized for its unique flavor and impressive health benefits.
But why should you bother growing Malabar Spinach? In today’s world, where access to fresh, organic produce can be limited or expensive, cultivating your own food is not just a hobby, it’s a smart and sustainable choice. Plus, this climbing vine is incredibly versatile – you can toss it in salads, stir-fries, soups, or even use it as a spinach substitute.
This DIY article is your ultimate guide to successfully growing Malabar Spinach at home, even if you’re a complete beginner. I’ll share my tried-and-true tricks and hacks, from selecting the right seeds to providing the perfect growing conditions, ensuring you’ll be harvesting a bountiful crop in no time. So, grab your gardening gloves, and let’s get started!
Malabar Spinat selbst anbauen: Ein umfassender DIY-Leitfaden
Hallo Gartenfreunde! Ich freue mich riesig, euch heute zu zeigen, wie ihr Malabar Spinat (Basella alba) ganz einfach selbst anbauen könnt. Dieser Kletterspinat ist nicht nur super lecker, sondern auch eine tolle Zierpflanze für euren Garten oder Balkon. Er ist hitzebeständig und wächst wie verrückt, also perfekt für warme Sommer! Lasst uns loslegen!
Was du für den Anbau von Malabar Spinat brauchst:
* Samen oder Stecklinge: Du kannst Malabar Spinat entweder aus Samen ziehen oder Stecklinge von einer bestehenden Pflanze nehmen. Ich persönlich finde Stecklinge einfacher, aber beides funktioniert prima.
* Anzuchttöpfe oder -schalen: Für die Voranzucht, falls du mit Samen startest.
* Anzuchterde: Spezielle Erde für die Anzucht, die nährstoffarm und locker ist.
* Blumentöpfe oder ein Beet: Für die ausgewachsenen Pflanzen. Die Größe hängt davon ab, wie viele Pflanzen du anbauen möchtest.
* Gute Gartenerde: Nährstoffreich und gut durchlässig.
* Rankhilfe: Malabar Spinat ist ein Kletterer, also braucht er etwas zum Festhalten. Ein Rankgitter, ein Zaun oder sogar ein Bambusstab sind ideal.
* Gießkanne oder Gartenschlauch: Zum regelmäßigen Gießen.
* Ggf. Dünger: Ein organischer Dünger kann das Wachstum fördern.
* Geduld und Liebe: Das Wichtigste überhaupt!
Anzucht aus Samen (optional):
Wenn du dich für die Anzucht aus Samen entscheidest, hier eine detaillierte Anleitung:
1. Samen vorbereiten: Die Samen des Malabar Spinats haben eine harte Schale. Um die Keimung zu beschleunigen, kannst du sie vor dem Aussäen für 24 Stunden in lauwarmem Wasser einweichen. Das macht die Schale weicher und erleichtert das Keimen.
2. Aussaat: Fülle deine Anzuchttöpfe oder -schalen mit Anzuchterde. Drücke die Erde leicht an und säe die Samen etwa 1 cm tief. Bedecke sie mit einer dünnen Schicht Erde und befeuchte alles vorsichtig mit einer Sprühflasche.
3. Standort: Stelle die Anzuchttöpfe an einen warmen, hellen Ort. Eine Temperatur zwischen 20 und 25 Grad Celsius ist ideal. Ein Mini-Gewächshaus oder eine durchsichtige Plastikfolie über den Töpfen hilft, die Luftfeuchtigkeit hoch zu halten.
4. Feuchtigkeit: Achte darauf, dass die Erde immer leicht feucht ist, aber nicht nass. Regelmäßiges Besprühen ist besser als zu viel Gießen.
5. Keimung: Die Keimung kann je nach Temperatur und Bedingungen 1-3 Wochen dauern. Hab Geduld!
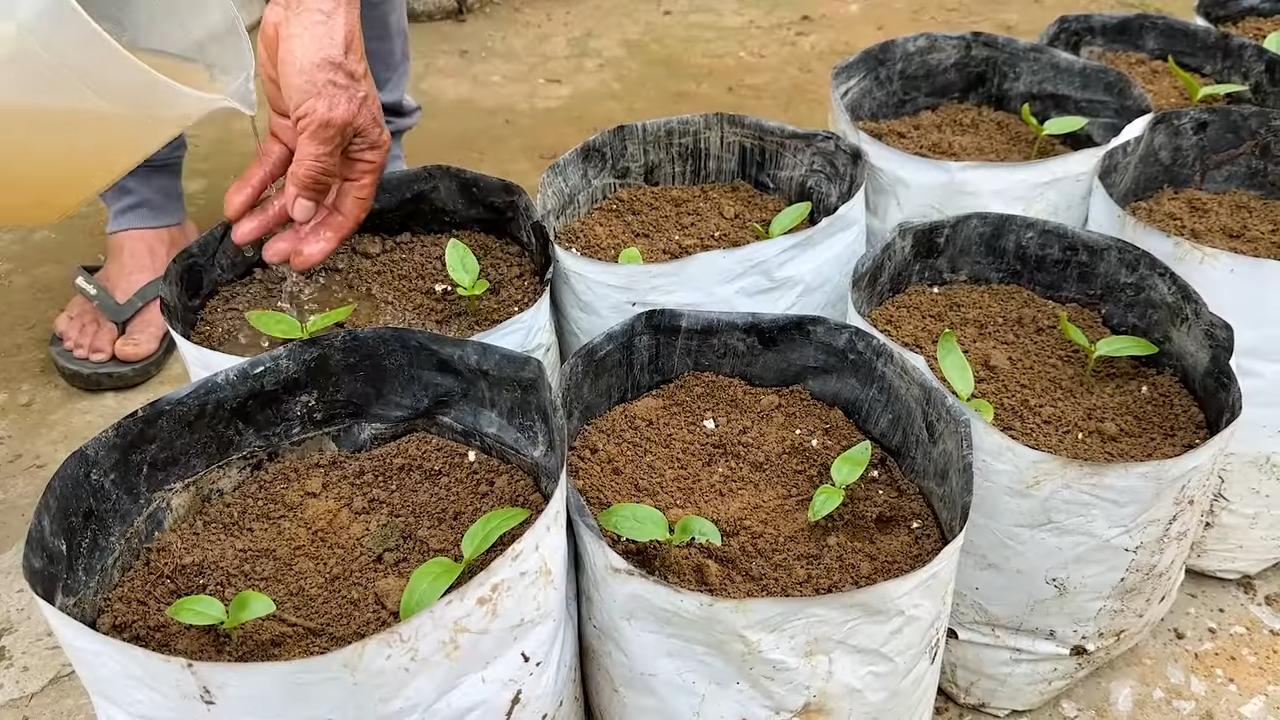
6. Pikieren: Sobald die Sämlinge ihre ersten richtigen Blätter (neben den Keimblättern) entwickelt haben, kannst du sie in größere Töpfe pikieren. Verwende dafür normale Gartenerde.
Anzucht aus Stecklingen:
Das ist meine bevorzugte Methode, da sie schneller geht und oft zuverlässiger ist.
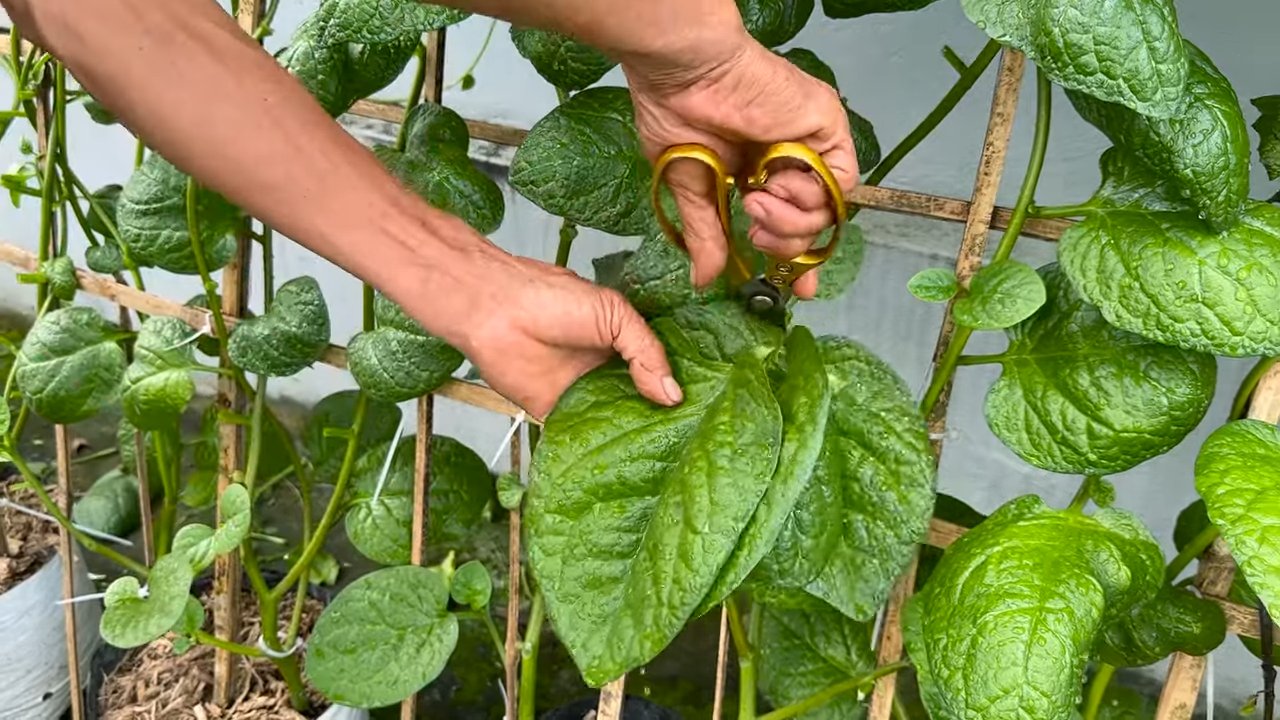
1. Stecklinge schneiden: Suche dir eine gesunde Malabar Spinat Pflanze und schneide etwa 10-15 cm lange Stecklinge ab. Achte darauf, dass die Stecklinge mindestens 2-3 Blattknoten haben.
2. Blätter entfernen: Entferne die unteren Blätter des Stecklings, so dass nur noch die oberen 2-3 Blätter übrig bleiben. Das reduziert die Verdunstung und fördert die Wurzelbildung.
3. Bewurzelung: Du hast zwei Möglichkeiten, die Stecklinge zu bewurzeln:
* Im Wasser: Stelle die Stecklinge in ein Glas mit Wasser. Achte darauf, dass die unteren Blattknoten im Wasser sind. Wechsle das Wasser alle paar Tage. Nach etwa 1-2 Wochen sollten sich Wurzeln bilden.
* In Erde: Stecke die Stecklinge direkt in feuchte Anzuchterde. Bedecke sie mit einer durchsichtigen Plastiktüte oder einem Mini-Gewächshaus, um die Luftfeuchtigkeit hoch zu halten.
4. Wurzelbildung: Egal welche Methode du wählst, die Wurzelbildung dauert in der Regel 1-2 Wochen. Sobald die Stecklinge ausreichend Wurzeln gebildet haben, kannst du sie in größere Töpfe oder ins Beet pflanzen.
Pflanzung und Pflege:
Egal ob du deine Pflanzen aus Samen gezogen oder aus Stecklingen gewonnen hast, die weitere Pflege ist gleich.
1. Standort wählen: Malabar Spinat liebt die Sonne! Wähle einen sonnigen Standort mit mindestens 6 Stunden direkter Sonneneinstrahlung pro Tag. Halbschatten wird auch toleriert, aber die Pflanzen werden nicht so üppig wachsen.
2. Boden vorbereiten: Malabar Spinat bevorzugt einen nährstoffreichen, gut durchlässigen Boden. Verbessere den Boden mit Kompost oder anderem organischen Material.
3. Pflanzen: Pflanze die Jungpflanzen in ausreichend großen Töpfen oder im Beet. Achte darauf, dass die Wurzelballen gut bedeckt sind. Der Abstand zwischen den Pflanzen sollte etwa 30-40 cm betragen.
4. Rankhilfe anbringen: Da Malabar Spinat ein Kletterer ist, benötigt er eine Rankhilfe. Ein Rankgitter, ein Zaun oder Bambusstäbe sind ideal. Leite die Triebe vorsichtig an der Rankhilfe entlang.
5. Gießen: Gieße die Pflanzen regelmäßig, besonders während trockener Perioden. Der Boden sollte immer leicht feucht sein, aber nicht nass. Vermeide Staunässe, da dies zu Wurzelfäule führen kann.
6. Düngen: Dünge die Pflanzen alle 2-3 Wochen mit einem organischen Dünger. Das fördert das Wachstum und die Blattbildung.
7. Schneiden: Regelmäßiges Schneiden fördert das Wachstum und verhindert, dass die Pflanzen zu lang und spärlich werden. Du kannst die Blätter und Triebe ernten, sobald sie groß genug sind.
8. Überwinterung (optional): Malabar Spinat ist nicht winterhart. In kälteren Regionen kannst du versuchen, die Pflanzen im Haus zu überwintern. Schneide sie dafür stark zurück und stelle sie an einen hellen, kühlen Ort. Gieße sie nur sparsam. Im Frühjahr kannst du sie dann wieder ins Freie pflanzen.
Ernte und Verwendung:
1. Ernte: Du kannst die Blätter und Triebe des Malabar Spinats ernten, sobald sie groß genug sind. Schneide sie einfach mit einer Schere ab. Je öfter du erntest, desto mehr neue Blätter werden gebildet.
2. Verwendung: Malabar Spinat kann wie normaler Spinat verwendet werden. Er ist reich an Vitaminen und Mineralstoffen. Du kannst ihn roh in Salaten essen, kochen, dünsten oder in Suppen und Eintöpfen verwenden. Die Blätter sind etwas dicker und fleischiger als normaler Spinat und haben einen leicht säuerlichen Geschmack.
Häufige Probleme und Lösungen:
* Schädlinge: Malabar Spinat ist relativ resistent gegen Schädlinge. Gelegentlich können Blattläuse auftreten. Diese kannst du mit einem Wasserstrahl abspritzen oder mit einem biologischen Insektizid bekämpfen.
* Krankheiten: Wurzelfäule kann bei Staunässe auftreten. Achte auf eine gute Drainage und vermeide Überwässerung.
* Gelbe Blätter: Gelbe Blätter können ein Zeichen für Nährstoffmangel sein. Dünge die Pflanzen mit einem organischen Dünger.
Zusätzliche Tipps:
* Mulchen: Eine Mulchschicht aus Stroh oder Rasenschnitt hilft, die Feuchtigkeit im Boden zu halten und Unkraut zu unterdrücken.
* Samen gewinnen: Wenn du Samen für das nächste Jahr gewinnen möchtest, lasse einige Blüten an der Pflanze. Die Samen reifen im Herbst.
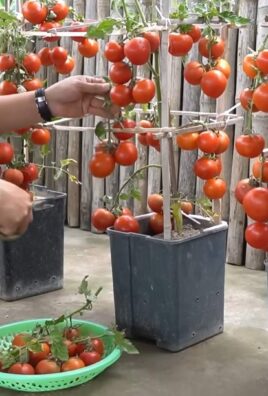
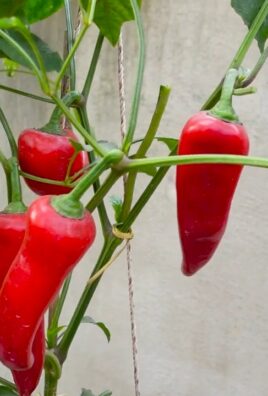
* Kombinationspflanzung: Malabar Spinat verträgt sich gut mit anderen Gemüsesorten wie Tomaten, Paprika und Auberginen.
Ich hoffe, dieser Leitfaden hilft dir dabei, deinen eigenen Malabar Spinat erfolgreich anzubauen. Es ist wirklich einfacher als man denkt und die
Conclusion
So, there you have it! Mastering the art of growing Malabar Spinach from cuttings is not just a gardening hack; it’s a gateway to a continuous supply of this nutritious and delicious leafy green. We’ve walked through the simple steps, highlighting the ease and efficiency of this propagation method. Forget about constantly buying seeds or waiting for them to germinate. With this DIY trick, you can quickly and reliably expand your Malabar Spinach patch, ensuring a steady harvest throughout the growing season.
Why is this a must-try? Because it’s incredibly rewarding! Imagine the satisfaction of nurturing new plants from simple cuttings, witnessing their rapid growth, and then enjoying the fruits (or rather, the leaves) of your labor. It’s a cost-effective way to increase your yield, a sustainable practice that reduces waste, and a fun project for gardeners of all skill levels. Plus, it’s a fantastic way to share your love of Malabar Spinach with friends and family by gifting them rooted cuttings.
But the adventure doesn’t stop there! Feel free to experiment with different rooting mediums. While we recommended water, you could also try using a well-draining potting mix or even a hydroponic setup. Observe how the cuttings respond and adjust your technique accordingly. Consider varying the size of the cuttings you take. Do smaller cuttings root faster, or do larger cuttings establish themselves more vigorously? These are all questions you can explore as you become a Malabar Spinach propagation pro.
Another exciting variation is to experiment with different varieties of Malabar Spinach. While the green-stemmed variety is the most common, you might be able to find red-stemmed varieties, which add a beautiful visual element to your garden and your dishes. See if the propagation techniques differ between varieties and share your findings with the gardening community.
Growing Malabar Spinach from cuttings is more than just a gardening technique; it’s an invitation to connect with nature, to learn about plant propagation, and to enjoy the bounty of your own backyard. So, grab your pruning shears, select some healthy stems, and get ready to embark on this exciting gardening journey.
We are confident that you’ll find this DIY trick to be a game-changer in your gardening endeavors. Don’t be afraid to experiment, adapt, and refine the process to suit your specific environment and preferences. And most importantly, we encourage you to share your experiences with us! Let us know how your cuttings are doing, what challenges you encountered, and what tips you discovered along the way. Your feedback will not only help us improve this guide but also inspire other gardeners to try their hand at growing Malabar Spinach from cuttings. Happy gardening!
Frequently Asked Questions (FAQ)
What are the best conditions for rooting Malabar Spinach cuttings?
The ideal conditions for rooting Malabar Spinach cuttings involve a warm, humid environment with indirect sunlight. Aim for a temperature range of 70-80°F (21-27°C). Avoid direct sunlight, as it can scorch the delicate cuttings. A bright windowsill or a shaded area in your garden is perfect. Humidity is crucial for preventing the cuttings from drying out before they can develop roots. You can increase humidity by misting the cuttings regularly or by placing a clear plastic bag over them, creating a mini-greenhouse effect. Just be sure to vent the bag occasionally to prevent the buildup of excessive moisture, which can lead to fungal growth.
How long does it take for Malabar Spinach cuttings to root?
Generally, Malabar Spinach cuttings will begin to develop roots within 7-14 days. However, the exact time can vary depending on environmental factors such as temperature, humidity, and the health of the parent plant. Be patient and monitor the cuttings regularly. You’ll know they’re ready to be transplanted when the roots are about 1-2 inches long. Avoid disturbing the cuttings too much during this period, as this can hinder root development.
Can I use rooting hormone to help Malabar Spinach cuttings root faster?
While not strictly necessary, using rooting hormone can certainly speed up the rooting process and increase the success rate, especially if you’re working with less-than-ideal conditions. Rooting hormone contains auxins, which are plant hormones that stimulate root growth. To use rooting hormone, simply dip the cut end of the stem into the powder or liquid before placing it in the rooting medium. Be sure to follow the instructions on the rooting hormone product. However, Malabar Spinach is generally easy to root, so you may find that it roots just fine without any added hormones.
What type of water is best for rooting Malabar Spinach cuttings?
The best type of water for rooting Malabar Spinach cuttings is clean, fresh water that is free of chlorine and other chemicals. Tap water can be used, but it’s best to let it sit out for 24 hours to allow the chlorine to evaporate. Alternatively, you can use filtered water or rainwater. Avoid using distilled water, as it lacks the minerals that plants need to thrive. Change the water every few days to prevent the growth of bacteria and algae.
What should I do if my Malabar Spinach cuttings start to rot?
If your Malabar Spinach cuttings start to rot, it’s usually a sign of excessive moisture or poor ventilation. Remove any affected cuttings immediately to prevent the rot from spreading to the healthy ones. Ensure that the cuttings are not sitting in stagnant water and that there is adequate air circulation. You may need to reduce the humidity levels or provide more ventilation. If the rot is only affecting a small portion of the cutting, you can try cutting away the affected area with a clean knife or scissors.
When is the best time of year to take Malabar Spinach cuttings?
The best time of year to take Malabar Spinach cuttings is during the active growing season, which is typically spring and summer. During these months, the plant is actively producing new growth, and the cuttings will root more readily. Avoid taking cuttings during the dormant season, as they are less likely to root successfully.
How do I transplant rooted Malabar Spinach cuttings?
Once your Malabar Spinach cuttings have developed roots that are about 1-2 inches long, they are ready to be transplanted into soil. Choose a well-draining potting mix that is rich in organic matter. Gently remove the cuttings from the water or rooting medium and plant them in individual pots or directly into your garden. Water the newly transplanted cuttings thoroughly and keep the soil moist but not waterlogged. Provide them with partial shade for the first few days to help them adjust to their new environment.
Can I grow Malabar Spinach cuttings indoors?
Yes, you can grow Malabar Spinach cuttings indoors, especially if you live in a climate with cold winters. Provide them with plenty of bright, indirect sunlight and keep the soil moist. You may also need to provide them with supplemental humidity, especially during the winter months when indoor air tends to be dry. Consider using a grow light to supplement natural light, especially if you don’t have a sunny window.
How often should I water Malabar Spinach after transplanting?
After transplanting, water your Malabar Spinach regularly to keep the soil consistently moist but not waterlogged. The frequency of watering will depend on the weather conditions and the type of soil you are using. Check the soil moisture regularly by sticking your finger into the soil. If the top inch of soil feels dry, it’s time to water. Avoid overwatering, as this can lead to root rot.
What are some common problems when growing Malabar Spinach from cuttings and how can I solve them?
Some common problems when growing Malabar Spinach from cuttings include:
* **Rotting:** As mentioned earlier, this is usually caused by excessive moisture or poor ventilation. Ensure that the cuttings are not sitting in stagnant water and that there is adequate air circulation.
* **Lack of Rooting:** This can be caused by insufficient humidity, low temperatures, or poor-quality cuttings. Increase humidity by misting the cuttings regularly or by placing a clear plastic bag over them. Ensure that the temperature is within the optimal range of 70-80°F (21-27°C). Select healthy, vigorous stems for cuttings.
* **Yellowing Leaves:** This can be caused by nutrient deficiencies or overwatering. Ensure that the soil is rich in organic matter and that you are not overwatering the plants. You can also fertilize the plants with a balanced fertilizer.
* **Pests and Diseases:** Malabar Spinach is generally resistant to pests and diseases, but it can occasionally be affected by aphids or spider mites. Inspect the plants regularly and treat any infestations promptly with insecticidal soap or neem oil.
By following these tips and troubleshooting common problems, you can successfully grow Malabar Spinach from cuttings and enjoy a bountiful harvest of this delicious and nutritious leafy green.
Leave a Comment