
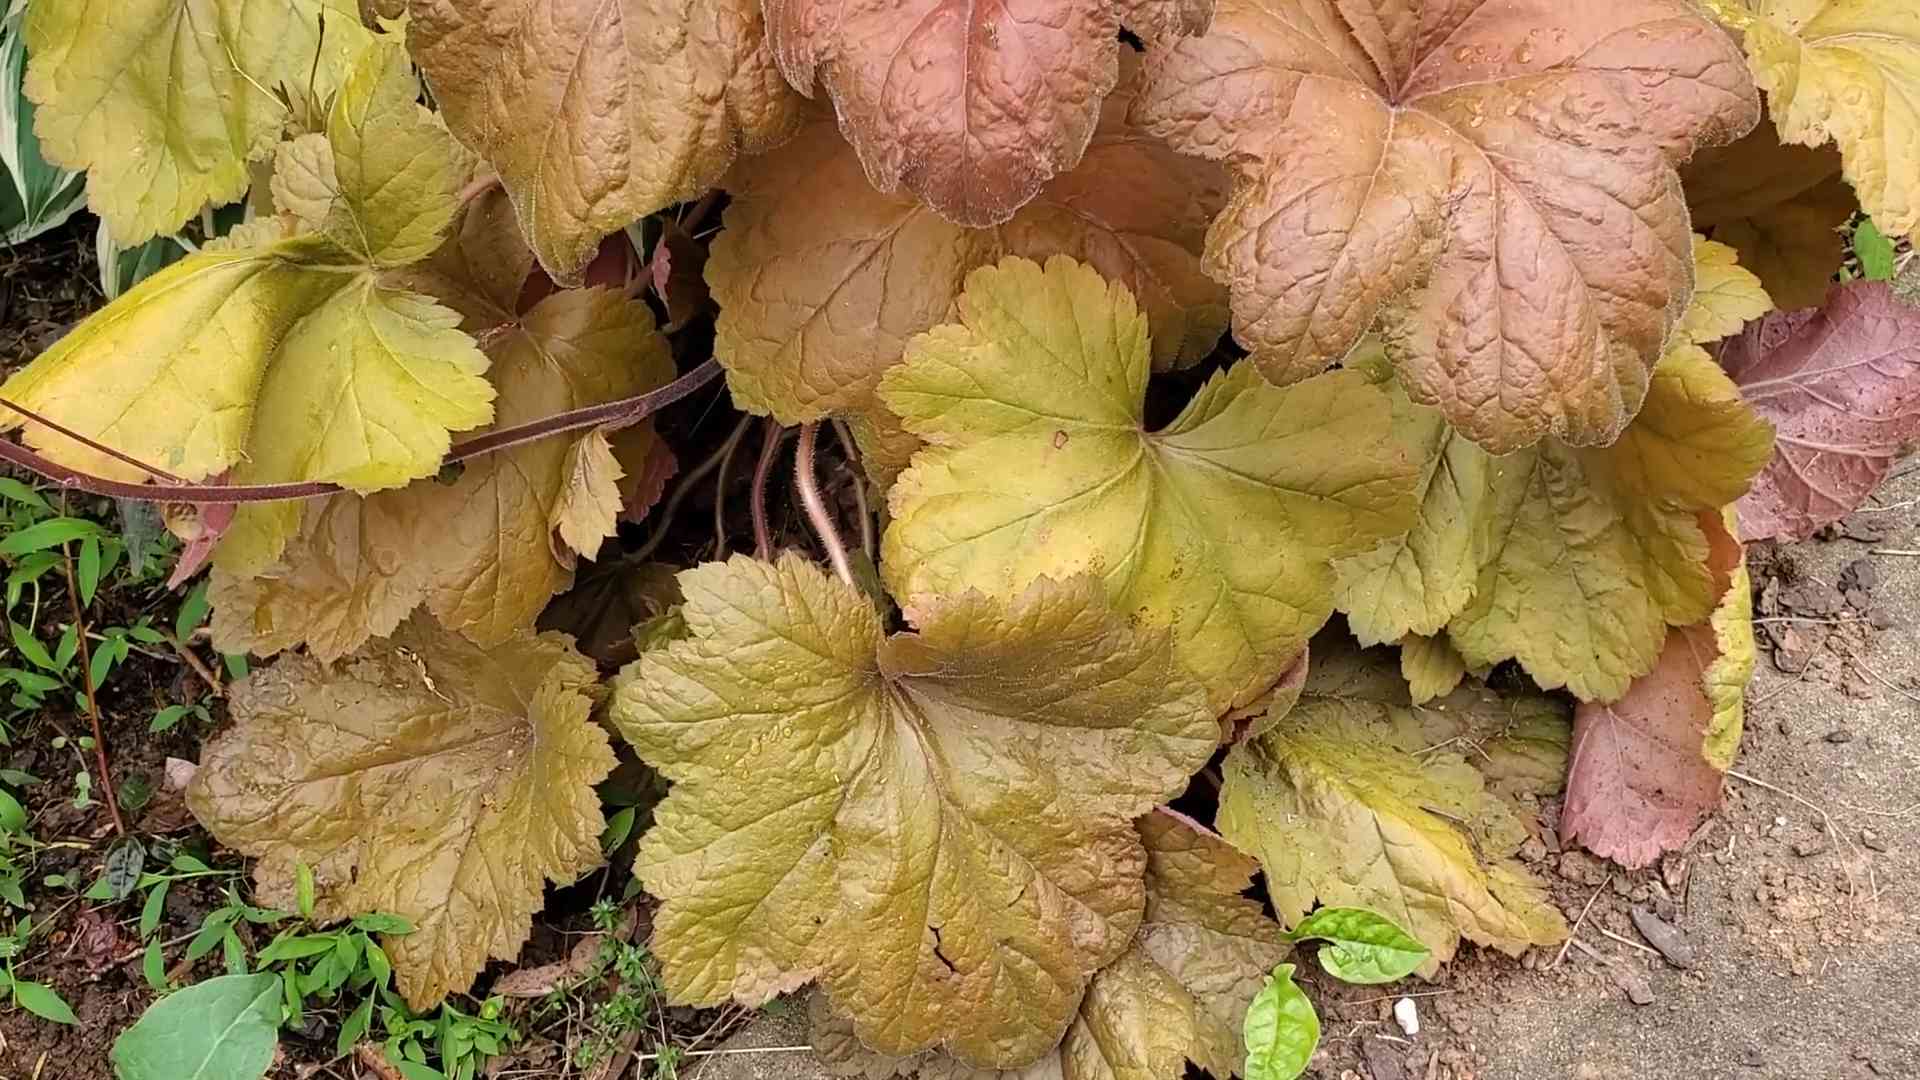
Coral Bells Growing From Seed: Sounds intimidating, right? Don’t worry, I’m here to tell you it’s totally achievable, even if you don’t have a green thumb! For centuries, gardeners have been captivated by the vibrant foliage of Coral Bells, also known as Heuchera. Originating in North America, these beauties were initially admired for their medicinal properties by indigenous peoples before becoming garden staples for their ornamental value.
But let’s be honest, buying established Coral Bells can get expensive, especially if you’re dreaming of a colorful, diverse garden. That’s where the magic of DIY comes in! Learning how to successfully achieve Coral Bells Growing From Seed opens up a world of possibilities. You can cultivate rare varieties, save money, and experience the immense satisfaction of nurturing a plant from its very beginning.
This article is your ultimate guide to demystifying the process. I’ll walk you through every step, from seed selection to transplanting, sharing my tried-and-true tips and tricks along the way. Get ready to unleash your inner gardener and create a stunning display of Coral Bells, all from the humble beginnings of a tiny seed!
Growing Coral Bells (Heuchera) From Seed: A Comprehensive DIY Guide
Hey there, fellow gardening enthusiasts! I’m so excited to share my experience with growing coral bells (Heuchera) from seed. It might seem a little daunting at first, but trust me, it’s incredibly rewarding to watch these beautiful plants emerge from tiny seeds. Plus, it’s a fantastic way to expand your collection without breaking the bank!
Why Grow Coral Bells From Seed?
Before we dive in, let’s quickly cover why you might want to consider starting coral bells from seed:
* Cost-Effective: Buying established plants can get expensive, especially if you want a variety of colors and cultivars. Seeds are a much more budget-friendly option.
* Wider Selection: You might find seed varieties that aren’t readily available as starter plants in your local nurseries.
* Personal Satisfaction: There’s something truly special about nurturing a plant from its earliest stages. It’s a real testament to your gardening skills!
* Control Over Growing Conditions: You can ensure your seedlings get the best possible start by controlling the soil, light, and moisture levels.
What You’ll Need
Okay, let’s gather our supplies. Here’s a list of everything you’ll need to successfully grow coral bells from seed:
* Coral Bells Seeds: Purchase high-quality seeds from a reputable source. Look for varieties that are known for their vigor and color.
* Seed Starting Trays or Pots: I prefer using seed starting trays with individual cells, but small pots work just as well.
* Seed Starting Mix: This is crucial! Don’t use regular potting soil. Seed starting mix is finer and provides better drainage and aeration.
* Spray Bottle: For gently misting the seeds and seedlings.
* Clear Plastic Dome or Plastic Wrap: To create a humid environment for germination.
* Grow Lights (Optional but Recommended): Coral bells seeds need light to germinate, so grow lights can significantly improve your success rate, especially if you’re starting seeds indoors during the darker months.
* Heat Mat (Optional): Coral bells seeds germinate best with slightly warmer soil temperatures.
* Small Labels and a Permanent Marker: To keep track of your different varieties.
* Tweezers (Optional): For carefully handling the tiny seeds.
* Vermiculite (Optional): To help retain moisture on the surface of the soil.
Timing is Everything: When to Start Your Seeds
The best time to start coral bells seeds indoors is typically 8-10 weeks before the last expected frost in your area. This gives the seedlings enough time to develop before you transplant them outdoors. If you’re unsure about your last frost date, you can easily find this information online by searching for your zip code and “last frost date.”
The Step-by-Step Guide to Sowing Coral Bells Seeds
Alright, let’s get our hands dirty! Here’s a detailed guide to sowing your coral bells seeds:
1. Prepare Your Seed Starting Trays or Pots: Fill your seed starting trays or pots with seed starting mix. Gently tap the trays or pots to settle the mix and remove any air pockets. Moisten the mix thoroughly with your spray bottle until it’s damp but not soggy.
2. Sow the Seeds: Coral bells seeds are incredibly tiny, so this step requires a bit of patience. Sprinkle the seeds very thinly and evenly over the surface of the soil. You can use tweezers to help you distribute the seeds more precisely. Remember, you only need a few seeds per cell or pot. Overcrowding can lead to weaker seedlings.
3. Lightly Cover the Seeds (Optional): Coral bells seeds need light to germinate, so traditionally, you wouldn’t cover them. However, I’ve found that a very light dusting of vermiculite can help retain moisture and improve germination rates. If you choose to do this, make sure the layer of vermiculite is extremely thin.
4. Mist the Seeds: Gently mist the surface of the soil with your spray bottle to ensure the seeds are in good contact with the moist soil. Be careful not to dislodge the seeds.
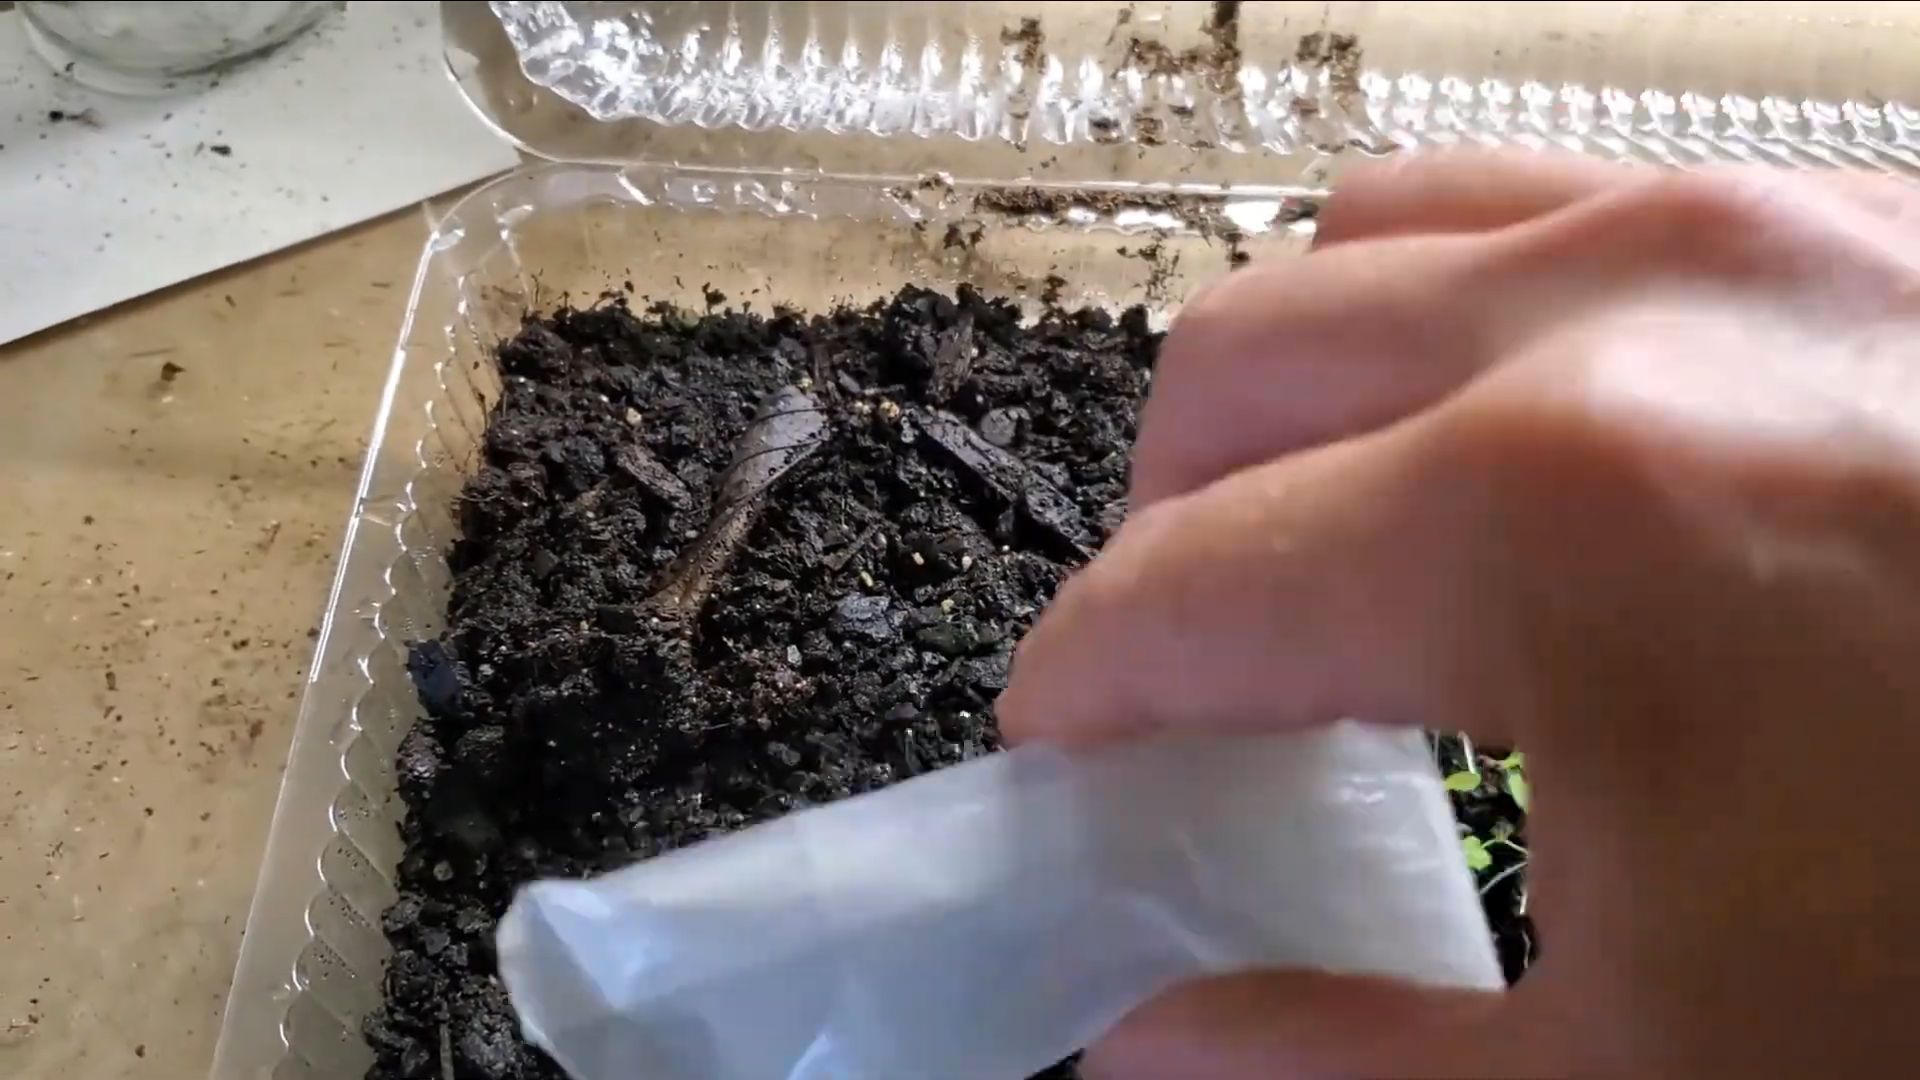
5. Create a Humid Environment: Cover the seed starting trays or pots with a clear plastic dome or plastic wrap. This will help create a humid environment that is essential for germination.
6. Provide Light and Warmth: Place the seed starting trays or pots under grow lights. If you’re using a heat mat, place the trays or pots on top of the mat. The ideal temperature for germination is around 70-75°F (21-24°C).
7. Monitor Moisture Levels: Check the moisture levels daily. The soil should remain consistently moist but not waterlogged. If the soil starts to dry out, mist it gently with your spray bottle. If you see condensation forming on the inside of the plastic dome or plastic wrap, lift it briefly to allow for some air circulation.
Germination and Early Seedling Care
Now comes the waiting game! Coral bells seeds typically germinate in 14-21 days, but it can sometimes take longer depending on the variety and environmental conditions.
1. Remove the Dome or Plastic Wrap: Once you see the first signs of germination, remove the plastic dome or plastic wrap. This will help prevent fungal diseases.
2. Maintain Consistent Moisture: Continue to monitor the moisture levels and mist the seedlings as needed.
3. Provide Adequate Light: Ensure the seedlings receive plenty of light. If you’re using grow lights, keep them on for 14-16 hours per day.
4. Thin the Seedlings (If Necessary): If you have multiple seedlings growing in the same cell or pot, you’ll need to thin them out to prevent overcrowding. Use small scissors to snip off the weaker seedlings at the soil line, leaving only the strongest seedling in each cell or pot.
Transplanting Your Coral Bells Seedlings
Once your seedlings have developed a few sets of true leaves (the leaves that look like miniature versions of the adult plant’s leaves), it’s time to transplant them into larger pots.
1. Prepare Your Pots: Fill small pots (2-3 inches in diameter) with a good quality potting mix.
2. Gently Remove the Seedlings: Carefully remove the seedlings from the seed starting trays or pots. Use a small spoon or fork to gently lift the seedlings, being careful not to damage the delicate roots.
3. Transplant the Seedlings: Make a small hole in the center of each pot and gently place the seedling into the hole. Backfill with potting mix and gently firm the soil around the base of the seedling.
4. Water Thoroughly: Water the transplanted seedlings thoroughly.
5. Acclimate to Outdoor Conditions: Before planting your coral bells seedlings outdoors, you’ll need to acclimate them to outdoor conditions. This process, called “hardening off,” involves gradually exposing the seedlings to increasing amounts of sunlight and wind over a period of 7-10 days. Start by placing the seedlings in a sheltered location outdoors for a few hours each day, gradually increasing the amount of time they spend outdoors.
Planting Your Coral Bells Outdoors
Once your coral bells seedlings have been hardened off, they’re ready to be planted in your garden!
1. Choose a Suitable Location: Coral bells prefer partial shade, especially in hotter climates. Choose a location that receives morning sun and afternoon shade.
2. Prepare the Soil: Amend the soil with compost or other organic matter to improve drainage and fertility.
3. Plant the Seedlings: Dig a hole that is slightly larger than the root ball of the seedling. Gently remove the seedling from its pot and place it in the hole. Backfill with soil and gently firm the soil around the base of the plant.
4. Water Thoroughly: Water the newly planted coral bells thoroughly.
5. Mulch: Apply a layer of mulch around the base of the plants to help retain moisture and suppress weeds.
Ongoing Care for Your Coral Bells
Coral bells are relatively low-maintenance plants, but here are a few tips to keep them thriving:
* Watering: Water regularly, especially during dry periods. Avoid overwatering, as this can lead to root rot.
* Fertilizing: Fertilize lightly in the spring with a balanced fertilizer.
* Deadheading: Remove spent flower stalks to encourage more blooms.
* Division: Divide mature plants every few years to prevent overcrowding and rejuvenate them.
Troubleshooting
Even with the best care, you might encounter a few challenges along the way. Here are some common problems and how to address them:
* Damping Off: This fungal disease can cause seedlings to collapse and die. To prevent damping off, use a sterile seed starting mix, avoid overwatering, and provide good air circulation.
* Slugs and Snails: These pests can damage the leaves of coral bells. Use slug and snail bait or hand
Conclusion
So, there you have it! Growing Coral Bells from seed might seem daunting at first, but with a little patience and the right approach, you can cultivate a vibrant collection of these stunning foliage plants right in your own backyard. This DIY method is a must-try for several reasons. First and foremost, it’s incredibly cost-effective. Purchasing mature Coral Bells from a nursery can quickly become expensive, especially if you’re looking to create a large, diverse display. Starting from seed allows you to grow a multitude of plants for a fraction of the cost.
Secondly, growing from seed gives you access to a wider variety of Coral Bells than you might find locally. Seed catalogs and online retailers offer a vast selection of cultivars, allowing you to experiment with different colors, textures, and sizes. Imagine a garden bursting with the deep purples of ‘Palace Purple’, the vibrant greens of ‘Lime Marmalade’, and the shimmering silvers of ‘Silver Scrolls’ – all grown from seeds you nurtured yourself!
Furthermore, the process of nurturing a plant from seed to maturity is incredibly rewarding. There’s a unique satisfaction in watching those tiny sprouts emerge and develop into thriving Coral Bells. It’s a tangible connection to nature and a testament to your gardening skills.
Don’t be afraid to experiment with variations on this method. Try different seed starting mixes to see which works best for you. Some gardeners swear by a mix of peat moss, vermiculite, and perlite, while others prefer a soilless mix specifically formulated for seed starting. You can also experiment with different light sources. While natural sunlight is ideal, supplemental grow lights can be beneficial, especially during the darker months.
Consider the location where you plan to transplant your Coral Bells. They thrive in partial shade, so choose a spot that receives morning sun and afternoon shade. Amend the soil with compost or other organic matter to improve drainage and fertility. Remember to water regularly, especially during dry spells.
We encourage you to give this DIY Coral Bells growing from seed trick a try. It’s a fun, affordable, and rewarding way to expand your garden and add a touch of elegance to your landscape. And most importantly, don’t forget to share your experiences with us! We’d love to hear about your successes, challenges, and any tips you’ve discovered along the way. Post pictures of your seedlings, share your favorite Coral Bells cultivars, and let us know what worked best for you. Together, we can create a community of Coral Bells enthusiasts and inspire others to embrace the joy of gardening. So, grab your seeds, get your hands dirty, and prepare to be amazed by the beauty you can create!
Frequently Asked Questions (FAQ)
What is the best time to start Coral Bells seeds?
The ideal time to start Coral Bells seeds is typically in late winter or early spring, about 8-10 weeks before the last expected frost. This allows the seedlings enough time to develop into strong, healthy plants before they are transplanted outdoors. Starting them indoors gives them a head start, especially in regions with shorter growing seasons. You can also start them in late summer for transplanting the following spring, but be sure to provide adequate protection during the winter months.
How long does it take for Coral Bells seeds to germinate?
Coral Bells seeds can be a bit slow to germinate. You can generally expect germination to occur within 14-21 days, but it can sometimes take longer, even up to a month. Patience is key! Ensure the soil remains consistently moist but not waterlogged during this period. Maintaining a consistent temperature of around 65-70°F (18-21°C) can also help speed up the germination process.
What kind of soil is best for starting Coral Bells seeds?
A fine-textured, well-draining seed starting mix is crucial for successful germination. Avoid using garden soil, as it can be too heavy and may contain pathogens that can harm the delicate seedlings. A mix of peat moss, vermiculite, and perlite is a good option, or you can purchase a commercially available seed starting mix. Make sure the mix is sterile to prevent fungal diseases.
Do Coral Bells seeds need light to germinate?
Yes, Coral Bells seeds require light to germinate. This means you should not cover the seeds with a thick layer of soil. Instead, gently press them into the surface of the seed starting mix. After sowing, mist the surface with water and cover the container with a clear plastic lid or plastic wrap to maintain humidity. Remove the cover once the seeds have germinated and provide adequate light.
How much light do Coral Bells seedlings need?
Once the seedlings have emerged, they need plenty of bright, indirect light. A sunny windowsill is a good option, but be careful to avoid direct sunlight, which can scorch the delicate leaves. If you don’t have access to a sunny windowsill, you can use fluorescent grow lights. Position the lights a few inches above the seedlings and keep them on for 14-16 hours per day.
When can I transplant Coral Bells seedlings outdoors?
Coral Bells seedlings can be transplanted outdoors once they have developed several sets of true leaves and the danger of frost has passed. Harden off the seedlings by gradually exposing them to outdoor conditions for a week or two before transplanting. Start by placing them in a sheltered location for a few hours each day, gradually increasing the amount of time they spend outdoors.
What are the best growing conditions for Coral Bells?
Coral Bells thrive in partial shade, although some cultivars can tolerate more sun. They prefer well-drained soil that is rich in organic matter. Amend the soil with compost or other organic matter before planting. Water regularly, especially during dry spells. Avoid overwatering, as this can lead to root rot.
Are Coral Bells deer resistant?
Coral Bells are generally considered to be deer resistant, but deer may still browse on them if other food sources are scarce. To protect your Coral Bells from deer, you can use deer repellent sprays or install fencing around your garden.
What are some common problems with Coral Bells?
Some common problems with Coral Bells include root rot, fungal diseases, and slug or snail damage. Root rot can be prevented by planting in well-drained soil and avoiding overwatering. Fungal diseases can be treated with fungicides. Slugs and snails can be controlled with slug bait or by handpicking them off the plants.
Can I collect seeds from my Coral Bells plants?
Yes, you can collect seeds from your Coral Bells plants, but keep in mind that the resulting plants may not be true to type. This means that they may not look exactly like the parent plant. To collect seeds, allow the flower stalks to dry on the plant. Once the seed pods are dry and brown, you can harvest them and extract the seeds. Store the seeds in a cool, dry place until you are ready to plant them.
Leave a Comment