
Bag Gardening Carrots: Imagine harvesting a vibrant bunch of sweet, crunchy carrots right from your patio, balcony, or even your kitchen windowsill! No sprawling garden needed. Sounds too good to be true? It’s not! I’m here to show you how incredibly easy and rewarding it is to grow your own carrots using the magic of bag gardening.
For centuries, humans have cultivated carrots, tracing their origins back to Afghanistan. Initially, they weren’t the vibrant orange we know and love, but rather purple, white, and yellow. The Dutch, in the 17th century, are credited with breeding the orange variety we predominantly see today, a color that became associated with their royal House of Orange. Now, you can continue this rich history, but with a modern twist!
In today’s busy world, many of us lack the space or time for traditional gardening. That’s where this DIY trick comes in. Bag Gardening Carrots offers a fantastic solution for urban dwellers, apartment residents, or anyone simply looking for a low-maintenance way to enjoy fresh, homegrown produce. Plus, it’s a fantastic project for kids, teaching them about where their food comes from. I’ll guide you through each step, from choosing the right bag and soil to planting and harvesting your delicious, homegrown carrots. Get ready to experience the joy of fresh, organic carrots, grown with your own two hands!
DIY Bag Gardening: Grow Your Own Carrots Anywhere!
Hey there, fellow gardening enthusiasts! Ever dreamed of harvesting your own sweet, crunchy carrots but thought you didn’t have the space? Well, I’m here to tell you that you absolutely can, even if you only have a balcony, patio, or even a sunny windowsill! We’re going to dive into the wonderful world of bag gardening and learn how to grow carrots in bags. It’s easier than you think, and the results are incredibly rewarding.
Why Bag Gardening for Carrots?
Before we get started, let’s talk about why bag gardening is such a great option for carrots:
* Space-Saving: This is the biggest advantage! Bags take up minimal space compared to traditional garden beds.
* Portability: You can move your carrot bags around to chase the sun or protect them from harsh weather.
* Excellent Drainage: Bags naturally provide good drainage, which is crucial for carrots to prevent rotting.
* Weed Control: It’s much easier to manage weeds in a contained bag environment.
* Soil Control: You have complete control over the soil composition, ensuring your carrots get the nutrients they need.
* Early Harvest: The soil in bags tends to warm up faster in the spring, potentially leading to an earlier harvest.
What You’ll Need
Okay, let’s gather our supplies. Here’s what you’ll need to get your carrot bag garden up and running:
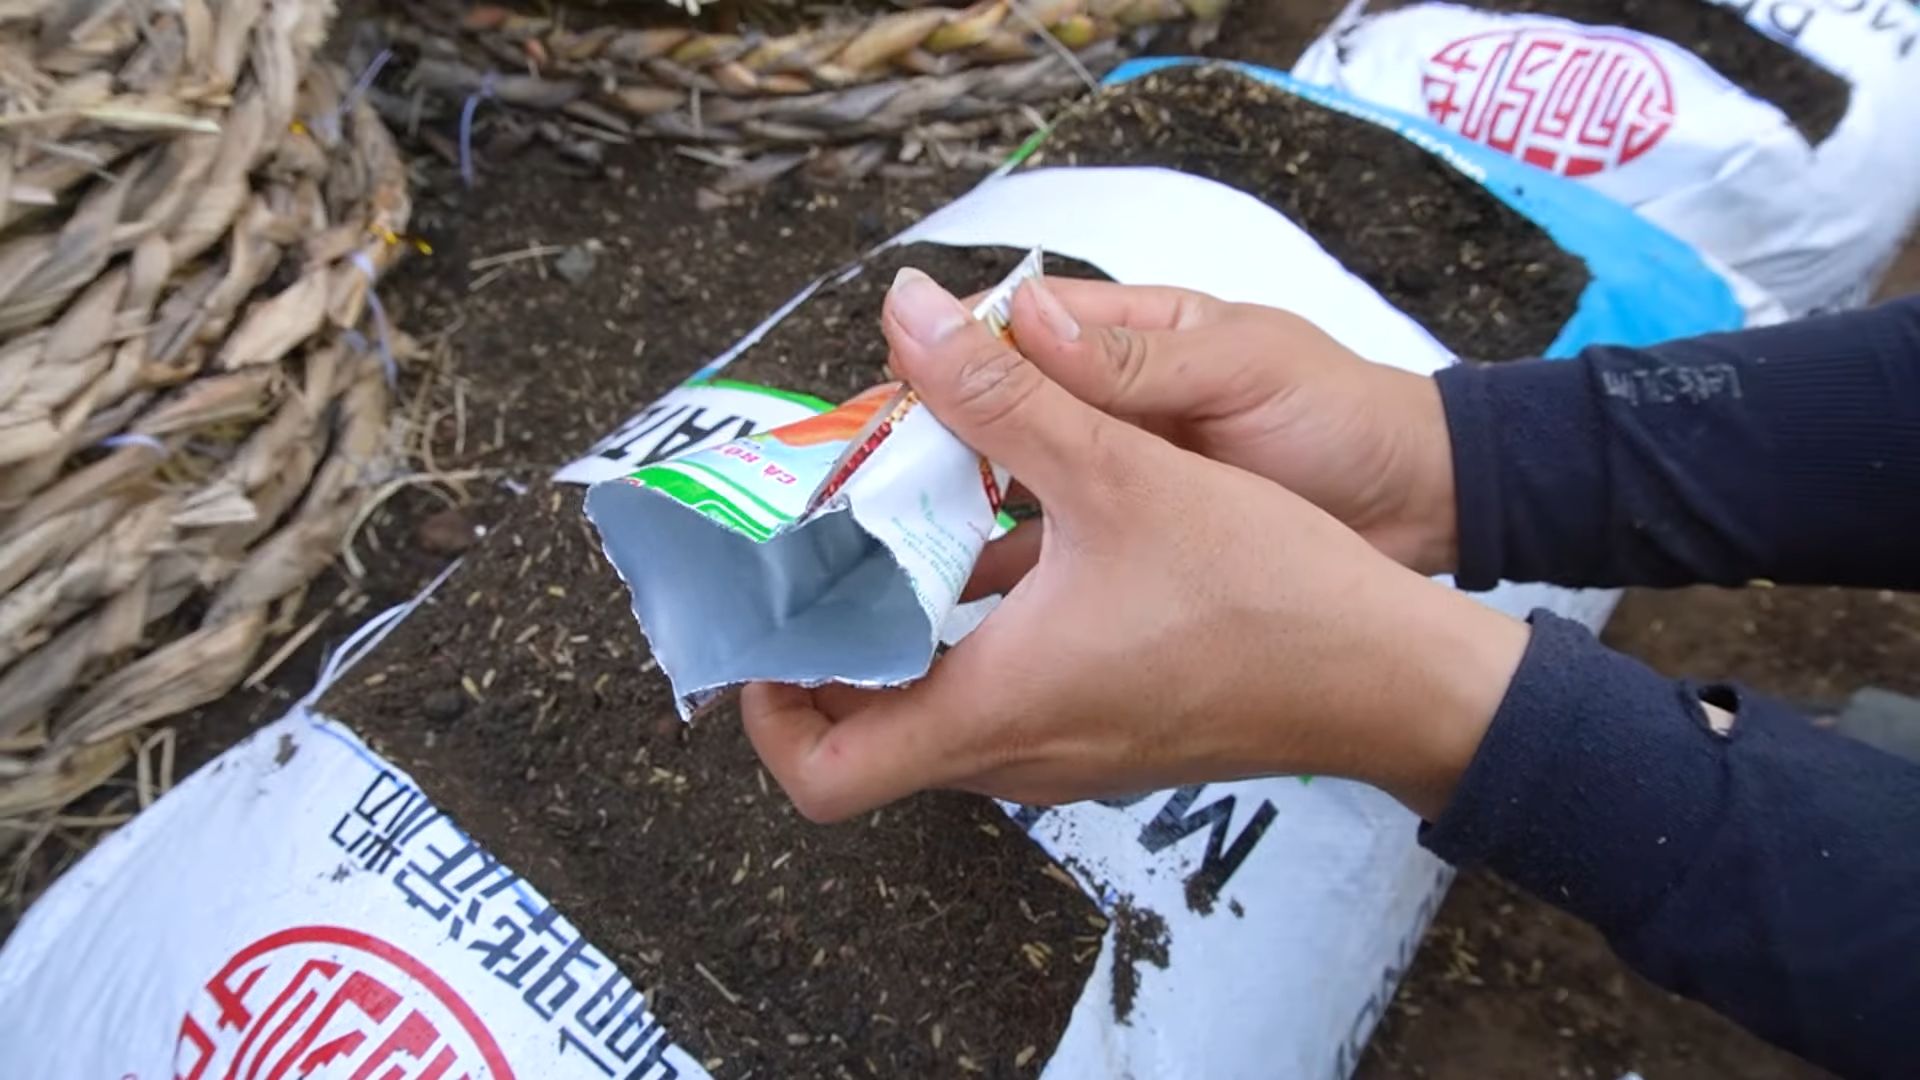
* Large Bags: Choose sturdy, dark-colored bags. Woven polypropylene bags (like those used for animal feed or potting soil) are ideal. Aim for bags that are at least 12-18 inches in diameter and 18-24 inches deep. The deeper, the better, as carrots need room to grow downwards. You can also use heavy-duty garbage bags, but double them up for extra strength and puncture resistance.
* Potting Mix: This is super important! Don’t use garden soil directly from your yard. It’s often too heavy and compacted for carrots. Instead, opt for a lightweight, well-draining potting mix specifically formulated for vegetables. A mix of peat moss, perlite, and vermiculite is a good starting point.
* Carrot Seeds: Choose a carrot variety that’s suitable for container gardening. Shorter, rounder varieties like ‘Thumbelina,’ ‘Parisian,’ or ‘Little Finger’ are excellent choices. You can also grow longer varieties, but make sure your bags are deep enough.
* Slow-Release Fertilizer: Carrots are heavy feeders, so adding a slow-release fertilizer to your potting mix will provide them with a steady supply of nutrients. Look for a fertilizer that’s balanced or slightly higher in phosphorus (the middle number in the N-P-K ratio).
* Watering Can or Hose: You’ll need a way to water your carrots regularly.
* Scissors or Knife: For cutting drainage holes in the bags.
* Optional:
* Gloves: To keep your hands clean.
* Trowel or Small Shovel: For filling the bags with potting mix.
* Seed Starting Tray (if starting seeds indoors): To get a head start on the growing season.
Step-by-Step Instructions: Planting Your Carrot Bag Garden
Alright, let’s get our hands dirty! Here’s how to plant your carrot bag garden:
1. Prepare the Bags
* Clean the Bags: If you’re using recycled bags, make sure they’re clean and free of any debris.
* Create Drainage Holes: This is crucial for preventing waterlogging. Use your scissors or knife to poke several drainage holes in the bottom of the bags. Space them about 4-6 inches apart. You can also add some holes along the lower sides of the bags.
* Reinforce the Bags (Optional): If you’re using garbage bags, consider reinforcing them with duct tape, especially along the bottom seams.
2. Fill the Bags with Potting Mix
* Partially Fill the Bags: Start by filling the bags about two-thirds full with your potting mix.
* Mix in Fertilizer: Sprinkle the slow-release fertilizer evenly over the potting mix, following the instructions on the fertilizer package. Gently mix it in with your hands or a trowel.
* Add More Potting Mix: Continue filling the bags with potting mix until they’re about 2-3 inches from the top.
* Water the Soil: Thoroughly water the potting mix until it’s evenly moist but not soggy. This will help settle the soil and prepare it for planting.
3. Sow the Carrot Seeds
* Spacing is Key: Carrots need space to develop properly. Sow the seeds about 1-2 inches apart. You can create shallow furrows in the soil with your finger or a small tool.
* Sow the Seeds: Sprinkle the carrot seeds evenly along the furrows.
* Cover the Seeds: Gently cover the seeds with a thin layer of potting mix (about 1/4 inch).
* Water Gently: Water the soil gently to avoid disturbing the seeds. A spray bottle or a watering can with a rose attachment works well.
* Label the Bags: Use a permanent marker to label the bags with the carrot variety and the date of planting.
4. Location, Location, Location!
* Sunlight is Essential: Carrots need at least 6-8 hours of sunlight per day. Choose a location that receives plenty of sunshine.
* Protect from Wind: If your area is prone to strong winds, place the bags in a sheltered location to prevent them from tipping over.
* Consider Drainage: Make sure the area where you place the bags has good drainage to prevent water from pooling around the base of the bags.
Caring for Your Carrot Bag Garden
Now that your carrots are planted, it’s time to provide them with the care they need to thrive.
1. Watering
* Keep the Soil Moist: Carrots need consistent moisture to develop properly. Water the bags regularly, especially during hot, dry weather.
* Check the Soil Moisture: Stick your finger into the soil to check the moisture level. If the top inch of soil feels dry, it’s time to water.
* Water Deeply: When you water, water deeply enough so that the water drains out of the drainage holes. This ensures that the entire root zone is moistened.
* Avoid Overwatering: Overwatering can lead to root rot. Make sure the soil is well-draining and avoid letting the bags sit in standing water.
2. Thinning
* Thin When Seedlings Emerge: Once the carrot seedlings emerge (usually within 1-3 weeks), it’s important to thin them out.
* Thin to 2-3 Inches Apart: Thin the seedlings so that they are spaced about 2-3 inches apart. This will give them enough room to grow without competing for resources.
* Gently Remove Seedlings: Use your fingers or small scissors to gently remove the unwanted seedlings. Be careful not to disturb the roots of the remaining seedlings.
3. Fertilizing
* Supplement with Liquid Fertilizer: Even with slow-release fertilizer, carrots may need supplemental feeding during the growing season.
* Use a Balanced Liquid Fertilizer: Use a balanced liquid fertilizer (e.g., 10-10-10) diluted to half strength.
* Fertilize Every 2-3 Weeks: Fertilize the carrots every 2-3 weeks, following the instructions on the fertilizer package.
4. Weed Control
* Hand-Pull Weeds: Regularly check the bags for weeds and hand-pull them as soon as you see them.
* Mulch (Optional): You can add a layer of mulch (e.g., straw, wood chips) to the surface of the soil to help suppress weeds and retain moisture.
5. Pest and Disease Control
* Monitor for Pests: Keep an eye out for common carrot pests, such as carrot rust flies, aphids, and nematodes.
* Use Organic Pest Control Methods: If you find pests, try using organic pest control methods, such as insecticidal soap or neem oil.
* Prevent Diseases: Ensure good air circulation around the plants to prevent fungal diseases. Avoid overwatering and remove any diseased leaves promptly.
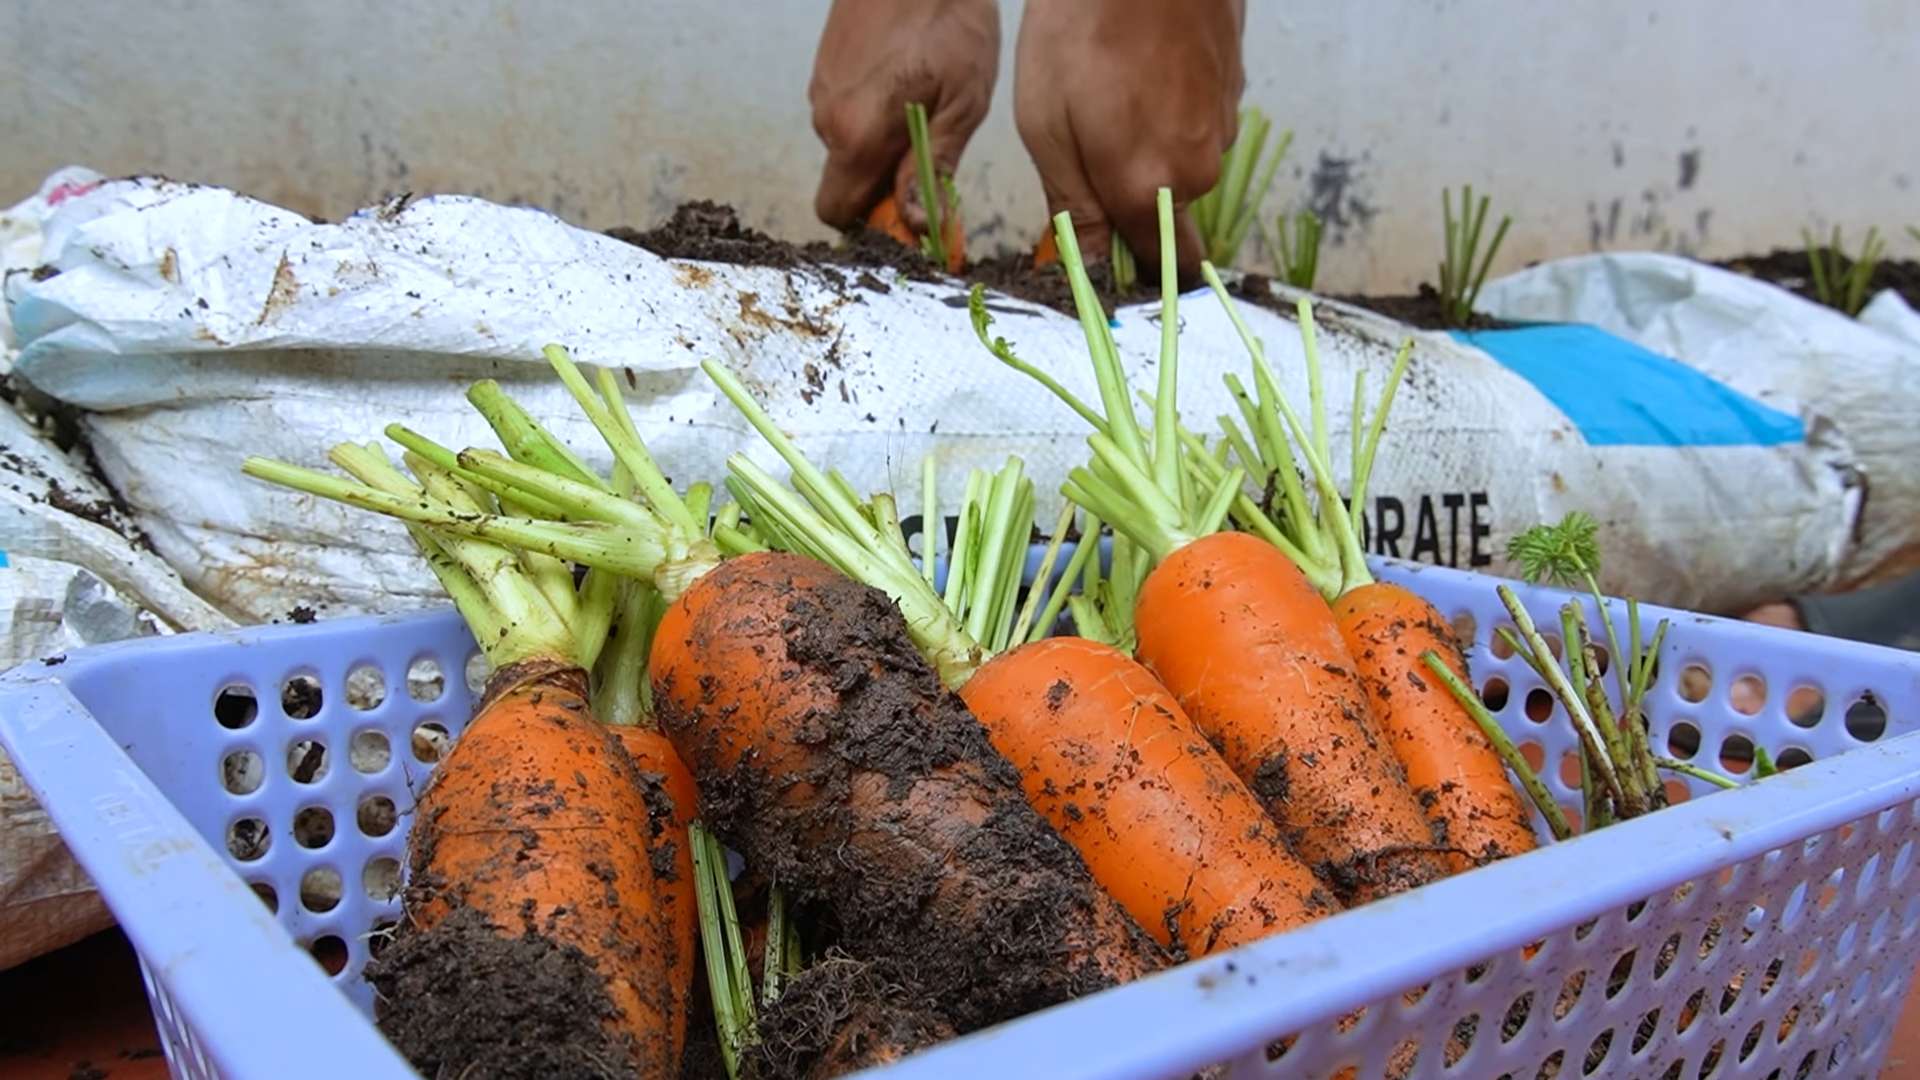
Harvesting Your Carrots
The moment we’ve all been waiting for!
* Check Maturity Dates: Check the seed packet for the estimated maturity date of your carrot variety.
* Look for Size and Color: Carrots are typically ready to harvest when they reach the desired size and color.
* Gently Pull Carrots: Gently loosen the soil around the carrots with a trowel or fork. Then, grasp the carrot tops firmly and pull them straight
Conclusion
So, there you have it! Transforming a simple bag into a thriving carrot patch is not just a gardening hack; it’s a gateway to fresh, homegrown goodness right at your doorstep. We’ve walked through the process, highlighting the ease and accessibility of this method, especially for those with limited space or challenging soil conditions. The beauty of bag gardening carrots lies in its simplicity and adaptability.
Why is this a must-try? Because it empowers you to take control of your food source, even in the smallest of spaces. Imagine the satisfaction of harvesting vibrant, sweet carrots that you nurtured from seed to table. Think of the cost savings compared to buying organic carrots at the grocery store. And consider the environmental benefits of reducing your carbon footprint by growing your own food locally.
But the benefits extend beyond the practical. Bag gardening is a therapeutic activity, a chance to connect with nature, and a rewarding learning experience for gardeners of all levels. It’s a fantastic project to involve children in, teaching them about the life cycle of plants and the importance of healthy eating.
Ready to take your bag gardening to the next level? Here are a few suggestions and variations to consider:
* Companion Planting: Enhance your carrot crop by planting companion herbs like rosemary or sage in the same bag. These herbs can help deter pests and improve the overall health of your plants. Marigolds are also excellent companions, adding a splash of color and further deterring unwanted insects.
* Succession Planting: Extend your harvest season by planting carrots in stages. Sow a new batch of seeds every few weeks to ensure a continuous supply of fresh carrots throughout the growing season.
* Variety is the Spice of Life: Experiment with different carrot varieties! From the classic Nantes to the colorful Rainbow Blend, there’s a carrot for every palate and preference. Consider the size and shape of the carrots when choosing varieties, as some may be better suited for container gardening than others. Shorter, rounder varieties like ‘Thumbelina’ are often a good choice.
* Vertical Gardening: If you’re truly short on space, consider creating a vertical bag garden. Simply hang multiple bags from a sturdy structure, creating a visually appealing and space-saving carrot garden.
* Upcycled Materials: Get creative with your bag choices! While grow bags are ideal, you can also repurpose old burlap sacks, feed bags, or even sturdy plastic shopping bags (just be sure to poke drainage holes).
We are confident that you’ll find bag gardening carrots to be a rewarding and enjoyable experience. It’s a simple, effective, and sustainable way to grow your own food, regardless of your gardening experience or available space.
So, grab a bag, some soil, and carrot seeds, and get started today! We can’t wait to hear about your success. Share your photos, tips, and experiences with us in the comments below. Let’s build a community of bag gardening enthusiasts and inspire others to grow their own food! Happy gardening!
Frequently Asked Questions (FAQ)
What type of bag is best for growing carrots?
The ideal bag for growing carrots is a grow bag made from breathable fabric, such as felt or a similar material. These bags allow for good drainage and aeration, which are crucial for healthy root development. The size of the bag is also important; aim for a bag that is at least 12 inches deep and 12 inches in diameter to provide enough space for the carrots to grow. However, you can also use sturdy plastic bags, burlap sacks, or even repurposed feed bags. Just make sure to create adequate drainage holes in the bottom of the bag to prevent waterlogging. Avoid using bags that are too thin or flimsy, as they may tear or collapse under the weight of the soil.
What kind of soil should I use for bag gardening carrots?
Carrots thrive in loose, well-draining soil that is rich in organic matter. A good soil mix for bag gardening carrots would be a combination of potting mix, compost, and perlite or vermiculite. The potting mix provides a base for the soil, while the compost adds essential nutrients and improves soil structure. Perlite or vermiculite helps to improve drainage and aeration, preventing the soil from becoming compacted. Avoid using heavy clay soil, as it can hinder root development and result in misshapen carrots. You can also add a slow-release fertilizer to the soil mix to provide a steady supply of nutrients throughout the growing season.
How often should I water my bag gardening carrots?
Watering frequency depends on several factors, including the weather, the type of bag you’re using, and the stage of growth of your carrots. Generally, you should water your bag gardening carrots whenever the top inch of soil feels dry to the touch. Water deeply and thoroughly, ensuring that the entire root zone is moistened. Avoid overwatering, as this can lead to root rot and other fungal diseases. During hot, dry weather, you may need to water more frequently, possibly even daily. Check the moisture level of the soil regularly and adjust your watering schedule accordingly. Using a moisture meter can be helpful in determining when to water.
How much sunlight do carrots need in a bag garden?
Carrots need at least 6-8 hours of direct sunlight per day to thrive. Choose a location for your bag garden that receives plenty of sunlight throughout the day. If you live in a particularly hot climate, you may need to provide some afternoon shade to prevent the soil from drying out too quickly. If you don’t have access to a sunny location, you can supplement with grow lights. Place the grow lights a few inches above the plants and provide them with 12-14 hours of light per day. Rotate the bags regularly to ensure that all sides of the plants receive adequate sunlight.
What are some common pests and diseases that affect carrots in bag gardens, and how can I prevent them?
Common pests that can affect carrots include carrot rust flies, aphids, and nematodes. Diseases include leaf blight and root rot. To prevent these problems, start with healthy, disease-free seeds. Practice crop rotation to avoid building up pests and diseases in the soil. Use companion planting to deter pests; for example, planting marigolds near your carrots can help repel nematodes. Inspect your plants regularly for signs of pests or diseases and take action promptly. You can use organic pest control methods, such as insecticidal soap or neem oil, to control aphids and other pests. Ensure good drainage to prevent root rot. If you notice any diseased plants, remove them immediately to prevent the spread of the disease.
When and how should I harvest my bag gardening carrots?
Carrots are typically ready to harvest 60-80 days after planting, depending on the variety. You can check the size of the carrots by gently pulling back the soil around the top of the roots. If they are the desired size, you can harvest them. To harvest, gently loosen the soil around the carrots and pull them straight up. If the soil is dry, water it thoroughly before harvesting to make it easier to pull the carrots. You can also use a garden fork to gently lift the carrots out of the soil. Store harvested carrots in a cool, dark place, such as the refrigerator, for up to several weeks.
Can I reuse the soil from my bag garden for future plantings?
Yes, you can reuse the soil from your bag garden, but it’s important to replenish the nutrients and improve the soil structure before planting again. After harvesting your carrots, remove any remaining plant debris from the soil. Amend the soil with fresh compost, aged manure, or other organic matter to replenish the nutrients that were used by the carrots. You can also add a slow-release fertilizer to provide a steady supply of nutrients for the next crop. If the soil is compacted, loosen it up by adding perlite or vermiculite. Consider rotating crops to avoid depleting the soil of specific nutrients.

Leave a Comment