
Bok Choy Home Growing: Ever dreamt of snipping fresh, vibrant greens right from your backyard for a delicious stir-fry? I know I have! There’s something incredibly satisfying about nurturing your own food, and Bok Choy is surprisingly easy to cultivate, even if you’re a beginner gardener like I once was.
For centuries, Bok Choy, also known as Chinese cabbage, has been a staple in Asian cuisine, gracing tables with its mild, slightly sweet flavor and crisp texture. Its cultivation dates back to the 5th century in China, and it holds a significant place in culinary traditions across East Asia. Beyond its delicious taste, Bok Choy is packed with vitamins and nutrients, making it a healthy and rewarding addition to your diet.
But why should you bother with Bok Choy Home Growing? In today’s world, knowing where your food comes from is more important than ever. Growing your own Bok Choy allows you to control the quality of your produce, ensuring it’s free from harmful pesticides and brimming with freshness. Plus, it’s a fantastic way to connect with nature, reduce your carbon footprint, and save money on groceries. In this article, I’m going to share some simple yet effective DIY tricks and hacks that will have you harvesting your own bountiful Bok Choy in no time. Get ready to unleash your inner gardener!
Growing Chili Peppers on Your Balcony: A Spicy DIY Adventure!
Okay, chili lovers, listen up! I’m going to walk you through everything you need to know to grow your own fiery chili peppers right on your balcony. Forget those bland supermarket peppers – we’re talking about fresh, flavorful, and seriously satisfying chilies grown with your own two hands. Trust me, there’s nothing quite like the feeling of harvesting your own homegrown heat.
What You’ll Need: The Chili Grower’s Toolkit
Before we dive in, let’s gather our supplies. This is what I’ve found works best for me, but feel free to adapt it to your own space and preferences.
* Chili Pepper Seeds or Seedlings: You can start from seeds (more rewarding, but takes longer) or buy seedlings from a garden center (faster, but less variety sometimes). Choose varieties that suit your taste and balcony size! I personally love Jalapeños for their versatility and Habaneros for a serious kick.
* Pots: Opt for pots that are at least 12 inches in diameter. Bigger is generally better, as it gives the roots more room to grow. Make sure they have drainage holes! Terra cotta pots are great because they breathe, but plastic works too.
* Potting Mix: Don’t use garden soil! It’s too heavy and doesn’t drain well. Use a good quality potting mix specifically formulated for containers. I like to add some perlite for extra drainage.
* Fertilizer: Chili peppers are heavy feeders, so you’ll need a good fertilizer. A balanced fertilizer (like 10-10-10) is a good starting point, but you can also use a fertilizer specifically formulated for tomatoes and peppers.
* Watering Can or Hose: For, well, watering! A gentle watering can is best for seedlings.
* Gardening Gloves: To keep your hands clean and protected.
* Small Trowel or Shovel: For planting and transplanting.
* Plant Labels: To keep track of your different chili varieties. Trust me, you’ll forget otherwise!
* Optional:
* Plant Supports: Some chili varieties can get quite tall and may need staking.
* Pest Control: Keep an eye out for pests like aphids and whiteflies. Insecticidal soap or neem oil can help.
* Heat Mat (for starting seeds): This can speed up germination.
* Grow Lights (if your balcony doesn’t get enough sun): Chili peppers need at least 6-8 hours of sunlight per day.
Phase 1: Starting from Seeds (Optional but Rewarding)
If you’re feeling ambitious, starting from seeds is a great way to get a wider variety of chili peppers. It does take more time and effort, but the satisfaction is worth it!
1. Soaking the Seeds (Optional): Some people like to soak their chili seeds in water for 12-24 hours before planting. This can help to soften the seed coat and speed up germination. I’ve done it both ways and haven’t noticed a huge difference, but it’s worth a try!
2. Planting the Seeds: Fill small seed trays or pots with seed starting mix. Moisten the mix thoroughly. Plant the seeds about ¼ inch deep. I usually plant 2-3 seeds per cell or pot, just in case some don’t germinate.
3. Providing Warmth: Chili seeds need warmth to germinate. The ideal temperature is around 75-85°F (24-29°C). You can use a heat mat to provide consistent warmth. If you don’t have a heat mat, you can place the seed trays in a warm spot in your house.
4. Maintaining Moisture: Keep the seed starting mix consistently moist, but not soggy. You can use a spray bottle to mist the surface of the mix.
5. Waiting for Germination: Germination can take anywhere from 1-3 weeks, depending on the chili variety and the temperature. Be patient!
6. Thinning the Seedlings: Once the seedlings have emerged and have a few sets of true leaves (the leaves that look like miniature chili pepper leaves), thin them out to one seedling per cell or pot. Choose the strongest, healthiest-looking seedling.
Phase 2: Planting Your Chili Peppers
Whether you started from seeds or bought seedlings, this is where the magic happens!
1. Choosing the Right Spot: Chili peppers need at least 6-8 hours of sunlight per day. Choose a spot on your balcony that gets plenty of sun. Also, consider the wind. If your balcony is very windy, you may need to provide some protection for your plants.
2. Preparing the Pots: Fill your pots with potting mix, leaving a few inches of space at the top.
3. Planting the Seedlings: Gently remove the seedlings from their containers. If the roots are pot-bound (tightly circling the bottom of the pot), gently loosen them before planting. Dig a hole in the potting mix that is large enough to accommodate the root ball. Place the seedling in the hole and backfill with potting mix. Gently firm the soil around the base of the plant.
4. Watering Thoroughly: Water the newly planted seedlings thoroughly. This will help to settle the soil and get the roots off to a good start.
5. Adding Plant Supports (If Needed): If you’re growing a tall chili variety, you may need to add plant supports to prevent the plants from toppling over. You can use stakes, trellises, or tomato cages.
Phase 3: Caring for Your Chili Peppers
This is where the real work begins, but it’s also the most rewarding part!
1. Watering Regularly: Chili peppers need consistent moisture, but they don’t like to be waterlogged. Water them when the top inch of soil feels dry to the touch. Water deeply, until the water drains out of the drainage holes. Avoid watering the leaves, as this can lead to fungal diseases.
2. Fertilizing Regularly: Chili peppers are heavy feeders and need regular fertilization to produce a good crop of peppers. Start fertilizing about 2-3 weeks after planting. Use a balanced fertilizer (like 10-10-10) or a fertilizer specifically formulated for tomatoes and peppers. Follow the instructions on the fertilizer label. I usually fertilize every 2-3 weeks.
3. Pruning (Optional): Pruning can help to encourage bushier growth and more pepper production. You can prune off any dead or yellowing leaves. You can also pinch off the tips of the branches to encourage branching.
4. Pest Control: Keep an eye out for pests like aphids, whiteflies, and spider mites. These pests can suck the sap from the leaves and weaken the plants. If you see any pests, treat them with insecticidal soap or neem oil. Follow the instructions on the product label.
5. Providing Support: As the plants grow, they may need additional support. Tie the stems to stakes or trellises to prevent them from breaking.
6. Pollination: Chili peppers are self-pollinating, but sometimes they need a little help. You can gently shake the plants or use a small paintbrush to transfer pollen from one flower to another. This is especially important if you’re growing your chili peppers indoors or in a sheltered location.
7. Sunlight Management: If you notice your plants are getting scorched by the sun, especially during the hottest part of the day, consider moving them to a slightly shadier spot or providing some temporary shade.
Phase 4: Harvesting Your Chili Peppers
This is the moment you’ve been waiting for!
1. Knowing When to Harvest: Chili peppers are ready to harvest when they have reached their mature color and size. The color will depend on the variety of chili pepper you’re growing. For example, Jalapeños are typically harvested when they are dark green, while Habaneros are harvested when they are orange or red.
2. Harvesting the Peppers: Use a sharp knife or scissors to cut the peppers from the plant. Be careful not to damage the plant.
3. Enjoying Your Harvest: Now comes the fun part! You can use your chili peppers fresh, or you can dry them, freeze them, or pickle them. The possibilities are endless! I love making homemade salsa, chili oil, and chili powder.
Troubleshooting: Common Chili Pepper Problems
Even with the best care, you might encounter some problems along the way. Here are a few common issues and how to deal with them:
* Yellowing Leaves: This can be caused by a number of factors, including overwatering, underwatering, nutrient deficiencies, or pests. Check the soil moisture and adjust your watering accordingly. Fertilize regularly. Inspect the plants for pests.
* Blossom End Rot: This is a condition where the bottom of the pepper turns black and rotten. It’s
Conclusion
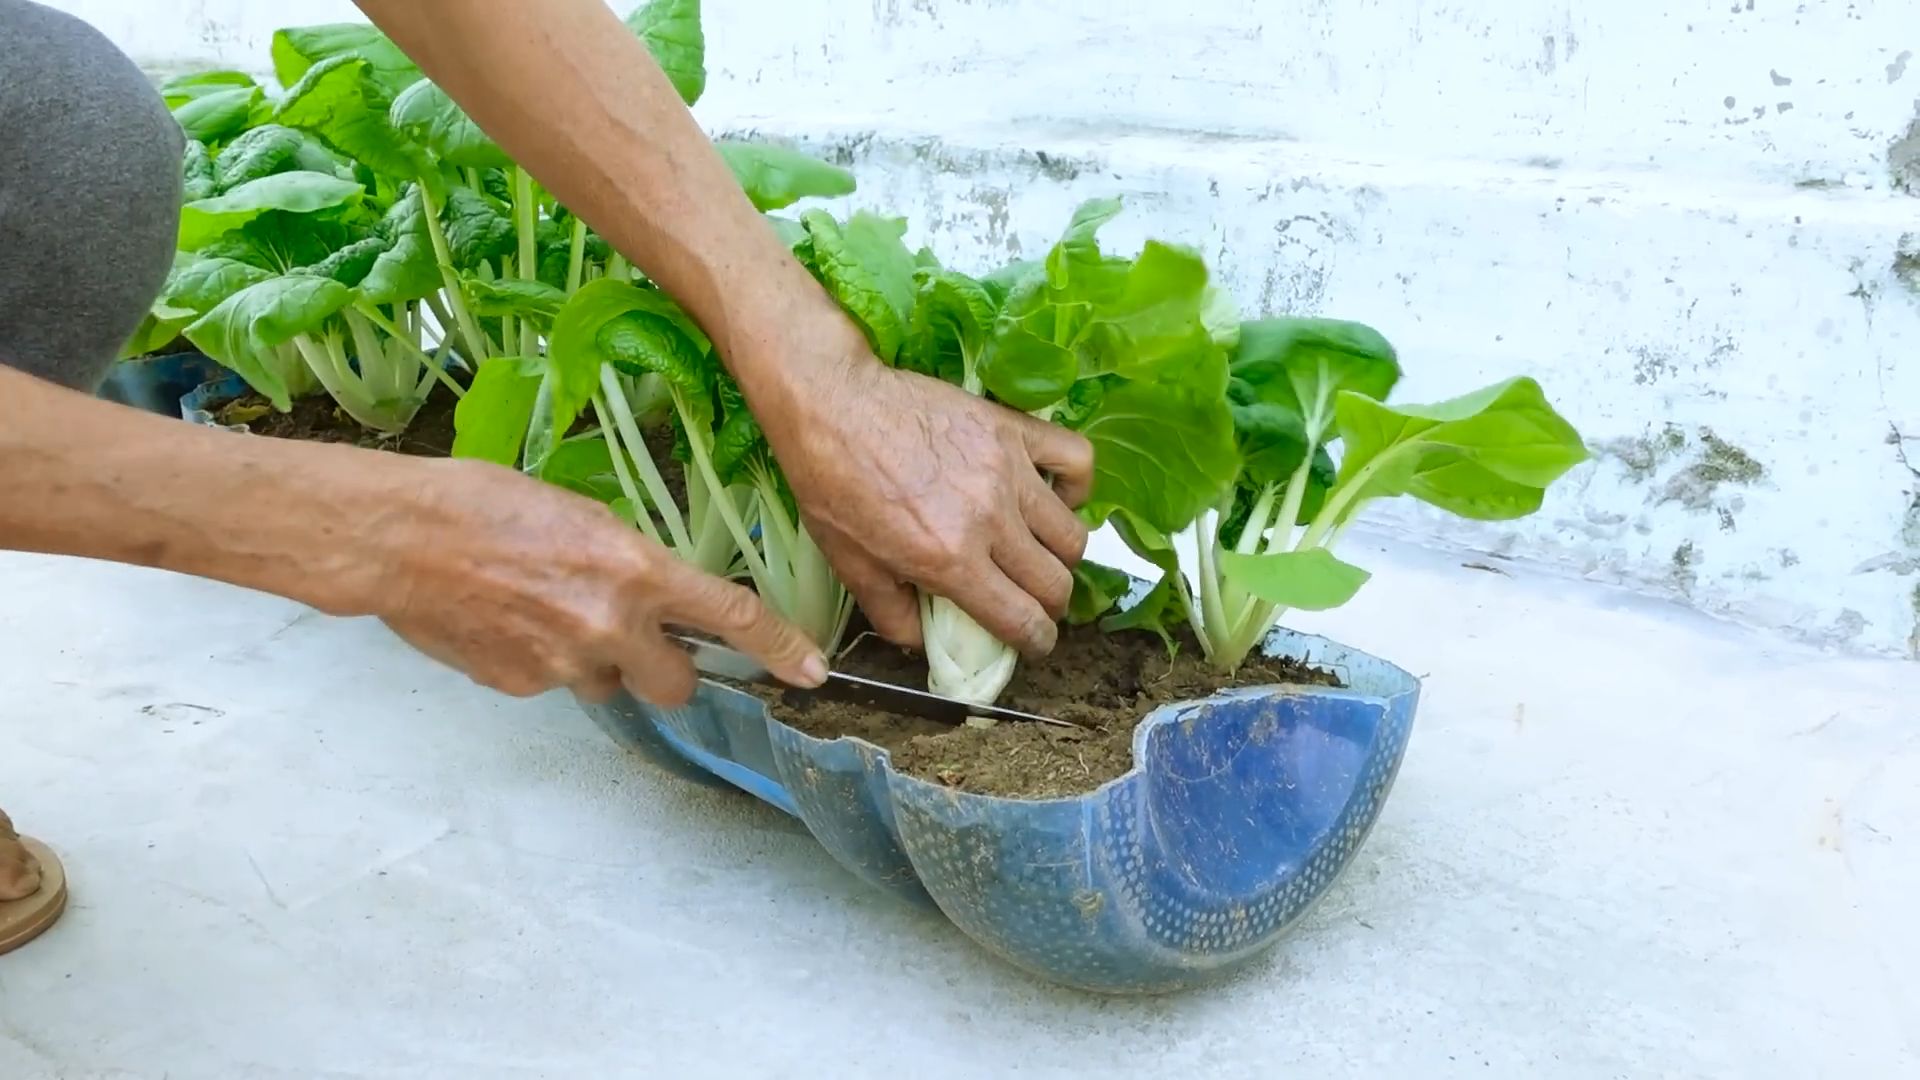
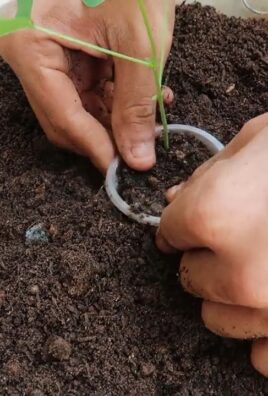
So, there you have it! Growing your own bok choy at home, even if you don’t have a sprawling garden, is not only achievable but incredibly rewarding. This simple DIY trick, using just the base of your store-bought bok choy, transforms kitchen scraps into a fresh supply of this nutritious and delicious vegetable. Forget constantly running to the grocery store; with a little patience and effort, you can enjoy the crisp, mild flavor of homegrown bok choy whenever you desire.
Why is this a must-try? Because it’s sustainable, cost-effective, and surprisingly easy. You’re reducing food waste by giving new life to something you’d normally discard. You’re saving money by decreasing your grocery bills. And you’re connecting with nature in a small but meaningful way, experiencing the satisfaction of nurturing something from almost nothing. Plus, the flavor of freshly grown bok choy is noticeably superior to store-bought varieties, offering a delightful crunch and subtle sweetness that will elevate your stir-fries, soups, and salads.
But don’t stop there! Experiment with different varieties of bok choy. While this method works beautifully with standard bok choy, you can also try it with baby bok choy or even other Asian greens like gai lan. Consider planting your regrown bok choy in different types of soil or containers to see what yields the best results. You can even try growing them indoors under grow lights if you live in a climate with harsh winters.
For a spicier kick, try adding a few drops of hot sauce to the water during the initial rooting phase. This can help deter pests and add a subtle flavor to the leaves. Alternatively, if you prefer a sweeter taste, consider adding a tiny pinch of sugar to the water. Remember to monitor the water quality and change it regularly to prevent bacterial growth.
The possibilities are endless! This DIY bok choy growing method is a fantastic starting point for exploring the world of home gardening, even in the smallest of spaces. It’s a fun and educational activity for the whole family, teaching children about the life cycle of plants and the importance of sustainability.
We wholeheartedly encourage you to give this DIY trick a try. It’s a simple, satisfying, and sustainable way to enjoy fresh, homegrown bok choy. Once you’ve experienced the joy of harvesting your own vegetables, you’ll be hooked!
Don’t forget to share your experiences with us! We’d love to see your bok choy growing journey. Post pictures of your regrown bok choy on social media using #HomegrownBokChoy and tag us so we can celebrate your success. Let’s create a community of bok choy enthusiasts and inspire others to embrace the joys of home gardening. We are eager to hear about your successes, challenges, and any variations you discover along the way. Your insights can help others learn and grow, literally! So, grab that bok choy base, get your hands dirty, and start growing!
Frequently Asked Questions (FAQ)
1. How long does it take for bok choy to regrow from the base?
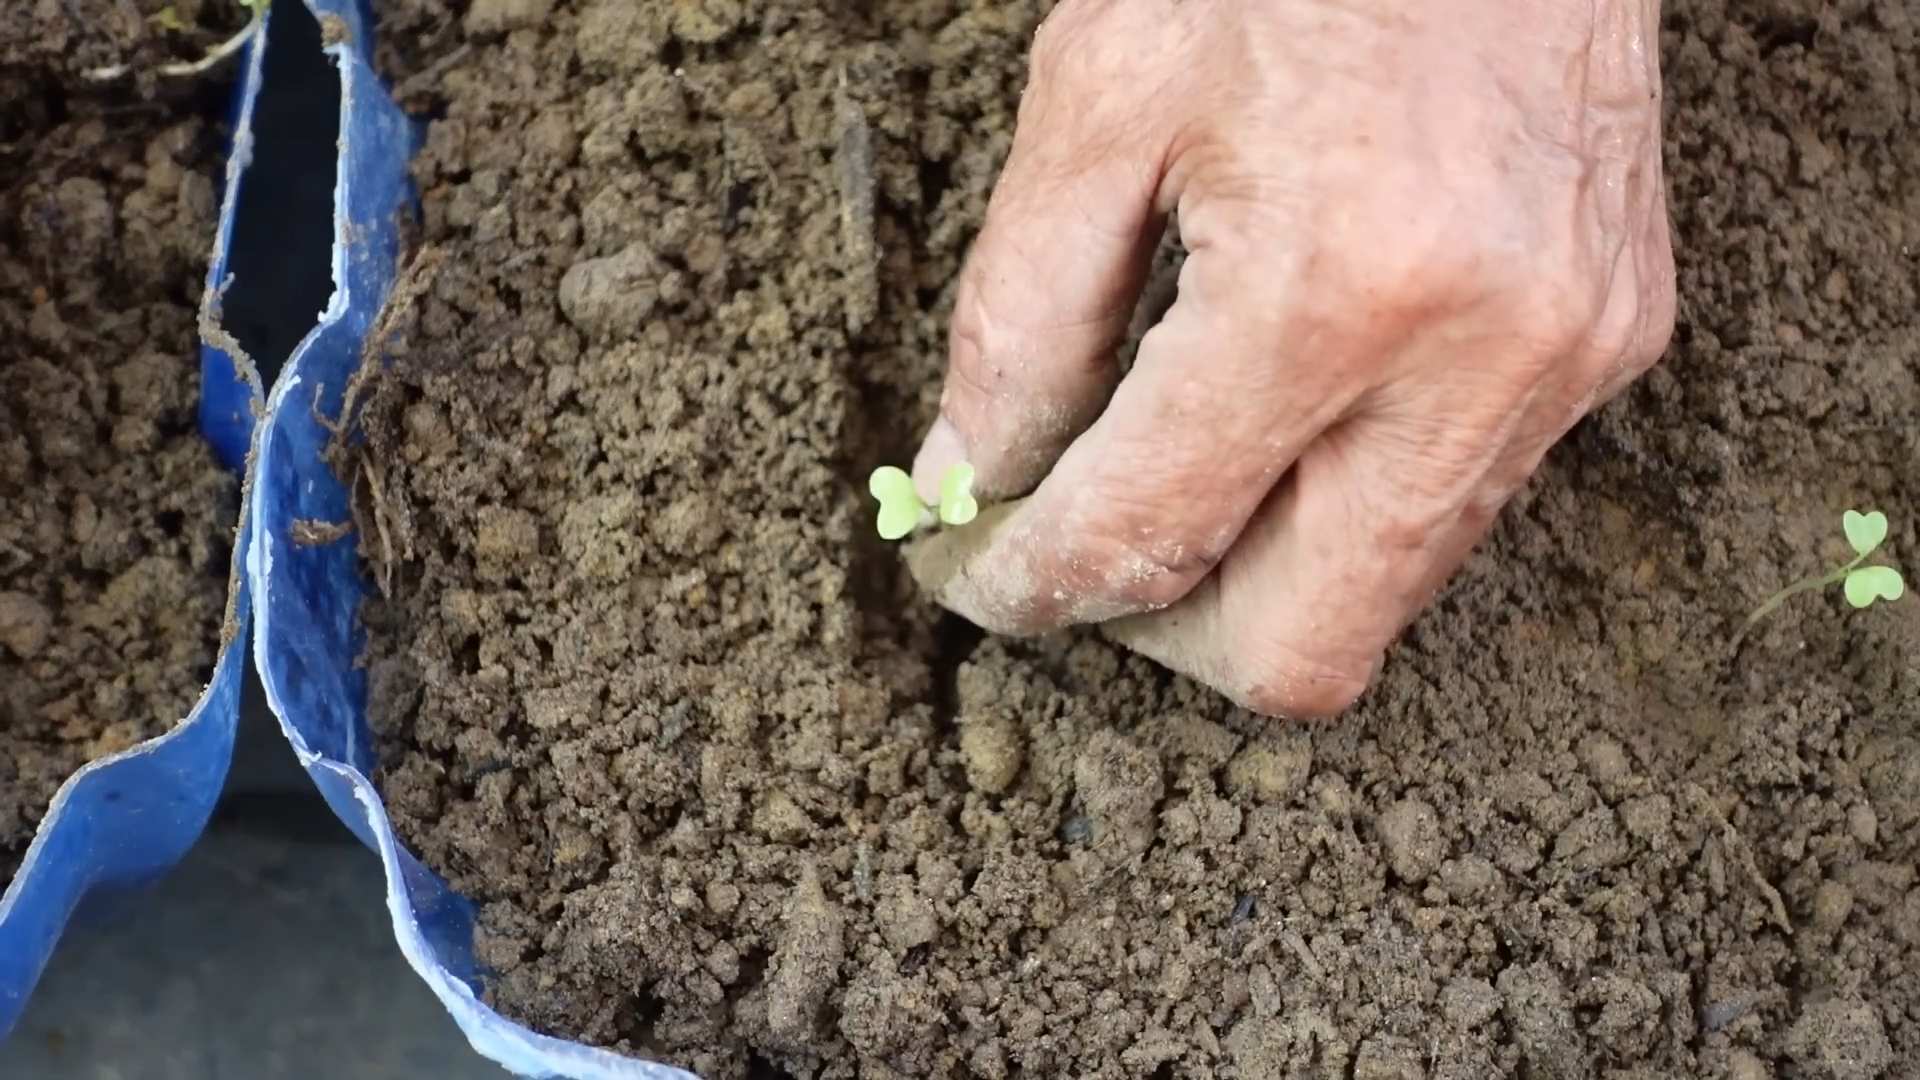
The time it takes for bok choy to regrow from the base can vary depending on several factors, including temperature, sunlight, and water quality. Generally, you should start to see new leaves emerging within 3-5 days of placing the base in water. Within 1-2 weeks, you should have a noticeable amount of new growth. However, it can take several weeks to a few months to grow a full-sized bok choy head suitable for harvesting. Be patient and consistent with watering and providing adequate sunlight.
2. What kind of water should I use for regrowing bok choy?
It’s best to use filtered or dechlorinated water for regrowing bok choy. Tap water often contains chlorine and other chemicals that can inhibit root growth. If you don’t have filtered water, you can let tap water sit out in an open container for 24 hours to allow the chlorine to evaporate. Change the water every 1-2 days to prevent bacterial growth and ensure the bok choy base has access to fresh, oxygenated water.
3. How much sunlight does regrowing bok choy need?
Bok choy needs plenty of sunlight to thrive. When initially regrowing the base in water, place it in a location that receives bright, indirect sunlight. Once you transplant it to soil, aim for at least 6 hours of direct sunlight per day. If you don’t have a sunny spot, you can supplement with grow lights. Insufficient sunlight can lead to leggy growth and reduced yields.
4. What kind of soil is best for growing bok choy?
Bok choy prefers well-draining, fertile soil that is rich in organic matter. A good potting mix for vegetables will work well. You can also amend your soil with compost or aged manure to improve its fertility and drainage. Bok choy prefers a slightly acidic to neutral soil pH, ideally between 6.0 and 7.0.
5. How often should I water bok choy after transplanting it to soil?
Water bok choy regularly to keep the soil consistently moist but not waterlogged. Check the soil moisture by sticking your finger about an inch deep. If the soil feels dry, it’s time to water. Water deeply, allowing the water to drain out of the bottom of the container. Avoid overhead watering, as this can increase the risk of fungal diseases.
6. What are some common pests and diseases that affect bok choy, and how can I prevent them?
Common pests that affect bok choy include aphids, cabbage worms, and flea beetles. You can prevent these pests by using row covers, handpicking them off the plants, or using organic insecticides like neem oil or insecticidal soap. Common diseases include downy mildew and clubroot. Prevent these diseases by ensuring good air circulation, avoiding overhead watering, and using disease-resistant varieties.
7. Can I grow bok choy indoors year-round?
Yes, you can grow bok choy indoors year-round, provided you have adequate lighting and temperature control. Use grow lights to supplement natural sunlight, especially during the winter months. Maintain a consistent temperature between 60-70°F (15-21°C). Ensure good air circulation to prevent fungal diseases.
8. How do I know when my bok choy is ready to harvest?
Bok choy is ready to harvest when the leaves are a good size and the head is firm. You can harvest the entire head at once or harvest individual leaves as needed. To harvest the entire head, cut it off at the base with a sharp knife. To harvest individual leaves, simply snip them off from the outer edges of the plant.
9. Can I regrow bok choy multiple times from the same base?
While you can regrow bok choy multiple times from the same base, the subsequent harvests will likely be smaller and less vigorous than the first. The base will eventually exhaust its stored energy. However, it’s still worth trying to get a few extra harvests from the same base.
10. What are some creative ways to use homegrown bok choy?
Homegrown bok choy is incredibly versatile and can be used in a variety of dishes. It’s delicious in stir-fries, soups, salads, and steamed dishes. You can also grill or sauté it as a side dish. Try adding it to smoothies for a nutritional boost. The possibilities are endless! Experiment with different recipes and find your favorite ways to enjoy your homegrown bok choy.
Leave a Comment