
Grow Green Beans at Home – and unlock a world of fresh, flavorful possibilities right in your backyard! Have you ever bitten into a green bean bursting with sunshine and garden-fresh goodness? It’s an experience that store-bought beans simply can’t replicate. For generations, cultivating green beans has been a cherished tradition, connecting us to the earth and providing sustenance. From ancient civilizations to modern-day kitchen gardens, these versatile legumes have nourished families and communities.
But let’s be honest, sometimes the idea of starting a garden can feel a little daunting. That’s where these simple DIY tricks and hacks come in! I’m here to show you that you don’t need a sprawling farm or a green thumb to grow green beans at home successfully. Whether you have a spacious garden bed or just a sunny balcony, I’ll share easy-to-follow tips and techniques to help you harvest a bountiful crop.
Imagine stepping outside your door and picking fresh, crisp green beans for dinner. No more trips to the grocery store, no more wondering about pesticides – just pure, homegrown goodness. Plus, gardening is a fantastic way to relieve stress, connect with nature, and enjoy the satisfaction of nurturing something from seed to table. So, let’s get our hands dirty and discover the joy of growing your own green beans!
Growing Green Beans: A Beginner’s Guide to a Bountiful Harvest
Hey there, fellow gardening enthusiasts! I’m so excited to share my experience with growing green beans at home. It’s surprisingly easy, incredibly rewarding, and nothing beats the taste of fresh, homegrown veggies. This guide will walk you through everything you need to know, from choosing the right variety to harvesting your delicious beans. Let’s get started!
Choosing Your Green Bean Variety
First things first, you need to decide what kind of green beans you want to grow. There are two main types: bush beans and pole beans.
* Bush Beans: These are compact and don’t require any support. They’re perfect for smaller gardens or containers. They produce a large harvest all at once, making them great for canning or freezing.
* Pole Beans: These are vining beans that need a trellis or other support to climb. They produce a steady harvest over a longer period. I personally love pole beans because they add a vertical element to my garden and are super productive.
Some popular varieties include:
* Bush Beans: Blue Lake Bush, Contender, Provider
* Pole Beans: Kentucky Wonder, Blue Lake Pole, Scarlet Runner (which are also beautiful!)
Preparing Your Garden Bed
Green beans are relatively easy to please, but they do appreciate well-drained soil and plenty of sunshine.
* Sunlight: Green beans need at least 6 hours of direct sunlight per day.
* Soil: The soil should be loose, well-draining, and rich in organic matter.
* pH: Aim for a soil pH between 6.0 and 7.0.
Step-by-Step Soil Preparation
1. Clear the Area: Remove any weeds, rocks, or debris from the area where you plan to plant your beans.
2. Amend the Soil: This is crucial! I like to add plenty of compost or well-rotted manure to the soil. This will improve drainage, add nutrients, and help retain moisture. Spread a 2-3 inch layer of compost over the area.
3. Till or Dig: Use a garden fork or tiller to incorporate the compost into the top 6-8 inches of soil. This will loosen the soil and make it easier for the bean roots to grow.
4. Rake Smooth: Rake the soil smooth to create a level planting surface.
5. Soil Testing (Optional): If you’re unsure about your soil’s pH, you can purchase a soil testing kit from your local garden center. This will tell you if you need to add any amendments to adjust the pH.
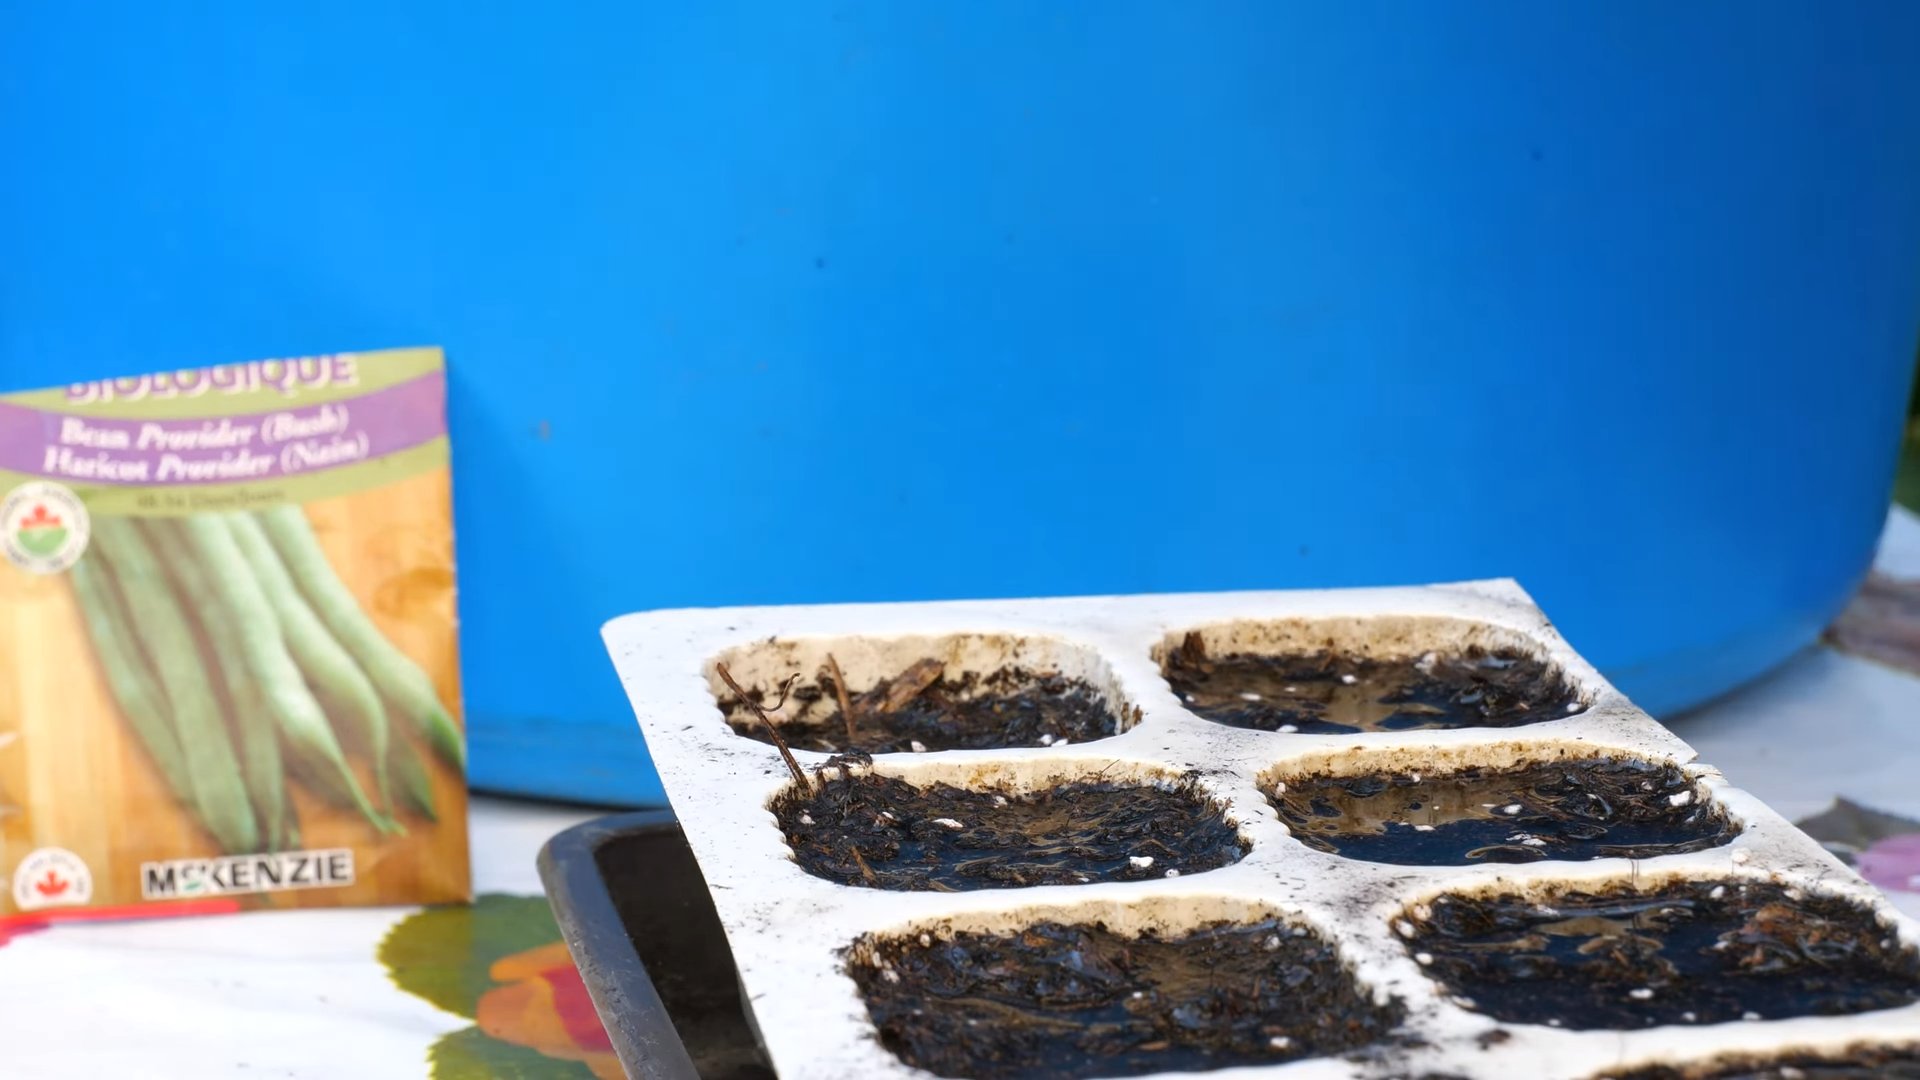
Planting Your Green Beans
Timing is key when planting green beans. They are warm-season crops and are sensitive to frost.
* When to Plant: Wait until the danger of frost has passed and the soil has warmed to at least 60°F (15°C). I usually plant my beans about two weeks after the last expected frost.
* Direct Sowing: Green beans are best direct-sown into the garden. They don’t transplant well.
Planting Instructions
1. Create Rows: For bush beans, create rows that are 18-24 inches apart. For pole beans, space your rows 2-3 feet apart.
2. Dig Holes: Dig holes that are about 1 inch deep.
3. Sow Seeds: Place 2-3 seeds in each hole. This ensures good germination.
4. Cover Seeds: Cover the seeds with soil and gently pat down.
5. Water Thoroughly: Water the area thoroughly after planting. Keep the soil consistently moist until the seeds germinate.
Setting Up a Trellis for Pole Beans
If you’re growing pole beans, you’ll need to provide them with a trellis or other support to climb. There are many options available, from simple bamboo stakes to elaborate wooden structures.
* Trellis Options: Bamboo stakes, netting, wire fencing, or a homemade wooden trellis.
* Placement: Install the trellis before or shortly after the bean seedlings emerge.
Building a Simple Bamboo Trellis
1. Gather Materials: You’ll need several bamboo stakes (at least 6-8 feet tall), twine, and scissors.
2. Arrange Stakes: Arrange the stakes in a teepee shape, spacing them evenly around the planting area.
3. Tie Stakes Together: Tie the stakes together at the top with twine. Make sure the structure is sturdy.
4. Add Horizontal Supports: Add horizontal supports by tying twine between the stakes at regular intervals. This will give the bean vines something to grab onto.
Caring for Your Green Beans
Once your beans are planted and the trellis is set up, it’s time to focus on providing them with the care they need to thrive.
* Watering: Green beans need consistent moisture, especially during flowering and pod development. Water deeply whenever the top inch of soil feels dry.
* Weeding: Keep the area around your beans free of weeds. Weeds compete with the beans for water and nutrients.
* Fertilizing: Green beans don’t need a lot of fertilizer, but a side dressing of compost or a balanced organic fertilizer can be beneficial. Apply fertilizer about 3-4 weeks after planting.
* Pest Control: Keep an eye out for common bean pests, such as aphids, bean beetles, and slugs. Handpick pests whenever possible. You can also use insecticidal soap or neem oil to control infestations.
* Mulching: Apply a layer of mulch around your bean plants to help retain moisture, suppress weeds, and regulate soil temperature. Straw, wood chips, or shredded leaves are all good options.
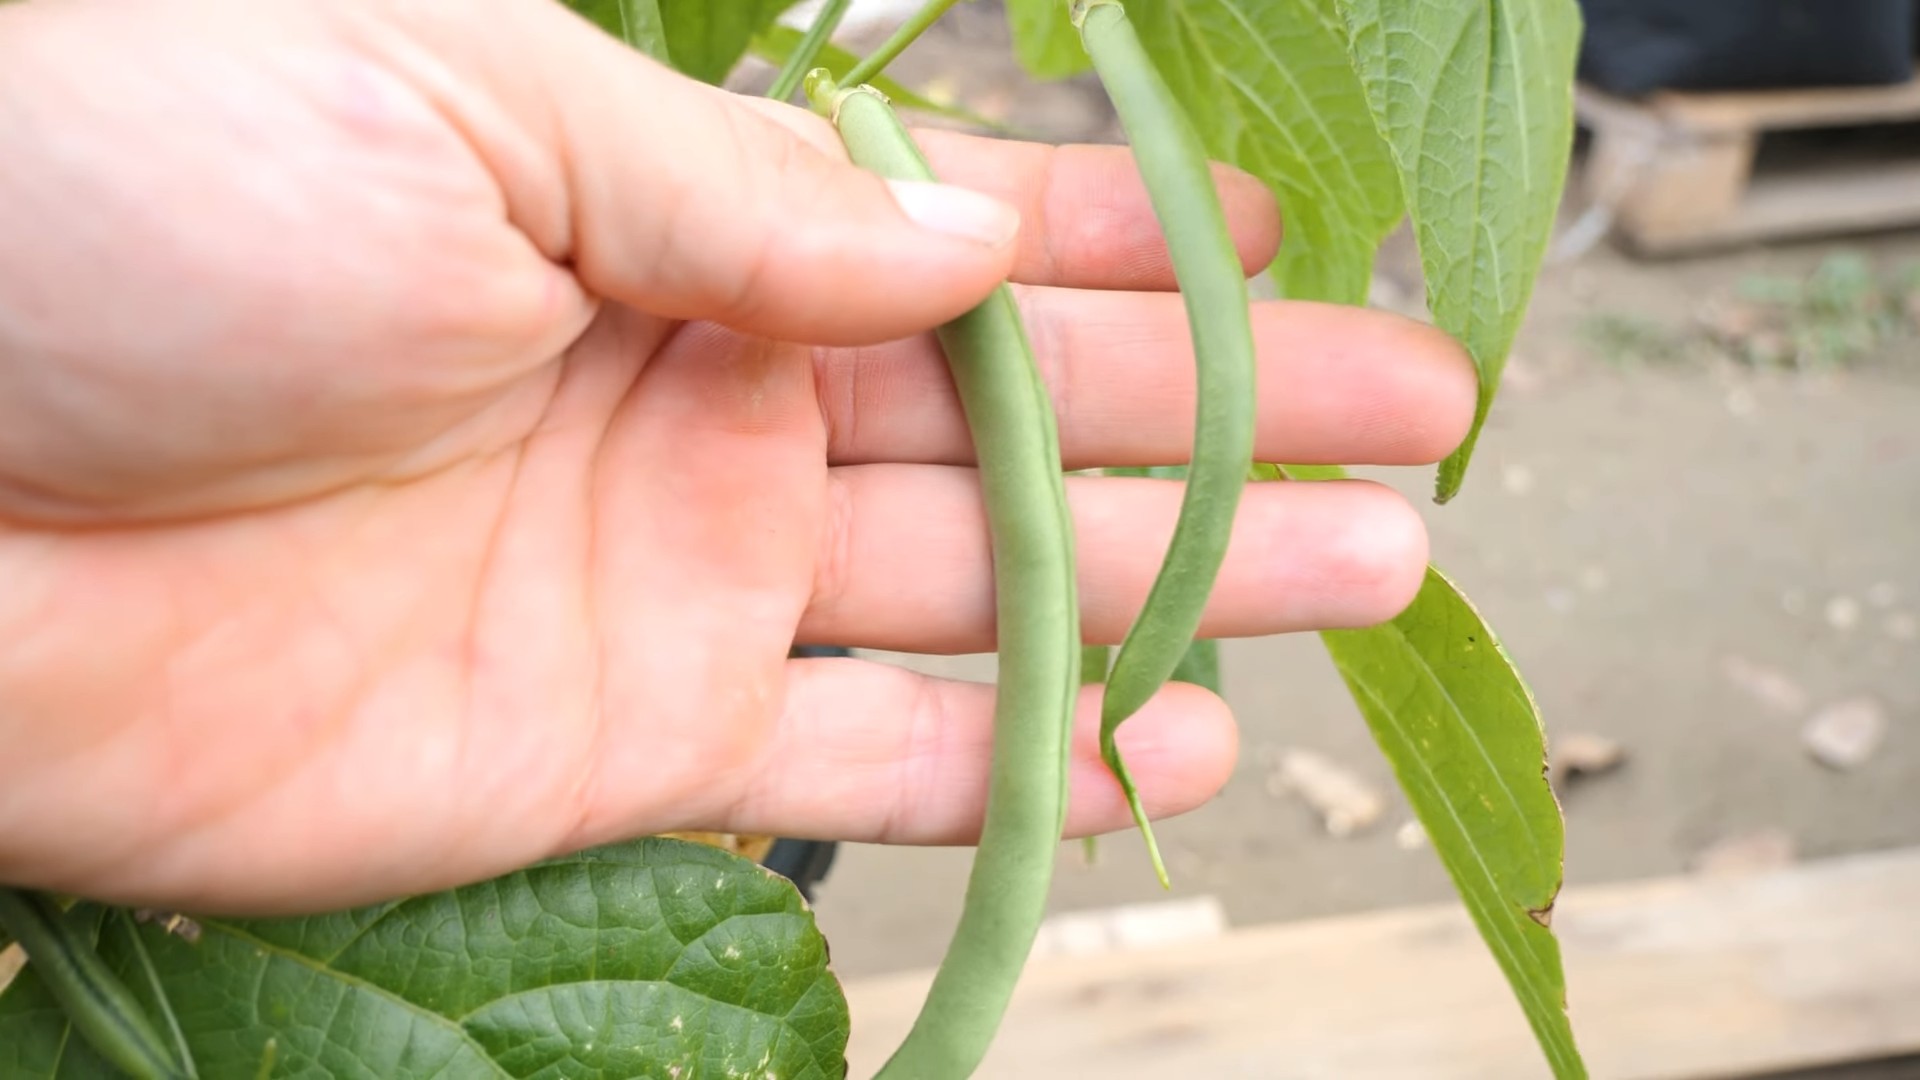
Harvesting Your Green Beans
The moment you’ve been waiting for! Harvesting your green beans at the right time is crucial for getting the best flavor and texture.
* When to Harvest: Green beans are typically ready to harvest about 50-60 days after planting. The pods should be firm, crisp, and snap easily when bent.
* Harvesting Technique: Gently snap the beans off the plant, being careful not to damage the vines.
* Frequency: Harvest your beans regularly, about every 2-3 days. This will encourage the plants to produce more beans.
Tips for a Bountiful Harvest
* Pick Early and Often: The more you pick, the more the plants will produce.
* Don’t Let Beans Get Too Big: Overripe beans can be tough and stringy.
* Harvest in the Morning: Beans are at their peak flavor and crispness in the morning.
Troubleshooting Common Problems
Even with the best care, you may encounter some problems when growing green beans. Here are a few common issues and how to address them:
* Poor Germination: This can be caused by cold soil, poor-quality seeds, or overwatering. Make sure the soil is warm enough before planting and use fresh seeds. Avoid overwatering, which can cause the seeds to rot.
* Yellowing Leaves: This can be a sign of nutrient deficiency, overwatering, or disease. Check the soil drainage and amend the soil with compost or fertilizer if necessary.
* Pest Infestations: As mentioned earlier, keep an eye out for common bean pests and take action to control them.
* Disease: Common bean diseases include powdery mildew and bean rust. Improve air circulation around the plants by spacing them properly and avoiding overhead watering. You can also use a fungicide if necessary.
Extending Your Harvest
Want to enjoy fresh green beans for as long as possible? Here are a few tips for extending your harvest:
* Succession Planting: Plant a new batch of beans every 2-3 weeks to ensure a continuous harvest.
* Choose Different Varieties: Plant both early-maturing and late-maturing varieties to extend the harvest season.
* Cold Frames or Row Covers: Use cold frames or row covers to protect your beans from frost in the fall.
Preserving Your Harvest
If you have a bumper crop of green beans, you’ll want to preserve them so you can enjoy them throughout the year. Here are a few popular methods:
* Freezing: Blanch the beans for 3 minutes, then cool them in ice water. Drain well and freeze in freezer bags or containers.
* Canning: Pressure canning is the safest way to preserve green beans. Follow a tested recipe for best results.
* Pickling: Pickled green beans are a delicious and tangy treat. There are many recipes available online.
Final Thoughts
Growing green beans at home is a rewarding experience that anyone can enjoy. With a little planning and care, you can have a bountiful harvest of fresh, delicious beans. So get out there, get your hands dirty, and start growing! Happy gardening!
Conclusion
So, there you have it! Growing green beans at home is not only achievable, but it’s also incredibly rewarding. From the satisfying crunch of a freshly picked bean to the vibrant green hue gracing your dinner plate, the experience is simply unmatched. We’ve walked you through the essential steps, from selecting the right variety to troubleshooting common issues, empowering you to cultivate your own thriving green bean patch.
But why is this DIY trick a must-try? Beyond the obvious benefits of fresh, organic produce, growing your own green beans offers a unique connection to nature. It’s a chance to witness the miracle of growth firsthand, to nurture a plant from seed to harvest, and to appreciate the hard work that goes into producing the food we eat. Plus, let’s be honest, the taste of homegrown green beans is far superior to anything you’ll find at the grocery store. They’re sweeter, crisper, and bursting with flavor.
This is more than just a gardening project; it’s an investment in your health, your well-being, and your connection to the natural world.
Now, let’s talk about variations. Feel free to experiment with different varieties of green beans. Bush beans are perfect for smaller spaces, while pole beans offer a vertical growing option and can be trained up trellises or fences. Consider adding companion plants like marigolds or nasturtiums to deter pests and attract beneficial insects. You can also try succession planting, sowing new seeds every few weeks to ensure a continuous harvest throughout the growing season. For those with limited outdoor space, container gardening is an excellent option. Choose a large pot with good drainage and use a high-quality potting mix.
Don’t be afraid to get creative and personalize your green bean growing experience. The possibilities are endless!
We understand that gardening can sometimes feel daunting, especially for beginners. But trust us, growing green beans is surprisingly easy and forgiving. With a little patience and attention, you’ll be harvesting your own delicious beans in no time.
We wholeheartedly encourage you to give this DIY trick a try. Imagine the satisfaction of serving a meal made with ingredients you grew yourself. Picture the smiles on your family’s faces as they savor the fresh, vibrant flavors of homegrown green beans.
And most importantly, we want to hear about your experience! Share your photos, tips, and stories with us in the comments below. Let’s create a community of green bean enthusiasts and inspire others to embrace the joys of homegrown produce. What variety did you choose? What challenges did you face, and how did you overcome them? What are your favorite ways to prepare your homegrown green beans? We’re eager to learn from your experiences and celebrate your successes.
So, grab your seeds, get your hands dirty, and embark on this rewarding journey of growing green beans at home. You won’t regret it! Happy gardening!
Frequently Asked Questions (FAQ)
What is the best time of year to plant green beans?
The ideal time to plant green beans is after the last frost in spring, when the soil has warmed to at least 60°F (15°C). Green beans are sensitive to cold temperatures, so planting too early can hinder germination and growth. In most regions, this typically falls between late spring and early summer. You can also check your local planting calendar for specific dates based on your climate. For a continuous harvest, consider succession planting, sowing new seeds every 2-3 weeks throughout the growing season.
How much sunlight do green beans need?
Green beans require at least 6-8 hours of direct sunlight per day to thrive. Choose a planting location that receives ample sunlight throughout the day. If you’re growing green beans in containers, make sure to place them in a sunny spot. Insufficient sunlight can lead to leggy growth, reduced yields, and increased susceptibility to diseases.
What type of soil is best for growing green beans?
Green beans prefer well-drained, fertile soil with a pH between 6.0 and 7.0. Amend the soil with compost or other organic matter to improve drainage and fertility. Avoid heavy clay soils, as they can become waterlogged and inhibit root growth. If your soil is particularly poor, consider growing green beans in raised beds or containers with a high-quality potting mix.
How often should I water my green beans?
Water green beans regularly, especially during dry periods. Aim to keep the soil consistently moist but not waterlogged. Water deeply at the base of the plants, avoiding wetting the foliage, which can increase the risk of fungal diseases. Mulching around the plants can help retain moisture and suppress weeds. The frequency of watering will depend on the weather conditions and soil type, but generally, you should water every 2-3 days.
What are some common pests and diseases that affect green beans?
Common pests that affect green beans include aphids, bean beetles, and spider mites. Diseases include powdery mildew, bean rust, and anthracnose. To prevent pest and disease problems, practice good garden hygiene, such as removing weeds and debris, and providing adequate air circulation. Inspect your plants regularly for signs of pests or diseases and take action promptly. Organic pest control methods, such as insecticidal soap or neem oil, can be effective for controlling pests. For diseases, consider using copper-based fungicides or other organic treatments.
How do I know when my green beans are ready to harvest?
Green beans are typically ready to harvest when they are about the size of a pencil and the pods are firm and crisp. The beans inside the pods should be small and underdeveloped. Overripe beans will be tough and stringy. Harvest green beans regularly to encourage continued production. Snap the beans off the plant carefully, avoiding damaging the stems.
Can I grow green beans in containers?
Yes, green beans can be successfully grown in containers. Choose a large pot with good drainage and use a high-quality potting mix. Bush bean varieties are generally better suited for container gardening than pole beans, as they are more compact. Provide adequate sunlight and water, and fertilize regularly. You may also need to provide support for the plants, such as a small trellis or stake.
How can I encourage more green bean production?
To encourage more green bean production, harvest the beans regularly, fertilize the plants with a balanced fertilizer, and provide adequate water and sunlight. Removing spent flowers and pods can also help stimulate new growth. Consider succession planting to ensure a continuous harvest throughout the growing season.
Are there any companion plants that are beneficial for green beans?
Yes, several companion plants can benefit green beans. These include marigolds, which deter pests, and nasturtiums, which attract beneficial insects. Other good companion plants for green beans include carrots, cucumbers, and rosemary. Avoid planting green beans near onions or garlic, as they can inhibit growth.
How do I store harvested green beans?
Harvested green beans can be stored in the refrigerator for up to a week. Place them in a plastic bag or container to prevent them from drying out. You can also freeze green beans for longer storage. Blanch them in boiling water for 2-3 minutes, then transfer them to an ice bath to stop the cooking process. Drain the beans and freeze them in freezer bags or containers.

Leave a Comment