
Grow more eggplants than you ever thought possible, even if you’re working with a small space or feel like you have a “brown thumb!” Have you ever dreamed of harvesting baskets overflowing with glossy, deep purple eggplants, ready for delicious ratatouille, creamy baba ghanoush, or perfectly grilled slices? I know I have! This isn’t just about gardening; it’s about connecting with nature, enjoying the fruits (or vegetables!) of your labor, and savoring the incredible flavor of homegrown produce.
Eggplants, with their rich history tracing back to ancient Asia, have been cultivated for centuries, gracing tables and gardens across the globe. From ornamental varieties to culinary staples, they hold a special place in many cultures. But let’s face it, sometimes getting those eggplants to actually *grow* can feel like a challenge. That’s where these DIY tricks and hacks come in!
In this article, I’m going to share some of my favorite, tried-and-true methods to help you grow more eggplants successfully. We’ll cover everything from soil preparation and companion planting to pest control and clever watering techniques. These aren’t just random tips; they’re practical solutions designed to boost your eggplant yield and make your gardening experience more rewarding. So, grab your gardening gloves, and let’s get started on the path to an abundant eggplant harvest!
Mehr Auberginen ernten: Ein DIY-Leitfaden für eine üppige Ernte
Ich liebe Auberginen! Und ich weiß, dass viele von euch auch Fans dieser vielseitigen und köstlichen Frucht sind. Aber manchmal ist es frustrierend, wenn die Auberginenpflanzen nicht so viele Früchte tragen, wie man sich wünscht. Keine Sorge, ich habe da ein paar Tricks auf Lager, die ich gerne mit euch teilen möchte, um eure Auberginenernte zu maximieren. Dieser DIY-Leitfaden ist vollgepackt mit praktischen Tipps und Tricks, die ich selbst ausprobiert habe und die wirklich funktionieren. Los geht’s!
Die Grundlagen: Optimale Bedingungen für Auberginen
Bevor wir uns den fortgeschrittenen Techniken widmen, ist es wichtig, die Grundlagen zu beherrschen. Auberginen sind wählerische Pflanzen und brauchen die richtigen Bedingungen, um zu gedeihen.
* Sonne, Sonne, Sonne: Auberginen lieben die Sonne! Sie brauchen mindestens 6-8 Stunden direkte Sonneneinstrahlung pro Tag. Wählt also einen sonnigen Standort in eurem Garten.
* Warmer Boden: Auberginen sind frostempfindlich und bevorzugen warme Böden. Die Bodentemperatur sollte idealerweise zwischen 21°C und 32°C liegen.
* Gut durchlässiger Boden: Auberginen mögen keinen nassen Füße. Der Boden sollte gut durchlässig sein, um Staunässe zu vermeiden.
* Regelmäßige Bewässerung: Auberginen brauchen regelmäßige Bewässerung, besonders während der Fruchtbildung. Achtet darauf, den Boden feucht zu halten, aber nicht zu durchnässen.
* Nährstoffreiche Erde: Auberginen sind Starkzehrer und benötigen viele Nährstoffe. Verwendet Kompost oder organischen Dünger, um den Boden anzureichern.
Schritt-für-Schritt-Anleitung: Auberginen richtig pflegen
Hier ist eine detaillierte Anleitung, wie ihr eure Auberginenpflanzen optimal pflegen könnt, um eine reiche Ernte zu erzielen:
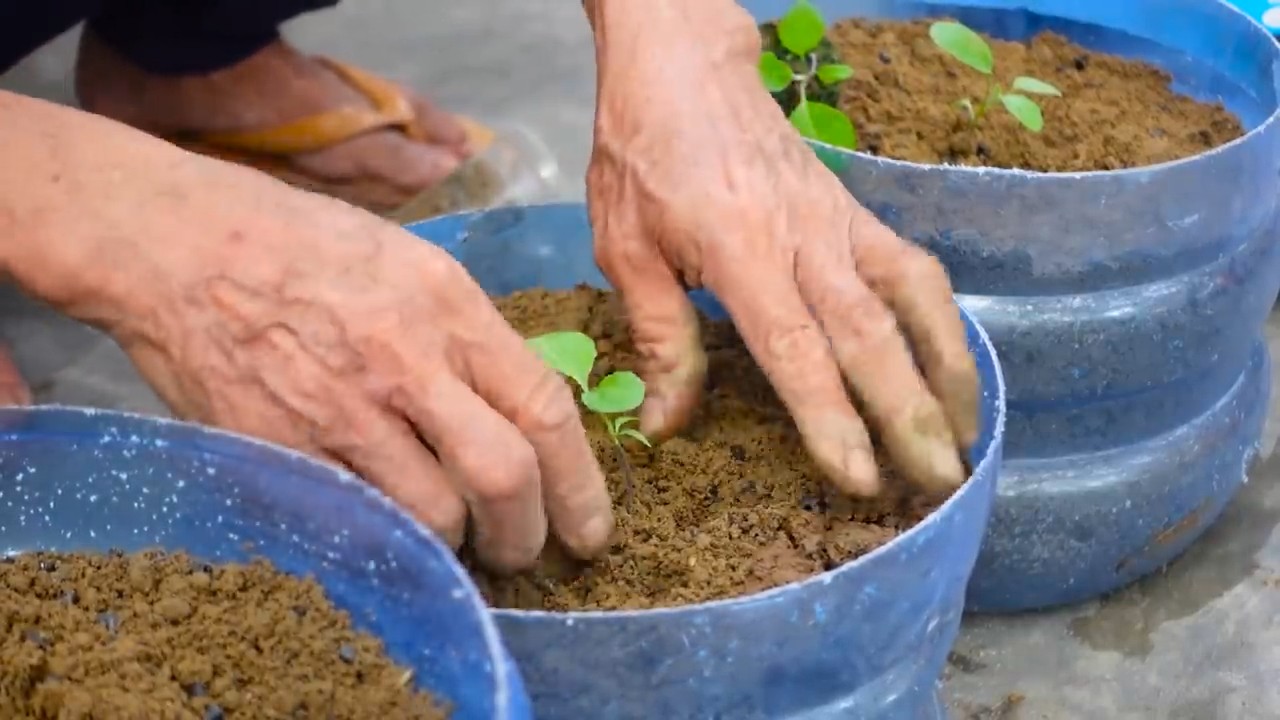
1. Aussaat oder Jungpflanzen: Ihr könnt Auberginen entweder aus Samen ziehen oder Jungpflanzen kaufen. Wenn ihr sie aus Samen zieht, beginnt am besten 6-8 Wochen vor dem letzten Frost im Haus. Jungpflanzen sind eine einfachere Option, besonders wenn ihr wenig Zeit habt.
2. Pflanzung: Sobald die Bodentemperatur warm genug ist, könnt ihr die Auberginenpflanzen ins Freie pflanzen. Achtet darauf, dass der Abstand zwischen den Pflanzen etwa 60-90 cm beträgt, damit sie genügend Platz zum Wachsen haben.
3. Mulchen: Mulchen ist ein wichtiger Schritt, um den Boden feucht zu halten, Unkraut zu unterdrücken und die Bodentemperatur zu regulieren. Verwendet organische Materialien wie Stroh, Holzhackschnitzel oder Kompost.
4. Bewässerung: Gießt die Auberginenpflanzen regelmäßig, besonders während trockener Perioden. Achtet darauf, den Boden gleichmäßig feucht zu halten, aber vermeidet Staunässe. Am besten gießt ihr am Morgen, damit die Blätter tagsüber abtrocknen können.
5. Düngung: Auberginen sind Starkzehrer und benötigen regelmäßige Düngung. Verwendet einen organischen Dünger, der reich an Phosphor und Kalium ist, um die Fruchtbildung zu fördern. Düngt alle 2-3 Wochen während der Wachstumsperiode.
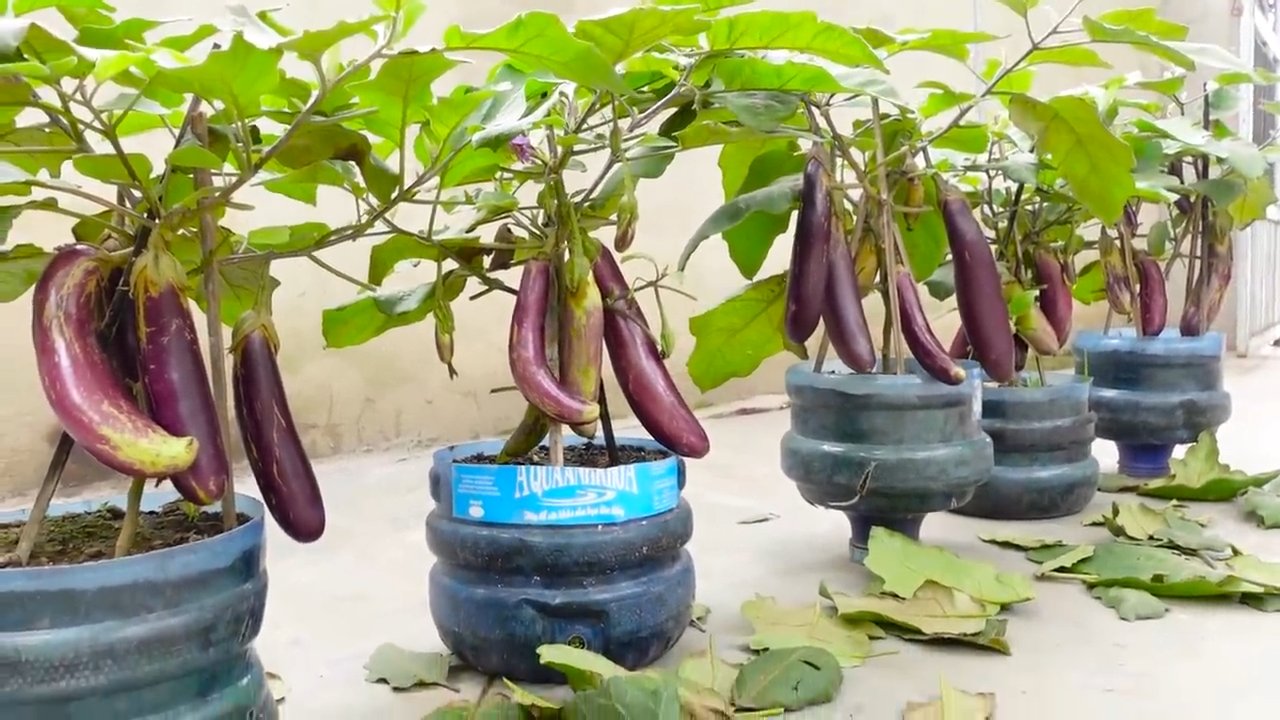
6. Stützen: Auberginenpflanzen können unter dem Gewicht der Früchte umknicken. Stützt die Pflanzen mit Stäben oder einem Rankgitter, um sie zu stabilisieren.
7. Schädlinge und Krankheiten: Achtet auf Schädlinge wie Blattläuse, Kartoffelkäfer und Spinnmilben. Bekämpft sie mit natürlichen Methoden wie Neemöl oder Insektizidseife. Auberginen können auch von Pilzkrankheiten wie Mehltau befallen werden. Sorgt für gute Belüftung und entfernt befallene Blätter.
8. Ernte: Auberginen sind erntereif, wenn sie eine glänzende, pralle Haut haben und sich leicht eindrücken lassen. Schneidet die Früchte mit einem scharfen Messer oder einer Gartenschere ab.
Spezielle Techniken für eine größere Ernte
Neben der richtigen Pflege gibt es noch ein paar spezielle Techniken, die ihr anwenden könnt, um eure Auberginenernte zu steigern.
Beschneiden für mehr Früchte
Das Beschneiden von Auberginenpflanzen kann die Fruchtbildung fördern, indem es die Luftzirkulation verbessert und die Energie der Pflanze auf die Entwicklung der Früchte konzentriert.
* Entfernt untere Blätter: Entfernt die unteren Blätter, die den Boden berühren, um Krankheiten vorzubeugen und die Luftzirkulation zu verbessern.
* Entfernt Seitentriebe: Entfernt Seitentriebe, die aus den Blattachseln wachsen, um die Energie der Pflanze auf die Haupttriebe und die Fruchtbildung zu lenken.
* Entfernt beschädigte oder kranke Blätter: Entfernt beschädigte oder kranke Blätter, um die Ausbreitung von Krankheiten zu verhindern.
* Beschneidet nach der Ernte: Nach der Ernte der ersten Früchte könnt ihr die Pflanze leicht beschneiden, um neues Wachstum und weitere Fruchtbildung anzuregen.
Bestäubungshilfe für eine bessere Fruchtbildung
Auberginen sind selbstbestäubend, aber manchmal kann die Bestäubung durch Wind oder Insekten nicht ausreichend sein. In diesem Fall könnt ihr die Bestäubung manuell unterstützen.
* Manuelle Bestäubung: Verwendet einen kleinen Pinsel, um den Pollen von einer Blüte auf die Narbe einer anderen Blüte zu übertragen. Macht dies am besten am Morgen, wenn der Pollen trocken ist.
* Lockt Bestäuber an: Pflanzt blühende Pflanzen in der Nähe eurer Auberginen, um Bestäuber wie Bienen und Schmetterlinge anzulocken.
Sortenwahl für unterschiedliche Klimazonen
Die Wahl der richtigen Auberginensorte ist entscheidend für den Erfolg eurer Ernte. Einige Sorten sind besser für kühle Klimazonen geeignet, während andere in heißen Klimazonen besser gedeihen.
* Kühle Klimazonen: Wählt Sorten wie ‘Black Beauty’, ‘Early Black Egg’ oder ‘Ichiban’, die früh reifen und kälteresistent sind.
* Heiße Klimazonen: Wählt Sorten wie ‘Long Purple’, ‘Thai Green’ oder ‘Listada de Gandia’, die hitzebeständig sind und lange Ernteperioden haben.
Problemlösung: Häufige Probleme und Lösungen
Auch mit der besten Pflege können bei Auberginenpflanzen Probleme auftreten. Hier sind einige häufige Probleme und wie ihr sie lösen könnt:
* Blütenfall: Wenn die Blüten abfallen, bevor sie Früchte bilden, kann dies an Stress durch Hitze, Kälte, Trockenheit oder Nährstoffmangel liegen. Sorgt für optimale Bedingungen und düngt die Pflanzen regelmäßig.
* Kleine Früchte: Wenn die Früchte klein bleiben, kann dies an Nährstoffmangel, unzureichender Bewässerung oder zu vielen Früchten an der Pflanze liegen. Düngt die Pflanzen, gießt sie regelmäßig und entfernt einige Früchte, um die Energie der Pflanze auf die verbleibenden Früchte zu konzentrieren.
* Schädlinge und Krankheiten: Achtet auf Schädlinge und Krankheiten und bekämpft sie frühzeitig mit natürlichen Methoden.
Zusätzliche Tipps für eine reiche Ernte
Hier sind noch ein paar zusätzliche Tipps, die euch helfen können, eure Auberginenernte zu maximieren:
* Fruchtfolge: Baut Auberginen nicht jedes Jahr am selben Standort an, um Krankheiten vorzubeugen.
* Begleitpflanzung: Pflanzt Basilikum, Ringelblumen oder Knoblauch in der Nähe eurer Auberginen, um Schädlinge abzuschrecken.
* Regelmäßige Ernte: Erntet die Auberginen regelmäßig, um die Pflanze zur Bildung neuer Früchte anzuregen.
Ich hoffe, dieser Leitfaden hilft euch dabei, eine üppige Auberginenernte zu erzielen! Mit ein wenig Geduld und den richtigen Techniken könnt ihr eure eigenen köstlichen Auberginen genießen. Viel Erfolg beim Gärtnern!
Conclusion
So, there you have it! This simple yet incredibly effective DIY trick for growing more eggplants is a game-changer for any gardener, regardless of experience level. We’ve walked you through the process, highlighting the benefits of increased yield, healthier plants, and a more bountiful harvest. But why is this method a must-try?
Firstly, it’s about maximizing your resources. Instead of relying solely on the natural growth of your eggplant plants, this technique empowers you to actively influence their productivity. You’re essentially giving your plants a boost, encouraging them to produce more of those delicious, versatile eggplants we all crave.
Secondly, it’s about resilience. By implementing this DIY trick, you’re not just increasing the quantity of your eggplants; you’re also potentially improving their quality and resistance to common diseases and pests. Stronger plants mean a more reliable harvest, even when faced with challenging environmental conditions.
Thirdly, it’s about sustainability. Gardening is, at its heart, a sustainable practice. This DIY trick amplifies that by allowing you to get the most out of your existing plants, reducing the need to purchase more seedlings or rely on potentially harmful chemicals. It’s a win-win for you and the environment.
But the beauty of this method lies in its adaptability. Feel free to experiment with variations to suit your specific needs and preferences. For example, if you live in a particularly hot climate, consider providing extra shade to your newly propagated cuttings to prevent them from drying out. Or, if you’re dealing with nutrient-poor soil, amend your potting mix with compost or other organic matter to give your cuttings a nutritional head start.
Consider using different rooting hormones to see which works best for your specific eggplant variety. Some gardeners have found success with willow water, a natural rooting hormone made by soaking willow branches in water. Others prefer commercially available rooting powders or gels.
Another variation involves the type of container you use for rooting. While we recommended small pots, you could also try using seedling trays or even repurposed plastic containers. Just make sure the container has adequate drainage to prevent waterlogging.
Don’t be afraid to get creative and tailor this DIY trick to your unique gardening situation. The key is to observe your plants closely and adjust your approach as needed.
We are confident that this DIY trick will revolutionize your eggplant growing experience. Imagine the satisfaction of harvesting basket after basket of plump, juicy eggplants, all thanks to your own ingenuity and a little bit of effort.
So, what are you waiting for? Grab your gardening tools, gather your supplies, and get ready to embark on a journey to eggplant abundance. We encourage you to try this DIY trick and share your experiences with us. Let us know what worked well for you, what challenges you encountered, and any variations you discovered along the way. Your feedback will help us refine this method and make it even more accessible to other gardeners.
Share your photos and stories on social media using [Your Hashtag Here] and let’s create a community of eggplant enthusiasts! Together, we can unlock the full potential of our gardens and enjoy the delicious rewards of homegrown produce. Happy gardening, and may your eggplant harvest be plentiful!
Frequently Asked Questions (FAQ)
1. What exactly is this DIY trick, and why should I bother with it?
This DIY trick involves propagating new eggplant plants from cuttings taken from existing, healthy plants. The primary reason to bother with it is to significantly increase your eggplant yield without having to purchase new seedlings or start from seed. It’s a cost-effective, sustainable, and rewarding way to maximize your garden’s productivity. Furthermore, you’re essentially cloning your best-performing plants, ensuring you get more of the varieties you already love. This method also allows you to extend your growing season, as you can start new plants indoors even after the outdoor growing season has ended.
2. What kind of eggplant varieties work best with this DIY propagation method?
Generally, most eggplant varieties can be propagated using this method. However, some varieties may root more easily than others. Experimenting with different varieties is part of the fun! Consider starting with varieties known for their vigorous growth and disease resistance, as these tend to be more successful. Heirloom varieties often respond well to propagation, as they haven’t been bred for specific traits that might hinder rooting. Keep detailed notes on which varieties perform best for you, so you can focus on those in future seasons.
3. How long does it typically take for the eggplant cuttings to root?
Rooting time can vary depending on several factors, including the eggplant variety, the rooting hormone used, the temperature, and the humidity. Generally, you can expect to see roots developing within 2-4 weeks. It’s crucial to maintain consistent moisture and warmth during this period. Avoid overwatering, as this can lead to rot. You can gently check for root development by carefully tugging on the cutting. If you feel resistance, it’s likely that roots have formed.
4. What are the signs that my eggplant cuttings are not rooting properly?
Several signs can indicate that your eggplant cuttings are struggling to root. These include yellowing or browning leaves, wilting, and the development of mold or fungus. If you notice any of these signs, take immediate action. Remove any affected leaves, ensure proper drainage, and consider using a fungicide if necessary. In some cases, it may be necessary to start over with fresh cuttings.
5. Can I use this DIY trick to propagate eggplant plants indoors during the winter?
Absolutely! This is one of the biggest advantages of this method. You can propagate eggplant plants indoors during the winter, giving you a head start on the growing season. Provide your cuttings with adequate light, either from a sunny window or a grow light. Maintain a consistent temperature and humidity level. This will allow you to have strong, healthy seedlings ready to transplant outdoors in the spring.
6. What kind of soil or potting mix should I use for rooting the eggplant cuttings?
A well-draining potting mix is essential for successful rooting. Avoid using garden soil, as it can be too heavy and may contain pathogens. A good option is a mix of peat moss, perlite, and vermiculite. You can also use a commercially available seed starting mix. The key is to ensure that the mix is light and airy, allowing for good root development.
7. How often should I water the eggplant cuttings while they are rooting?
Water the eggplant cuttings regularly to keep the potting mix consistently moist, but not waterlogged. Check the moisture level daily and water when the top inch of soil feels dry to the touch. Avoid overwatering, as this can lead to root rot. A spray bottle can be helpful for gently misting the cuttings without saturating the soil.
8. Do I need to use rooting hormone for this DIY trick?
While not strictly necessary, using rooting hormone can significantly increase the success rate of your eggplant cuttings. Rooting hormone contains auxins, which are plant hormones that promote root development. You can purchase rooting hormone in powder or liquid form. Follow the instructions on the product label for proper application.
9. Once the eggplant cuttings have rooted, when and how should I transplant them?
Once the eggplant cuttings have developed a healthy root system, they are ready to be transplanted. Harden off the seedlings by gradually exposing them to outdoor conditions for a week or two before transplanting them into your garden. Choose a sunny location with well-draining soil. Dig a hole slightly larger than the root ball and gently place the seedling in the hole. Backfill with soil and water thoroughly.
10. What are some common mistakes to avoid when propagating eggplant cuttings?
Some common mistakes to avoid include:
* Using unhealthy or diseased plant material.
* Overwatering or underwatering the cuttings.
* Exposing the cuttings to extreme temperatures.
* Using a heavy or poorly draining potting mix.
* Not providing adequate light.
* Forgetting to harden off the seedlings before transplanting.
By avoiding these mistakes, you can significantly increase your chances of success with this DIY trick for growing more eggplants.


Leave a Comment