
Easy Grow Artichokes at Home – sounds like a dream, right? I know, I used to think so too! But trust me, with a few simple tricks and a little DIY magic, you can be harvesting your own delicious artichokes before you know it. Forget those pricey grocery store artichokes; imagine plucking them fresh from your own garden!
Artichokes, with their architectural beauty and unique flavor, have a rich history. Originating in the Mediterranean, they were prized by the ancient Greeks and Romans, who considered them a delicacy and even an aphrodisiac! For centuries, they’ve been a symbol of abundance and culinary sophistication. Now, you can bring that same sense of luxury and accomplishment to your own backyard.
Why bother with the effort? Well, for starters, homegrown artichokes taste infinitely better than anything you can buy. Plus, knowing exactly where your food comes from is incredibly satisfying. But more importantly, learning easy grow artichokes at home techniques empowers you to be more self-sufficient and connect with nature. In today’s world, where we’re often disconnected from the source of our food, this is more important than ever. I’m here to show you how to make it happen, even if you think you don’t have a green thumb. Let’s get started!
Easy Grow Artichokes at Home: A DIY Guide
Hey there, fellow gardening enthusiasts! Ever dreamt of harvesting your own spiky, delicious artichokes right from your backyard? Well, dream no more! Growing artichokes at home is totally achievable, even if you’re a beginner like I once was. It takes a little patience and some know-how, but trust me, the reward of fresh, homegrown artichokes is absolutely worth it. This guide will walk you through everything you need to know, from choosing the right variety to harvesting your bounty. Let’s get started!
Choosing Your Artichoke Variety
First things first, you need to decide which artichoke variety you want to grow. Different varieties have different characteristics, like size, color, and cold hardiness. Here are a few popular choices:
* Green Globe: This is probably the most common variety, known for its large, round, green artichokes. It’s a reliable producer and a great choice for beginners.
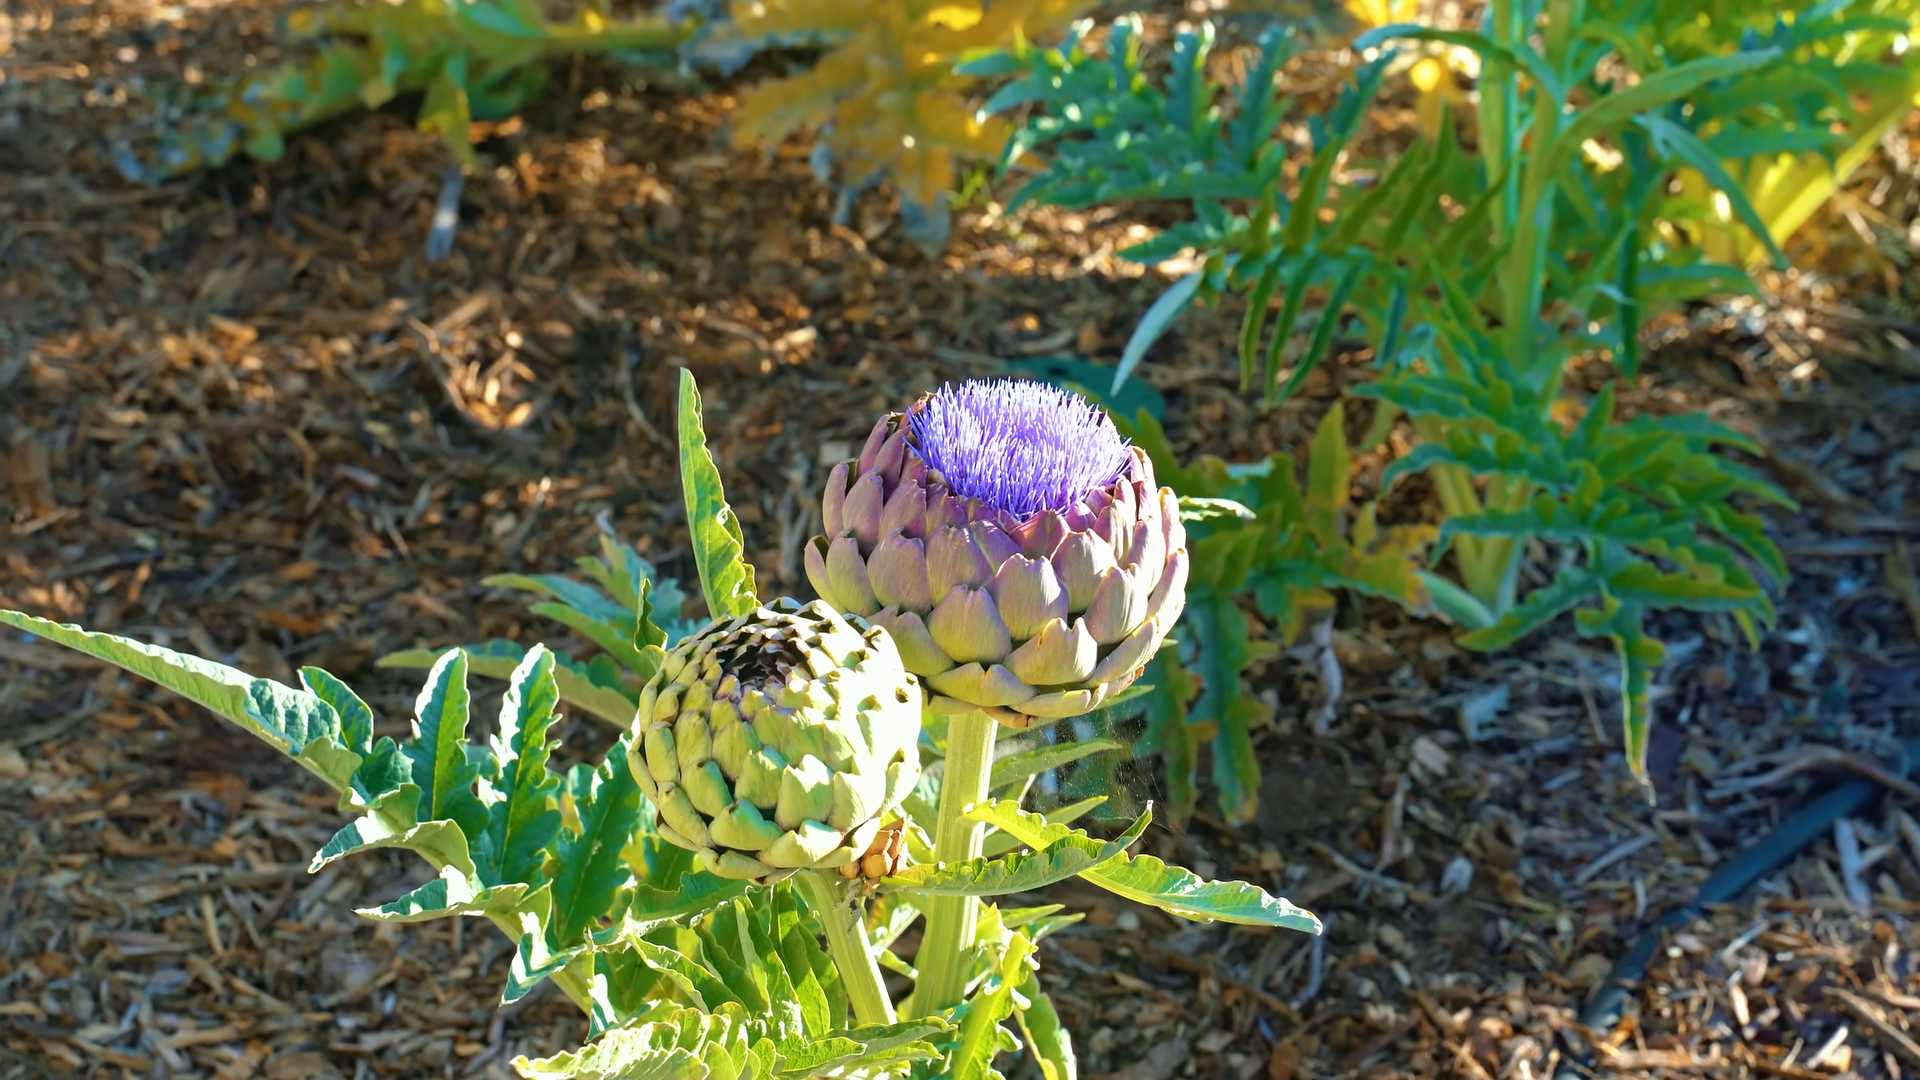
* Violetta: If you’re looking for something a little different, Violetta artichokes have a beautiful purple hue. They’re also known for their tender hearts.
* Imperial Star: This variety is a good choice for cooler climates, as it matures relatively quickly. It produces smaller, but still delicious, artichokes.
* Big Heart: As the name suggests, this variety boasts a large, meaty heart. It’s a favorite among artichoke lovers.
Consider your local climate and personal preferences when making your selection. I personally started with Green Globe because it’s so widely available and relatively easy to grow.
Starting from Seed vs. Transplants
You have two options for starting your artichoke plants: from seed or from transplants.
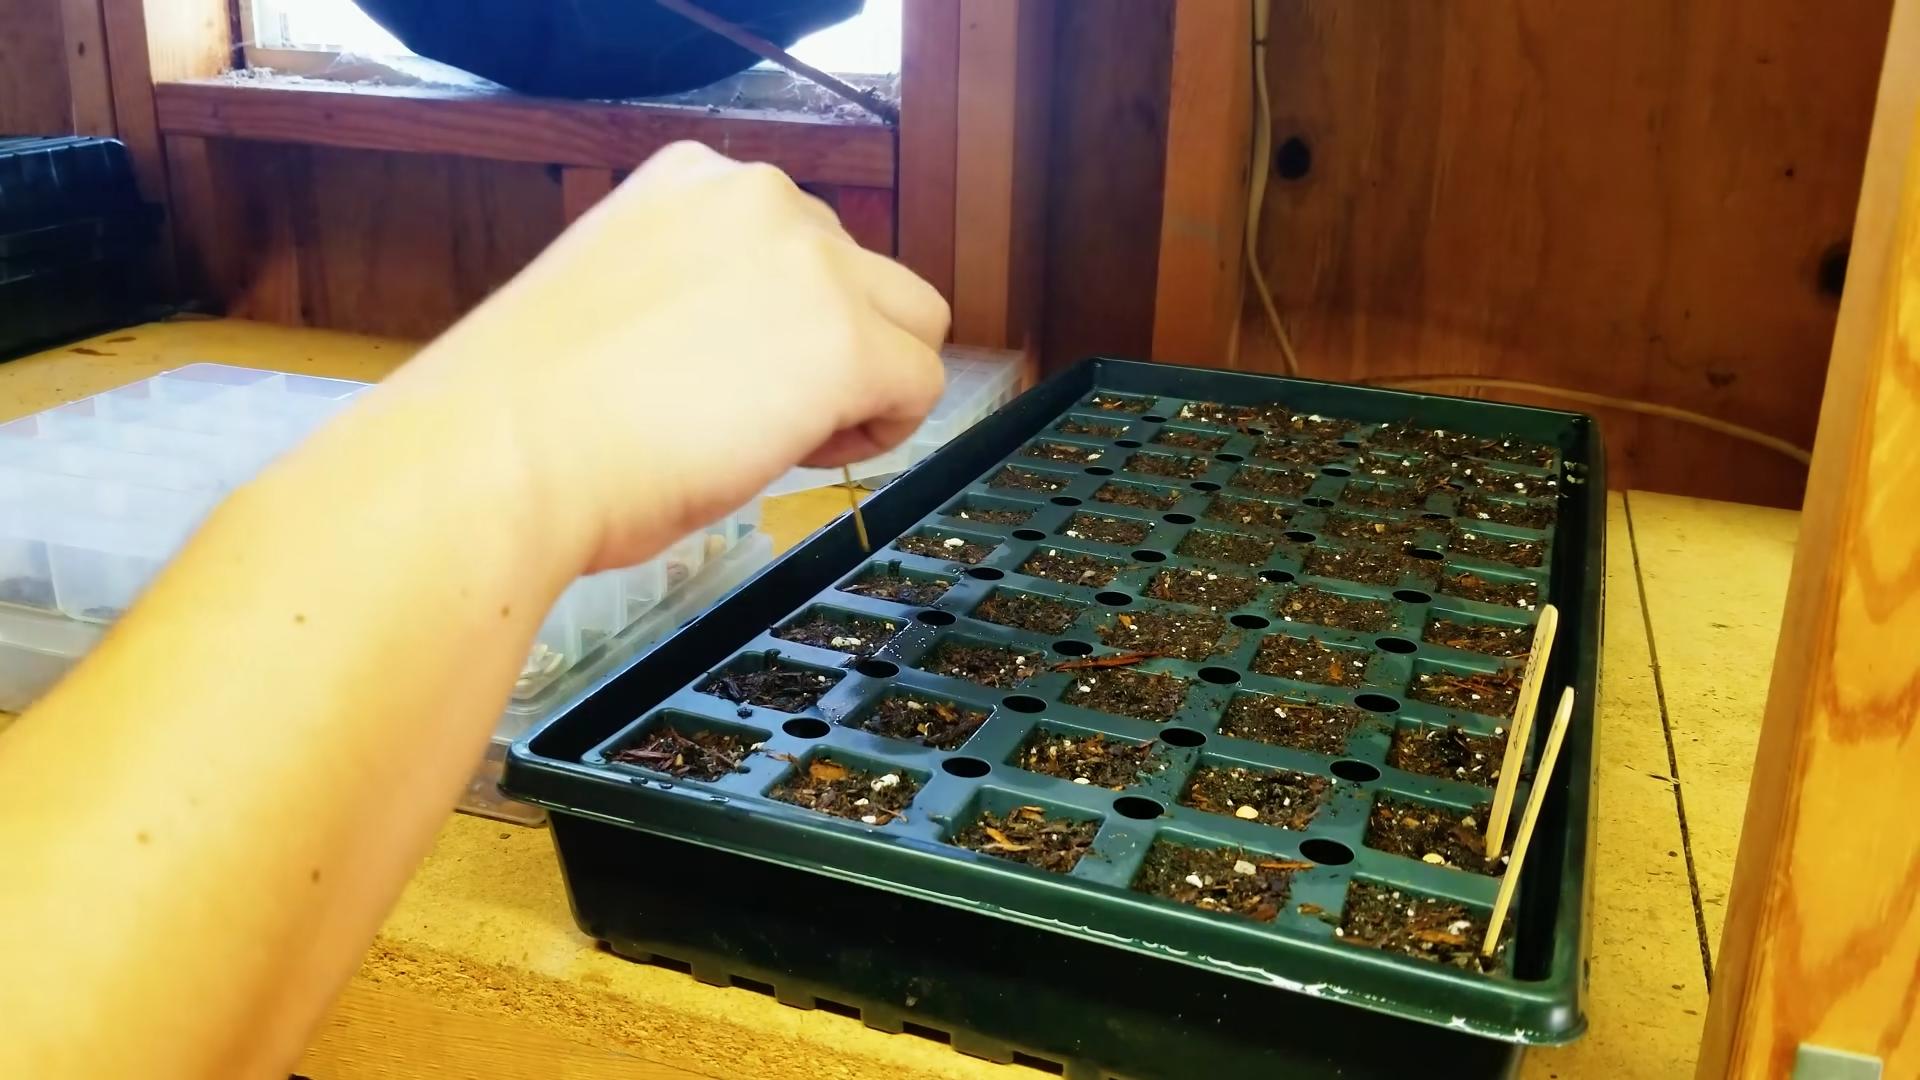
* Starting from Seed: This is the more economical option, but it requires more time and effort. Artichokes started from seed may not produce in their first year, and you’ll need to start them indoors several weeks before the last frost.
* Starting from Transplants: This is the easier and faster option. You can purchase established artichoke plants from a nursery and transplant them directly into your garden. This will give you a head start and increase your chances of harvesting artichokes in the first year.
I recommend starting with transplants, especially if you’re a beginner. It’s less daunting and you’ll see results much sooner.
Preparing Your Garden Bed
Artichokes are heavy feeders, so they need rich, well-drained soil. Here’s how to prepare your garden bed:
* Choose a Sunny Location: Artichokes need at least 6-8 hours of sunlight per day.
* Amend the Soil: Dig in plenty of compost or well-rotted manure to improve soil fertility and drainage. Artichokes thrive in soil with a pH between 6.0 and 6.5. You can test your soil pH with a simple soil testing kit.
* Ensure Good Drainage: Artichokes don’t like soggy soil, so make sure your garden bed has good drainage. If your soil is heavy clay, consider adding sand or perlite to improve drainage.
* Space Plants Properly: Artichokes can get quite large, so space them at least 4-6 feet apart. This will allow them plenty of room to grow and prevent overcrowding.
Planting Your Artichoke Transplants
Now for the fun part: planting your artichoke transplants!
1. Dig a Hole: Dig a hole that’s slightly larger than the root ball of your transplant.
2. Remove the Transplant: Gently remove the transplant from its container, being careful not to damage the roots.
3. Loosen the Roots: Gently loosen the roots of the transplant to encourage them to spread out.
4. Place the Transplant: Place the transplant in the hole, making sure the top of the root ball is level with the surrounding soil.
5. Fill the Hole: Fill the hole with soil, gently firming it around the base of the plant.
6. Water Thoroughly: Water the transplant thoroughly to help it settle in.
Caring for Your Artichoke Plants
Once your artichoke plants are in the ground, they’ll need regular care to thrive.
* Watering: Artichokes need consistent moisture, especially during dry periods. Water deeply whenever the top inch of soil feels dry. Avoid overwatering, as this can lead to root rot.
* Fertilizing: Feed your artichoke plants regularly with a balanced fertilizer. I like to use a slow-release fertilizer in the spring and then supplement with liquid fertilizer every few weeks during the growing season.
* Mulching: Apply a layer of mulch around your artichoke plants to help retain moisture, suppress weeds, and regulate soil temperature. Straw, wood chips, or shredded leaves are all good choices.
* Weeding: Keep your garden bed free of weeds, as they can compete with your artichoke plants for nutrients and water.
* Pest Control: Artichokes can be susceptible to certain pests, such as aphids and snails. Inspect your plants regularly and take action if you see any signs of infestation. You can use organic pest control methods, such as insecticidal soap or diatomaceous earth.
* Pruning: After harvesting, cut back the spent flower stalks to encourage new growth. In colder climates, you may need to protect your artichoke plants from frost. You can do this by covering them with a thick layer of mulch or a frost blanket.
Overwintering Artichokes in Cold Climates
If you live in a region with harsh winters, you’ll need to take extra steps to protect your artichoke plants. Artichokes are perennials in warmer climates (zones 7-10), but they can be grown as annuals in colder regions. However, with proper care, you can overwinter them and enjoy artichokes for several years.
1. Cut Back the Foliage: In late fall, after the first frost, cut back the foliage to about 6 inches above the ground.
2. Apply a Thick Layer of Mulch: Cover the plants with a thick layer of mulch, such as straw or leaves. This will help insulate the roots and protect them from freezing temperatures. I usually use at least a foot of straw.
3. Consider a Protective Cover: For extra protection, you can also cover the plants with a frost blanket or a cold frame.
4. Remove the Protection in Spring: In early spring, after the last frost, remove the mulch and protective cover. The plants should start to sprout new growth.
Harvesting Your Artichokes
The moment you’ve been waiting for! Harvesting your own artichokes is incredibly satisfying.
1. Timing is Key: Harvest your artichokes when the buds are still tight and firm, but before the scales start to open. The size of the artichoke will depend on the variety, but generally, you want to harvest them when they’re about 3-4 inches in diameter.
2. Use a Sharp Knife: Use a sharp knife to cut the artichoke stem about 2-3 inches below the bud.
3. Harvest Regularly: Harvest your artichokes regularly to encourage the plant to produce more buds.
Enjoying Your Homegrown Artichokes
Now that you’ve harvested your artichokes, it’s time to enjoy them! There are countless ways to prepare and eat artichokes.
* Steaming: Steaming is a classic way to cook artichokes. Simply steam them for about 30-45 minutes, or until the leaves are tender. Serve with melted butter or your favorite dipping sauce.
* Grilling: Grilling artichokes gives them a smoky flavor. Cut them in half, brush them with olive oil, and grill them over medium heat for about 15-20 minutes per side.
* Roasting: Roasting artichokes brings out their sweetness. Cut them in half, toss them with olive oil, garlic, and herbs, and roast them in a preheated oven at 400°F (200°C) for about 30-40 minutes.
* Stuffing: Stuffed artichokes are a delicious and impressive dish. Fill them with a mixture of breadcrumbs, cheese, herbs, and garlic, and bake them until tender.
Don’t forget to remove the choke (the fuzzy part in the center) before eating the heart. The heart is the most prized part of the artichoke, and it’s incredibly delicious.
Troubleshooting Common Artichoke Problems
Even with the best care, you may encounter some problems when growing artichokes. Here are a few common issues and how to address them:
* Aphids: These tiny insects can suck the sap from your artichoke plants, causing them to weaken and become stunted. Control aphids with insecticidal soap or neem oil.
* Snails and Slugs: These pests can munch on the leaves of your artichoke plants, leaving behind unsightly holes. Control snails and slugs with beer traps or by
Conclusion
So, there you have it! Growing your own artichokes at home is not only achievable, but it’s also incredibly rewarding. Forget those expensive, often bruised, artichokes at the grocery store. With a little patience and this straightforward DIY trick, you can cultivate plump, delicious artichokes right in your backyard or even on your patio.
Why is this a must-try? Because it puts you in control. You know exactly what goes into growing your food – no harsh chemicals, no mystery ingredients, just pure, homegrown goodness. Plus, the flavor of a freshly harvested artichoke is simply unparalleled. It’s sweeter, more tender, and bursting with a freshness you just can’t find in store-bought varieties.
Beyond the basic method outlined above, there’s plenty of room for experimentation. Consider these variations:
* Container Gardening Artichokes: If you’re short on space, don’t despair! Artichokes thrive in large containers. Just ensure your pot is at least 24 inches in diameter and provides excellent drainage. Choose a dwarf variety like ‘Little Violet’ for best results in containers.
* Different Varieties: While ‘Green Globe’ is a popular choice, explore other artichoke varieties to find your favorite. ‘Violetta Precoce’ offers a beautiful purple hue, while ‘Romanesco’ is known for its unique, slightly nutty flavor.
* Companion Planting: Enhance your artichoke patch by planting beneficial companions. Marigolds deter pests, while legumes like beans and peas fix nitrogen in the soil, providing a natural fertilizer boost.
* Extending the Season: In colder climates, protect your artichoke plants during the winter months with a thick layer of mulch or by moving container-grown plants indoors to a cool, bright location.
Growing your own artichokes is more than just a gardening project; it’s an experience. It’s about connecting with nature, learning about the growing process, and ultimately, enjoying the fruits (or rather, the thistles!) of your labor. The satisfaction of serving a dish featuring artichokes you nurtured from seed or seedling is truly unmatched.
We wholeheartedly encourage you to give this DIY trick a try. Don’t be intimidated – artichokes are surprisingly resilient plants. Follow our guide, adapt it to your specific climate and growing conditions, and get ready to enjoy a bountiful harvest.
And most importantly, we want to hear about your experience! Share your photos, tips, and challenges in the comments below. Let’s create a community of artichoke enthusiasts and learn from each other. Happy growing! Let us know how you **grow artichokes** at home.
Frequently Asked Questions (FAQ)
1. What is the best time of year to plant artichokes?
The ideal time to plant artichokes depends on your climate. In regions with mild winters (zones 7-10), you can plant artichokes in the fall for a spring harvest. In colder climates (zones 6 and below), it’s best to start artichokes indoors in late winter or early spring and transplant them outdoors after the last frost. This gives them a head start and allows them to establish themselves before the onset of winter.
2. How much sunlight do artichokes need?
Artichokes are sun-loving plants and require at least 6-8 hours of direct sunlight per day to thrive. Choose a planting location that receives ample sunlight throughout the day. If you’re growing artichokes in containers, make sure to place them in a sunny spot on your patio or balcony.
3. What type of soil is best for growing artichokes?
Artichokes prefer well-draining soil that is rich in organic matter. Amend your soil with compost or well-rotted manure before planting to improve its fertility and drainage. A slightly acidic to neutral soil pH (around 6.0-7.0) is ideal. If your soil is heavy clay, consider adding sand or perlite to improve drainage.
4. How often should I water my artichoke plants?
Artichokes need consistent moisture, especially during hot, dry weather. Water deeply and regularly, ensuring that the soil remains consistently moist but not waterlogged. Avoid overhead watering, as this can increase the risk of fungal diseases. A good rule of thumb is to water when the top inch of soil feels dry to the touch.
5. How do I fertilize my artichoke plants?
Artichokes are heavy feeders and benefit from regular fertilization. Apply a balanced fertilizer (e.g., 10-10-10) every 4-6 weeks during the growing season. You can also side-dress your plants with compost or well-rotted manure. Avoid over-fertilizing, as this can lead to excessive foliage growth at the expense of flower production.
6. How do I protect my artichoke plants from pests and diseases?
Artichokes can be susceptible to pests such as aphids, snails, and slugs. Inspect your plants regularly and take action to control these pests as needed. Handpicking, insecticidal soap, and diatomaceous earth are effective options. Fungal diseases such as powdery mildew and botrytis can also affect artichokes. Ensure good air circulation around your plants and avoid overhead watering to minimize the risk of these diseases. If necessary, apply a fungicide according to the manufacturer’s instructions.
7. When are artichokes ready to harvest?
Artichokes are typically ready to harvest in the spring or early summer, depending on your climate and the variety you’re growing. The buds should be firm and plump, with tightly closed scales. Harvest the artichokes when they reach their mature size but before the scales begin to open. Use a sharp knife to cut the stem about 2-3 inches below the base of the bud.
8. How do I store harvested artichokes?
Freshly harvested artichokes can be stored in the refrigerator for up to a week. To keep them fresh, wrap them loosely in a plastic bag or damp paper towel. Avoid washing the artichokes until you’re ready to use them.
9. Can I grow artichokes from seed?
Yes, you can grow artichokes from seed, but it’s important to note that plants grown from seed may not be true to type, meaning they may not produce artichokes that are identical to the parent plant. To start artichokes from seed, sow the seeds indoors 8-10 weeks before the last frost. Transplant the seedlings outdoors after the last frost, once they have developed several sets of true leaves.
10. My artichoke plant didn’t produce any artichokes this year. What could be the reason?
There are several reasons why your artichoke plant may not have produced any artichokes. Some common causes include:
* Insufficient Sunlight: Artichokes need at least 6-8 hours of direct sunlight per day to produce flowers.
* Poor Soil: Artichokes need well-draining soil that is rich in organic matter.
* Inadequate Watering: Artichokes need consistent moisture, especially during hot, dry weather.
* Lack of Fertilization: Artichokes are heavy feeders and benefit from regular fertilization.
* Immature Plant: Artichokes typically don’t produce flowers until their second year of growth.
* Extreme Temperatures: Artichokes can be damaged by extreme heat or cold.
Review your growing conditions and make any necessary adjustments to ensure that your artichoke plant has the resources it needs to thrive.


Leave a Comment