
Grow Sweet Potatoes
I’ve always loved the taste of sweet potatoes – creamy, subtly sweet, and incredibly versatile in the kitchen. But did you know that growing your own sweet potatoes is surprisingly easy and rewarding? This isn’t just about saving money at the grocery store; it’s about connecting with nature, enjoying fresh, homegrown produce, and experiencing the satisfaction of nurturing a plant from slip to harvest. This article is packed with Grow Sweet Potatoes tips and tricks, perfect for both seasoned gardeners and complete beginners.
The humble sweet potato boasts a rich history, originating in Central and South America centuries ago. It’s played a vital role in various cultures, providing a staple food source and even featuring in traditional medicine. Today, its popularity continues to grow, and for good reason! Sweet potatoes are packed with nutrients and offer a delicious alternative to regular potatoes.
Why Grow Your Own?
There are so many reasons to try your hand at growing your own sweet potatoes! Beyond the delicious harvest, you’ll gain a deeper appreciation for where your food comes from. You’ll also have complete control over the growing process, ensuring your sweet potatoes are free from pesticides and other chemicals. Plus, imagine the pride of sharing your homegrown bounty with friends and family – it’s a truly satisfying experience. This guide will walk you through everything you need to know, from selecting the right slips to harvesting your sweet potato crop. So, let’s get started on your journey to successfully Grow Sweet Potatoes!
Growing Sweet Potatoes: A Complete DIY Guide
I love sweet potatoes! They’re delicious, versatile, and surprisingly easy to grow yourself, even if you only have a small space. This guide will walk you through the entire process, from preparing your “slips” (the cuttings you’ll plant) to harvesting your delicious bounty. Let’s get started!
Phase 1: Preparing Your Sweet Potato Slips
- Select the right sweet potatoes: Choose healthy, firm sweet potatoes without bruises or blemishes. Organic sweet potatoes are ideal, but any variety will work. Avoid those that are already sprouting significantly, as these might be too far along.
- Prepare the sweet potatoes: Wash your chosen sweet potatoes thoroughly. You can leave the skin on.
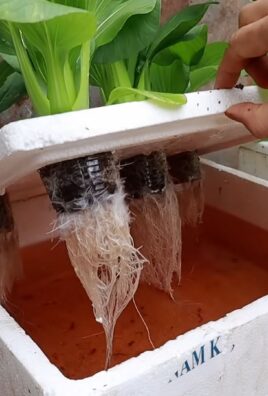
- Start the sprouting process: Find a shallow container (a tray or even a plate will do). Fill it with about an inch of water. Place your sweet potatoes on top of the water, ensuring that only the bottom third of each potato is submerged. The goal is to encourage root and sprout growth.
- Maintain moisture and warmth: Keep the water level consistent, adding more as needed. Place the container in a warm, sunny location. The ideal temperature is around 70-80°F (21-27°C). This process usually takes 2-4 weeks, depending on the temperature and the variety of sweet potato.
- Monitor for sprouts: You’ll start to see sprouts emerge from the “eyes” of the sweet potato. These sprouts, along with the roots that will develop, are your slips. Once the sprouts are a few inches long and have developed some roots, you’re ready to plant.
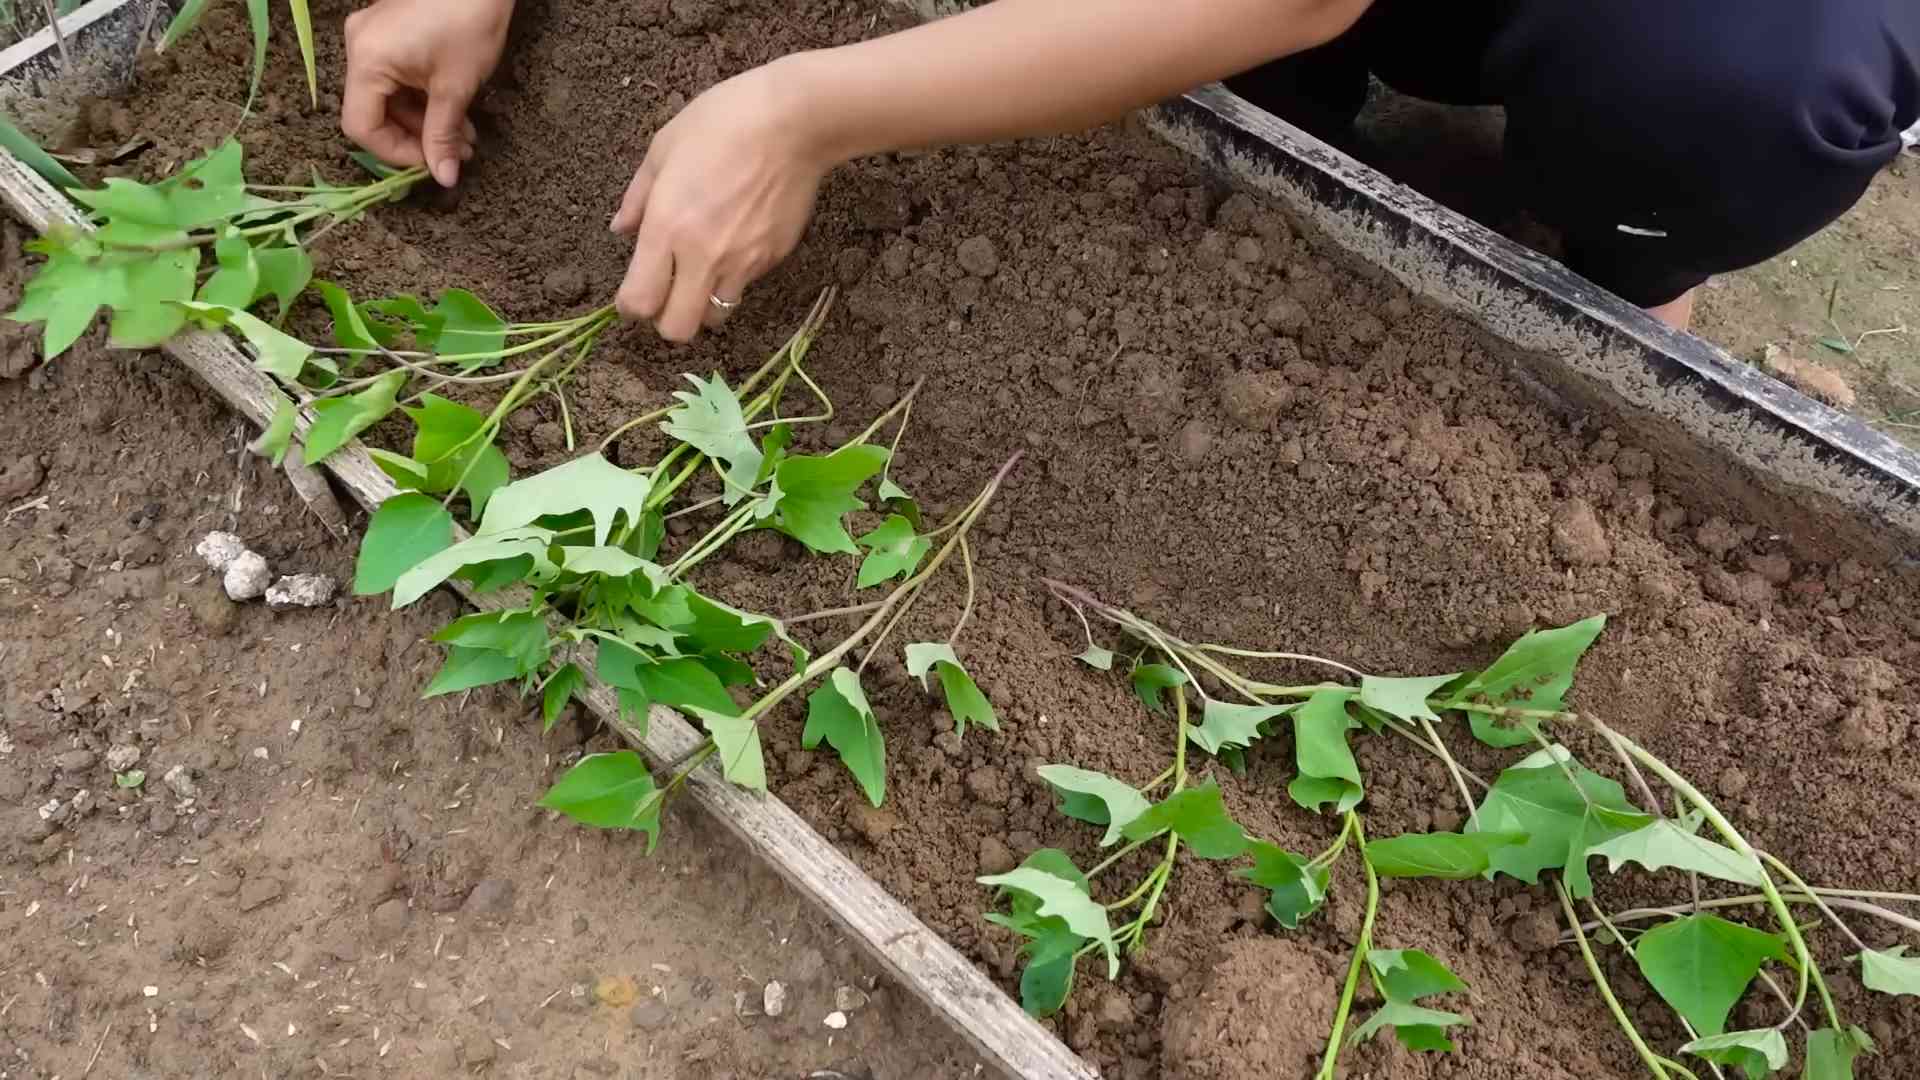
Phase 2: Planting Your Sweet Potato Slips
- Choose your planting location: Sweet potatoes need at least six hours of direct sunlight per day. Select a sunny spot in your garden or a large container. Well-drained soil is crucial; sweet potatoes don’t like wet feet.
- Prepare the soil: Amend your soil with compost or other organic matter to improve drainage and fertility. This will give your sweet potatoes the nutrients they need to thrive. For container gardening, use a well-draining potting mix.
- Plant your slips: Gently separate the sprouts from the sweet potato, ensuring each slip has a few roots attached. Plant the slips horizontally, burying them about 4-6 inches deep and spacing them 12-18 inches apart. If planting in containers, choose a container at least 12 inches deep.
- Water thoroughly: After planting, water the soil deeply to help the slips establish themselves. Avoid overwatering, as this can lead to root rot.
- Mulch (optional but recommended): Applying a layer of mulch, such as straw or shredded leaves, will help retain moisture, suppress weeds, and regulate soil temperature.
Phase 3: Caring for Your Sweet Potato Plants
- Regular watering: Keep the soil consistently moist but not soggy. Water deeply and less frequently rather than shallowly and often. The frequency will depend on your climate and soil type. Check the soil moisture regularly by sticking your finger a couple of inches into the soil. If it feels dry, it’s time to water.
- Weed control: Regularly remove weeds to prevent them from competing with your sweet potato plants for water and nutrients. Mulching can significantly reduce weed growth.
- Fertilizing (optional): While not strictly necessary, a balanced fertilizer can promote vigorous growth. Follow the instructions on the fertilizer package carefully. Over-fertilizing can be harmful.
- Pest and disease monitoring: Regularly inspect your plants for signs of pests or diseases. Address any issues promptly to prevent widespread damage. Common pests include sweet potato weevils and aphids. Common diseases include fungal leaf spots and root rot.
- Hilling (optional but beneficial): As your plants grow, you can “hill” them by adding more soil around the base of the plants. This encourages the development of more sweet potatoes.
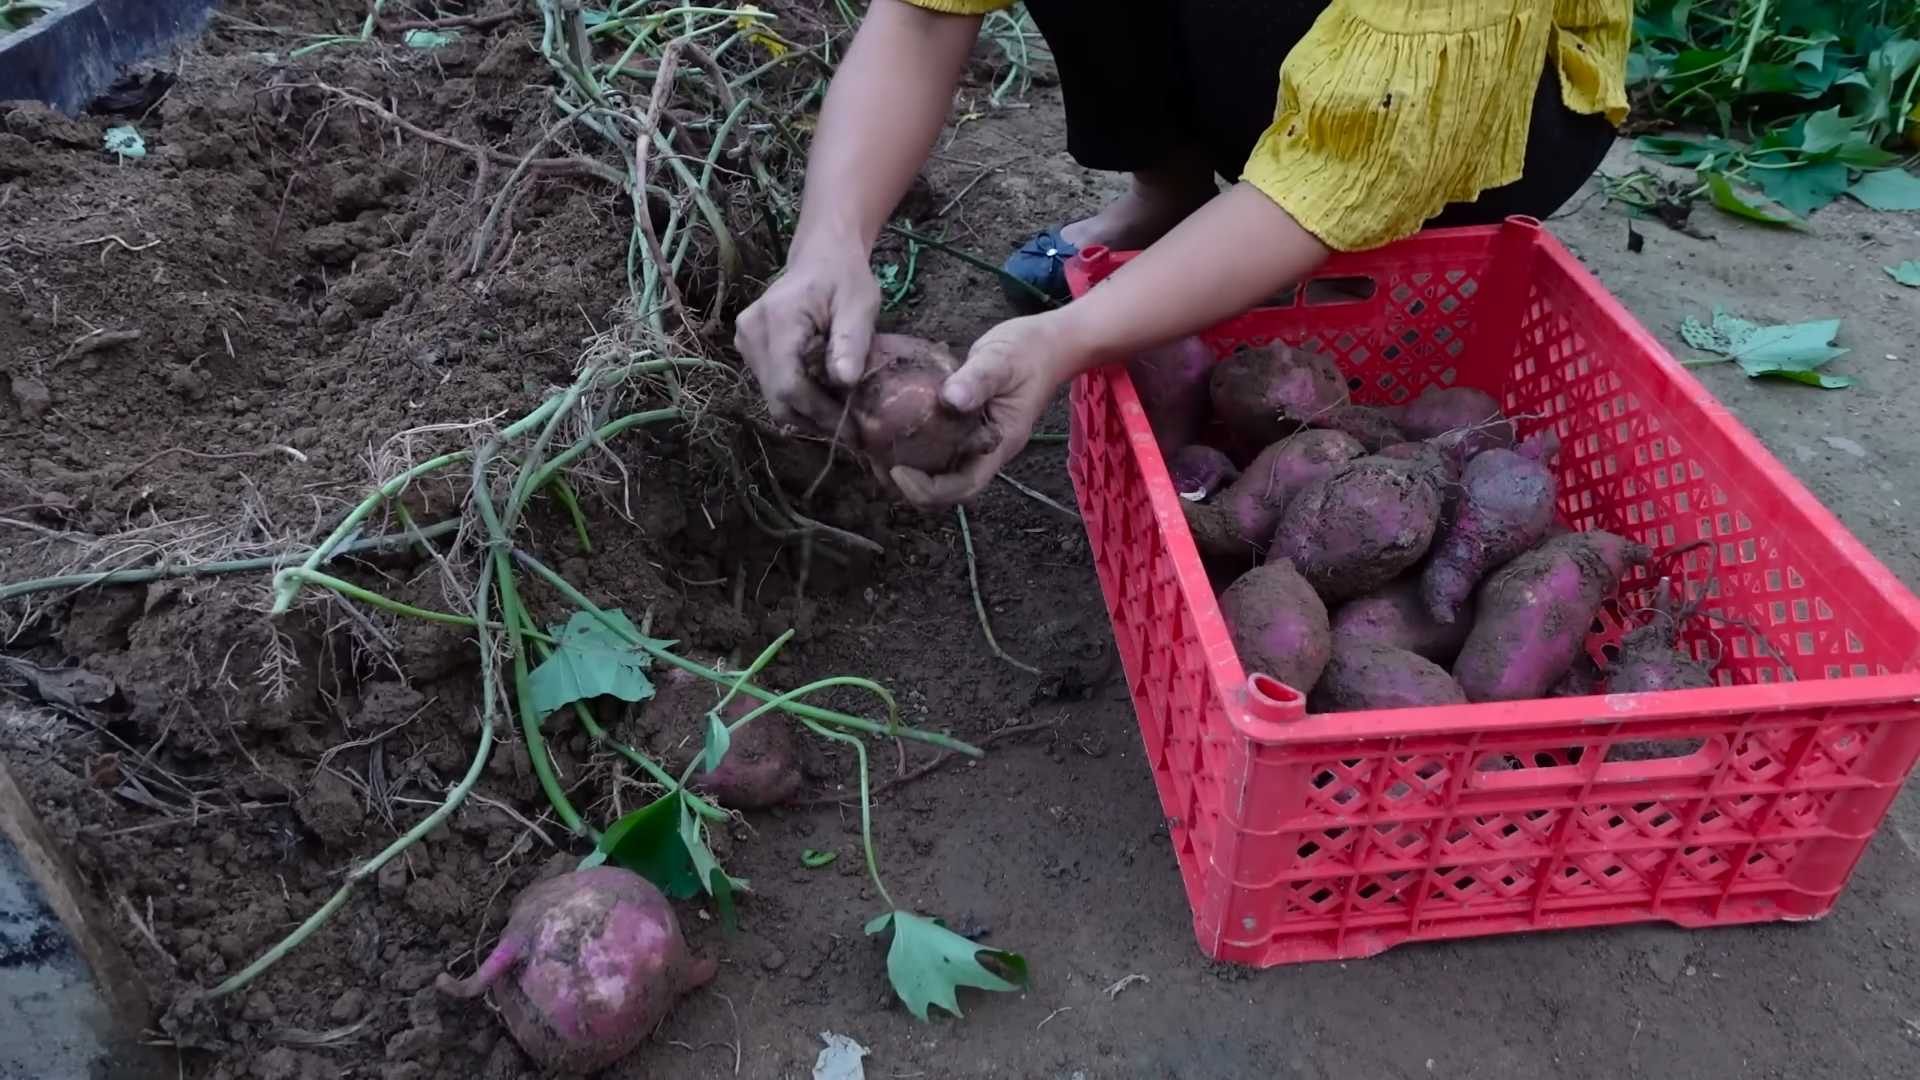
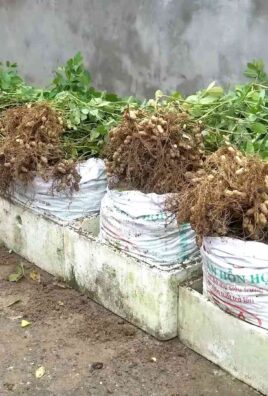
Phase 4: Harvesting Your Sweet Potatoes
- Timing is key: Sweet potatoes are typically ready for harvest 3-4 months after planting, depending on the variety and growing conditions. The leaves will start to yellow and die back as a sign of maturity. You can gently tug on a few potatoes to check for firmness.
- Harvesting method: Use a garden fork or shovel to carefully lift the sweet potatoes from the ground. Be gentle to avoid damaging the tubers. Try to avoid breaking them.
- Cleaning and curing: After harvesting, gently brush off excess soil. Allow the sweet potatoes to cure in a warm, dry, and well-ventilated area for 7-10 days. This process helps to improve their flavor and storage life. Spread them out in a single layer.
- Storage: Once cured, store your sweet potatoes in a cool, dark, and dry place. They should keep for several months under ideal conditions.
Tips for Success:
Remember, patience is key! Growing sweet potatoes takes time and effort, but the reward of harvesting your own delicious sweet potatoes is well worth it. Don’t be discouraged if your first attempt isn’t perfect – learn from your experience and try again next year!
Troubleshooting:
If you encounter problems, such as wilting plants or poor growth, consider factors like watering, sunlight, soil drainage, and pests. Research specific issues online or consult with local gardening experts for tailored advice.
Conclusion
So there you have it – a comprehensive guide to growing your own sweet potatoes! This DIY method isn’t just about saving money; it’s about experiencing the incredible satisfaction of nurturing a plant from a humble slip to a bountiful harvest. The taste of a sweet potato you’ve grown yourself, freshly pulled from the earth, is unparalleled. It’s a flavor explosion that truly connects you to the land and the process of cultivation. This simple yet rewarding DIY sweet potato growing trick is a must-try for anyone with even a small patch of land, a sunny balcony, or even just a large container. It’s a project that’s accessible to beginners, yet offers a depth of learning and satisfaction that seasoned gardeners will appreciate.
Beyond the basic method outlined, there are numerous avenues for experimentation and customization. Consider trying different varieties of sweet potatoes – each boasts unique flavor profiles and growing characteristics. Some varieties are better suited to specific climates, so research is key to maximizing your yield. You can also experiment with different growing mediums. While well-draining soil is ideal, you can achieve excellent results using raised beds, containers filled with a soilless mix, or even repurposed grow bags. The possibilities are endless!
Furthermore, think about integrating your sweet potato plants into a larger garden design. Their sprawling vines can act as a living ground cover, suppressing weeds and enriching the soil. Interplanting with other vegetables, such as beans or squash, can create a synergistic effect, promoting healthy growth and pest control. Don’t be afraid to get creative and adapt the techniques to your specific environment and gardening style. The beauty of this DIY method lies in its adaptability.
We strongly encourage you to embark on this rewarding journey of growing your own sweet potatoes. Share your experiences with us! Post pictures of your thriving plants and your delicious harvest on social media using #GrowSweetPotatoesDIY. We’d love to see your progress and celebrate your successes. Let’s build a community of home growers, sharing tips, tricks, and the joy of harvesting the fruits (or rather, the roots!) of our labor. Remember, even small successes are significant steps towards a more self-sufficient and fulfilling lifestyle. So grab those slips, prepare your soil, and get ready to experience the magic of growing your own sweet potatoes!
Frequently Asked Questions
Q: What is the best time of year to plant sweet potato slips?
The ideal time to plant sweet potato slips is after the last frost and when the soil has warmed up to at least 60-70°F (15-21°C). This usually falls between late spring and early summer, depending on your geographical location. Check your local frost dates for the most accurate planting window.
Q: How much sunlight do sweet potato plants need?
Sweet potatoes are sun-worshippers! They thrive in full sun, meaning at least 6-8 hours of direct sunlight per day. A location with ample sunlight is crucial for healthy growth and a bountiful harvest. Insufficient sunlight can lead to poor growth and reduced yields.
Q: What type of soil is best for growing sweet potatoes?
Sweet potatoes prefer well-drained, sandy loam soil that is rich in organic matter. Heavy clay soils can lead to root rot, so amending the soil with compost or other organic materials to improve drainage is essential. The soil should be loose and easy to work with to allow for proper root development.
Q: How often should I water my sweet potato plants?
Consistent watering is key, but avoid overwatering. Water deeply and regularly, especially during dry periods, but allow the soil to dry slightly between waterings. Overwatering can lead to root rot, while underwatering can stunt growth. Monitor the soil moisture regularly and adjust your watering schedule accordingly.
Q: How do I harvest my sweet potatoes?
Sweet potatoes are typically ready for harvest 3-4 months after planting, depending on the variety and growing conditions. Harvesting is usually done in the fall after the foliage has died back. Carefully dig around the plants to avoid damaging the sweet potatoes. Cure the harvested sweet potatoes in a warm, dry place for a few weeks to improve their storage life.
Q: Can I grow sweet potatoes in containers?
Absolutely! Container gardening is a great option for growing sweet potatoes, especially if you have limited space. Choose large containers (at least 12 inches deep) with drainage holes to prevent root rot. Use a well-draining potting mix and ensure the containers receive ample sunlight.
Q: What are some common pests and diseases that affect sweet potatoes?
Sweet potatoes can be susceptible to various pests and diseases, including sweet potato weevils, aphids, and fungal diseases like root rot. Regularly inspect your plants for signs of pests or diseases and take appropriate measures to control them. Good sanitation practices, such as removing infected plants, can help prevent the spread of diseases.
Q: Can I save seeds from my sweet potatoes to grow more plants next year?
No, sweet potatoes are not grown from seeds. They are propagated vegetatively using slips, which are cuttings from the stems of existing plants. You can easily propagate your own slips from your harvest to plant the following year, ensuring the continuation of your successful sweet potato growing journey.
Leave a Comment