
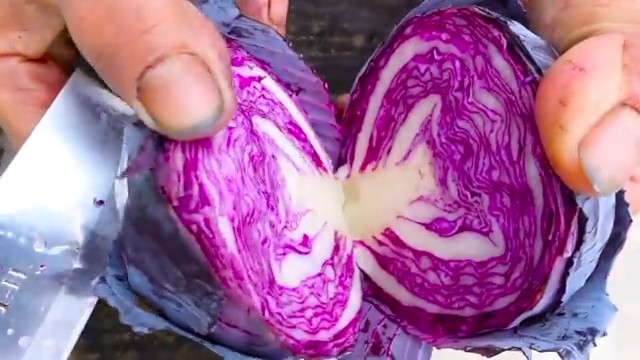
Growing Queen Cabbage at Home might sound like something reserved for seasoned gardeners with acres of land, but I’m here to tell you it’s totally achievable, even if you’re working with a small balcony or a sunny windowsill! Have you ever dreamed of harvesting your own vibrant, delicious cabbage, knowing exactly where it came from and how it was grown? This isn’t just about saving money at the grocery store; it’s about connecting with nature, enjoying the satisfaction of nurturing life, and adding a touch of regal flair to your dinner table.
Cabbage, in its various forms, has been a staple food for centuries, with roots tracing back to ancient Europe and Asia. It’s been celebrated for its nutritional value and its ability to thrive in diverse climates. Historically, it was a symbol of prosperity and good health, often featured in traditional dishes and folk remedies.
But why should *you* bother with growing your own cabbage? Well, store-bought cabbage can sometimes lack that fresh, vibrant flavor. Plus, you have no control over the pesticides or herbicides used. With these simple DIY tricks, you can cultivate your own organic, flavorful Queen Cabbage right at home. I’m going to share some easy-to-follow tips and hacks that will transform you into a cabbage-growing pro, regardless of your experience level. Get ready to impress your friends and family with your gardening prowess and enjoy the unmatched taste of homegrown goodness! Let’s get started on growing Queen Cabbage at Home!
Königskohl zu Hause anbauen: Dein umfassender DIY-Leitfaden
Hallo Gartenfreunde! Habt ihr schon mal von Königskohl gehört? Diese beeindruckende Kohlart, auch bekannt als Palmkohl oder Cavolo Nero, ist nicht nur super gesund, sondern auch ein echter Hingucker im Garten. Ich zeige euch, wie ihr diesen robusten und leckeren Kohl ganz einfach selbst anbauen könnt. Los geht’s!
Was du für den Anbau von Königskohl brauchst
Bevor wir loslegen, hier eine Liste mit allem, was du benötigst:
* Saatgut: Königskohl-Saatgut (Cavolo Nero) ist online oder in Gartencentern erhältlich.
* Anzuchterde: Für die Voranzucht der Sämlinge.
* Anzuchttöpfe oder -schalen: Kleine Behälter für die Anzucht.
* Gartenerde: Gut vorbereitete Gartenerde für das Beet.
* Kompost oder organischer Dünger: Zur Verbesserung der Bodenqualität.
* Gießkanne oder Schlauch: Zum Bewässern der Pflanzen.
* Gartenwerkzeug: Spaten, Harke, Pflanzkelle.
* Pflanzstäbe (optional): Für zusätzlichen Halt, besonders bei windigen Standorten.
* Schutznetz (optional): Zum Schutz vor Schädlingen wie Kohlweißlingen.
Die Vorbereitung: So startest du richtig
Die Vorbereitung ist das A und O für einen erfolgreichen Anbau. Hier sind die Schritte, die du beachten solltest:
1. Saatgut auswählen: Achte beim Kauf von Saatgut auf Qualität und Frische. Bio-Saatgut ist immer eine gute Wahl.
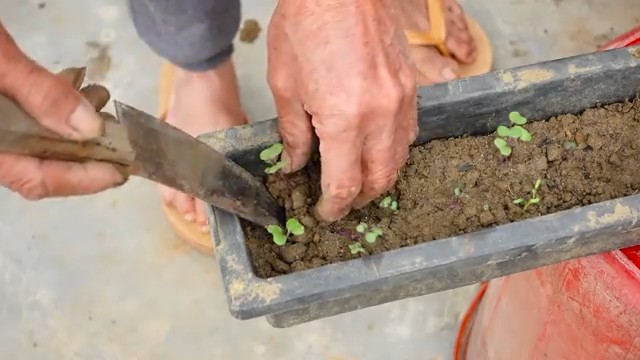
2. Anzuchtgefäße vorbereiten: Fülle die Anzuchttöpfe oder -schalen mit Anzuchterde. Drücke die Erde leicht an.
3. Aussaat: Lege 2-3 Samen pro Topf etwa 1 cm tief in die Erde. Bedecke die Samen leicht mit Erde und gieße sie vorsichtig an.
4. Standort: Stelle die Anzuchtgefäße an einen hellen und warmen Ort. Eine Temperatur von 18-20°C ist ideal für die Keimung.
5. Feuchtigkeit: Halte die Erde feucht, aber nicht nass. Vermeide Staunässe, da dies zu Schimmelbildung führen kann.
6. Keimung: Die Keimung dauert in der Regel 5-10 Tage. Sobald die Sämlinge aufgegangen sind, kannst du die schwächsten entfernen, sodass nur der stärkste Sämling pro Topf übrig bleibt.
Das Auspflanzen: Ab ins Beet!
Sobald die Sämlinge kräftig genug sind, können sie ins Beet umziehen. Hier sind die Schritte für das Auspflanzen:
1. Zeitpunkt: Pflanze die Sämlinge aus, sobald sie etwa 10-15 cm groß sind und das Wetter mild ist. In der Regel ist das im Frühjahr (April/Mai) oder im Spätsommer (August/September) der Fall.
2. Beet vorbereiten: Lockere die Erde im Beet gründlich auf und entferne Unkraut. Arbeite Kompost oder organischen Dünger ein, um die Bodenqualität zu verbessern. Königskohl bevorzugt einen nährstoffreichen und gut durchlässigen Boden.
3. Pflanzabstand: Halte einen Pflanzabstand von etwa 50-60 cm zwischen den Pflanzen ein. So haben sie genügend Platz zum Wachsen.
4. Pflanzlöcher graben: Grabe Pflanzlöcher, die etwas größer sind als die Wurzelballen der Sämlinge.
5. Sämlinge einsetzen: Setze die Sämlinge vorsichtig in die Pflanzlöcher ein. Achte darauf, dass die Wurzelballen nicht beschädigt werden.
6. Löcher füllen: Fülle die Pflanzlöcher mit Erde und drücke sie leicht an.
7. Angießen: Gieße die Pflanzen gründlich an.
Die Pflege: So bleibt dein Königskohl gesund und kräftig
Die richtige Pflege ist entscheidend für eine reiche Ernte. Hier sind einige Tipps:
1. Bewässerung: Königskohl benötigt regelmäßig Wasser, besonders während trockener Perioden. Gieße die Pflanzen am besten morgens, damit die Blätter über den Tag abtrocknen können. Vermeide Staunässe.
2. Düngung: Dünge die Pflanzen regelmäßig mit Kompost oder organischem Dünger. Eine zusätzliche Düngung mit Brennnesseljauche ist ebenfalls empfehlenswert.
3. Unkrautbekämpfung: Entferne regelmäßig Unkraut, um die Nährstoffkonkurrenz zu minimieren.
4. Schädlingsbekämpfung: Königskohl kann von verschiedenen Schädlingen befallen werden, wie z.B. Kohlweißlingen, Erdflöhen oder Kohlfliegen. Kontrolliere die Pflanzen regelmäßig und bekämpfe Schädlinge bei Bedarf mit biologischen Mitteln. Ein Schutznetz kann helfen, Kohlweißlinge fernzuhalten.
5. Stützung: Bei windigen Standorten kann es sinnvoll sein, die Pflanzen mit Pflanzstäben zu stützen, um ein Umknicken zu verhindern.
Die Ernte: Endlich ernten!
Die Erntezeit für Königskohl ist in der Regel vom Herbst bis in den Winter. Hier sind die Schritte für die Ernte:
1. Zeitpunkt: Ernte die Blätter, sobald sie groß genug sind. Du kannst die unteren Blätter nach und nach ernten, während die Pflanze weiterwächst.
2. Erntetechnik: Schneide die Blätter mit einem scharfen Messer oder einer Schere ab. Achte darauf, die Herzblätter in der Mitte der Pflanze nicht zu beschädigen, damit die Pflanze weiterwachsen kann.
3. Lagerung: Königskohl ist im Kühlschrank einige Tage haltbar. Du kannst die Blätter auch blanchieren und einfrieren, um sie länger haltbar zu machen.
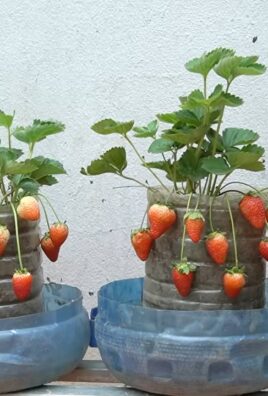
H3 Königskohl im Topf anbauen: Geht das?
Ja, absolut! Wenn du keinen Garten hast, kannst du Königskohl auch im Topf anbauen. Hier sind die Besonderheiten:
* Topfgröße: Wähle einen Topf mit einem Durchmesser von mindestens 30 cm.
* Erde: Verwende eine hochwertige Gemüseerde.
* Düngung: Dünge die Pflanzen regelmäßig, da die Nährstoffe im Topf schneller verbraucht sind.
* Standort: Stelle den Topf an einen sonnigen Standort.
* Bewässerung: Achte auf eine ausreichende Bewässerung, besonders an heißen Tagen.
H3 Königskohl in der Küche: Vielseitig und lecker
Königskohl ist in der Küche vielseitig einsetzbar. Hier sind einige Ideen:
* Gekocht: Königskohl kann wie Spinat oder Grünkohl gekocht werden.
* Gebraten: Die Blätter können in der Pfanne mit Knoblauch und Olivenöl gebraten werden.
* Roh: Junge, zarte Blätter können auch roh in Salaten verwendet werden.
* Smoothies: Königskohl ist eine gesunde Zutat für grüne Smoothies.
* Suppen und Eintöpfe: Königskohl verleiht Suppen und Eintöpfen eine besondere Note.
H3 Häufige Probleme und Lösungen
Auch beim Anbau von Königskohl können Probleme auftreten. Hier sind einige häufige Probleme und ihre Lösungen:
* Gelbe Blätter: Gelbe Blätter können auf Nährstoffmangel oder Staunässe hindeuten. Dünge die Pflanzen und achte auf eine gute Drainage.
* Löcher in den Blättern: Löcher in den Blättern werden oft durch Schädlinge verursacht. Kontrolliere die Pflanzen regelmäßig und bekämpfe Schädlinge bei Bedarf.
* Kümmerwuchs: Kümmerwuchs kann auf einen schlechten Standort oder Nährstoffmangel hindeuten. Wähle einen sonnigen Standort und dünge die Pflanzen regelmäßig.
* Schimmelbildung: Schimmelbildung kann durch zu hohe Luftfeuchtigkeit oder Staunässe verursacht werden. Sorge für eine gute Belüftung und vermeide Staunässe.
H4 Zusätzliche Tipps für den erfolgreichen Anbau
* Fruchtfolge beachten: Baue Königskohl nicht jedes
Conclusion
So, there you have it! Growing your own Queen Cabbage at home isn’t just a gardening project; it’s an investment in fresh, flavorful, and incredibly rewarding produce. We’ve walked through the steps, from selecting the right seeds to nurturing your cabbage to its full, majestic potential. But why is this DIY trick a must-try?
Firstly, the taste difference is undeniable. Store-bought cabbage, while convenient, often lacks the vibrant flavor and crisp texture of a homegrown Queen Cabbage. Imagine the sweet, slightly peppery notes bursting in your mouth, a taste that’s simply unmatched by commercially grown varieties. You’re also in complete control of what goes into your cabbage. No harsh pesticides or questionable fertilizers – just pure, natural goodness.
Secondly, growing your own Queen Cabbage is surprisingly accessible, even for beginner gardeners. With a little patience and attention to detail, you can cultivate these impressive vegetables in your backyard, on your patio, or even in containers on your balcony. It’s a fantastic way to connect with nature, learn about the growing process, and enjoy the satisfaction of harvesting your own food.
Thirdly, think of the cost savings! While the initial investment in seeds and supplies might seem like a hurdle, the yield from just a few Queen Cabbage plants can significantly reduce your grocery bill. Plus, you’ll have an abundance of fresh cabbage to share with friends and family, spreading the joy of homegrown goodness.
Now, let’s talk about variations and suggestions. Feel free to experiment with different planting times to extend your harvest season. Consider companion planting with herbs like rosemary or thyme to deter pests and enhance the flavor of your cabbage. You can also try different varieties of Queen Cabbage, such as those with red or purple leaves, for a visually stunning addition to your garden.
Don’t be afraid to get creative! Perhaps you want to try fermenting your Queen Cabbage into sauerkraut or kimchi. Or maybe you’ll discover a new and exciting way to incorporate it into your favorite recipes. The possibilities are endless!
We wholeheartedly encourage you to embark on this DIY adventure and experience the joy of growing your own Queen Cabbage. It’s a rewarding, sustainable, and delicious way to enhance your culinary experiences and connect with the natural world.
And most importantly, we want to hear about your experiences! Share your tips, tricks, and triumphs in the comments below. Let us know what worked for you, what challenges you faced, and what delicious dishes you created with your homegrown Queen Cabbage. Your feedback will not only inspire other gardeners but also help us refine our guide and make it even better. So, grab your seeds, get your hands dirty, and let the Queen Cabbage growing journey begin!
Frequently Asked Questions (FAQ)
1. What exactly is Queen Cabbage, and why should I grow it instead of regular cabbage?
Queen Cabbage isn’t a specific variety, but rather a term often used to describe large, robust cabbage heads that are particularly impressive in size and quality. Growing these “Queen” cabbages, regardless of the specific variety you choose (like Brunswick or Danish Ballhead, which are known for their size), offers several advantages over simply buying standard cabbage. Homegrown cabbage, especially when allowed to mature fully, tends to have a sweeter, more nuanced flavor than store-bought options. You also have complete control over the growing process, ensuring that your cabbage is free from unwanted pesticides and chemicals. Plus, the sheer satisfaction of harvesting a massive, beautiful cabbage head that you nurtured from a tiny seed is an experience in itself!
2. What are the ideal growing conditions for Queen Cabbage?
Queen Cabbage thrives in cool weather, making spring and fall the best times to plant. They prefer full sun, meaning at least 6 hours of direct sunlight per day. The soil should be well-drained and rich in organic matter. A slightly acidic soil pH (around 6.0 to 6.8) is ideal. Consistent watering is crucial, especially during dry periods. Aim to keep the soil consistently moist but not waterlogged. Adding a layer of mulch around the plants can help retain moisture and suppress weeds.
3. How do I start Queen Cabbage from seeds?
You can start Queen Cabbage seeds indoors 6-8 weeks before the last expected frost or direct sow them outdoors after the danger of frost has passed. For indoor starting, sow seeds ¼ inch deep in seed-starting trays filled with a well-draining potting mix. Keep the soil moist and provide adequate light (either natural or artificial). Once the seedlings have developed a few sets of true leaves, you can transplant them outdoors, spacing them 18-24 inches apart. If direct sowing, prepare the soil by amending it with compost or other organic matter. Sow seeds ½ inch deep and thin the seedlings to the desired spacing once they emerge.
4. What are some common pests and diseases that affect Queen Cabbage, and how can I prevent or treat them?
Cabbage loopers, cabbage worms, aphids, and flea beetles are common pests that can damage Queen Cabbage. To prevent infestations, consider using row covers to protect your plants. Regularly inspect your plants for signs of pests and handpick them off if possible. You can also use organic insecticides like Bacillus thuringiensis (Bt) for cabbage worms or insecticidal soap for aphids. Common diseases include clubroot, black rot, and downy mildew. To prevent these diseases, practice crop rotation, ensure good drainage, and avoid overhead watering. If you notice signs of disease, remove the affected leaves or plants immediately.
5. How long does it take to grow Queen Cabbage from seed to harvest?
The time it takes to grow Queen Cabbage from seed to harvest varies depending on the variety and growing conditions, but generally, it takes between 70 and 100 days. You’ll know your cabbage is ready to harvest when the head is firm and solid to the touch. The size will also be a good indicator; look for heads that are large and well-formed, resembling the “Queen” you’re aiming for.
6. Can I grow Queen Cabbage in containers?
Yes, you can grow Queen Cabbage in containers, but you’ll need to choose a large container (at least 15-20 gallons) to accommodate the plant’s size. Use a well-draining potting mix and ensure the container has drainage holes. Water regularly and fertilize every few weeks with a balanced fertilizer. Container-grown cabbage may require more frequent watering and fertilization than those grown in the ground.
7. What are some good companion plants for Queen Cabbage?
Companion planting can help deter pests, attract beneficial insects, and improve the overall health of your Queen Cabbage. Good companion plants include:
* **Aromatic herbs:** Rosemary, thyme, sage, and dill can help repel cabbage moths and other pests.
* **Marigolds:** These flowers attract beneficial insects and deter nematodes.
* **Nasturtiums:** These flowers attract aphids away from your cabbage.
* **Legumes:** Beans and peas fix nitrogen in the soil, which can benefit cabbage growth.
* **Onions and garlic:** These alliums can help deter pests.
8. How do I store harvested Queen Cabbage?
To store harvested Queen Cabbage, remove any loose outer leaves and wrap the head in plastic wrap. Store it in the refrigerator crisper drawer. Properly stored cabbage can last for several weeks.
9. What are some delicious ways to use my homegrown Queen Cabbage?
The possibilities are endless! You can use your Queen Cabbage in salads, slaws, soups, stews, stir-fries, and more. It’s also delicious roasted, grilled, or sautéed. Consider using it to make sauerkraut, kimchi, or stuffed cabbage rolls. Don’t be afraid to experiment and discover your own favorite ways to enjoy this versatile vegetable.
10. What if my Queen Cabbage doesn’t grow as big as I expected?
Several factors can contribute to smaller-than-expected cabbage heads, including insufficient sunlight, poor soil, inadequate watering, and pest or disease problems. Review your growing conditions and make adjustments as needed. Ensure your cabbage is getting enough sunlight, water, and nutrients. Protect it from pests and diseases. Even if your cabbage isn’t as large as you hoped, it will still be delicious and rewarding to harvest! Remember, every gardening experience is a learning opportunity.


Leave a Comment