
Growing Cabbage Without a Garden? Absolutely! I know what you’re thinking: “Cabbage? That’s a farm thing, not a balcony thing!” But trust me, you don’t need acres of land to enjoy the satisfaction of harvesting your own crisp, homegrown cabbage. This DIY guide is your passport to fresh, flavorful cabbage, even if your “garden” is just a sunny windowsill or a small patio.
For centuries, cabbage has been a staple in diets around the world, from the hearty stews of Eastern Europe to the vibrant slaws of America. Its versatility and nutritional value have made it a beloved vegetable across cultures. But traditionally, growing cabbage meant having access to a dedicated garden space. Not anymore!
In today’s world, where space is often a premium, and access to fresh, healthy produce can be limited, learning how to grow your own food, even in small spaces, is more important than ever. This DIY article will empower you to bypass the limitations of traditional gardening and unlock the secrets to growing cabbage without a garden. Imagine the joy of adding freshly harvested cabbage to your meals, knowing you nurtured it from seed to table, all within the confines of your own home. So, let’s ditch the garden myths and get ready to cultivate some cabbage magic!
Kohl Anbauen Ohne Garten: Dein DIY-Guide für den Balkon- oder Terrassenanbau
Hey Gartenfreunde! Wer sagt, dass man einen Garten braucht, um frischen Kohl zu ernten? Ich zeige euch, wie ihr auch ohne Beet prächtige Kohlköpfe auf eurem Balkon oder eurer Terrasse ziehen könnt. Es ist einfacher, als ihr denkt, und das Ergebnis ist super lecker!
Was du brauchst: Die Materialliste
Bevor wir loslegen, hier eine Liste mit allem, was du für dein Kohl-Anbau-Projekt benötigst:
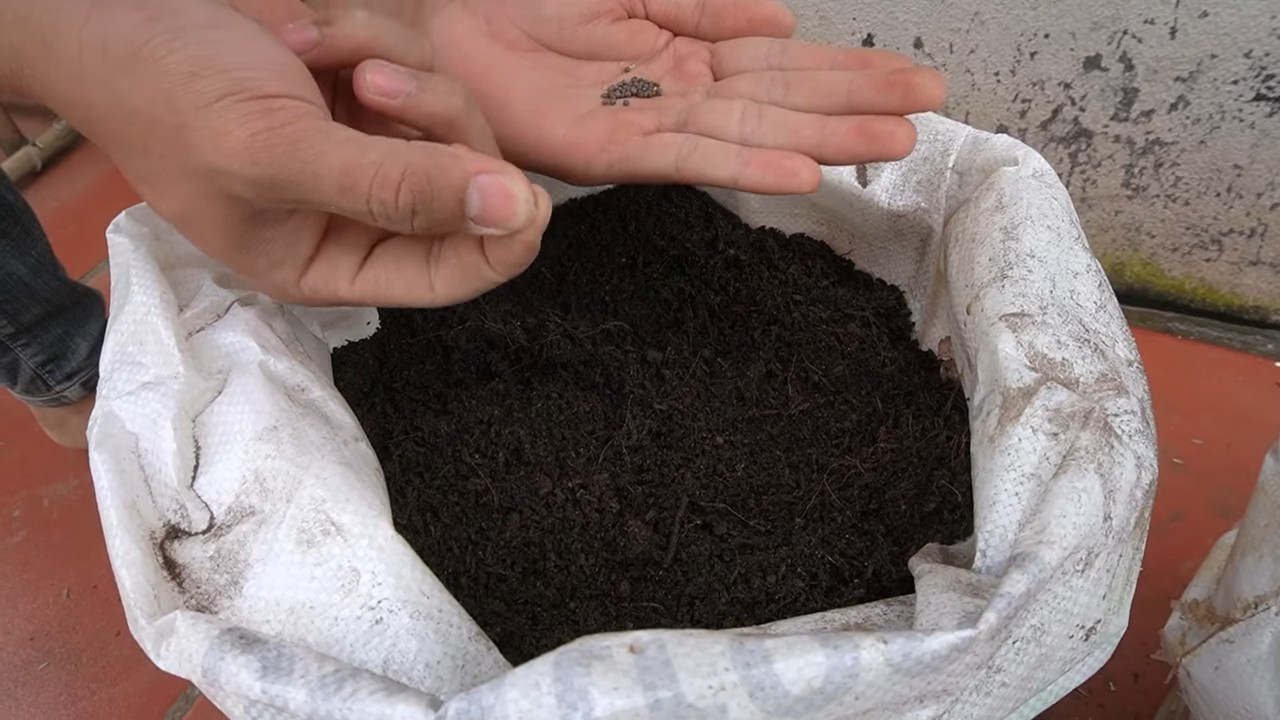
* Kohlsaat oder Jungpflanzen: Entscheide dich für eine Kohlsorte, die dir schmeckt. Rotkohl, Weißkohl, Wirsing oder Spitzkohl – die Wahl liegt bei dir! Jungpflanzen sind einfacher, aber mit Saatgut kannst du den ganzen Prozess von Anfang an miterleben.
* Große Pflanzgefäße: Kohl braucht Platz! Wähle Töpfe oder Kübel mit mindestens 30 Litern Fassungsvermögen pro Pflanze. Je größer, desto besser.
* Hochwertige Pflanzerde: Verwende am besten spezielle Gemüseerde oder mische Blumenerde mit Kompost. Kohl ist ein Starkzehrer und braucht nährstoffreiche Erde.
* Drainagematerial: Blähton, Kies oder Tonscherben für den Topfboden. Das verhindert Staunässe.
* Dünger: Organischer Gemüsedünger oder Komposttee. Kohl braucht regelmäßige Düngergaben.
* Gießkanne oder Gartenschlauch: Zum regelmäßigen Gießen.
* Schneckenkorn oder andere Schneckenabwehr: Schnecken lieben Kohl!
* Eventuell ein Rankgitter: Für Sorten, die dazu neigen, umzufallen.
* Geduld und Liebe: Das Wichtigste!
Die Vorbereitung: Der Grundstein für deinen Kohl-Erfolg
Bevor wir mit dem Pflanzen beginnen, müssen wir ein paar Vorbereitungen treffen. Das ist wichtig, damit sich deine Kohlpflanzen wohlfühlen und gut wachsen können.
1. Die richtigen Pflanzgefäße auswählen: Wie gesagt, Kohl braucht Platz. Achte darauf, dass die Töpfe groß genug sind und über Abzugslöcher verfügen, damit überschüssiges Wasser ablaufen kann.
2. Drainage legen: Bedecke den Boden der Töpfe mit einer Schicht Blähton, Kies oder Tonscherben. Das sorgt für eine gute Drainage und verhindert Staunässe, die zu Wurzelfäule führen kann.
3. Erde vorbereiten: Fülle die Töpfe mit hochwertiger Pflanzerde. Du kannst auch Blumenerde mit Kompost mischen, um die Erde nährstoffreicher zu machen. Kohl ist ein Starkzehrer und braucht viele Nährstoffe.
4. Standort wählen: Kohl braucht einen sonnigen Standort. Stelle die Töpfe an einen Ort, an dem sie mindestens sechs Stunden Sonne pro Tag bekommen.
Die Aussaat oder das Pflanzen: Der Start in die Kohl-Saison
Jetzt geht es ans Eingemachte! Du hast zwei Möglichkeiten: Entweder du ziehst deine Kohlpflanzen selbst aus Samen vor oder du kaufst Jungpflanzen im Gartencenter.
Aussaat (Option 1)
1. Aussaatgefäße vorbereiten: Fülle kleine Anzuchttöpfe oder eine Anzuchtschale mit Anzuchterde.
2. Samen aussäen: Lege die Kohlsaat etwa 1 cm tief in die Erde und bedecke sie leicht mit Erde.
3. Gießen: Befeuchte die Erde vorsichtig mit einer Sprühflasche.
4. Warm stellen: Stelle die Anzuchttöpfe an einen warmen, hellen Ort. Eine Temperatur von 18-20 Grad Celsius ist ideal.
5. Feucht halten: Halte die Erde feucht, aber nicht nass.
6. Pikieren: Sobald die Keimlinge ihre ersten richtigen Blätter haben (nach etwa 2-3 Wochen), kannst du sie in größere Töpfe pikieren.
Pflanzen von Jungpflanzen (Option 2)
1. Pflanzlöcher vorbereiten: Grabe in den vorbereiteten Töpfen Löcher, die groß genug sind, um die Wurzelballen der Jungpflanzen aufzunehmen.
2. Pflanzen einsetzen: Setze die Jungpflanzen vorsichtig in die Löcher und fülle die Löcher mit Erde auf.
3. Andrücken: Drücke die Erde leicht an.
4. Gießen: Gieße die Pflanzen gründlich an.
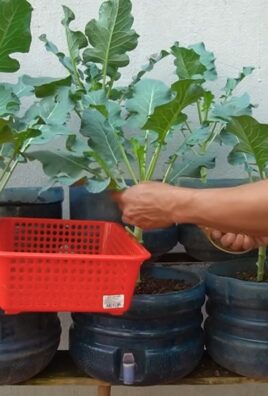
Die Pflege: Damit dein Kohl prächtig gedeiht
Kohl ist zwar relativ pflegeleicht, aber ein paar Dinge solltest du beachten, damit er gut wächst und du eine reiche Ernte einfahren kannst.
1. Gießen: Kohl braucht regelmäßig Wasser, besonders während der Wachstumsphase. Gieße am besten morgens oder abends, wenn die Sonne nicht scheint. Vermeide Staunässe.
2. Düngen: Kohl ist ein Starkzehrer und braucht regelmäßige Düngergaben. Dünge alle zwei Wochen mit organischem Gemüsedünger oder Komposttee.
3. Schneckenabwehr: Schnecken lieben Kohl! Schütze deine Pflanzen mit Schneckenkorn, Schneckenzäunen oder anderen Schneckenabwehrmaßnahmen. Du kannst auch Kaffeesatz um die Pflanzen streuen, das mögen Schnecken gar nicht.
4. Krankheiten und Schädlinge: Achte auf Anzeichen von Krankheiten oder Schädlingen. Bei Bedarf kannst du biologische Pflanzenschutzmittel einsetzen. Kohlweißlinge können ein Problem sein, hier hilft ein Netz über den Pflanzen.
5. Stützen: Einige Kohlsorten, wie z.B. Kopfkohl, können dazu neigen, umzufallen, wenn die Köpfe zu schwer werden. In diesem Fall kannst du die Pflanzen mit einem Rankgitter oder Stäben stützen.
6. Verwelkte Blätter entfernen: Entferne regelmäßig verwelkte oder gelbe Blätter, um Krankheiten vorzubeugen.
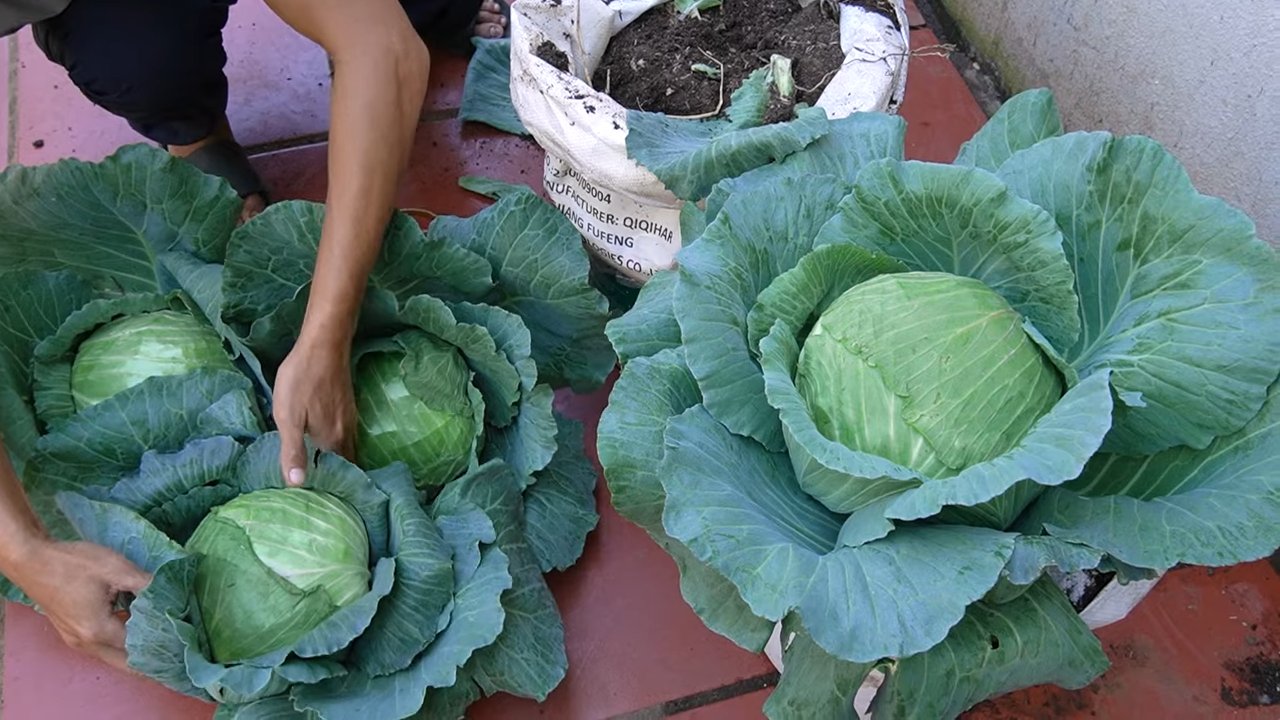
Die Ernte: Der Lohn deiner Mühe
Je nach Kohlsorte und Aussaatzeitpunkt kannst du deinen Kohl nach etwa 3-6 Monaten ernten.
1. Reife erkennen: Der Kohlkopf sollte fest und geschlossen sein.
2. Ernten: Schneide den Kohlkopf mit einem scharfen Messer oder einer Gartenschere ab. Lasse dabei ein paar Blätter am Strunk stehen, damit der Kohlkopf nicht austrocknet.
3. Lagerung: Kohl kann im Kühlschrank einige Wochen gelagert werden. Wickle ihn am besten in ein feuchtes Tuch ein.
Zusätzliche Tipps für den Kohl-Anbau im Topf
* Sortenwahl: Wähle für den Anbau im Topf eher kleinere Kohlsorten, wie z.B. Spitzkohl oder Mini-Kohl.
* Fruchtfolge: Baue Kohl nicht jedes Jahr im selben Topf an, um Krankheiten vorzubeugen.
* Mulchen: Bedecke die Erde um die Kohlpflanzen mit Mulch, z.B. Stroh oder Rasenschnitt. Das hält die Erde feucht und unterdrückt Unkraut.
* Beipflanzung: Pflanze neben Kohl Pflanzen, die ihn vor Schädlingen schützen, z.B. Ringelblumen oder Tagetes.
* Regelmäßige Kontrolle: Kontrolliere deine Kohlpflanzen regelmäßig auf Schädlinge und Krankheiten. Je früher du Probleme erkennst, desto besser kannst du sie bekämpfen.
Häufige Probleme und Lösungen
* Schneckenbefall: Schneckenkorn, Schneckenzäune, Kaffeesatz.
* Kohlweißlinge: Netz über die Pflanzen spannen.
* Wurzelfäule: Staunässe vermeiden, gute Drainage gewährleisten.
* Nährstoffmangel: Regelmäßig düngen.
* Kopf wird nicht fest: Zu wenig Sonne, zu wenig Wasser, zu wenig Dünger.
Fazit: Kohl Anbauen ist kinderleicht!
Mit ein wenig Geduld und Pflege kannst du auch ohne Garten frischen Kohl auf deinem Balkon oder deiner Terrasse ernten. Es ist ein tolles Gefühl, eigenes Gemüse anzubauen und zu wissen, wo es herkommt. Also, worauf wartest du noch? Leg los und werde zum Kohl-Gärtner! Ich wünsche dir viel Erfolg und eine reiche Ernte
Conclusion
So, there you have it! Growing cabbage without a garden isn’t just a whimsical idea; it’s a practical, space-saving, and surprisingly rewarding endeavor. We’ve explored the ins and outs of container gardening for cabbage, highlighting the ease and accessibility this method offers, even for those with limited outdoor space. Forget the sprawling garden plot – with a few simple supplies and a little know-how, you can cultivate your own fresh, crisp cabbage right on your balcony, patio, or even a sunny windowsill.
The beauty of this DIY trick lies in its adaptability. You’re not confined to a specific variety of cabbage. Experiment with different types! Try growing smaller, faster-maturing varieties like ‘Golden Acre’ or ‘Early Jersey Wakefield’ for quicker results. Or, if you’re feeling adventurous, explore colorful options like red cabbage or savoy cabbage to add a vibrant touch to your container garden and your culinary creations. Consider companion planting within your container as well. Marigolds can deter pests, while dill can attract beneficial insects. These additions not only enhance the health of your cabbage but also add visual interest to your container garden.
Beyond the convenience and versatility, growing your own cabbage offers a connection to your food that you simply can’t get from store-bought produce. You’ll witness the entire life cycle of the plant, from tiny seedling to mature head, and you’ll have the satisfaction of knowing exactly where your food comes from and how it was grown. Plus, freshly harvested cabbage tastes infinitely better than anything you can buy at the supermarket. The flavor is crisper, sweeter, and more vibrant.
Don’t be intimidated by the prospect of growing your own vegetables. This method is incredibly beginner-friendly, and the rewards are well worth the effort. The key is to provide your cabbage plants with the right conditions: plenty of sunlight, well-draining soil, and consistent watering. With a little attention and care, you’ll be harvesting your own delicious cabbage in no time.
We wholeheartedly encourage you to give this DIY trick a try. Embrace the opportunity to grow your own food, connect with nature, and enjoy the unparalleled flavor of homegrown cabbage. Once you’ve experienced the satisfaction of harvesting your own cabbage from a container, you’ll be hooked!
And most importantly, we want to hear about your experience! Share your successes, your challenges, and your tips with us in the comments below. Let’s create a community of container cabbage growers and learn from each other. What varieties did you try? What challenges did you face, and how did you overcome them? What are your favorite ways to use your homegrown cabbage in the kitchen? Your insights and experiences will be invaluable to other readers who are just starting out. So, get planting, get growing, and get sharing! Let’s prove that growing cabbage without a garden is not only possible but also a fun, rewarding, and delicious experience for everyone.
Frequently Asked Questions (FAQ)
What is the best size container for growing cabbage?
A good rule of thumb is to use a container that is at least 12 inches in diameter and 12 inches deep. However, larger is generally better, especially if you plan to grow multiple cabbage plants in the same container. A 5-gallon bucket or a large planter pot works well. The larger the container, the more room the roots have to grow, and the less frequently you’ll need to water. Ensure the container has drainage holes to prevent waterlogging, which can lead to root rot.
What type of soil should I use for growing cabbage in a container?
Cabbage thrives in well-draining, nutrient-rich soil. A good potting mix specifically formulated for vegetables is ideal. Avoid using garden soil, as it can be too heavy and may not drain properly in a container. You can also amend your potting mix with compost or other organic matter to improve its fertility and drainage. A slightly acidic to neutral pH (around 6.0 to 7.0) is optimal for cabbage growth.
How much sunlight does cabbage need?
Cabbage needs at least 6 hours of direct sunlight per day to thrive. Choose a location for your container garden that receives plenty of sunlight throughout the day. If you live in a particularly hot climate, some afternoon shade may be beneficial to prevent the plants from overheating. If you don’t have a sunny spot outdoors, you can supplement with grow lights.
How often should I water my cabbage plants?
Water your cabbage plants regularly, keeping the soil consistently moist but not waterlogged. Check the soil moisture level daily, especially during hot or dry weather. Water deeply whenever the top inch of soil feels dry to the touch. Avoid overhead watering, as this can promote fungal diseases. Instead, water at the base of the plant.
What kind of fertilizer should I use for cabbage?
Cabbage is a heavy feeder, so it’s important to fertilize regularly. Use a balanced fertilizer specifically formulated for vegetables, following the instructions on the label. You can also use organic fertilizers like compost tea or fish emulsion. Fertilize every 2-3 weeks during the growing season.
How do I protect my cabbage plants from pests?
Cabbage can be susceptible to pests like cabbage worms, aphids, and flea beetles. Inspect your plants regularly for signs of infestation. You can handpick pests off the plants or use organic pest control methods like insecticidal soap or neem oil. Covering your plants with row covers can also help to prevent pests from reaching them. Companion planting with marigolds or other pest-repelling plants can also be effective.
When is cabbage ready to harvest?
Cabbage is typically ready to harvest when the head is firm and feels solid to the touch. The exact time to harvest will depend on the variety of cabbage you’re growing. Check the seed packet or plant tag for specific information. To harvest, simply cut the head off the plant at the base with a sharp knife.
Can I grow cabbage indoors?
While it’s possible to grow cabbage indoors, it can be challenging to provide the plants with enough light and space. Cabbage needs at least 6 hours of direct sunlight per day, which can be difficult to achieve indoors without supplemental lighting. If you do decide to grow cabbage indoors, choose a sunny windowsill or use grow lights to provide adequate illumination. Also, make sure to use a large enough container to accommodate the plant’s root system.
What are some good companion plants for cabbage?
Several plants can be beneficial to grow alongside cabbage. Marigolds deter pests, dill attracts beneficial insects, and thyme repels cabbage moths. Other good companion plants include rosemary, sage, and chamomile. Avoid planting cabbage near members of the nightshade family, such as tomatoes, peppers, and eggplants, as they can compete for nutrients and attract similar pests.
Can I grow cabbage from seed in a container?
Yes, you can start cabbage seeds directly in a container. Sow the seeds about 1/4 inch deep and keep the soil consistently moist. Once the seedlings emerge, thin them out to one plant per container. You can also start cabbage seeds indoors and transplant them to a container once they are large enough.
What if my cabbage head doesn’t form properly?
Several factors can contribute to a cabbage head not forming properly, including insufficient sunlight, lack of nutrients, and improper watering. Make sure your plants are getting enough sunlight, fertilize regularly, and water consistently. Also, check for pests and diseases that could be affecting the plant’s growth. If the problem persists, try a different variety of cabbage or adjust your growing conditions.


Leave a Comment