
Easy Strawberry Growing Guide: Imagine stepping into your backyard and plucking a sun-ripened, juicy strawberry, bursting with flavor, straight from your own garden. Sounds idyllic, right? Well, it’s more achievable than you think! For centuries, strawberries have been cherished, not just for their delicious taste, but also for their vibrant color and the joy they bring. From ancient Roman gardens to medieval monastery plots, strawberries have always held a special place in our hearts and on our tables.
But let’s be honest, the thought of growing your own strawberries can sometimes feel a little daunting. Where do you even begin? That’s where this easy strawberry growing guide comes in! I’m here to share some simple, effective DIY tricks and hacks that will transform even the most novice gardener into a strawberry-growing pro.
In today’s world, where we’re increasingly conscious of where our food comes from, growing your own strawberries offers a fantastic way to enjoy fresh, healthy produce while connecting with nature. Plus, store-bought strawberries often lack the intense flavor of homegrown ones. So, ditch the supermarket berries and get ready to embark on a rewarding gardening adventure. I’ll guide you through every step, from choosing the right variety to protecting your precious plants from pests. Let’s get growing!

Erdbeeren einfach selbst anbauen: Dein DIY-Leitfaden für eine reiche Ernte
Hallo liebe Gartenfreunde! Ich freue mich riesig, euch heute zu zeigen, wie ihr ganz einfach eure eigenen Erdbeeren anbauen könnt. Es gibt nichts Besseres als den süßen Geschmack von frisch gepflückten Erdbeeren aus dem eigenen Garten. Und glaubt mir, es ist einfacher als ihr denkt! Egal ob ihr einen großen Garten, einen kleinen Balkon oder nur ein sonniges Fensterbrett habt, es gibt eine Methode, die für euch passt. Lasst uns loslegen!
Die Grundlagen: Was Erdbeeren zum Wachsen brauchen
Bevor wir mit dem Pflanzen beginnen, ist es wichtig zu verstehen, was Erdbeeren wirklich brauchen, um zu gedeihen. Hier sind die wichtigsten Faktoren:
* Sonne: Erdbeeren lieben die Sonne! Sie brauchen mindestens 6-8 Stunden direktes Sonnenlicht pro Tag. Je mehr Sonne, desto süßer werden die Früchte.
* Boden: Ein gut durchlässiger, leicht saurer Boden (pH-Wert zwischen 5,5 und 6,5) ist ideal. Schwere, lehmige Böden können verbessert werden, indem man Kompost oder Sand untermischt.
* Wasser: Erdbeeren brauchen regelmäßige Bewässerung, besonders während der Fruchtbildung. Achtet darauf, dass der Boden feucht, aber nicht durchnässt ist.
* Nährstoffe: Erdbeeren sind hungrig! Eine regelmäßige Düngung mit einem ausgewogenen Dünger fördert das Wachstum und die Fruchtbildung.
* Platz: Erdbeeren brauchen Platz zum Wachsen. Achtet darauf, dass die Pflanzen genügend Abstand zueinander haben, um eine gute Luftzirkulation zu gewährleisten und Krankheiten vorzubeugen.
Schritt-für-Schritt-Anleitung: Erdbeeren pflanzen
Jetzt, wo wir die Grundlagen kennen, können wir mit dem Pflanzen beginnen. Ich zeige euch, wie ihr Erdbeeren im Garten, im Topf und sogar in einem Erdbeerturm anbauen könnt.
Erdbeeren im Garten pflanzen
1. Den richtigen Standort wählen: Sucht euch einen sonnigen Platz in eurem Garten aus, der gut vor Wind geschützt ist.
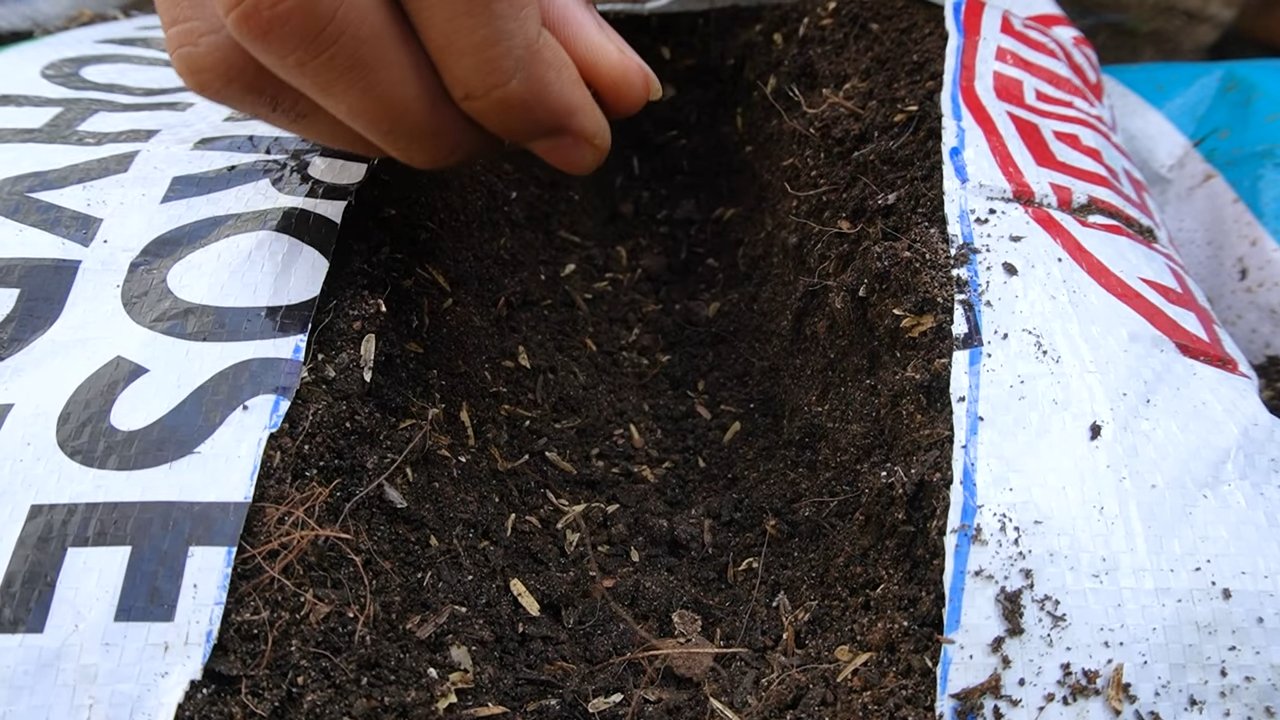
2. Den Boden vorbereiten: Lockert den Boden gründlich auf und entfernt Unkraut und Steine. Mischt Kompost oder gut verrotteten Mist unter, um den Boden zu verbessern.
3. Die Pflanzen setzen: Grabt kleine Löcher, die groß genug sind, um die Wurzelballen der Erdbeerpflanzen aufzunehmen. Setzt die Pflanzen so tief, dass die Krone (der Punkt, an dem die Blätter aus der Wurzel kommen) knapp über der Bodenoberfläche liegt.
4. Abstand halten: Achtet darauf, dass die Pflanzen genügend Abstand zueinander haben. Ein Abstand von 25-30 cm zwischen den Pflanzen und 40-50 cm zwischen den Reihen ist ideal.
5. Angießen: Gießt die Pflanzen nach dem Setzen gründlich an.
6. Mulchen: Mulcht den Boden um die Pflanzen herum mit Stroh, Holzhackschnitzeln oder speziellem Mulchvlies. Das hilft, die Feuchtigkeit im Boden zu halten, Unkraut zu unterdrücken und die Früchte sauber zu halten.
Erdbeeren im Topf pflanzen
1. Den richtigen Topf wählen: Wählt einen Topf mit einem Durchmesser von mindestens 20 cm und einem guten Wasserabzug.
2. Die richtige Erde verwenden: Verwendet eine hochwertige Blumenerde, die gut durchlässig ist.
3. Die Pflanzen setzen: Setzt die Erdbeerpflanzen in den Topf, so dass die Krone knapp über der Erdoberfläche liegt.
4. Angießen: Gießt die Pflanzen nach dem Setzen gründlich an.
5. Düngen: Düngt die Pflanzen regelmäßig mit einem Flüssigdünger für Erdbeeren.
6. Standort: Stellt den Topf an einen sonnigen Standort.
Erdbeeren im Erdbeerturm pflanzen
Ein Erdbeerturm ist eine tolle Möglichkeit, Erdbeeren auf kleinem Raum anzubauen. Ihr könnt einen Erdbeerturm kaufen oder ihn selbst bauen.
1. Den Erdbeerturm vorbereiten: Füllt den Erdbeerturm mit Erde.
2. Die Pflanzen setzen: Setzt die Erdbeerpflanzen in die dafür vorgesehenen Löcher im Erdbeerturm.
3. Angießen: Gießt die Pflanzen nach dem Setzen gründlich an.
4. Düngen: Düngt die Pflanzen regelmäßig mit einem Flüssigdünger für Erdbeeren.
5. Standort: Stellt den Erdbeerturm an einen sonnigen Standort.
Pflege deiner Erdbeerpflanzen: So sorgst du für eine reiche Ernte
Die richtige Pflege ist entscheidend für eine reiche Erdbeerernte. Hier sind einige Tipps, die ihr beachten solltet:
* Bewässerung: Gießt die Erdbeerpflanzen regelmäßig, besonders während der Fruchtbildung. Achtet darauf, dass der Boden feucht, aber nicht durchnässt ist. Vermeidet es, die Blätter zu gießen, da dies Pilzkrankheiten fördern kann.
* Düngung: Düngt die Erdbeerpflanzen regelmäßig mit einem ausgewogenen Dünger für Erdbeeren. Beginnt mit der Düngung im Frühjahr, wenn die Pflanzen zu wachsen beginnen, und setzt sie bis zum Ende der Erntezeit fort.
* Unkrautbekämpfung: Entfernt regelmäßig Unkraut, das um die Erdbeerpflanzen herum wächst. Unkraut konkurriert mit den Erdbeeren um Nährstoffe und Wasser.
* Ausläufer entfernen: Erdbeerpflanzen bilden Ausläufer, die neue Pflanzen bilden. Wenn ihr keine neuen Pflanzen ziehen wollt, solltet ihr die Ausläufer regelmäßig entfernen, da sie der Mutterpflanze Energie rauben.
* Schutz vor Schädlingen und Krankheiten: Achtet auf Schädlinge wie Schnecken, Blattläuse und Erdbeermilben. Bekämpft sie bei Bedarf mit geeigneten Mitteln. Achtet auch auf Anzeichen von Krankheiten wie Grauschimmel oder Mehltau. Entfernt befallene Blätter und Früchte sofort.
* Vogelschutz: Vögel lieben Erdbeeren! Schützt eure Erdbeeren mit einem Netz vor Vogelfraß.
Die Ernte: Der Lohn deiner Mühe
Endlich ist es soweit: Die Erdbeeren sind reif und können geerntet werden! Erdbeeren sind reif, wenn sie eine tiefrote Farbe haben und leicht vom Stiel abzulösen sind. Pflückt die Erdbeeren vorsichtig, um sie nicht zu beschädigen. Am besten erntet ihr die Erdbeeren am Morgen, wenn sie noch kühl sind.
Tipp: Erdbeeren schmecken am besten, wenn sie frisch geerntet werden. Ihr könnt sie aber auch einfrieren, zu Marmelade verarbeiten oder in Kuchen und Desserts verwenden.
Sortenempfehlungen: Welche Erdbeersorte ist die richtige für dich?
Es gibt viele verschiedene Erdbeersorten, die sich in Geschmack, Größe und Erntezeitpunkt unterscheiden. Hier sind einige beliebte Sorten:
* Elsanta: Eine sehr beliebte Sorte mit großen, festen Früchten und einem süß-säuerlichen Geschmack.
* Korona: Eine frühe Sorte mit mittelgroßen, süßen Früchten.
* Senga Sengana: Eine klassische Sorte mit aromatischen, dunkelroten Früchten.
* Hummi Praline: Eine immertragende Sorte, die mehrmals im Jahr Früchte trägt.
* Mieze Schindler: Eine alte Sorte mit einem einzigartigen, aromatischen Geschmack.
Wählt die Sorte, die am besten zu euren Vorlieben und den Bedingungen in eurem Garten passt.
Häufige Probleme und Lösungen: Was tun, wenn etwas schief geht?
Auch beim Erdbeeranbau kann es zu Problemen kommen. Hier sind einige häufige Probleme und ihre Lösungen:
* Schneckenfraß: Schnecken lieben Erdbeeren! Sammelt die Schnecken ab oder verwendet Schneckenkorn.
* Blattläuse: Blattläuse saugen an den Blättern und schwächen die Pflanzen. Bekämpft sie mit einem Insektizid oder mit einer Seifenlauge.
* Grauschimmel: Grauschimmel ist eine Pilzkrankheit, die die Früchte befällt. Entfernt befallene Früchte sofort und sorgt für eine gute Luftzirkulation.
*
Conclusion
So, there you have it! Mastering the art of easy strawberry growing doesn’t require a green thumb or a massive garden. With a little planning, the right techniques, and a dash of patience, you can transform your backyard, balcony, or even a sunny windowsill into a thriving strawberry patch.
Why is this DIY approach a must-try? Because it puts you in control. You choose the varieties that tantalize your taste buds, you dictate the growing conditions, and you reap the rewards of fresh, juicy strawberries bursting with flavor – far superior to anything you’ll find at the grocery store. Plus, there’s an undeniable satisfaction in nurturing something from a tiny seed or seedling to a bountiful harvest.
But the journey doesn’t end with the basic guide. Feel free to experiment! Try different container sizes to see what works best for your space. Explore vertical gardening techniques to maximize your yield in limited areas. Consider companion planting with herbs like basil or thyme to deter pests and enhance the flavor of your strawberries. You can even try growing alpine strawberries for a unique, intensely flavored treat.
Don’t be afraid to get creative with your soil mix. While the recommended blend is a great starting point, you can tailor it to your specific needs. For example, adding a bit of bone meal can provide extra phosphorus for robust root development, while incorporating composted manure can boost the overall nutrient content.
And remember, growing strawberries is a learning process. Don’t be discouraged if you encounter challenges along the way. Pests, diseases, and unpredictable weather are all part of the game. The key is to stay observant, adapt your strategies, and learn from your mistakes.
We wholeheartedly encourage you to embark on this delicious adventure. Imagine the joy of picking your own sun-ripened strawberries for breakfast, using them to create delectable desserts, or sharing them with friends and family. The possibilities are endless!
Once you’ve given our easy strawberry growing guide a try, we’d love to hear about your experience. Share your photos, tips, and triumphs in the comments section below. Let’s build a community of strawberry enthusiasts and learn from each other’s successes. Happy growing!
Frequently Asked Questions (FAQ)
Q: What are the best strawberry varieties for beginners?
A: For those new to strawberry growing, we recommend starting with everbearing varieties like ‘Seascape’ or ‘Albion’. These varieties produce fruit throughout the growing season, offering a more consistent harvest compared to June-bearing types. They are also generally more forgiving and adaptable to different growing conditions. Another great option is ‘Ozark Beauty’, a June-bearing variety known for its large, flavorful berries and disease resistance. Consider your local climate when choosing a variety; your local nursery can provide recommendations tailored to your region.
Q: How often should I water my strawberry plants?
A: Watering frequency depends on several factors, including the weather, the type of container you’re using, and the soil composition. As a general rule, water deeply whenever the top inch of soil feels dry to the touch. During hot, dry periods, you may need to water daily. Avoid overwatering, as this can lead to root rot. Ensure your containers have adequate drainage to prevent water from pooling at the bottom. A good way to check is to stick your finger into the soil about an inch deep. If it feels dry, it’s time to water. If it feels moist, wait a day or two and check again.
Q: What kind of fertilizer should I use for my strawberry plants?
A: Strawberries benefit from regular fertilization, especially during their active growing season. A balanced fertilizer with an NPK ratio of 10-10-10 or 12-12-12 is a good starting point. Alternatively, you can use a fertilizer specifically formulated for berries. Apply the fertilizer according to the package instructions, typically every 4-6 weeks. Avoid over-fertilizing, as this can burn the roots and damage the plants. Organic options like compost tea or fish emulsion are also excellent choices, providing a slow-release source of nutrients.
Q: How do I protect my strawberries from pests and diseases?
A: Prevention is key when it comes to pest and disease control. Start by choosing disease-resistant varieties and providing your plants with optimal growing conditions. Regularly inspect your plants for signs of pests or diseases, such as aphids, spider mites, or powdery mildew. If you spot any problems, address them promptly. Insecticidal soap or neem oil can be effective against many common pests. For fungal diseases, consider using a copper-based fungicide. You can also use netting to protect your berries from birds and other animals. Companion planting with herbs like basil or marigolds can also help deter pests naturally.
Q: How do I overwinter my strawberry plants?
A: Overwintering strawberries depends on your climate. In colder regions, you’ll need to protect your plants from freezing temperatures. Mulch heavily around the plants with straw or pine needles to insulate the roots. If you’re growing strawberries in containers, you can move them to a sheltered location, such as a garage or shed. In milder climates, you may only need to provide a light layer of mulch. Remove the mulch in the spring once the threat of frost has passed.
Q: My strawberry plants are producing runners. Should I remove them?
A: Whether or not to remove runners depends on your goals. Runners are horizontal stems that grow from the main plant and can develop into new strawberry plants. If you want to propagate more plants, you can allow the runners to root in separate containers. However, if you want to maximize fruit production from your existing plants, it’s best to remove the runners. Runners divert energy away from fruit production, so removing them will encourage the plant to focus on producing larger, more flavorful berries.
Q: How long does it take for strawberry plants to produce fruit?
A: The time it takes for strawberry plants to produce fruit depends on the variety and the growing conditions. June-bearing varieties typically produce fruit in the spring, about a year after planting. Everbearing varieties can produce fruit throughout the growing season, starting a few months after planting. Day-neutral varieties also produce fruit throughout the growing season, but they are less sensitive to day length than everbearing varieties. Be patient and provide your plants with the care they need, and you’ll be rewarded with a bountiful harvest.
Q: Can I grow strawberries indoors?
A: Yes, you can grow strawberries indoors, but it requires providing them with adequate light and proper care. Choose a sunny windowsill or use grow lights to provide at least 6-8 hours of light per day. Use a well-draining potting mix and water regularly. Pollinate the flowers by hand using a small brush. Indoor strawberry plants may not produce as much fruit as outdoor plants, but they can still provide a delicious and rewarding harvest.
Q: What do I do with my strawberry plants after they finish fruiting?
A: After your strawberry plants finish fruiting, it’s important to give them some TLC to prepare them for the next season. Remove any dead or diseased leaves and trim back the plants slightly. Fertilize them with a balanced fertilizer to replenish their nutrient reserves. Continue to water them regularly and protect them from pests and diseases. With proper care, your strawberry plants will reward you with another bountiful harvest next year.
Leave a Comment