
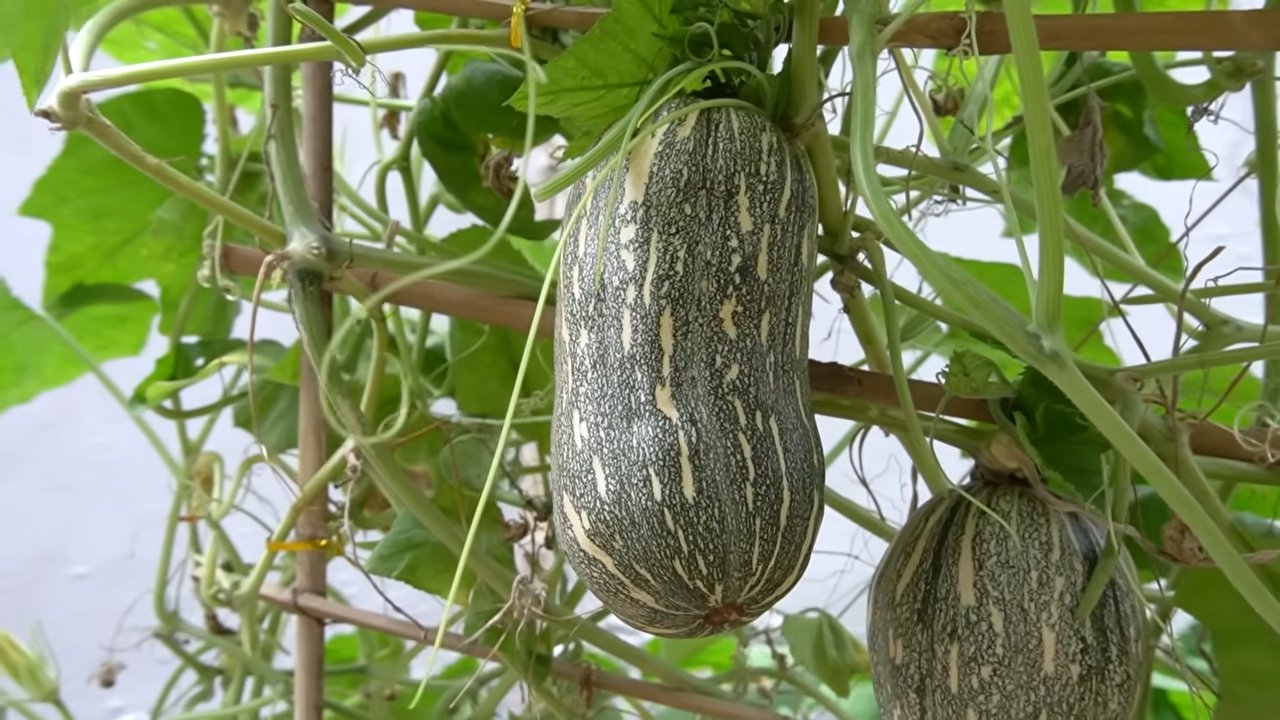
Double pumpkin harvest tips are what every gardener dreams of, right? Imagine a bountiful autumn, overflowing with plump, vibrant pumpkins – enough for pies, decorations, and maybe even a friendly pumpkin-carving competition! For centuries, pumpkins have been a symbol of abundance and harvest, deeply rooted in cultures around the world, from Native American traditions to modern-day Halloween celebrations. But let’s be honest, sometimes getting those pumpkins to actually *grow* can feel like a bit of a gamble.
I’ve been there, staring at a single, lonely pumpkin vine wondering where I went wrong. That’s why I’m so excited to share these DIY tricks and hacks with you! We all want to maximize our garden’s potential, and with a few simple strategies, you can significantly increase your pumpkin yield. These aren’t complicated, time-consuming methods; they’re practical, easy-to-implement tips that will help you achieve that double pumpkin harvest you’ve been longing for. So, ditch the disappointment of a meager pumpkin patch and get ready to unlock the secrets to a truly spectacular autumn harvest. Let’s dive into these double pumpkin harvest tips and transform your garden into a pumpkin paradise!
Doppelte Kürbisernte: So maximierst du deine Ausbeute!
Hallo liebe Gartenfreunde! Ich liebe Kürbisse, und ich bin sicher, viele von euch auch! Es gibt nichts Schöneres, als im Herbst eine reiche Ernte einzufahren und mit den selbstgezogenen Kürbissen leckere Suppen, Kuchen oder gruselige Halloween-Dekorationen zu zaubern. Aber was, wenn ich dir sage, dass du deine Kürbisernte verdoppeln oder sogar verdreifachen kannst? Klingt gut, oder? Hier sind meine bewährten Tipps und Tricks, wie du das Maximum aus deinen Kürbispflanzen herausholst.
Die Grundlagen: Der richtige Start ist entscheidend
Bevor wir uns den fortgeschrittenen Techniken widmen, müssen wir sicherstellen, dass die Grundlagen stimmen. Ein gesunder Start ist das A und O für eine reiche Ernte.
* Die richtige Sorte wählen: Nicht alle Kürbissorten sind gleich. Einige sind ertragreicher als andere. Informiere dich, welche Sorten in deiner Region gut gedeihen und hohe Erträge versprechen. Beliebte und ertragreiche Sorten sind beispielsweise ‘Hokkaido’, ‘Butternut’ oder ‘Muskatkürbis’.
* Der richtige Zeitpunkt für die Aussaat: Kürbisse sind frostempfindlich. Starte die Anzucht im Haus etwa 3-4 Wochen vor dem letzten erwarteten Frost. Direktsaat im Freien ist erst möglich, wenn keine Frostgefahr mehr besteht und der Boden sich ausreichend erwärmt hat.
* Der perfekte Standort: Kürbisse lieben die Sonne! Wähle einen sonnigen Standort mit mindestens 6-8 Stunden direkter Sonneneinstrahlung pro Tag. Der Boden sollte gut durchlässig und reich an Nährstoffen sein.
* Boden vorbereiten: Kürbisse sind Starkzehrer. Bereite den Boden vor der Pflanzung gründlich vor, indem du reichlich Kompost oder gut verrotteten Mist einarbeitest. Das sorgt für eine optimale Nährstoffversorgung.
Schritt-für-Schritt-Anleitung zur Kürbispflanzung
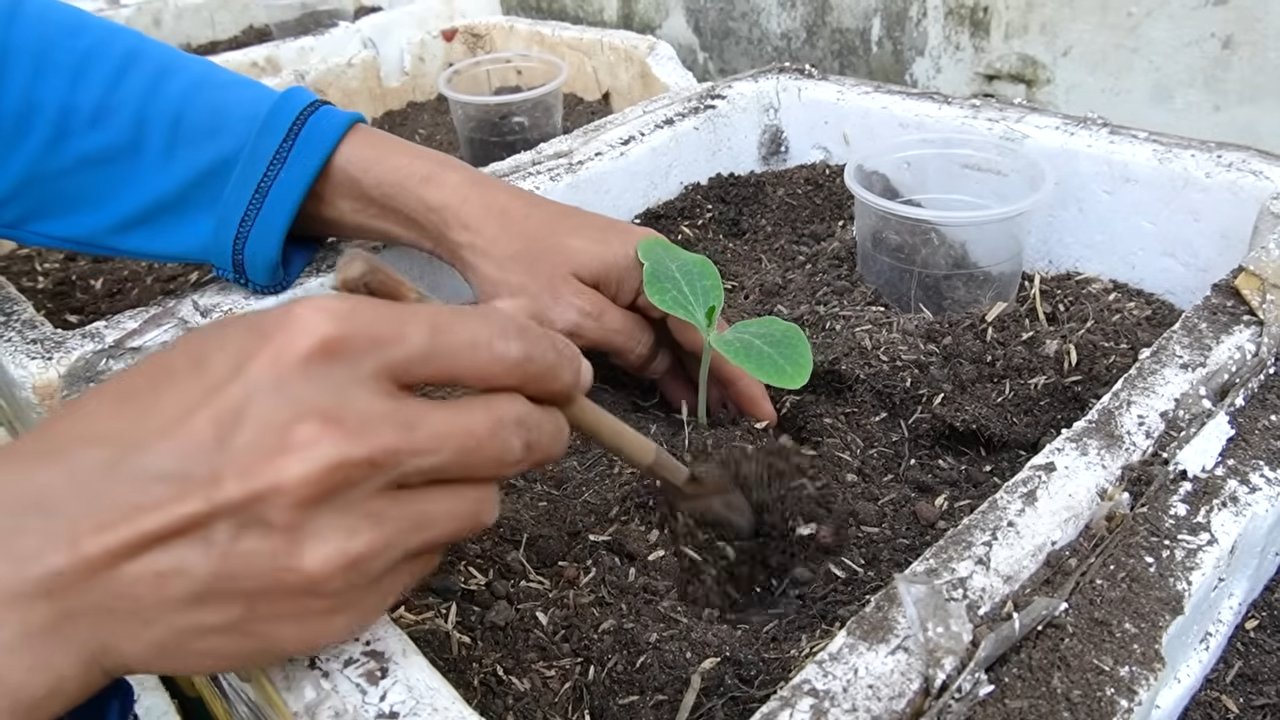
1. Anzucht im Haus (optional): Fülle kleine Töpfe mit Anzuchterde und säe 1-2 Samen pro Topf. Halte die Erde feucht und stelle die Töpfe an einen warmen, hellen Ort. Sobald die Sämlinge gekeimt sind, vereinzele sie, sodass nur der stärkste Sämling pro Topf übrig bleibt.
2. Vorbereitung des Pflanzbeets: Grabe ein ausreichend großes Pflanzloch (etwa doppelt so groß wie der Wurzelballen). Mische den Aushub mit Kompost oder Mist.
3. Pflanzen: Setze die Kürbispflanzen vorsichtig in die Pflanzlöcher. Achte darauf, dass der Wurzelballen nicht beschädigt wird. Fülle die Pflanzlöcher mit der vorbereiteten Erde und drücke sie leicht an.
4. Gießen: Gieße die Pflanzen nach dem Einsetzen gründlich an.
5. Mulchen: Bedecke den Boden um die Pflanzen herum mit einer Schicht Mulch (z.B. Stroh oder Rasenschnitt). Das hilft, die Feuchtigkeit im Boden zu halten und Unkraut zu unterdrücken.
Die Geheimnisse einer doppelten Ernte: Meine besten Tipps
Jetzt kommen wir zu den spannenden Techniken, mit denen du deine Kürbisernte wirklich maximieren kannst.
* Regelmäßiges Gießen: Kürbisse brauchen viel Wasser, besonders während der Fruchtbildung. Gieße regelmäßig und gründlich, am besten am Morgen, damit die Blätter über den Tag abtrocknen können. Vermeide es, die Blätter direkt zu gießen, um Pilzkrankheiten vorzubeugen.
* Richtig düngen: Kürbisse sind Starkzehrer und benötigen eine regelmäßige Düngung. Verwende einen organischen Dünger oder einen speziellen Kürbisdünger. Dünge während der Wachstumsphase und während der Fruchtbildung.
* Bestäubung unterstützen: Kürbisse sind auf die Bestäubung durch Bienen und andere Insekten angewiesen. Um die Bestäubung zu fördern, kannst du bienenfreundliche Pflanzen in der Nähe deiner Kürbispflanzen anpflanzen. An trüben Tagen oder wenn es wenig Insekten gibt, kannst du die Bestäubung auch manuell durchführen.
* Ausgeizen: Das Ausgeizen von Kürbispflanzen kann die Ernte deutlich steigern. Entferne Seitentriebe, die keine Blüten oder Früchte tragen. Das lenkt die Energie der Pflanze in die Entwicklung der verbleibenden Früchte.
* Früchte reduzieren: Wenn deine Kürbispflanze zu viele Früchte trägt, kann es sein, dass sie nicht alle ausreichend versorgen kann. Reduziere die Anzahl der Früchte, indem du die kleinsten und schwächsten entfernst. Das ermöglicht es den verbleibenden Früchten, größer und reifer zu werden.
* Schutz vor Schädlingen und Krankheiten: Achte auf Schädlinge wie Schnecken, Blattläuse oder Kürbiskäfer. Bekämpfe sie frühzeitig mit natürlichen Mitteln. Auch Pilzkrankheiten wie Mehltau können die Kürbispflanzen befallen. Sorge für eine gute Belüftung und vermeide es, die Blätter direkt zu gießen.
Detaillierte Anleitungen zu den Schlüsseltechniken
Hier gehe ich noch etwas tiefer in die wichtigsten Techniken ein, damit du sie optimal anwenden kannst.
Manuelle Bestäubung: So geht’s!
Wenn du sicherstellen willst, dass deine Kürbisse optimal bestäubt werden, kannst du die Bestäubung manuell durchführen. Das ist besonders hilfreich, wenn es wenig Insekten gibt oder das Wetter nicht mitspielt.
1. Erkenne die männlichen und weiblichen Blüten: Männliche Blüten haben einen langen, dünnen Stiel, während weibliche Blüten einen kleinen Fruchtansatz direkt unter der Blüte haben.
2. Wähle eine männliche Blüte aus: Pflücke eine männliche Blüte am frühen Morgen, kurz nachdem sie sich geöffnet hat.
3. Entferne die Blütenblätter: Entferne vorsichtig die Blütenblätter der männlichen Blüte, sodass nur noch der Staubbeutel übrig bleibt.
4. Bestäube die weibliche Blüte: Tupfe mit dem Staubbeutel der männlichen Blüte vorsichtig auf die Narbe der weiblichen Blüte. Stelle sicher, dass du die Narbe vollständig mit Pollen bedeckst.
5. Markiere die bestäubte Blüte: Markiere die bestäubte Blüte mit einem kleinen Band oder einem Stück Garn, damit du weißt, welche Blüten du bereits bestäubt hast.
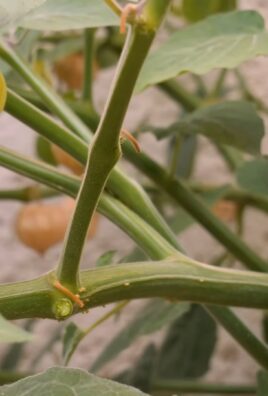
Ausgeizen: Mehr Kraft für die Kürbisse
Das Ausgeizen ist eine wichtige Technik, um die Energie der Pflanze auf die Entwicklung der Früchte zu konzentrieren.
1. Identifiziere die Seitentriebe: Seitentriebe sind Triebe, die aus den Blattachseln (dem Winkel zwischen dem Haupttrieb und dem Blattstiel) wachsen.
2. Entferne die Seitentriebe: Entferne die Seitentriebe, die keine Blüten oder Früchte tragen, mit einer scharfen Schere oder einem Messer. Schneide die Triebe so nah wie möglich am Haupttrieb ab.
3. Lass einige Seitentriebe stehen: Lass einige Seitentriebe stehen, die Blüten oder Früchte tragen. Diese Triebe können zur Ernte beitragen.
Früchte reduzieren: Qualität statt Quantität
Wenn deine Kürbispflanze zu viele Früchte trägt, kann es sein, dass sie nicht alle ausreichend versorgen kann. Reduziere die Anzahl der Früchte, um die Qualität der verbleibenden Früchte zu verbessern.
1. Beobachte die Früchte: Beobachte die Früchte an deiner Kürbispflanze und identifiziere die kleinsten und schwächsten Früchte.
2. Entferne die schwächsten Früchte: Entferne die schwächsten Früchte mit einer scharfen Schere oder einem Messer. Schneide die Früchte so nah wie möglich am Stiel ab.
3. Lass die stärksten Früchte stehen: Lass die stärksten und gesündesten Früchte an der Pflanze stehen. Diese Früchte werden die meiste Energie erhalten und sich optimal entwickeln.
Zusätzliche Tipps für eine erfolgreiche Kürbisernte
* Kürbisse drehen: Drehe die Kürbisse regelmäßig, damit sie gleichmäßig von allen Seiten Sonne bekommen. Das sorgt für eine gleichmäßige Reifung und verhindert Druckstellen.
* Kürbisse unter
Conclusion
So, there you have it! Unlocking a double pumpkin harvest isn’t just a pipe dream; it’s an achievable goal with a little planning and these simple, yet effective, DIY tricks. We’ve explored the importance of strategic pruning, the power of hand-pollination, and the vital role of soil health in maximizing your pumpkin yield. These aren’t just abstract concepts; they are practical techniques that can transform your pumpkin patch from a modest producer to a bountiful source of autumnal joy.
Why is this a must-try? Because who doesn’t want more pumpkins? Imagine the possibilities: more pumpkin pies, more jack-o’-lanterns, more pumpkin spice lattes, and more opportunities to share the harvest with friends and neighbors. Beyond the sheer abundance, these techniques offer a deeper connection to your garden. You’ll gain a better understanding of the pumpkin plant’s life cycle, its needs, and its potential. It’s a rewarding experience that goes beyond simply growing a vegetable; it’s about nurturing life and reaping the benefits of your hard work.
But don’t stop there! Experiment with different varieties of pumpkins. Try using different types of organic fertilizers to see which ones work best for your soil. Consider companion planting with beneficial herbs and flowers to attract pollinators and deter pests. The possibilities are endless! You could even try grafting different pumpkin varieties onto a single rootstock for a truly unique and impressive display. The key is to be curious, observant, and willing to adapt your approach based on what you learn.
We’ve focused on techniques that are accessible to gardeners of all skill levels, from beginners to seasoned pros. You don’t need fancy equipment or specialized knowledge to implement these strategies. All you need is a little time, a little effort, and a willingness to learn. And remember, even if you don’t achieve a perfect double harvest on your first try, you’ll still learn valuable lessons that will help you improve your gardening skills in the years to come.
Don’t be intimidated by the prospect of hand-pollination or pruning. These techniques are easier than they sound, and the rewards are well worth the effort. Think of it as a hands-on science experiment, a chance to get your hands dirty and connect with nature.
Now, it’s your turn. We encourage you to try these DIY tricks for a double pumpkin harvest in your own garden. Document your progress, take pictures, and share your experiences with us. We’d love to hear about your successes, your challenges, and any variations you discover along the way. Share your photos and stories on social media using #DoublePumpkinHarvest and let’s create a community of pumpkin-growing enthusiasts! Let’s all aim for a truly spectacular autumn harvest this year! We are confident that with these tips, you’ll be well on your way to a pumpkin patch overflowing with gourds. Happy growing!
Frequently Asked Questions (FAQ)
Q: How do I know when to start pruning my pumpkin plants?
A: The best time to start pruning is when your pumpkin plant has developed several healthy vines and you can clearly identify the main vine. Typically, this is about 4-6 weeks after planting. Look for the first female flowers (the ones with a small pumpkin already forming at the base) and focus on pruning the non-fruit-bearing vines to direct the plant’s energy towards fruit production. Avoid pruning during periods of extreme heat or drought, as this can stress the plant.
Q: What’s the best way to hand-pollinate my pumpkin flowers?
A: Hand-pollination is best done in the early morning, as the male and female flowers are most receptive at this time. Identify a male flower (it has a long, thin stem) and a female flower (it has a small pumpkin at the base). Gently remove the petals from the male flower to expose the pollen-covered stamen. Then, carefully brush the pollen onto the stigma of the female flower. You can also use a small paintbrush to transfer the pollen. To ensure successful pollination, you can cover the pollinated female flower with a small bag or netting for a day or two to prevent insects from interfering.
Q: My pumpkin plants are getting powdery mildew. What should I do?
A: Powdery mildew is a common fungal disease that affects pumpkin plants. To prevent it, ensure good air circulation around your plants by spacing them adequately and pruning away any overcrowded foliage. You can also apply a preventative fungicide, such as neem oil or copper fungicide, according to the product instructions. If your plants are already infected, remove any affected leaves and spray with a fungicide. Baking soda mixed with water (1 tablespoon per gallon) can also be an effective treatment.
Q: How much water do pumpkin plants need?
A: Pumpkin plants need consistent moisture, especially during fruit development. Water deeply and regularly, aiming for about 1-2 inches of water per week. Avoid overhead watering, as this can promote fungal diseases. Instead, water at the base of the plant, preferably in the morning. Mulching around the plants can help retain moisture and suppress weeds. Check the soil moisture regularly and adjust your watering schedule accordingly, depending on the weather conditions.
Q: What kind of fertilizer should I use for my pumpkin plants?
A: Pumpkin plants are heavy feeders and benefit from regular fertilization. Before planting, amend your soil with plenty of compost or well-rotted manure. During the growing season, use a balanced fertilizer (e.g., 10-10-10) every few weeks. Once the pumpkins start to develop, switch to a fertilizer that is higher in phosphorus and potassium to promote fruit growth. Organic options include bone meal, rock phosphate, and wood ash. Avoid over-fertilizing, as this can lead to excessive foliage growth at the expense of fruit production.
Q: How do I protect my pumpkins from pests like squash bugs and vine borers?
A: Squash bugs and vine borers can be devastating pests for pumpkin plants. To prevent them, inspect your plants regularly for eggs and larvae and remove them by hand. You can also use row covers to protect your plants from pests early in the season. For squash bugs, insecticidal soap can be effective. For vine borers, you can try injecting Bacillus thuringiensis (Bt) into the vine near the entry hole. Another option is to wrap the base of the vine with aluminum foil to deter the borers from laying eggs.
Q: How long does it take for a pumpkin to mature?
A: The time it takes for a pumpkin to mature depends on the variety, but generally, it takes about 90-120 days from planting to harvest. The pumpkin is ready to harvest when the skin is hard and resistant to scratching, and the stem is dry and brown. Leave about 3-4 inches of stem attached to the pumpkin when you harvest it.
Q: Can I grow pumpkins in containers?
A: Yes, you can grow pumpkins in containers, but you’ll need a large container (at least 20 gallons) and a dwarf or bush variety of pumpkin. Ensure the container has good drainage and use a high-quality potting mix. Water and fertilize regularly, and provide support for the vines as needed. Container-grown pumpkins may not be as large as those grown in the ground, but they can still be a fun and rewarding experience.
Q: What are some good companion plants for pumpkins?
A: Good companion plants for pumpkins include marigolds, nasturtiums, and other flowering plants that attract pollinators. Herbs like basil, oregano, and thyme can also help deter pests. Corn and beans can provide support for the pumpkin vines and fix nitrogen in the soil, respectively. Avoid planting pumpkins near potatoes or brassicas (e.g., cabbage, broccoli), as they can compete for nutrients.
Q: How can I ensure I get a double pumpkin harvest specifically?
A: Achieving a double pumpkin harvest requires a multi-faceted approach. First, select a pumpkin variety known for its productivity. Second, implement the pruning techniques described earlier to direct the plant’s energy towards fewer, larger fruits. Third, ensure consistent watering and fertilization throughout the growing season. Fourth, hand-pollinate your female flowers to guarantee successful fruit set. Finally, monitor your plants closely for pests and diseases and take action promptly. By combining these strategies, you’ll significantly increase your chances of a double pumpkin harvest. Remember, consistent effort and attention to detail are key to success.

Leave a Comment