
Boost Malabar Spinach Growth and unlock the full potential of this vibrant, leafy green right in your own backyard! Have you ever dreamt of harvesting basketfuls of delicious, nutritious Malabar spinach, but felt like your plants just weren’t thriving? I know I have! It can be frustrating to put in the effort and not see the results you’re hoping for.
Malabar spinach, also known as Basella alba, isn’t actually a true spinach, but a climbing vine with succulent leaves that have been enjoyed for centuries in Asian and African cuisines. Its history is rich, and its versatility in the kitchen is undeniable. But sometimes, getting it to flourish in a home garden can feel like a challenge. That’s where these DIY tricks and hacks come in!
Let’s face it, we all want to maximize our garden yields, especially when it comes to nutrient-packed greens like Malabar spinach. Whether you’re a seasoned gardener or just starting out, these simple, actionable tips will help you boost Malabar Spinach Growth and enjoy a bountiful harvest. I’m excited to share these secrets with you, so you can finally have the lush, thriving Malabar spinach plants you’ve always wanted!
DIY: So bringst du deinen Malabarspinat zum Explodieren!
Hey Leute, ich liebe es, meinen eigenen Garten zu haben, und Malabarspinat ist eine meiner absoluten Lieblingspflanzen! Er ist nicht nur superlecker, sondern auch unglaublich einfach anzubauen. Aber manchmal braucht er einfach einen kleinen Schub, um wirklich zu explodieren. Deshalb zeige ich euch heute meine bewährten DIY-Tricks, mit denen ihr das Wachstum eures Malabarspinats ordentlich ankurbeln könnt. Keine Sorge, es ist alles super einfach und ihr braucht keine teuren Produkte!
Was du brauchst:
* Malabarspinat-Samen oder Jungpflanzen
* Einen sonnigen Standort (mindestens 6 Stunden Sonne pro Tag)
* Gut durchlässigen Boden (oder einen großen Topf mit guter Blumenerde)
* Kompost oder gut verrotteten Mist
* Eierschalen
* Kaffeesatz
* Bananenschalen
* Eine Sprühflasche
* Eine Gießkanne
* Pflanzenstützen (Rankgitter, Bambusstäbe, etc.)
* Geduld und Liebe!
Die Vorbereitung: Der Grundstein für üppiges Wachstum
Bevor wir mit den eigentlichen Tricks loslegen, ist es wichtig, dass die Basis stimmt. Ein guter Start ist die halbe Miete, wie man so schön sagt!
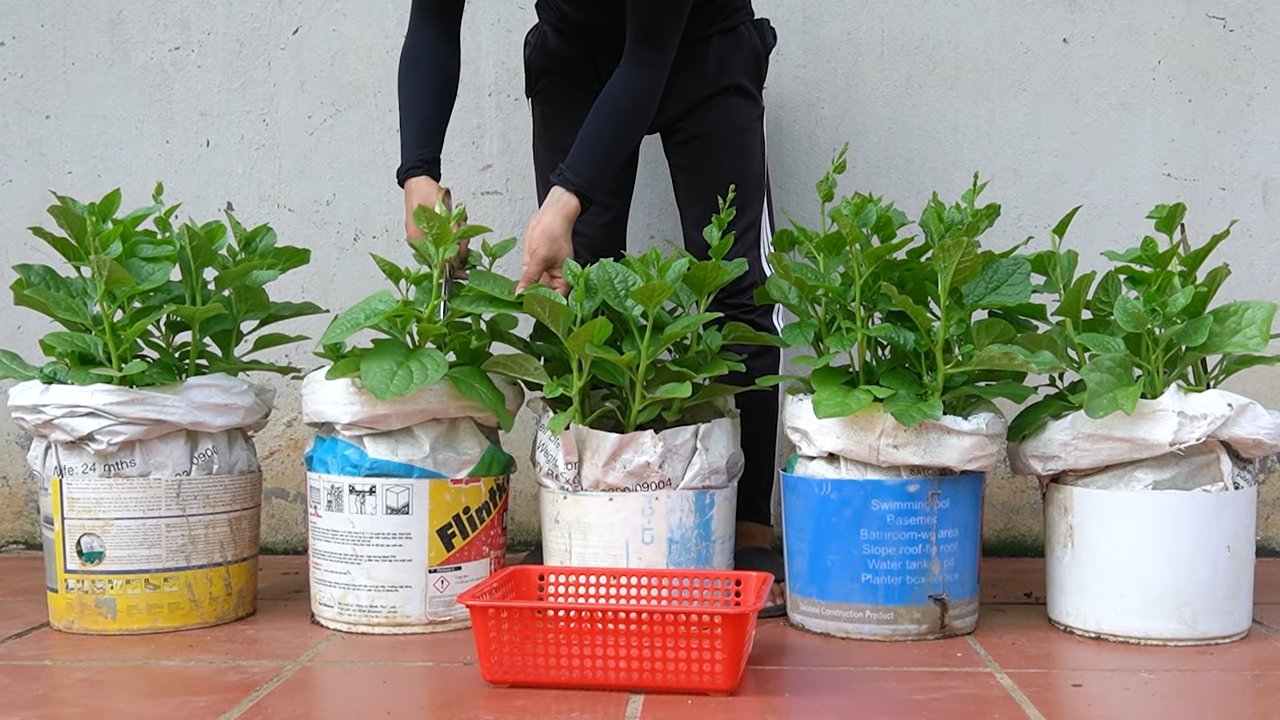
1. Der richtige Standort: Malabarspinat liebt die Sonne! Sucht euch einen Platz in eurem Garten aus, der mindestens 6 Stunden direkte Sonneneinstrahlung pro Tag bekommt. Je mehr Sonne, desto besser! Wenn ihr ihn in Töpfen anpflanzt, könnt ihr ihn natürlich auch flexibel umstellen, um ihm die optimale Sonnendosis zu geben.
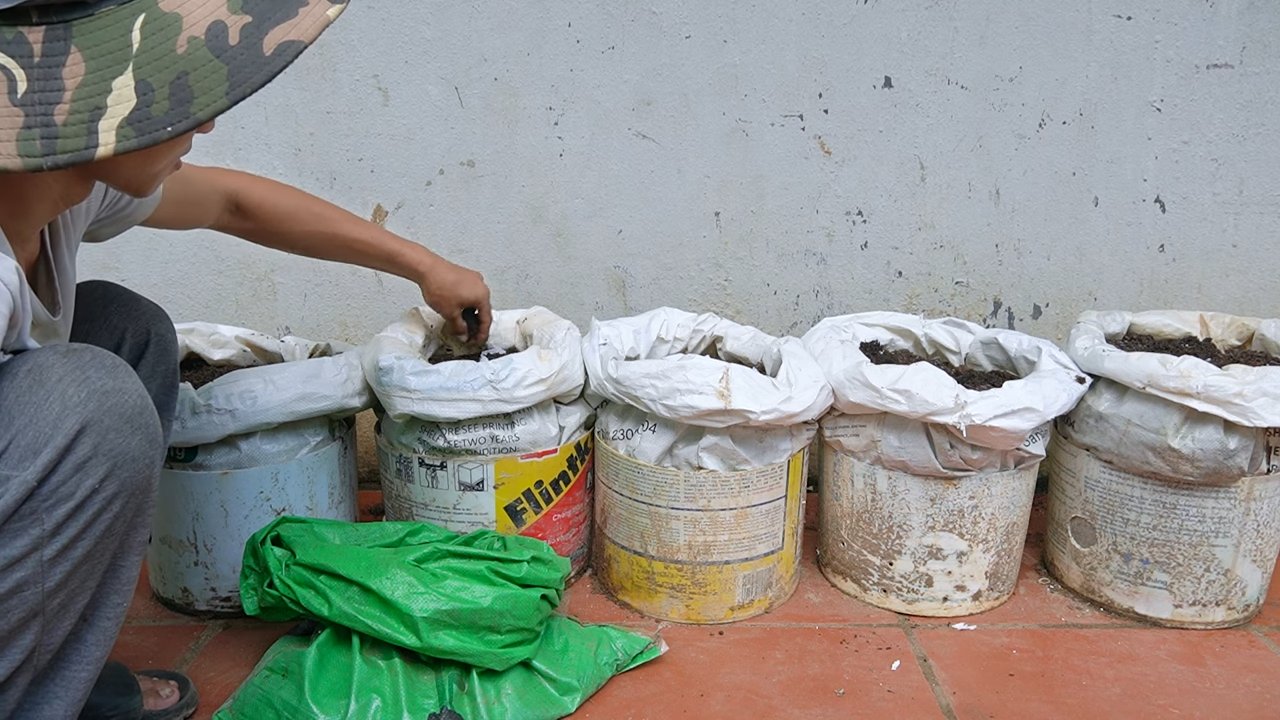
2. Der perfekte Boden: Malabarspinat braucht einen gut durchlässigen Boden. Staunässe mag er gar nicht! Wenn euer Gartenboden eher lehmig ist, könnt ihr ihn mit Kompost, Sand oder Perlit auflockern. Wenn ihr ihn in Töpfen anpflanzt, verwendet eine hochwertige Blumenerde. Ich mische meiner Blumenerde immer noch etwas Kompost unter, um den Nährstoffgehalt zu erhöhen.
3. Kompost ist Gold wert: Bevor ihr die Samen oder Jungpflanzen einpflanzt, arbeitet eine ordentliche Portion Kompost oder gut verrotteten Mist in den Boden ein. Kompost ist ein echter Alleskönner! Er verbessert die Bodenstruktur, speichert Feuchtigkeit und versorgt die Pflanzen mit wichtigen Nährstoffen.
DIY-Düngung: Natürliche Booster für deinen Malabarspinat
Jetzt kommen wir zu den spannenden DIY-Düngemitteln, die euren Malabarspinat so richtig auf Touren bringen werden!
Eierschalen-Power: Kalzium für starke Pflanzen
Eierschalen sind eine fantastische Kalziumquelle für eure Pflanzen. Kalzium ist wichtig für das Zellwachstum und die Stabilität der Pflanzen.
1. Eierschalen sammeln: Sammelt eure Eierschalen und spült sie gründlich aus.
2. Trocknen und zerkleinern: Lasst die Eierschalen gut trocknen und zerkleinert sie dann zu feinem Pulver. Das geht am besten mit einem Mörser oder einer alten Kaffeemühle.
3. Einarbeiten in den Boden: Streut das Eierschalenpulver um die Pflanzen herum und arbeitet es leicht in den Boden ein. Ihr könnt es auch direkt beim Einpflanzen in das Pflanzloch geben.
Kaffeesatz-Kick: Stickstoff für grünes Wachstum
Kaffeesatz ist reich an Stickstoff, der für das Wachstum von Blättern und Stängeln unerlässlich ist. Außerdem macht er den Boden leicht sauer, was Malabarspinat mag.
1. Kaffeesatz sammeln: Sammelt euren Kaffeesatz nach dem Brühen.
2. Trocknen: Lasst den Kaffeesatz gut trocknen, um Schimmelbildung zu vermeiden.
3. Verwenden: Streut den getrockneten Kaffeesatz um die Pflanzen herum und arbeitet ihn leicht in den Boden ein. Achtet darauf, nicht zu viel Kaffeesatz zu verwenden, da er den Boden sonst zu sauer machen könnte. Eine dünne Schicht reicht völlig aus.
Bananenschalen-Booster: Kalium für gesunde Früchte und Wurzeln
Bananenschalen sind reich an Kalium, das für die Blütenbildung, die Fruchtentwicklung und die Wurzelgesundheit wichtig ist.
1. Bananenschalen sammeln: Sammelt eure Bananenschalen.
2. Zerkleinern: Schneidet die Bananenschalen in kleine Stücke.
3. Vergraben: Vergrabt die Bananenschalenstücke um die Pflanzen herum im Boden. Sie zersetzen sich langsam und geben dabei Kalium an den Boden ab. Ihr könnt die Bananenschalen auch in Wasser einweichen und das Wasser dann zum Gießen verwenden.
Blattdüngung: Der schnelle Nährstoff-Kick
Neben der Bodendüngung könnt ihr eurem Malabarspinat auch mit einer Blattdüngung einen schnellen Nährstoff-Kick geben.
1. Brennnesseljauche: Brennnesseljauche ist ein natürlicher Dünger, der reich an Stickstoff, Kalium und Eisen ist. Sie stärkt die Pflanzen und macht sie widerstandsfähiger gegen Krankheiten und Schädlinge. Um Brennnesseljauche herzustellen, übergießt ihr 1 kg frische Brennnesseln mit 10 Litern Wasser und lasst die Mischung 1-2 Wochen gären. Verdünnt die Jauche vor der Anwendung im Verhältnis 1:10 mit Wasser und besprüht die Blätter eures Malabarspinats damit.
2. Algenextrakt: Algenextrakt ist ein weiterer natürlicher Dünger, der reich an Spurenelementen ist. Er fördert das Wachstum und die Vitalität der Pflanzen. Ihr könnt Algenextrakt im Gartenfachhandel kaufen und ihn gemäß den Anweisungen auf der Verpackung verdünnen und auf die Blätter sprühen.
Die richtige Pflege: Gießen, Stützen und Ernten
Neben der Düngung ist auch die richtige Pflege entscheidend für ein üppiges Wachstum eures Malabarspinats.
1. Richtig gießen: Malabarspinat braucht regelmäßig Wasser, besonders während der heißen Sommermonate. Gießt die Pflanzen am besten morgens, damit die Blätter über den Tag abtrocknen können. Vermeidet Staunässe!
2. Stützen: Malabarspinat ist eine Kletterpflanze und braucht eine Stütze, an der er hochranken kann. Ihr könnt ihm ein Rankgitter, Bambusstäbe oder eine andere geeignete Konstruktion anbieten.
3. Regelmäßig ernten: Erntet die Blätter und Triebe regelmäßig, um das Wachstum anzuregen. Je mehr ihr erntet, desto mehr neue Blätter werden nachwachsen! Die jungen Blätter sind am zartesten und schmecken am besten.
Schutz vor Schädlingen und Krankheiten: Vorbeugen ist besser als Heilen
Malabarspinat ist relativ robust, aber auch er kann von Schädlingen und Krankheiten befallen werden.
1. Schnecken: Schnecken lieben Malabarspinat! Schützt eure Pflanzen mit Schneckenkorn oder Schneckenzäunen. Ihr könnt auch Kaffeesatz um die Pflanzen streuen, da Schnecken den Geruch nicht mögen.
2. Blattläuse: Blattläuse können ebenfalls an Malabarspinat auftreten. Besprüht die Pflanzen mit einem Wasserstrahl oder mit einer Lösung aus Schmierseife und Wasser.
3. Pilzkrankheiten: Bei feuchtem Wetter können Pilzkrankheiten auftreten. Achtet auf eine gute Belüftung der Pflanzen und vermeidet Staunässe.
Zusätzliche Tipps für den ultimativen Wachstumsschub:
* Mulchen: Mulcht den Boden um die Pflanzen herum mit Stroh, Heu oder Rasenschnitt. Das hält den Boden feucht, unterdrückt Unkraut und versorgt den Boden mit Nährstoffen.
* Regelmäßig hacken: Hackt den Boden regelmäßig auf, um ihn aufzulockern und die Belüftung zu verbessern.
* Pflanzen stärken: Stärkt eure Pflanzen regelmäßig mit Pflanzenstärkungsmitteln aus dem Gartenfachhandel.
* Beobachten: Beobachtet eure Pflanzen regelmäßig auf Schädlinge und Krankheiten und handelt frühzeitig, wenn ihr etwas entdeckt.
Mit diesen DIY-Tricks und der richtigen Pflege werdet ihr bald eine üppige Ernte von leckerem Malabarspinat haben
Conclusion
So, there you have it! This simple, yet incredibly effective DIY trick to boost Malabar spinach growth is a game-changer for any gardener, whether you’re a seasoned pro or just starting out. We’ve walked you through the process, highlighting the benefits of this method, and hopefully, inspired you to give it a try.
Why is this a must-try? Because it addresses the core needs of Malabar spinach: consistent moisture, nutrient availability, and a supportive environment for vigorous growth. By implementing this DIY approach, you’re not just passively waiting for your spinach to grow; you’re actively creating the ideal conditions for it to thrive. You’ll see faster growth, lusher foliage, and a more abundant harvest. Imagine the satisfaction of harvesting basketfuls of vibrant, healthy Malabar spinach that you nurtured yourself!
But the beauty of gardening lies in experimentation. Feel free to adapt this DIY trick to suit your specific needs and resources. For example, if you live in a particularly dry climate, consider adding a layer of mulch around the base of your plants to further conserve moisture. You could also experiment with different types of organic fertilizers, such as compost tea or worm castings, to provide an extra boost of nutrients.
Another variation to consider is the type of container you use. While we’ve focused on using readily available materials, you could also invest in self-watering planters or raised beds. These options can provide even better drainage and aeration, further enhancing the growth of your Malabar spinach.
Don’t be afraid to get creative and tailor this DIY trick to your unique gardening style. The most important thing is to provide your Malabar spinach with the care and attention it needs to flourish.
We are confident that this DIY trick will significantly improve your Malabar spinach growing experience. It’s a cost-effective, environmentally friendly, and incredibly rewarding way to cultivate this delicious and nutritious leafy green.
Now, it’s your turn! We encourage you to try this DIY trick and witness the difference it makes. Share your experiences with us in the comments below. We’d love to hear about your successes, challenges, and any variations you’ve tried. Let’s build a community of Malabar spinach enthusiasts and learn from each other’s experiences. Happy gardening!
Frequently Asked Questions (FAQ)
What exactly is Malabar spinach, and why should I grow it?
Malabar spinach (Basella alba or Basella rubra) isn’t a true spinach, but a heat-tolerant vine that produces edible leaves and stems. It’s an excellent alternative to spinach in warmer climates where traditional spinach struggles. It’s packed with vitamins A and C, iron, and calcium. Plus, it’s incredibly versatile in the kitchen – you can use it in salads, stir-fries, soups, and stews. Growing your own ensures you have a fresh, organic supply of this nutritious leafy green.
How often should I water my Malabar spinach after implementing this DIY trick?
The watering frequency depends on your climate and soil type. However, the goal of this DIY trick is to maintain consistent moisture without waterlogging the soil. Check the soil moisture level daily by sticking your finger about an inch into the soil. If it feels dry, it’s time to water. In hot, dry weather, you may need to water daily, while in cooler, wetter weather, you may only need to water every few days. The key is to observe your plants and adjust your watering schedule accordingly.
What type of fertilizer is best for Malabar spinach when using this DIY method?
Malabar spinach benefits from regular feeding with a balanced fertilizer. Opt for an organic fertilizer with an NPK ratio (nitrogen, phosphorus, potassium) of around 10-10-10 or 5-5-5. Compost tea, worm castings, and well-rotted manure are also excellent organic options. Apply the fertilizer according to the package instructions, typically every 2-4 weeks during the growing season. Avoid over-fertilizing, as this can lead to excessive foliage growth at the expense of flower and seed production.
My Malabar spinach leaves are turning yellow. What could be the problem?
Yellowing leaves (chlorosis) can indicate several issues. The most common causes are nutrient deficiencies (especially nitrogen or iron), overwatering, or underwatering. Check the soil moisture level and adjust your watering schedule accordingly. If the soil is consistently wet, improve drainage by adding perlite or sand to the soil mix. If you suspect a nutrient deficiency, apply a balanced fertilizer or a fertilizer specifically formulated for leafy greens. Also, ensure your plants are getting enough sunlight, as insufficient light can also cause yellowing.
How much sunlight does Malabar spinach need to thrive?
Malabar spinach thrives in full sun, which means at least 6-8 hours of direct sunlight per day. However, it can also tolerate partial shade, especially in hot climates. If you live in a region with intense afternoon sun, providing some shade during the hottest part of the day can prevent leaf scorch. Insufficient sunlight can lead to leggy growth and reduced leaf production.
Can I grow Malabar spinach in a container using this DIY trick?
Absolutely! Malabar spinach is well-suited to container gardening. Choose a pot that is at least 12 inches in diameter and depth to provide ample space for the roots to grow. Use a well-draining potting mix and ensure the container has drainage holes. The DIY trick works perfectly in containers, helping to retain moisture and nutrients. Remember to water and fertilize regularly, as container-grown plants tend to dry out and deplete nutrients faster than those grown in the ground.
How do I harvest Malabar spinach, and when should I start?
You can start harvesting Malabar spinach leaves as soon as the plants are established and have reached a reasonable size (around 6-8 inches tall). Harvest by snipping off the outer leaves or the tips of the vines. Regular harvesting encourages the plant to produce more leaves. Avoid removing more than one-third of the plant at any one time. The leaves are best harvested when they are young and tender.
Is Malabar spinach susceptible to any pests or diseases?
Malabar spinach is generally resistant to pests and diseases. However, it can occasionally be affected by aphids, spider mites, or fungal diseases. Inspect your plants regularly for signs of infestation or disease. If you notice any problems, treat them promptly with organic pest control methods, such as insecticidal soap or neem oil. Good air circulation and proper watering practices can also help prevent fungal diseases.
How can I save seeds from my Malabar spinach plant?
Malabar spinach produces small, dark purple berries that contain the seeds. Allow the berries to ripen fully on the vine until they are dry and wrinkled. Harvest the berries and remove the seeds. Dry the seeds thoroughly before storing them in an airtight container in a cool, dark place. The seeds can be stored for several years and used to propagate new plants.
Can I use this DIY trick for other leafy green vegetables?
While this DIY trick is particularly beneficial for Malabar spinach, it can also be adapted for other leafy green vegetables that require consistent moisture and nutrient availability, such as lettuce, kale, and Swiss chard. The key is to adjust the watering and fertilization schedule to suit the specific needs of each plant.
Leave a Comment