
Grow Cantaloupe in Grow Bags? Absolutely! Imagine biting into a juicy, homegrown cantaloupe, bursting with flavor, knowing you nurtured it from seed to sweet perfection, all within the cozy confines of your own backyard – or even your balcony! For centuries, cultivating melons has been a symbol of abundance and summer’s bounty, tracing back to ancient Egypt and beyond. But let’s face it, not everyone has acres of land to dedicate to sprawling vines. That’s where the magic of grow bags comes in!
I’m here to tell you that you don’t need a sprawling farm to enjoy the taste of fresh, homegrown cantaloupe. This DIY guide is your ticket to unlocking the secrets of successfully growing these delicious melons in grow bags, regardless of your space limitations. We’ll walk through everything from choosing the right grow bag size and soil mix to providing the perfect support for your growing vines.
Why is this DIY trick a game-changer? Because it empowers you to take control of your food source, enjoy healthier, pesticide-free produce, and experience the sheer joy of gardening, even in the smallest of spaces. Plus, learning how to grow cantaloupe in grow bags is surprisingly easy and rewarding. So, grab your gardening gloves, and let’s get started on this exciting journey to cantaloupe-growing success!
Cantaloupe-Anbau im Pflanzsack: Dein DIY-Leitfaden für süße Melonen
Hey Gartenfreunde! Habt ihr auch so Lust auf saftige, selbstgezogene Cantaloupe-Melonen? Aber keinen Platz für ein riesiges Feld? Keine Sorge, ich zeige euch, wie ihr diese leckeren Früchte ganz einfach in Pflanzsäcken anbauen könnt! Es ist einfacher als ihr denkt und spart jede Menge Platz. Los geht’s!
Warum Cantaloupe im Pflanzsack?
Bevor wir loslegen, kurz die Vorteile:
* Platzsparend: Ideal für Balkone, Terrassen oder kleine Gärten.
* Bessere Kontrolle: Du hast die volle Kontrolle über die Bodenqualität und Bewässerung.
* Weniger Unkraut: Pflanzsäcke reduzieren das Unkrautwachstum erheblich.
* Einfacher Transport: Du kannst die Pflanzsäcke bei Bedarf leicht umstellen.
* Frühere Ernte: Pflanzsäcke erwärmen sich schneller, was zu einer früheren Ernte führen kann.
Was du brauchst: Die Materialliste
Hier ist eine Liste aller Materialien, die du für dein Cantaloupe-Pflanzsack-Projekt benötigst:
* Pflanzsäcke: Wähle Pflanzsäcke mit mindestens 40-50 Litern Fassungsvermögen. Stoffpflanzsäcke sind ideal, da sie eine gute Drainage und Belüftung gewährleisten.
* Cantaloupe-Samen oder Jungpflanzen: Du kannst entweder Samen aussäen oder vorgezogene Jungpflanzen kaufen. Ich persönlich bevorzuge Jungpflanzen, da sie schneller wachsen.
* Hochwertige Blumenerde: Verwende eine gut durchlässige Blumenerde, die reich an organischen Stoffen ist.
* Kompost: Kompost verbessert die Bodenstruktur und liefert wichtige Nährstoffe.
* Organischer Dünger: Ein Langzeitdünger oder Flüssigdünger speziell für Gemüse ist ideal.
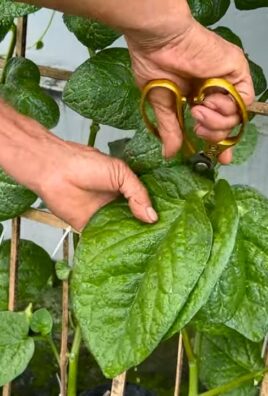
* Gartenschere: Zum Beschneiden der Pflanzen.
* Gießkanne oder Gartenschlauch: Zum Bewässern.
* Rankhilfe (optional): Cantaloupe-Pflanzen können ranken, daher ist eine Rankhilfe hilfreich, besonders bei begrenztem Platz.
* Mulch (optional): Mulch hilft, die Feuchtigkeit im Boden zu halten und Unkraut zu unterdrücken. Stroh oder Holzhackschnitzel eignen sich gut.
Schritt-für-Schritt-Anleitung: Cantaloupe im Pflanzsack anbauen
Jetzt geht’s ans Eingemachte! Folge diesen Schritten, um deine eigenen Cantaloupe-Melonen im Pflanzsack anzubauen:
1. Vorbereitung des Pflanzsacks
1. Wähle den richtigen Standort: Cantaloupe-Melonen brauchen viel Sonne, mindestens 6-8 Stunden pro Tag. Wähle einen sonnigen Standort für deine Pflanzsäcke.
2. Fülle den Pflanzsack: Mische die Blumenerde mit Kompost im Verhältnis 2:1. Fülle den Pflanzsack bis etwa 5 cm unter den Rand.
3. Dünge den Boden: Gib den organischen Langzeitdünger gemäß den Anweisungen auf der Verpackung hinzu. Mische ihn gut unter die Erde.
4. Bewässere den Boden: Gieße den Boden gründlich, bis er gleichmäßig feucht ist.
2. Aussaat oder Einpflanzen
1. Aussaat (wenn du Samen verwendest): Säe die Samen etwa 2 cm tief in den Boden. Halte einen Abstand von etwa 10 cm zwischen den Samen. Gieße die Samen vorsichtig an.
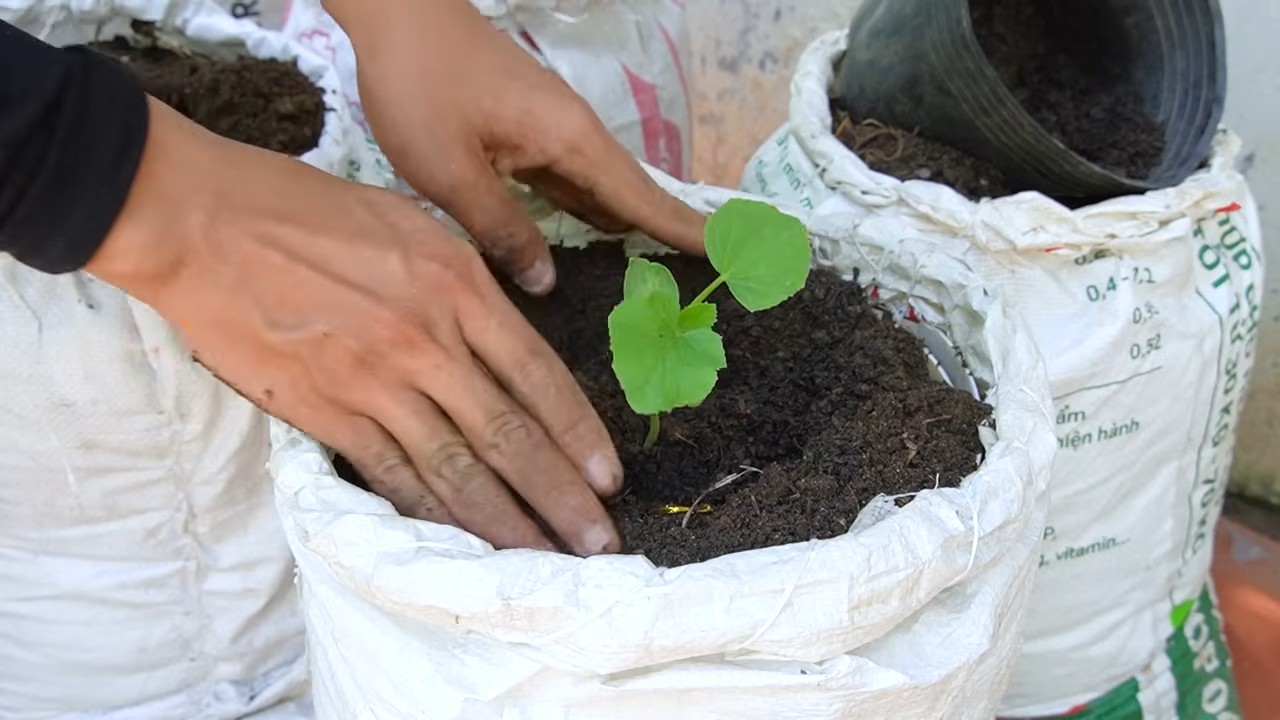
2. Einpflanzen (wenn du Jungpflanzen verwendest): Grabe ein Loch, das groß genug für den Wurzelballen der Jungpflanze ist. Setze die Jungpflanze vorsichtig ein und fülle das Loch mit Erde. Drücke die Erde leicht an. Halte einen Abstand von etwa 30-45 cm zwischen den Pflanzen.
3. Gießen: Gieße die Pflanzen nach dem Einpflanzen gründlich an.
3. Pflege der Cantaloupe-Pflanzen
1. Bewässerung: Cantaloupe-Melonen brauchen regelmäßige Bewässerung, besonders während der Fruchtbildung. Gieße die Pflanzen, wenn sich die oberste Erdschicht trocken anfühlt. Vermeide es, die Blätter zu benetzen, um Pilzkrankheiten vorzubeugen.
2. Düngung: Dünge die Pflanzen alle 2-3 Wochen mit einem Flüssigdünger speziell für Gemüse. Befolge die Anweisungen auf der Verpackung.
3. Beschneiden: Beschneide die Pflanzen, um das Wachstum zu fördern und die Fruchtbildung zu verbessern. Entferne Seitentriebe, die keine Blüten oder Früchte tragen.
4. Rankhilfe: Wenn deine Cantaloupe-Pflanzen ranken, leite sie an einer Rankhilfe entlang. Dies hilft, die Früchte vom Boden fernzuhalten und die Belüftung zu verbessern.
5. Mulchen: Trage eine Schicht Mulch um die Pflanzen auf, um die Feuchtigkeit im Boden zu halten und Unkraut zu unterdrücken.
6. Schutz vor Schädlingen und Krankheiten: Achte auf Schädlinge wie Blattläuse oder Mehltau. Bei Bedarf verwende biologische Schädlingsbekämpfungsmittel oder Fungizide.
4. Ernte der Cantaloupe-Melonen
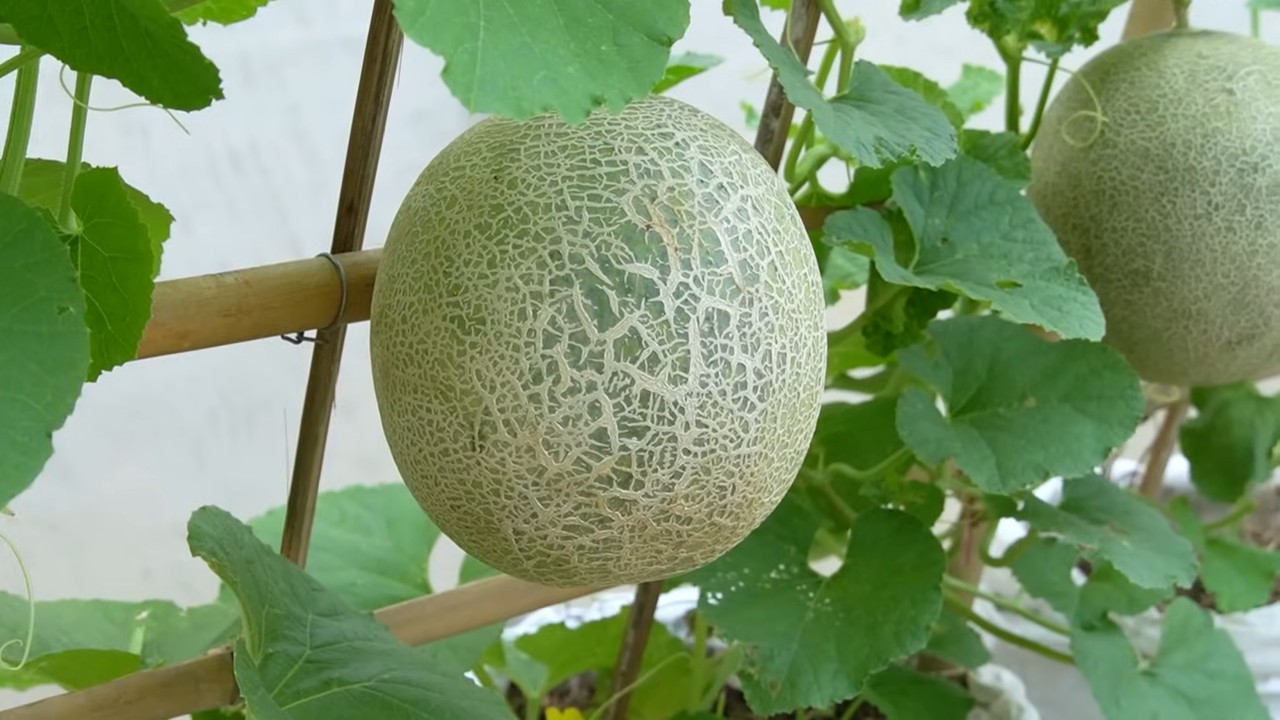
1. Reife erkennen: Cantaloupe-Melonen sind reif, wenn sie einen süßen Duft verströmen und sich leicht vom Stiel lösen lassen. Die Schale sollte eine gelblich-braune Farbe haben.
2. Ernten: Schneide die Melone vorsichtig mit einer Gartenschere vom Stiel ab.
3. Genießen: Lass dir deine selbstgezogene Cantaloupe-Melone schmecken!
Zusätzliche Tipps für den erfolgreichen Cantaloupe-Anbau im Pflanzsack
* Wähle die richtige Sorte: Es gibt viele verschiedene Cantaloupe-Sorten. Wähle eine Sorte, die für den Anbau im Pflanzsack geeignet ist. Kleinere Sorten sind oft besser geeignet.
* Achte auf die Drainage: Stelle sicher, dass deine Pflanzsäcke eine gute Drainage haben, um Staunässe zu vermeiden.
* Schütze die Früchte vor Schädlingen: Schnecken und andere Schädlinge können Cantaloupe-Melonen beschädigen. Schütze die Früchte mit Netzen oder anderen Schutzmaßnahmen.
* Drehe die Pflanzsäcke: Drehe die Pflanzsäcke regelmäßig, damit alle Seiten der Pflanzen ausreichend Sonnenlicht erhalten.
* Sei geduldig: Cantaloupe-Melonen brauchen Zeit, um zu reifen. Sei geduldig und gib den Pflanzen die Zeit, die sie brauchen.
Häufige Probleme und Lösungen
* Gelbe Blätter: Können auf Nährstoffmangel oder Überwässerung hindeuten. Dünge die Pflanzen oder passe die Bewässerung an.
* Mehltau: Eine Pilzkrankheit, die sich durch einen weißen Belag auf den Blättern äußert. Verwende ein Fungizid oder sorge für eine bessere Belüftung.
* Schädlinge: Blattläuse, Schnecken oder andere Schädlinge können die Pflanzen befallen. Verwende biologische Schädlingsbekämpfungsmittel oder sammle die Schädlinge von Hand ab.
* Früchte faulen: Können durch Staunässe oder Kontakt mit dem Boden verursacht werden. Sorge für eine gute Drainage und verwende eine Rankhilfe, um die Früchte vom Boden fernzuhalten.
Fazit
Mit ein wenig Geduld und Sorgfalt kannst du auch auf kleinem Raum köstliche Cantaloupe-Melonen im Pflanzsack anbauen. Ich hoffe, diese Anleitung hilft dir dabei! Viel Spaß beim Gärtnern und guten Appetit!
Conclusion
So, there you have it! Growing cantaloupe in grow bags isn’t just a trend; it’s a game-changer for gardeners of all levels, especially those with limited space or challenging soil conditions. We’ve walked you through the entire process, from selecting the right grow bag and choosing the perfect cantaloupe variety to nurturing your plants and harvesting those sweet, juicy melons.
Why is this DIY trick a must-try? Because it empowers you to enjoy the unparalleled flavor of homegrown cantaloupe, regardless of your garden size. It offers superior drainage and aeration compared to traditional in-ground planting, leading to healthier roots and more abundant yields. Plus, the portability of grow bags allows you to chase the sun, ensuring your cantaloupes receive the optimal amount of sunlight for ripening.
But the beauty of this method lies in its adaptability. Feel free to experiment with different cantaloupe varieties. Try ‘Athena’ for its disease resistance, ‘Hales Best Jumbo’ for its classic flavor, or even smaller, personal-sized varieties like ‘Sugar Cube’ if you’re short on space. You can also adjust the soil mix to suit your specific needs. Adding more compost will boost nutrient levels, while incorporating perlite will further improve drainage.
Consider companion planting to enhance your cantaloupe’s growth. Marigolds can deter pests, while basil can improve flavor. Just be mindful of spacing to avoid overcrowding. And don’t forget to provide adequate support for your growing vines, especially as the melons begin to develop. A simple trellis or even a sturdy tomato cage can make a world of difference.
Ultimately, growing cantaloupe in grow bags is about more than just producing delicious fruit; it’s about connecting with nature, learning new skills, and experiencing the satisfaction of nurturing something from seed to harvest. It’s about taking control of your food source and enjoying the freshest, most flavorful cantaloupe imaginable.
We wholeheartedly encourage you to give this DIY trick a try. Don’t be intimidated if you’re a beginner; the steps are straightforward, and the rewards are well worth the effort. And once you’ve harvested your first homegrown cantaloupe, we’d love to hear about your experience! Share your photos, tips, and triumphs in the comments below. Let’s build a community of grow bag cantaloupe enthusiasts and inspire others to embark on this rewarding gardening journey. Remember, the key to success is patience, observation, and a willingness to learn. Happy growing! This method is a great way to get the best **cantaloupe** you have ever tasted.
Frequently Asked Questions (FAQ)
1. What size grow bag is best for growing cantaloupe?
The ideal size grow bag for cantaloupe is typically between 15 and 25 gallons. This provides ample space for the root system to develop and allows for sufficient soil volume to retain moisture and nutrients. While you can technically use a smaller bag (e.g., 10 gallons), you’ll likely need to water and fertilize more frequently, and the overall yield may be reduced. A larger bag (e.g., 30 gallons or more) is generally unnecessary and may be more difficult to move. Consider the mature size of the cantaloupe variety you’re growing when making your decision. Larger varieties will benefit from a larger grow bag.
2. What type of soil should I use in my grow bag for cantaloupe?
Cantaloupe plants thrive in well-draining, nutrient-rich soil. A good starting point is a mix of equal parts potting soil, compost, and perlite or vermiculite. The potting soil provides a base for the mix, the compost adds essential nutrients and improves water retention, and the perlite or vermiculite enhances drainage and aeration. Avoid using garden soil directly in your grow bag, as it can become compacted and hinder root growth. You can also amend the soil with slow-release fertilizer to provide a steady supply of nutrients throughout the growing season. Consider adding a small amount of bone meal to promote strong root development and blossom set.
3. How often should I water my cantaloupe plants in grow bags?
Watering frequency will depend on several factors, including the weather, the size of the grow bag, and the stage of plant growth. Generally, you should water your cantaloupe plants whenever the top inch of soil feels dry to the touch. During hot, sunny weather, this may mean watering daily, or even twice a day. In cooler or cloudier weather, you may only need to water every other day. Be sure to water deeply, allowing the water to drain out of the bottom of the grow bag. Avoid overwatering, as this can lead to root rot. A good way to check if your plants need water is to lift the grow bag. If it feels light, it’s likely time to water.
4. How much sunlight do cantaloupe plants need in grow bags?
Cantaloupe plants require at least 6-8 hours of direct sunlight per day to thrive. Choose a location for your grow bag that receives ample sunlight throughout the day. If you live in a particularly hot climate, you may want to provide some afternoon shade to prevent the plants from overheating. The portability of grow bags makes it easy to move your plants to follow the sun or provide shade as needed. If you’re growing cantaloupe indoors, you’ll need to supplement with grow lights to provide sufficient light.
5. How do I fertilize cantaloupe plants in grow bags?
Cantaloupe plants are heavy feeders and require regular fertilization to produce abundant fruit. Start by incorporating slow-release fertilizer into the soil mix at planting time. Then, supplement with liquid fertilizer every 2-3 weeks throughout the growing season. Use a balanced fertilizer (e.g., 10-10-10) during the early stages of growth, and then switch to a fertilizer with a higher phosphorus content (e.g., 5-10-5) once the plants begin to flower and set fruit. Avoid over-fertilizing, as this can lead to excessive vegetative growth and reduced fruit production.
6. How do I prevent pests and diseases from affecting my cantaloupe plants in grow bags?
Growing cantaloupe in grow bags can actually help reduce the risk of soilborne diseases. However, it’s still important to take precautions to prevent pests and diseases. Regularly inspect your plants for signs of pests, such as aphids, squash bugs, and cucumber beetles. Handpick pests whenever possible, or use insecticidal soap or neem oil to control infestations. To prevent fungal diseases, ensure good air circulation around your plants and avoid overhead watering. If you notice signs of disease, such as powdery mildew or leaf spot, treat promptly with a fungicide. Companion planting with marigolds can also help deter pests.
7. How do I know when my cantaloupe is ripe and ready to harvest?
Knowing when to harvest cantaloupe is crucial for enjoying its optimal flavor and sweetness. There are several indicators to look for. First, the skin of the cantaloupe will change color from green to a tan or yellowish hue. Second, the stem will begin to slip easily from the fruit. This is known as the “full slip” stage. Third, the cantaloupe will emit a sweet, musky aroma. Finally, the blossom end of the cantaloupe will soften slightly. Once all of these indicators are present, your cantaloupe is likely ripe and ready to harvest. Gently twist the cantaloupe from the vine, and enjoy!
8. Can I grow cantaloupe in grow bags in a greenhouse?
Yes, growing cantaloupe in grow bags in a greenhouse is an excellent option, especially in regions with shorter growing seasons or cooler climates. The greenhouse provides a controlled environment that can extend the growing season and protect your plants from frost and other weather extremes. Be sure to provide adequate ventilation in the greenhouse to prevent overheating and humidity buildup. You may also need to hand-pollinate the flowers, as pollinators may not be as active in a greenhouse environment.
9. What are some good companion plants for cantaloupe in grow bags?
Companion planting can be a beneficial practice for cantaloupe, helping to deter pests, attract pollinators, and improve overall plant health. Some good companion plants for cantaloupe include:
* **Marigolds:** Deter nematodes and other soil pests.
* **Basil:** Repels aphids and other insects, and may improve the flavor of the cantaloupe.
* **Nasturtiums:** Attract aphids away from the cantaloupe plants.
* **Radishes:** Can help deter cucumber beetles.
* **Beans:** Fix nitrogen in the soil, which can benefit cantaloupe growth.
Avoid planting cantaloupe near potatoes, as they can compete for nutrients.
10. Can I reuse grow bags for growing cantaloupe in subsequent years?
Yes, you can reuse grow bags for growing cantaloupe in subsequent years, but it’s important to take a few precautions. First, thoroughly clean the grow bag to remove any remaining soil or plant debris. You can wash the bag with soap and water, or even soak it in a diluted bleach solution to kill any pathogens. Second, replace the soil with fresh potting mix. Avoid reusing the old soil, as it may be depleted of nutrients and harbor pests or diseases. Finally, inspect the grow bag for any signs of damage, such as tears or

Leave a Comment