
Grow Onions Easily DIY – that’s the magic phrase that will unlock a world of flavor and freshness right in your backyard! Have you ever dreamt of snipping fresh, vibrant green onion tops for your salad or pulling up a perfectly formed bulb for your favorite stew? Well, stop dreaming and start doing! This isn’t just about gardening; it’s about connecting with nature, saving money, and enjoying the unparalleled taste of homegrown produce.
Onions have a rich history, dating back thousands of years. Ancient Egyptians revered them, even using them as offerings to the gods! From humble beginnings to culinary staples, onions have nourished civilizations. But let’s face it, sometimes growing them can feel like a bit of a mystery. That’s where these DIY tricks come in.
In today’s busy world, who has time for complicated gardening techniques? That’s why I’m sharing these simple, effective, and time-saving methods to help you grow onions easily DIY, even if you have limited space or experience. Imagine the satisfaction of harvesting your own onions, knowing exactly where they came from and what went into growing them. No more questionable supermarket produce – just pure, delicious, homegrown goodness. Plus, these DIY hacks are not only easy but also incredibly rewarding. Let’s get our hands dirty and transform your garden (or even a sunny windowsill!) into an onion-growing paradise!
Zwiebeln einfach selbst ziehen: Dein DIY-Guide für eine reiche Ernte
Hey Gartenfreunde! Habt ihr Lust, eure eigenen Zwiebeln anzubauen? Es ist einfacher als ihr denkt und schmeckt einfach unschlagbar, wenn man weiß, dass man sie selbst gezogen hat. Ich zeige euch, wie ihr mit einfachen Mitteln und ein bisschen Geduld eine reiche Zwiebelernte erzielen könnt. Los geht’s!
Was du brauchst: Die Vorbereitung
Bevor wir loslegen, brauchen wir natürlich das richtige Material. Hier ist eine Liste, damit du alles griffbereit hast:
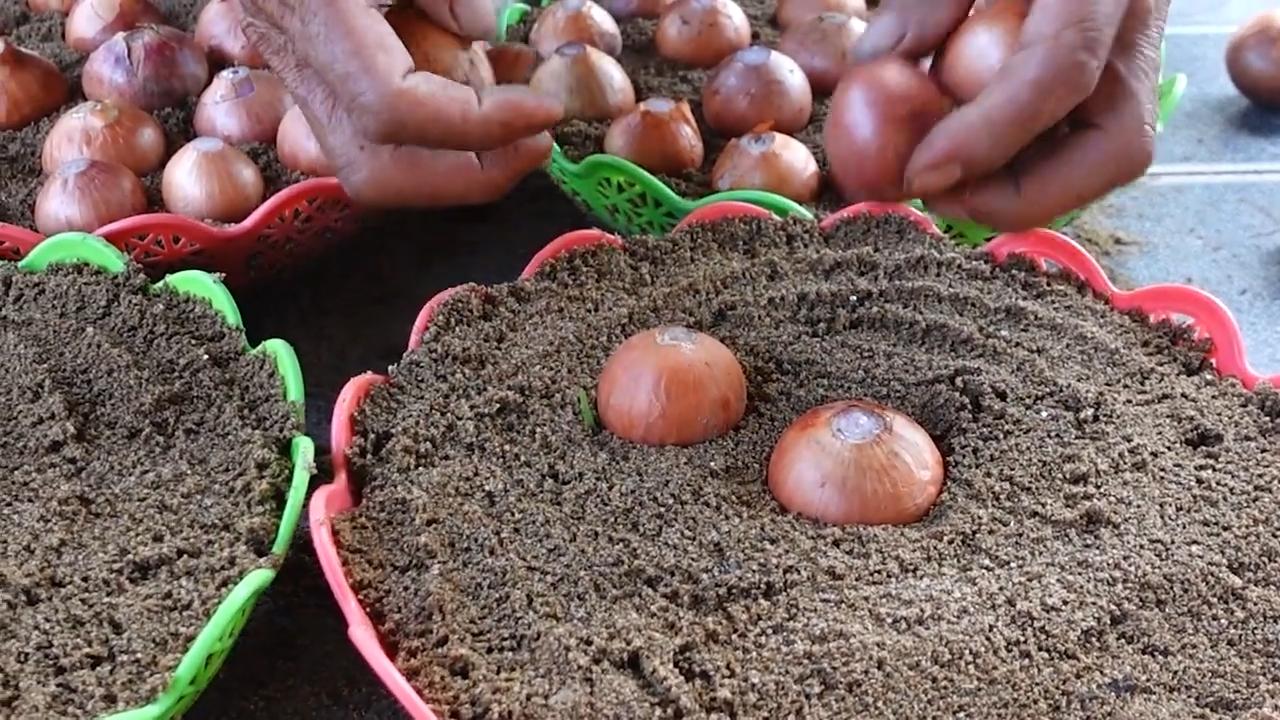
* Zwiebeln: Entweder Steckzwiebeln (die sind super einfach für Anfänger) oder Zwiebelsamen. Ich persönlich mag Steckzwiebeln, weil sie schneller Ergebnisse liefern.
* Gute Erde: Am besten eine lockere, humusreiche Erde. Du kannst entweder spezielle Gemüseerde kaufen oder deine eigene mischen.
* Pflanzgefäße oder Gartenbeet: Je nachdem, ob du im Garten oder auf dem Balkon anbaust.
* Gießkanne: Zum Bewässern, natürlich!
* Gartengeräte: Eine kleine Schaufel oder Pflanzkelle, um die Zwiebeln einzupflanzen.
* Dünger (optional): Ein organischer Dünger kann das Wachstum fördern.
* Geduld: Zwiebeln brauchen Zeit zum Wachsen!
Schritt-für-Schritt-Anleitung: Zwiebeln pflanzen
Jetzt geht’s ans Eingemachte! Hier ist eine detaillierte Anleitung, wie du deine Zwiebeln erfolgreich pflanzt:
1. Den richtigen Zeitpunkt wählen: Der beste Zeitpunkt zum Pflanzen von Zwiebeln ist im Frühjahr (März/April) oder im Herbst (September/Oktober). Die genaue Zeit hängt von deiner Region ab. Achte darauf, dass kein Frost mehr zu erwarten ist. Ich pflanze meine meistens im April, wenn die Temperaturen etwas milder sind.
2. Den Standort vorbereiten: Zwiebeln lieben die Sonne! Wähle einen sonnigen Standort in deinem Garten oder auf deinem Balkon. Lockere die Erde gut auf und entferne Unkraut. Wenn du im Topf anbaust, achte darauf, dass der Topf ausreichend groß ist und Abzugslöcher hat, damit das Wasser gut ablaufen kann.
3. Die Zwiebeln vorbereiten: Wenn du Steckzwiebeln verwendest, kannst du sie direkt einpflanzen. Wenn du Zwiebelsamen verwendest, musst du sie zuerst vorziehen. Das geht am besten in kleinen Anzuchttöpfen oder einer Anzuchtschale.
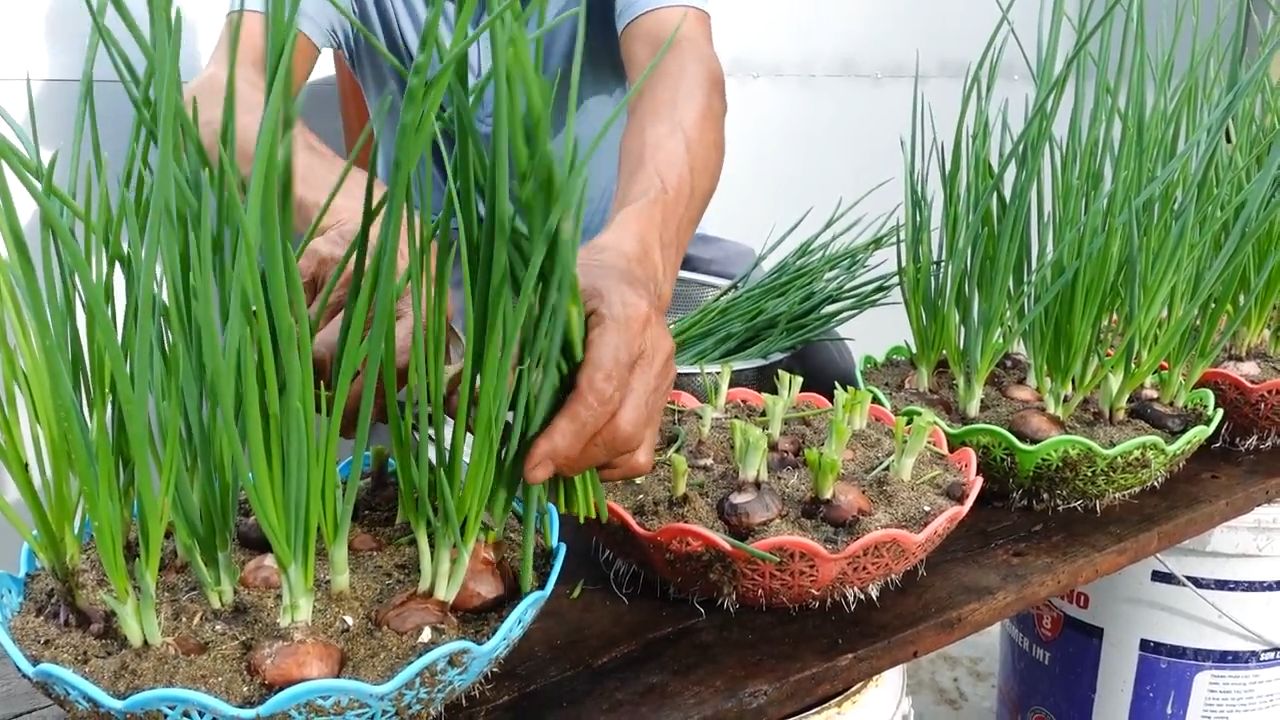
4. Steckzwiebeln pflanzen:
* Mache mit der Pflanzkelle kleine Löcher in die Erde. Die Löcher sollten etwa 5-8 cm tief sein.
* Setze die Steckzwiebeln mit der Spitze nach oben in die Löcher.
* Bedecke die Zwiebeln mit Erde, sodass nur noch die Spitze herausschaut.
* Drücke die Erde leicht an.
* Gieße die Zwiebeln vorsichtig an.
5. Zwiebelsamen säen:
* Fülle die Anzuchttöpfe oder die Anzuchtschale mit Anzuchterde.
* Verteile die Zwiebelsamen gleichmäßig auf der Erde.
* Bedecke die Samen mit einer dünnen Schicht Erde.
* Befeuchte die Erde mit einer Sprühflasche.
* Stelle die Anzuchttöpfe oder die Anzuchtschale an einen hellen und warmen Ort.
* Halte die Erde feucht, aber nicht nass.
* Sobald die Sämlinge groß genug sind (etwa 5-10 cm), kannst du sie in größere Töpfe oder ins Gartenbeet umpflanzen.
6. Der richtige Abstand: Achte darauf, dass du genügend Abstand zwischen den Zwiebeln lässt. Ein Abstand von etwa 10-15 cm ist ideal. So haben die Zwiebeln genügend Platz zum Wachsen und entwickeln.
7. Gießen: Gieße die Zwiebeln regelmäßig, besonders in trockenen Perioden. Die Erde sollte immer leicht feucht sein, aber nicht nass. Vermeide Staunässe, da dies zu Fäulnis führen kann.
8. Düngen (optional): Wenn du möchtest, kannst du deine Zwiebeln während der Wachstumsphase mit einem organischen Dünger düngen. Das fördert das Wachstum und die Entwicklung der Zwiebeln. Ich verwende gerne Kompost oder Hornspäne.
Pflege während der Wachstumsphase
Die Arbeit ist noch nicht getan! Jetzt geht es darum, die Zwiebeln gut zu pflegen, damit sie prächtig gedeihen.
* Unkraut entfernen: Halte das Beet oder die Töpfe unkrautfrei. Unkraut konkurriert mit den Zwiebeln um Nährstoffe und Wasser.
* Boden lockern: Lockere den Boden regelmäßig auf, damit die Wurzeln ausreichend Sauerstoff bekommen.
* Schädlinge beobachten: Achte auf Schädlinge wie Zwiebelfliegen oder Lauchmotten. Bei Bedarf kannst du biologische Schädlingsbekämpfungsmittel einsetzen. Ich hatte zum Glück noch nie große Probleme damit, aber es ist gut, vorbereitet zu sein.
* Gießen anpassen: Passe die Wassermenge an die Wetterbedingungen an. An heißen Tagen brauchen die Zwiebeln mehr Wasser als an kühlen Tagen.
Die Ernte: Wann sind die Zwiebeln reif?
Das ist der spannendste Teil! Du hast deine Zwiebeln gehegt und gepflegt, und jetzt ist es Zeit, die Früchte deiner Arbeit zu ernten.
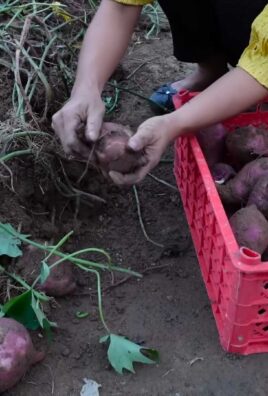
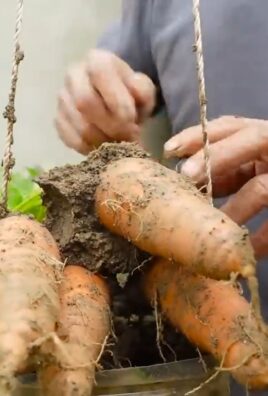
* Anzeichen der Reife: Die Zwiebeln sind reif, wenn das Laub gelb wird und umknickt. Das ist ein Zeichen dafür, dass die Zwiebeln ihr Wachstum abgeschlossen haben.
* Ernten: Ziehe die Zwiebeln vorsichtig aus der Erde. Schüttle die Erde ab und lasse die Zwiebeln an einem trockenen und luftigen Ort trocknen. Das Trocknen ist wichtig, damit die Zwiebeln haltbar werden.
* Lagern: Lagere die getrockneten Zwiebeln an einem kühlen, trockenen und dunklen Ort. So halten sie sich mehrere Monate. Ich hänge meine Zwiebeln gerne in Zöpfen auf, das sieht nicht nur schön aus, sondern sorgt auch für eine gute Belüftung.
Extra-Tipps für eine erfolgreiche Zwiebelernte
Hier sind noch ein paar zusätzliche Tipps, die dir helfen können, deine Zwiebelernte zu optimieren:
* Fruchtfolge beachten: Pflanze Zwiebeln nicht jedes Jahr am selben Standort. Wechsle die Kulturen ab, um Krankheiten und Schädlingen vorzubeugen.
* Boden verbessern: Verbessere den Boden vor dem Pflanzen mit Kompost oder anderem organischen Material. Das sorgt für eine gute Nährstoffversorgung.
* Sortenvielfalt: Probiere verschiedene Zwiebelsorten aus, um herauszufinden, welche am besten in deinem Garten oder auf deinem Balkon gedeihen. Es gibt gelbe, rote und weiße Zwiebeln, jede mit ihrem eigenen Geschmack.
* Frühzeitig aussäen: Wenn du Zwiebelsamen verwendest, kannst du sie bereits im Februar oder März im Haus vorziehen. Das gibt den Zwiebeln einen Wachstumsvorsprung.
* Mulchen: Mulche den Boden um die Zwiebeln herum mit Stroh oder Rasenschnitt. Das hält den Boden feucht und unterdrückt Unkraut.
Häufige Probleme und Lösungen
Auch beim Zwiebelanbau können Probleme auftreten. Hier sind einige häufige Probleme und wie du sie lösen kannst:
* Zwiebelfliegen: Die Larven der Zwiebelfliege fressen an den Zwiebeln und können sie zerstören. Schütze deine Zwiebeln mit einem Insektenschutznetz oder setze Nützlinge wie Schlupfwespen ein.
* Falscher Mehltau: Falscher Mehltau ist eine Pilzkrankheit, die sich durch einen weißen Belag auf den Blättern äußert. Sorge für eine gute Belüftung und vermeide Staunässe. Bei Bedarf kannst du ein Fungizid einsetzen.
* Zwiebelrost: Zwiebelrost ist eine weitere Pilzkrankheit, die sich durch orangefarbene P
Conclusion
So, there you have it! Growing onions easily DIY is not just a catchy phrase; it’s a genuinely achievable goal with this simple yet effective method. We’ve walked you through the steps, highlighting how you can transform kitchen scraps into a thriving onion patch, saving you money and reducing food waste in the process. This isn’t just about growing onions; it’s about embracing a more sustainable and self-sufficient lifestyle.
But why is this DIY trick a must-try? Firstly, it’s incredibly cost-effective. Instead of constantly buying onions from the grocery store, you’re essentially recycling the base of the onion you already use. Over time, this can lead to significant savings, especially if you’re a frequent onion user. Secondly, it’s environmentally friendly. By regrowing your onions, you’re reducing the amount of food waste that ends up in landfills, contributing to a healthier planet. Thirdly, it’s surprisingly easy and rewarding. Watching your little onion scraps sprout and grow into full-fledged onions is a truly satisfying experience. It’s a fantastic way to connect with nature and learn more about the food you eat.
Beyond the basic method, there are several exciting variations you can explore. For instance, you can experiment with different types of onions. Try regrowing red onions, shallots, or even scallions using the same technique. Each variety will offer a slightly different flavor profile and growth habit, adding diversity to your homegrown onion collection. Another variation involves using different growing mediums. While we’ve focused on water propagation, you can also try planting the onion base directly into soil. This method may require a bit more attention to watering and fertilization, but it can also result in faster and more robust growth. You can also try using different containers. While a simple glass of water works well, you can also use small pots, recycled containers, or even a hydroponic system for a more advanced setup.
Consider adding companion plants to your onion patch. Plants like carrots, chamomile, and summer savory are known to deter pests and improve the overall health of your onions. Experiment with different combinations to see what works best in your garden. You can also try succession planting to ensure a continuous supply of fresh onions. Plant new onion bases every few weeks to stagger your harvests and avoid periods of scarcity.
We wholeheartedly encourage you to give this DIY onion-growing trick a try. It’s a fun, easy, and rewarding project that anyone can do, regardless of their gardening experience. Don’t be afraid to experiment, adapt the method to your specific needs and preferences, and most importantly, have fun!
Once you’ve successfully grown your own onions, we’d love to hear about your experience. Share your photos, tips, and stories with us in the comments section below. Let’s create a community of DIY onion growers and inspire others to embrace this sustainable and rewarding practice. Your insights and experiences can help others overcome challenges and achieve success in their own onion-growing endeavors. Let’s all learn and grow together! Remember, growing onions easily DIY is within everyone’s reach.
Frequently Asked Questions (FAQ)
How long does it take for an onion to regrow from its base?
The time it takes for an onion to regrow from its base can vary depending on several factors, including the type of onion, the growing conditions, and the method used. Generally, you can expect to see new green shoots emerging from the onion base within a week or two. However, it may take several months for the onion to fully mature and produce a usable bulb.
In the initial stages, the onion will focus on developing its root system and green shoots. Once the roots are established, the onion will begin to grow more rapidly. If you’re growing the onion in water, you’ll need to transplant it into soil once the roots are a few inches long. This will provide the onion with the nutrients it needs to continue growing.
If you’re growing the onion directly in soil, make sure to keep the soil moist but not waterlogged. Overwatering can lead to root rot, which can kill the onion. You should also fertilize the onion regularly with a balanced fertilizer to provide it with the nutrients it needs to thrive.
What kind of onions work best for regrowing?
While you can regrow almost any type of onion from its base, some varieties tend to be more successful than others. Green onions (scallions) are particularly easy to regrow, as they readily sprout new shoots from their base. Yellow onions, white onions, and red onions can also be regrown, but they may take a bit longer to sprout and may not produce as large of a bulb.
Shallots are another excellent option for regrowing. They tend to multiply readily, producing multiple new bulbs from a single base. This can be a great way to increase your onion yield.
When selecting onions for regrowing, choose ones that are firm and healthy, with no signs of rot or decay. Avoid onions that have already started to sprout, as they may be less likely to regrow successfully.
How often should I change the water when regrowing onions in water?
When regrowing onions in water, it’s important to change the water regularly to prevent the growth of bacteria and algae. You should aim to change the water every one to two days, or more frequently if the water becomes cloudy or discolored.
When changing the water, be careful not to damage the roots of the onion. Gently lift the onion out of the glass or container, pour out the old water, and rinse the container thoroughly. Then, refill the container with fresh water and place the onion back in.
Using filtered or distilled water can help to prevent the buildup of minerals and other impurities that can inhibit growth. You can also add a small amount of hydrogen peroxide to the water to help prevent the growth of bacteria and algae.
What do I do after the onion has grown roots in water?
Once the onion has grown roots that are a few inches long, it’s time to transplant it into soil. This will provide the onion with the nutrients it needs to continue growing and develop a bulb.
Choose a pot or container that is at least 6 inches deep and wide. Fill the pot with a well-draining potting mix. Gently remove the onion from the water and plant it in the soil, making sure to cover the roots completely.
Water the onion thoroughly after planting and keep the soil moist but not waterlogged. Place the pot in a sunny location where the onion will receive at least 6 hours of sunlight per day.
Fertilize the onion regularly with a balanced fertilizer to provide it with the nutrients it needs to thrive. You can also add compost or other organic matter to the soil to improve its fertility.
Can I grow onions indoors year-round using this method?
Yes, you can grow onions indoors year-round using this method. However, you’ll need to provide the onions with adequate light and warmth to ensure their success.
If you’re growing onions indoors during the winter months, you may need to supplement the natural light with grow lights. Onions need at least 6 hours of sunlight per day to thrive.
You should also keep the onions in a warm location, away from drafts and cold temperatures. Onions prefer temperatures between 60 and 70 degrees Fahrenheit.
With proper care and attention, you can enjoy a continuous supply of fresh onions year-round by growing them indoors. This is a great way to have fresh ingredients on hand, regardless of the season.
Leave a Comment