
Terrace Guava Tree Harvest: There’s nothing quite like the satisfaction of biting into a juicy, homegrown guava, especially when you’ve nurtured that tree yourself, right on your terrace! Imagine plucking ripe, fragrant guavas just steps from your door – it’s a dream many urban gardeners share, and I’m here to tell you, it’s absolutely achievable.
Guava trees have a rich history, deeply rooted in tropical and subtropical cultures around the world. From being a vital food source to holding symbolic significance in various traditions, the guava has always been cherished. Now, you can bring that piece of history and deliciousness to your own home.
But let’s be honest, successfully managing a terrace guava tree harvest in a limited space can feel daunting. Pests, diseases, and the sheer challenge of providing the right conditions can leave you feeling overwhelmed. That’s where these DIY tricks and hacks come in! I’m going to share simple, effective strategies to maximize your yield, protect your precious tree, and ensure you’re enjoying a bountiful harvest year after year. Think of it as your personal guide to guava-growing success, tailored specifically for terrace gardens. So, grab your gardening gloves, and let’s get started on transforming your terrace into a guava paradise!
Guaven-Ernte auf der Terrasse: So machst du es richtig!
Hallo ihr Lieben! Ich freue mich riesig, euch heute mitzunehmen auf meine Guaven-Ernte-Reise direkt von meiner Terrasse! Es ist ein unglaublich befriedigendes Gefühl, eigene Früchte anzubauen und zu ernten, und ich möchte euch zeigen, wie auch ihr das schaffen könnt. Guaven sind nicht nur superlecker, sondern auch reich an Vitaminen und Antioxidantien. Also, lasst uns loslegen!
Vorbereitung auf die Ernte
Bevor wir mit dem Pflücken beginnen, ist es wichtig, dass wir uns gut vorbereiten. Eine gute Vorbereitung ist das A und O für eine erfolgreiche Ernte.
* Werkzeug bereitstellen: Sammelt alles, was ihr braucht. Dazu gehören:
* Eine saubere Gartenschere oder ein scharfes Messer.
* Einen Korb oder eine Schüssel für die geernteten Guaven.
* Handschuhe, um eure Hände sauber zu halten und euch vor eventuellen Stacheln zu schützen (obwohl Guavenbäume in der Regel keine haben).
* Eine Leiter oder einen Hocker, falls eure Guave hoch oben hängt.
* Den Baum inspizieren: Schaut euch euren Guavenbaum genau an. Achtet auf reife Früchte, die bereit zur Ernte sind.
* Wetter checken: Erntet am besten an einem trockenen Tag. Feuchtigkeit kann die Früchte anfälliger für Schimmel machen.
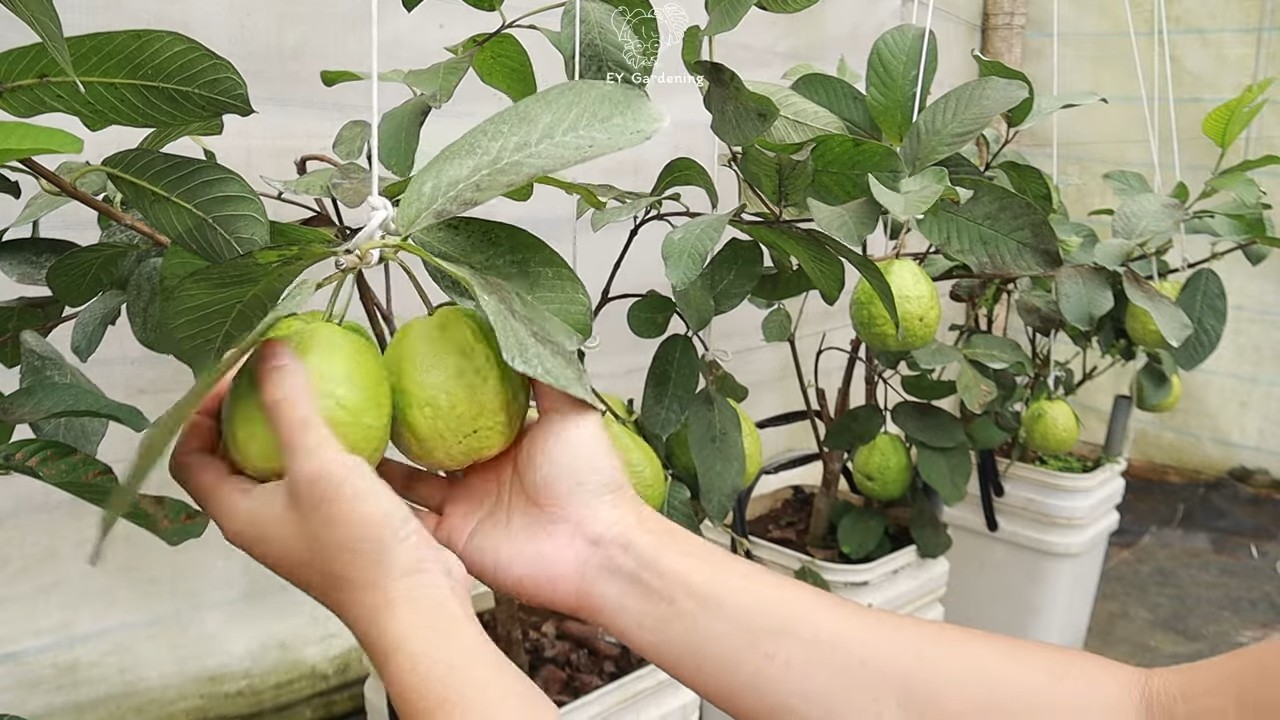
Wie erkenne ich reife Guaven?
Das ist eine der wichtigsten Fragen! Es gibt verschiedene Anzeichen, auf die ihr achten könnt, um festzustellen, ob eure Guaven reif sind:
* Farbe: Die Farbe der Guave verändert sich, wenn sie reif ist. Je nach Sorte kann sie von Grün zu Gelb, Rosa oder sogar Rot wechseln. Achtet auf eine gleichmäßige, satte Farbe.
* Duft: Reife Guaven verströmen einen süßen, aromatischen Duft. Wenn ihr eine Guave in die Hand nehmt und sie duftet herrlich, ist das ein gutes Zeichen.
* Textur: Die Frucht sollte leicht weich sein, wenn ihr sie sanft drückt. Sie sollte nicht steinhart sein, aber auch nicht zu matschig.
* Leichtes Ablösen: Eine reife Guave lässt sich leicht vom Baum pflücken. Wenn ihr ziehen müsst, ist sie wahrscheinlich noch nicht reif.
Die Ernte: Schritt für Schritt
Jetzt kommt der spannende Teil: Die Ernte selbst!
1. Auswahl der reifen Früchte: Geht systematisch vor und sucht nach den Guaven, die die oben genannten Kriterien erfüllen. Achtet darauf, keine unreifen Früchte zu pflücken, da diese nicht nachreifen.
2. Schneiden oder Pflücken:
* Schneiden: Wenn die Guave etwas schwerer zu erreichen ist, verwendet eure Gartenschere oder euer Messer, um sie vorsichtig vom Baum zu schneiden. Schneidet den Stiel knapp über der Frucht ab, um Beschädigungen zu vermeiden.
* Pflücken: Wenn die Guave leicht zu erreichen ist und sich leicht vom Baum löst, könnt ihr sie einfach vorsichtig abdrehen.
3. Behandlung der Früchte: Legt die geernteten Guaven vorsichtig in euren Korb oder eure Schüssel. Vermeidet es, sie zu quetschen oder zu werfen, da sie leicht beschädigt werden können.
4. Kontrolle des Baumes: Nachdem ihr die reifen Früchte geerntet habt, schaut euch den Baum noch einmal genau an. Vielleicht habt ihr eine übersehen oder eine, die in den nächsten Tagen reif sein wird.
5. Reinigung des Werkzeugs: Reinigt eure Gartenschere oder euer Messer nach der Ernte gründlich, um die Ausbreitung von Krankheiten zu verhindern.
Lagerung und Verarbeitung der Guaven
Nach der Ernte stellt sich natürlich die Frage: Was mache ich jetzt mit all den leckeren Guaven?
* Lagerung:
* Zimmertemperatur: Reife Guaven können bei Zimmertemperatur für ein paar Tage gelagert werden. Achtet darauf, sie nicht direktem Sonnenlicht oder Hitze auszusetzen.
* Kühlschrank: Wenn ihr die Guaven länger aufbewahren möchtet, könnt ihr sie im Kühlschrank lagern. Wickelt sie in Papier oder legt sie in einen perforierten Beutel, um die Feuchtigkeit zu regulieren. Im Kühlschrank halten sie sich etwa eine Woche.
* Verarbeitung:
* Frisch essen: Die einfachste und leckerste Art, Guaven zu genießen, ist, sie frisch zu essen. Schneidet sie einfach auf und genießt das süße, aromatische Fruchtfleisch.
* Smoothies: Guaven sind eine tolle Zutat für Smoothies. Sie verleihen ihnen eine exotische Note und sind reich an Vitaminen.
* Marmelade: Aus Guaven lässt sich eine köstliche Marmelade herstellen. Das Rezept ist relativ einfach und die Marmelade schmeckt fantastisch auf Brot oder Brötchen.
* Saft: Guavensaft ist erfrischend und gesund. Ihr könnt ihn entweder selbst herstellen oder im Supermarkt kaufen.
* Desserts: Guaven können auch in verschiedenen Desserts verwendet werden, wie zum Beispiel Kuchen, Torten oder Eis.
Problemlösung bei der Guaven-Ernte
Manchmal läuft nicht alles glatt. Hier sind ein paar häufige Probleme und wie ihr sie lösen könnt:
* Früchte fallen vorzeitig ab: Das kann verschiedene Ursachen haben, wie zum Beispiel Wassermangel, Nährstoffmangel oder Schädlingsbefall. Achtet darauf, euren Baum ausreichend zu gießen und zu düngen. Bei Schädlingsbefall solltet ihr geeignete Maßnahmen ergreifen.
* Früchte sind nicht süß genug: Das kann an der Sorte liegen oder daran, dass der Baum nicht genügend Sonnenlicht bekommt. Wählt eine süße Sorte und stellt sicher, dass euer Baum an einem sonnigen Standort steht.
* Schädlinge befallen die Früchte: Es gibt verschiedene Schädlinge, die Guaven befallen können, wie zum Beispiel Fruchtfliegen oder Blattläuse. Kontrolliert euren Baum regelmäßig und ergreift bei Bedarf Maßnahmen zur Schädlingsbekämpfung.
Tipps für eine reiche Guaven-Ernte im nächsten Jahr
Damit ihr auch im nächsten Jahr wieder eine reiche Guaven-Ernte habt, solltet ihr folgende Tipps beachten:
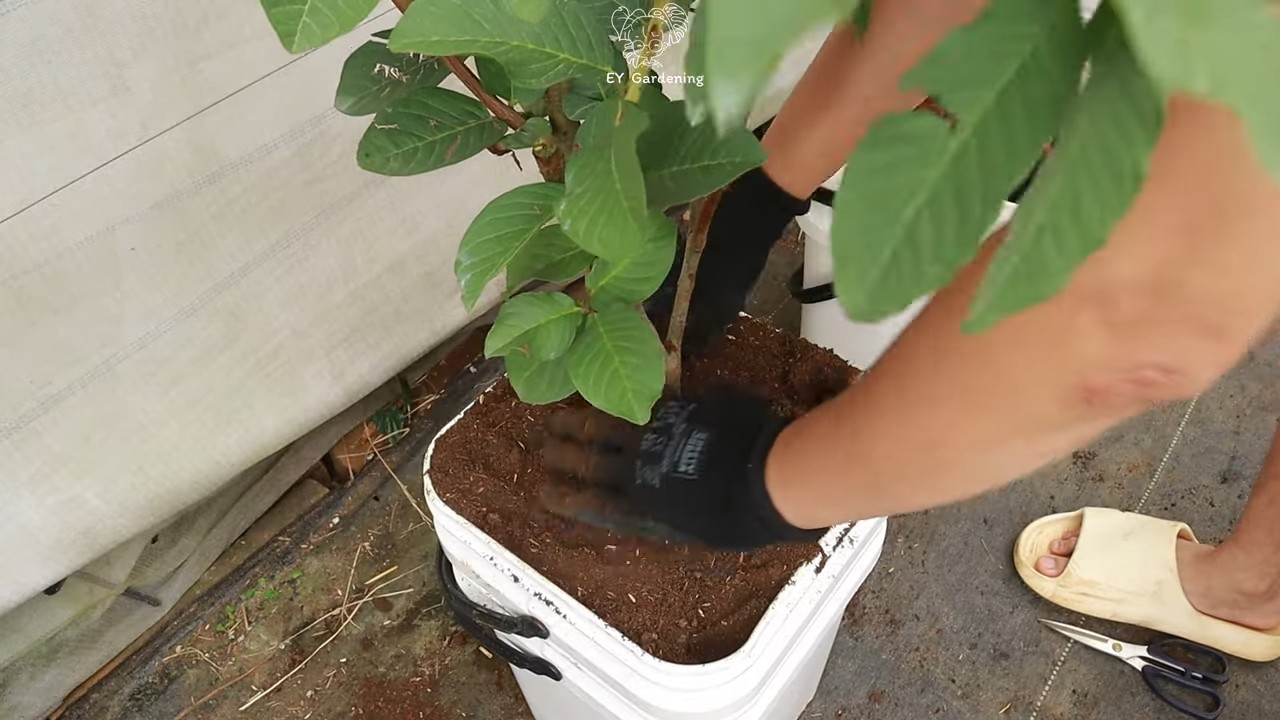
* Regelmäßiges Gießen: Guavenbäume brauchen ausreichend Wasser, besonders während der Blütezeit und der Fruchtentwicklung.
* Düngen: Düngt euren Baum regelmäßig mit einem ausgewogenen Dünger, um ihm die notwendigen Nährstoffe zuzuführen.
* Beschneiden: Beschneidet euren Baum regelmäßig, um ihn in Form zu halten und die Fruchtbildung zu fördern. Entfernt abgestorbene oder kranke Äste.
* Schädlingsbekämpfung: Kontrolliert euren Baum regelmäßig auf Schädlinge und ergreift bei Bedarf Maßnahmen zur Schädlingsbekämpfung.
* Schutz vor Frost: Guavenbäume sind frostempfindlich. Schützt euren Baum im Winter vor Frost, indem ihr ihn abdeckt oder ins Haus holt.
Fazit
Ich hoffe, dieser Leitfaden hat euch geholfen, eure Guaven-Ernte auf der Terrasse erfolgreich zu gestalten. Es ist ein wunderbares Gefühl, eigene Früchte anzubauen und zu ernten, und ich wünsche euch viel Erfolg dabei! Lasst mich wissen, wenn ihr Fragen habt oder eure eigenen Erfahrungen teilen möchtet. Viel Spaß beim Ernten und Genießen eurer selbst angebauten Guaven!
Conclusion
So, there you have it! Transforming your terrace guava tree harvest into delectable guava paste is not just a rewarding experience; it’s a testament to the magic of homemade goodness. This DIY guava paste recipe is a must-try for several compelling reasons. First and foremost, you’re in complete control of the ingredients. Say goodbye to artificial preservatives and excessive sugars often found in store-bought versions. Instead, you’re embracing the pure, unadulterated flavor of your own homegrown guavas.
Beyond the health benefits, crafting your own guava paste allows for unparalleled customization. Want a hint of spice? Add a pinch of chili flakes during the cooking process. Prefer a more intense guava flavor? Reduce the cooking time slightly to retain more of the fruit’s natural tang. The possibilities are truly endless. Consider adding a splash of lime juice for extra zest, or incorporating a touch of vanilla extract for a warm, comforting aroma. For a truly unique twist, experiment with different sweeteners like honey or maple syrup instead of granulated sugar.
Furthermore, making guava paste from your terrace guava tree harvest is a fantastic way to minimize food waste. Instead of letting those perfectly ripe guavas go to waste, you’re transforming them into a delicious and versatile treat that can be enjoyed for months to come. Imagine spreading it on toast, pairing it with cheese, or using it as a filling for pastries. The applications are limited only by your imagination.
This isn’t just about making guava paste; it’s about connecting with your food, appreciating the fruits of your labor (literally!), and creating something truly special. It’s about experiencing the satisfaction of transforming simple ingredients into a culinary masterpiece. It’s about embracing the joy of DIY and sharing that joy with your loved ones.
We wholeheartedly encourage you to embark on this guava paste-making adventure. Don’t be intimidated by the process; it’s simpler than you might think. Follow our recipe, experiment with your own variations, and most importantly, have fun!
Once you’ve created your own batch of homemade guava paste, we’d love to hear about your experience. Share your photos, tips, and variations in the comments below. Let’s build a community of guava paste enthusiasts and inspire others to embrace the joys of homemade goodness. What unique twists did you add? What did you pair it with? What was the reaction of your family and friends? Your feedback is invaluable and will help us refine and improve this recipe for future generations of guava paste makers. So, go ahead, harvest those guavas, and let the magic begin! Let’s celebrate the deliciousness of your terrace guava tree harvest together!
Frequently Asked Questions (FAQ)
What kind of guavas are best for making guava paste?
The best guavas for making guava paste are those that are ripe and fragrant. Pink guavas are generally preferred because they impart a beautiful color to the paste, but white guavas can also be used. The key is to choose guavas that are free from blemishes and have a strong, sweet aroma. Avoid using guavas that are overly ripe or have soft spots, as they may affect the texture and flavor of the final product. The riper the guava, the sweeter the paste will be, so adjust the amount of sugar accordingly.
How long does homemade guava paste last?
When stored properly, homemade guava paste can last for several months. The high sugar content acts as a natural preservative. To ensure its longevity, store the guava paste in an airtight container in the refrigerator. You can also wrap it tightly in plastic wrap and then store it in a freezer bag for even longer storage. Properly stored guava paste can last for up to 6 months in the refrigerator and up to a year in the freezer. Always check for any signs of spoilage, such as mold or an off odor, before consuming.
Can I use a different sweetener instead of sugar?
Yes, you can definitely experiment with different sweeteners. Honey, maple syrup, agave nectar, and even coconut sugar can be used as substitutes for granulated sugar. Keep in mind that each sweetener will impart a slightly different flavor to the guava paste. Honey will add a floral note, while maple syrup will provide a richer, more caramel-like flavor. Adjust the amount of sweetener according to your taste preferences. Start with the same amount as the sugar called for in the recipe and then adjust as needed. Also, be aware that using liquid sweeteners may slightly alter the cooking time, so keep a close eye on the consistency of the paste.
How do I know when the guava paste is done?
Determining when the guava paste is done is crucial for achieving the desired texture. The paste is ready when it has thickened considerably and pulls away from the sides of the pot as you stir it. A good test is to place a small spoonful of the paste on a cold plate. If it sets quickly and forms a soft, gel-like consistency, it’s ready. If it remains runny, continue cooking for a few more minutes and test again. Be careful not to overcook the paste, as it can become too hard and brittle. The ideal consistency should be firm enough to hold its shape but still slightly pliable.
What can I do if my guava paste is too hard?
If your guava paste turns out too hard, don’t worry, it can be salvaged. Simply add a small amount of water or guava juice to the paste and gently heat it over low heat, stirring constantly until it softens. Be careful not to add too much liquid, as this will make the paste too runny. Start with a tablespoon of liquid and add more as needed until you achieve the desired consistency. You can also add a squeeze of lime juice to brighten the flavor and help soften the paste.
Can I add other fruits or spices to the guava paste?
Absolutely! One of the best things about making homemade guava paste is the ability to customize it to your liking. You can add other fruits, such as apples, pears, or even a touch of pineapple, to complement the guava flavor. Spices like cinnamon, cloves, nutmeg, and ginger can also add warmth and depth to the paste. Experiment with different combinations to find your perfect flavor profile. A pinch of chili flakes can also add a subtle kick. Just be sure to add any additional ingredients towards the end of the cooking process to preserve their flavor and texture.
What are some ways to use guava paste?
Guava paste is incredibly versatile and can be used in a variety of ways. It’s delicious spread on toast, crackers, or cheese. It can also be used as a filling for pastries, empanadas, and other baked goods. Guava paste pairs particularly well with cream cheese, so consider using it as a filling for sandwiches or as a topping for cheesecakes. You can also melt guava paste and use it as a glaze for meats or poultry. For a simple and elegant dessert, serve guava paste with a slice of cheese and a glass of wine. The possibilities are endless!
How can I prevent the guava paste from sticking to the pot?
To prevent the guava paste from sticking to the pot, use a heavy-bottomed pot or saucepan. This will help distribute the heat evenly and prevent scorching. Stir the paste frequently, especially as it begins to thicken. You can also add a small amount of butter or coconut oil to the pot before adding the guava puree. This will create a non-stick surface and make it easier to stir the paste. If you notice any sticking, reduce the heat and continue stirring until the paste is done.
Leave a Comment