
Grow Celery Backyard: Imagine stepping outside your back door and snipping fresh, crisp celery stalks for your salad, soup, or a healthy snack. No more limp, store-bought celery that’s been sitting on the shelf for days! This isn’t just a dream; it’s an achievable reality with a few simple tricks and a little DIY spirit. For centuries, celery has been cultivated, not just for its culinary uses, but also for its medicinal properties. Ancient Romans and Greeks valued it for its digestive benefits and even used it in victory wreaths.
But let’s face it, growing celery can seem intimidating. It has a reputation for being finicky, and many gardeners shy away from it. That’s where this DIY guide comes in! I’m going to share my tried-and-true methods for successfully grow celery backyard, even if you’re a beginner. We’ll cover everything from seed starting to harvesting, ensuring you have a bountiful supply of this crunchy vegetable.
Why bother with the effort? Because homegrown celery tastes infinitely better than anything you can buy. Plus, you’ll know exactly what went into growing it – no harmful pesticides or chemicals. So, grab your gardening gloves, and let’s embark on this exciting journey to cultivate your own celery patch right in your backyard!
Sellerie im eigenen Garten ziehen: Eine Schritt-für-Schritt-Anleitung
Hey Gartenfreunde! Habt ihr euch jemals gefragt, wie man diesen knackigen, aromatischen Sellerie, den wir so gerne in Suppen, Salaten oder einfach so knabbern, selbst anbauen kann? Ich habe es ausprobiert und kann euch sagen: Es ist gar nicht so schwer, wie man denkt! Mit ein bisschen Geduld und den richtigen Schritten könnt auch ihr bald euren eigenen, frischen Sellerie ernten. Los geht’s!
Die Vorbereitung: Was ihr braucht und wo ihr anfangen solltet
Bevor wir loslegen, ist es wichtig, dass wir alles vorbereitet haben. Nichts ist ärgerlicher, als mitten im Projekt festzustellen, dass etwas fehlt. Hier ist eine Liste mit allem, was ihr braucht:
* Selleriesamen oder eine Selleriepflanze: Samen sind günstiger, aber es dauert länger, bis ihr ernten könnt. Eine Jungpflanze ist schneller, aber auch teurer. Ich empfehle für Anfänger eine Jungpflanze.
* Anzuchttöpfe oder eine Anzuchtschale: Für die Voranzucht der Samen (falls ihr euch für Samen entschieden habt).
* Anzuchterde: Spezielle Erde für die Anzucht, die nährstoffarm und locker ist.
* Gartenerde: Gute, nährstoffreiche Gartenerde für das Beet oder den Topf, in dem der Sellerie später wachsen soll.
* Kompost oder organischer Dünger: Um den Boden anzureichern und den Sellerie mit Nährstoffen zu versorgen.
* Gießkanne oder Gartenschlauch: Zum regelmäßigen Gießen.
* Mulchmaterial (z.B. Stroh oder Holzhackschnitzel): Um die Feuchtigkeit im Boden zu halten und Unkraut zu unterdrücken.
* Ein sonniger bis halbschattiger Standort: Sellerie braucht Licht, aber keine pralle Mittagssonne.
* Geduld: Sellerie braucht Zeit, um zu wachsen.
Sellerie aus Samen ziehen: Der lange Weg zum Erfolg
Wenn ihr euch für den Anbau aus Samen entschieden habt, braucht ihr etwas mehr Geduld. Aber keine Sorge, ich zeige euch, wie es geht:
1. Aussaat vorbereiten: Füllt eure Anzuchttöpfe oder die Anzuchtschale mit Anzuchterde. Befeuchtet die Erde leicht.
2. Samen aussäen: Selleriesamen sind sehr klein. Streut sie sparsam auf die Erde. Drückt sie leicht an, aber bedeckt sie nicht mit Erde. Sellerie ist ein Lichtkeimer, das heißt, er braucht Licht zum Keimen.
3. Feuchtigkeit halten: Besprüht die Samen regelmäßig mit Wasser, damit die Erde feucht bleibt. Am besten verwendet ihr eine Sprühflasche, um die Samen nicht wegzuschwemmen.
4. Warm und hell stellen: Stellt die Anzuchttöpfe an einen warmen und hellen Ort. Eine Temperatur von 20-25°C ist ideal.
5. Geduld haben: Es dauert etwa 2-3 Wochen, bis die Samen keimen.
6. Pikieren: Sobald die Sämlinge groß genug sind, um sie anzufassen (etwa 5-7 cm hoch), könnt ihr sie pikieren. Das bedeutet, dass ihr sie vorsichtig aus der Anzuchtschale nehmt und in einzelne Töpfe umpflanzt. Achtet darauf, die Wurzeln nicht zu beschädigen.
7. Weiter pflegen: Gießt die Sämlinge regelmäßig und düngt sie alle paar Wochen mit einem organischen Dünger.
8. Abhärten: Bevor ihr die Sämlinge ins Freie pflanzt, solltet ihr sie abhärten. Das bedeutet, dass ihr sie für ein paar Tage stundenweise nach draußen stellt, damit sie sich an die Sonne und den Wind gewöhnen.
Sellerie pflanzen: Der Umzug ins Beet oder den Topf
Egal, ob ihr eure Selleriepflanzen selbst gezogen oder gekauft habt, jetzt ist es Zeit, sie ins Beet oder in einen Topf zu pflanzen.
1. Den richtigen Zeitpunkt wählen: Sellerie ist frostempfindlich. Pflanzt ihn erst nach den letzten Frösten ins Freie. In der Regel ist das Mitte Mai der Fall.
2. Den Boden vorbereiten: Lockert den Boden gut auf und entfernt Unkraut. Mischt Kompost oder organischen Dünger unter die Erde, um sie mit Nährstoffen anzureichern.
3. Pflanzlöcher graben: Grabt Pflanzlöcher, die etwas größer sind als die Wurzelballen der Selleriepflanzen.
4. Pflanzen einsetzen: Setzt die Selleriepflanzen in die Pflanzlöcher und füllt sie mit Erde auf. Drückt die Erde leicht an.
5. Gießen: Gießt die Pflanzen gründlich an.
6. Mulchen: Verteilt eine Schicht Mulchmaterial um die Pflanzen, um die Feuchtigkeit im Boden zu halten und Unkraut zu unterdrücken.
Sellerie pflegen: Gießen, Düngen, Schützen
Sellerie ist zwar nicht besonders anspruchsvoll, aber er braucht regelmäßige Pflege, um gut zu wachsen.
1. Gießen: Sellerie braucht viel Wasser. Gießt ihn regelmäßig, besonders bei trockenem Wetter. Achtet darauf, dass der Boden immer feucht, aber nicht nass ist.
2. Düngen: Düngt den Sellerie alle paar Wochen mit einem organischen Dünger. Das sorgt für ein gesundes Wachstum und aromatische Stangen.
3. Unkraut entfernen: Entfernt regelmäßig Unkraut, damit der Sellerie nicht von ihm überwuchert wird.
4. Schutz vor Schädlingen: Sellerie kann von verschiedenen Schädlingen befallen werden, z.B. von Schnecken oder Blattläusen. Kontrolliert die Pflanzen regelmäßig und bekämpft Schädlinge bei Bedarf mit natürlichen Mitteln.
5. Bleichen (optional): Wenn ihr besonders helle und zarte Selleriestangen möchtet, könnt ihr sie bleichen. Das bedeutet, dass ihr die Stangen etwa 2-3 Wochen vor der Ernte mit Erde oder speziellem Bleichmaterial umhüllt. Dadurch werden sie vor Sonnenlicht geschützt und bleiben hell. Ich persönlich lasse diesen Schritt meistens weg, da ich den etwas kräftigeren Geschmack der grünen Stangen bevorzuge.
Sellerie ernten: Der Lohn der Mühe
Nach etwa 3-4 Monaten könnt ihr euren selbst angebauten Sellerie ernten.
1. Den richtigen Zeitpunkt wählen: Der Sellerie ist erntereif, wenn die Stangen eine ausreichende Größe erreicht haben und fest sind.
2. Ernten: Schneidet die Stangen mit einem scharfen Messer knapp über dem Boden ab.
3. Lagern: Sellerie hält sich im Kühlschrank etwa 1-2 Wochen. Ihr könnt ihn auch einfrieren.
Häufige Probleme und Lösungen
Auch beim Sellerieanbau können Probleme auftreten. Hier sind einige der häufigsten Probleme und wie ihr sie lösen könnt:
* Gelbe Blätter: Gelbe Blätter können ein Zeichen für Nährstoffmangel sein. Düngt den Sellerie mit einem organischen Dünger.
* Schneckenbefall: Schnecken können große Schäden an den Selleriepflanzen verursachen. Sammelt die Schnecken ab oder verwendet Schneckenkorn.
* Blattläuse: Blattläuse saugen den Pflanzensaft aus und schwächen die Pflanzen. Besprüht die Pflanzen mit einem Wasser-Seifen-Gemisch oder verwendet Nützlinge wie Marienkäfer.
* Krankheiten: Sellerie kann von verschiedenen Krankheiten befallen werden, z.B. von Selleriefäule. Achtet auf eine gute Belüftung und vermeidet Staunässe.
Zusätzliche Tipps für den erfolgreichen Sellerieanbau
Hier sind noch ein paar zusätzliche Tipps, die euch helfen können, euren Sellerieanbau noch erfolgreicher zu gestalten:
* Fruchtfolge beachten: Baut Sellerie nicht jedes Jahr am selben Standort an. Wechselt die Kulturen ab, um Krankheiten und Schädlingen vorzubeugen.
* Beetnachbarn: Gute Beetnachbarn für Sellerie sind z.B. Tomaten, Gurken, Kohl und Salat.
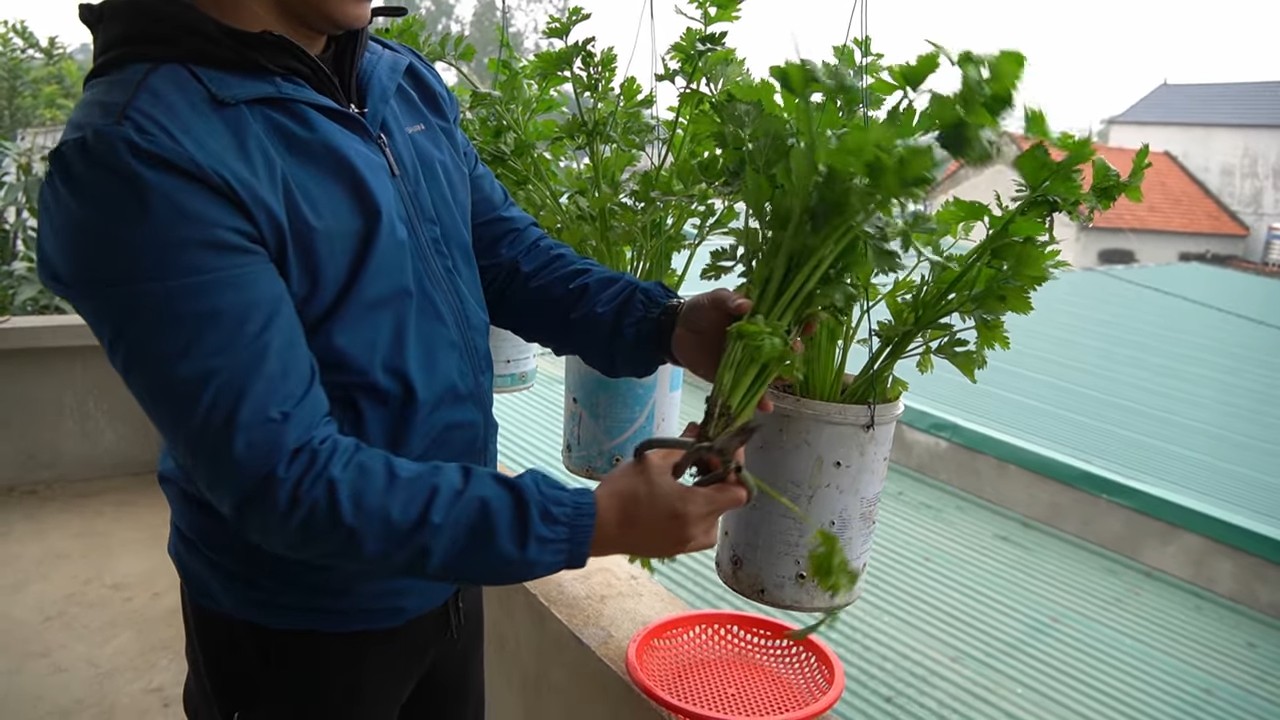
* Sellerie im Topf anbauen: Wenn ihr keinen Garten habt, könnt ihr Sellerie auch im Topf anbauen. Wählt einen ausreichend großen Topf (mindestens 20

Conclusion
So, there you have it! Growing celery in your backyard isn’t just a whimsical gardening project; it’s a genuinely rewarding experience that puts fresh, crisp, and flavorful celery right at your fingertips. Forget the limp, often tasteless stalks you find at the grocery store. Homegrown celery bursts with a vibrant taste that will elevate your salads, soups, and snacks to a whole new level.
This DIY trick is a must-try for several compelling reasons. First and foremost, you gain complete control over the growing process. You know exactly what goes into your celery, avoiding potentially harmful pesticides and herbicides. This is especially important if you’re conscious about eating organic and healthy. Secondly, the taste difference is undeniable. Freshly harvested celery has a sweetness and crunch that store-bought varieties simply can’t match. Imagine the satisfaction of snipping off a stalk just moments before adding it to your favorite dish!
But the benefits don’t stop there. Growing your own celery is also incredibly cost-effective in the long run. While the initial investment in seeds or seedlings might seem like a hurdle, consider how much you spend on celery each year. Over time, your backyard celery patch will pay for itself, providing you with a continuous supply of this versatile vegetable.
Looking for variations? Absolutely! Try experimenting with different celery varieties. ‘Utah Tall’ is a classic choice, known for its robust flavor and sturdy stalks. ‘Golden Self-Blanching’ is another popular option, offering a milder taste and a beautiful golden hue. You can also try growing celery in containers if you have limited space. Just make sure to choose a large pot with good drainage and provide plenty of sunlight.
Consider companion planting to enhance your celery’s growth and deter pests. Plant basil, onions, or garlic nearby to naturally repel insects and improve the overall health of your garden. You can also use row covers to protect your celery from extreme weather conditions or pests.
Don’t be afraid to get creative with your celery harvest. Use the leaves to make flavorful pesto or add them to soups and stews for an extra boost of flavor. The stalks can be juiced for a refreshing and healthy drink, or used as a crunchy snack with your favorite dip.
We wholeheartedly encourage you to give this DIY trick a try. Growing celery in your backyard is a fun, educational, and ultimately delicious experience. It’s a chance to connect with nature, learn about the growing process, and enjoy the fruits (or rather, vegetables) of your labor.
So, grab your gardening gloves, prepare your soil, and get ready to embark on a celery-growing adventure! And most importantly, we want to hear about your experience. Share your tips, tricks, and triumphs with us in the comments below. Let’s create a community of backyard celery growers and inspire others to discover the joys of homegrown goodness. Let us know if this **grow celery backyard** guide helped you!
Frequently Asked Questions (FAQ)
1. What is the best time of year to plant celery?
The best time to plant celery depends on your climate. In general, celery thrives in cool weather, so it’s best to start seeds indoors 10-12 weeks before the last expected frost. If you live in a warmer climate, you can start seeds in late summer for a fall or winter harvest. Celery requires a long growing season, typically around 120-140 days, so plan accordingly. Starting indoors gives the plants a head start and ensures they have enough time to mature before the weather gets too hot or cold.
2. What kind of soil does celery need?
Celery is a heavy feeder and requires rich, well-drained soil. Amend your soil with plenty of compost or well-rotted manure before planting. The ideal soil pH for celery is between 6.0 and 6.8. Celery also needs consistent moisture, so make sure your soil retains water well. Adding organic matter to the soil will help improve its water-holding capacity. Avoid planting celery in heavy clay soil, as this can lead to root rot. If you have clay soil, amend it with sand and compost to improve drainage.
3. How much sunlight does celery need?
Celery needs at least six hours of sunlight per day. Choose a sunny location in your garden where your celery plants will receive plenty of light. However, in very hot climates, celery may benefit from some afternoon shade to prevent the leaves from scorching. If you’re growing celery in containers, you can move them to a shadier location during the hottest part of the day.
4. How often should I water celery?
Celery needs consistent moisture to thrive. Water your celery plants deeply and regularly, especially during hot, dry weather. Aim to keep the soil consistently moist, but not waterlogged. A good rule of thumb is to water when the top inch of soil feels dry to the touch. Mulching around your celery plants can help retain moisture and suppress weeds. Drip irrigation is an excellent way to water celery, as it delivers water directly to the roots and minimizes water loss through evaporation.
5. How do I blanch celery?
Blanching celery is a technique used to reduce bitterness and make the stalks more tender. There are several ways to blanch celery. One method is to mound soil around the stalks, leaving only the top leaves exposed. Another method is to wrap the stalks with newspaper or cardboard, again leaving the top leaves exposed. Blanching typically takes about two to three weeks. However, some celery varieties are self-blanching, meaning they don’t require any special treatment to reduce bitterness.
6. What are some common pests and diseases that affect celery?
Celery can be susceptible to several pests and diseases, including celery leaf tier, aphids, celery blight, and pink rot. Regularly inspect your plants for signs of pests or diseases. If you find any, take action immediately to prevent them from spreading. Organic pest control methods, such as insecticidal soap or neem oil, can be effective against aphids and other pests. To prevent diseases, ensure good air circulation around your plants and avoid overhead watering. Remove any infected leaves or plants immediately to prevent the disease from spreading.
7. How do I harvest celery?
You can harvest celery when the stalks are at least 6-8 inches long. To harvest, simply cut the stalks at the base of the plant with a sharp knife. You can harvest individual stalks as needed, or harvest the entire plant at once. After harvesting, store celery in the refrigerator in a plastic bag or container. Celery will stay fresh for up to two weeks in the refrigerator.
8. Can I grow celery from the base of a store-bought stalk?
Yes, you can regrow celery from the base of a store-bought stalk. Cut off the stalks about 2 inches from the base. Place the base in a shallow dish of water, with the cut side facing up. Place the dish in a sunny location and change the water every day. After a few days, you should see new roots and leaves starting to grow. Once the roots are well-developed, you can transplant the celery base into a pot or directly into your garden. While this method won’t produce a full-sized celery plant, it’s a fun and easy way to get a small harvest of fresh celery.
9. Is celery a good source of nutrients?
Yes, celery is a good source of several essential nutrients, including vitamin K, vitamin A, folate, and potassium. It’s also a good source of dietary fiber and antioxidants. Celery is low in calories and fat, making it a healthy addition to any diet.
10. Can I grow celery indoors?
Yes, you can grow celery indoors, but it requires a bit more effort than growing it outdoors. You’ll need a large pot with good drainage, a sunny location, and consistent moisture. You may also need to supplement with artificial light, especially during the winter months. Choose a compact celery variety that is well-suited for container growing.


Leave a Comment