
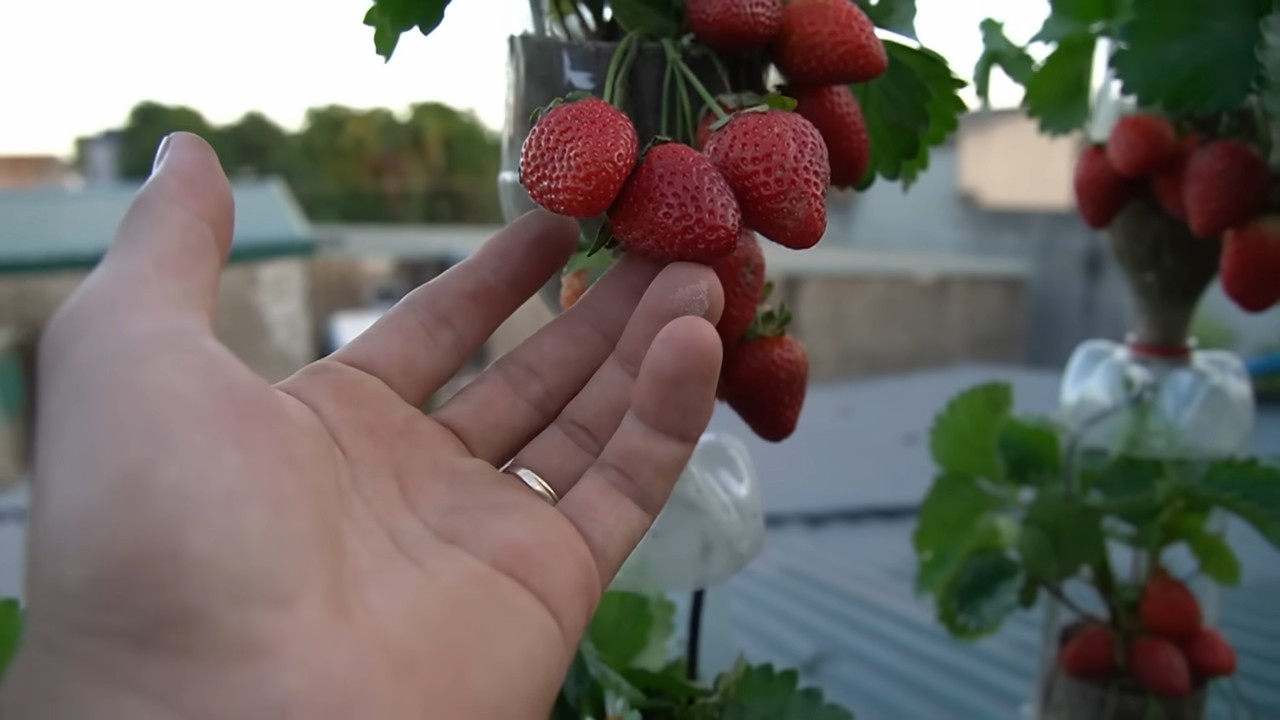
DIY Strawberry Planter Bottles: Imagine plucking juicy, sun-ripened strawberries straight from your own vertical garden, even if you only have a tiny balcony or patio! Sounds dreamy, right? Well, it’s totally achievable, and I’m here to show you how with a super fun and incredibly easy DIY project. Forget expensive planters and limited space; we’re transforming ordinary plastic bottles into a thriving strawberry haven.
The concept of vertical gardening isn’t new. In fact, it dates back centuries, with examples like the Hanging Gardens of Babylon showcasing humanity’s ingenuity in maximizing space and bringing greenery into urban environments. While we might not be building wonders of the ancient world, this DIY Strawberry Planter Bottles project taps into that same spirit of resourcefulness and creativity.
Why do you need this DIY trick? Because everyone deserves fresh, delicious strawberries, and not everyone has the luxury of a sprawling garden. Plus, store-bought strawberries can be pricey and sometimes lack that homegrown flavor. This project is not only budget-friendly and space-saving, but it’s also a fantastic way to recycle those plastic bottles that might otherwise end up in a landfill. I’m excited to share this simple yet effective method that will bring a touch of sweetness and sustainability to your life!
DIY Erdbeerpflanzer aus Plastikflaschen: So geht’s!
Hallo liebe Gartenfreunde! Habt ihr auch so wenig Platz wie ich, aber trotzdem Lust auf frische, selbst gezogene Erdbeeren? Dann habe ich hier die perfekte Lösung für euch: Einen Erdbeerpflanzer aus alten Plastikflaschen! Das ist nicht nur super nachhaltig, weil wir Müll recyceln, sondern auch platzsparend und sieht richtig cool aus. Ich zeige euch, wie ihr das ganz einfach selber machen könnt. Los geht’s!
Was du brauchst:
* Genügend leere Plastikflaschen (am besten 1,5 oder 2 Liter Flaschen) – je nachdem, wie hoch dein Pflanzturm werden soll. Ich empfehle mindestens 5-6 Flaschen.
* Ein scharfes Messer oder eine Schere
* Einen Bohrer oder einen Nagel und Hammer
* Pflanzerde
* Erdbeerpflanzen (kleine Sorten eignen sich am besten)
* Gießkanne
* Eventuell: Sprühfarbe (optional, um die Flaschen zu verschönern)
* Eventuell: Handschuhe (zum Schutz deiner Hände)
Die Vorbereitung:
Bevor wir loslegen, müssen wir die Flaschen vorbereiten. Das ist ganz wichtig, damit die Erdbeeren später auch genug Platz zum Wachsen haben.
1. Flaschen reinigen: Zuerst spülst du alle Plastikflaschen gründlich mit warmem Wasser und Spülmittel aus. Entferne alle Etiketten und Klebereste. Eine saubere Basis ist wichtig!
2. Löcher bohren: Jetzt kommt der Bohrer (oder Nagel und Hammer) zum Einsatz. Wir brauchen Löcher für die Drainage und für die Erdbeerpflanzen.
* Drainagelöcher: Bohre oder schlage mehrere kleine Löcher in den Boden jeder Flasche. Das verhindert Staunässe, die den Erdbeerpflanzen schaden könnte.
* Pflanzlöcher: Schneide oder bohre Löcher in die Seiten der Flaschen. Die Größe der Löcher hängt von der Größe deiner Erdbeerpflanzen ab. Ich empfehle, mit kleineren Löchern anzufangen und sie bei Bedarf zu vergrößern. Achte darauf, dass die Löcher groß genug sind, damit die Pflanzen gut hineinpassen, aber nicht so groß, dass die Erde herausfällt. Pro Flasche kannst du 3-4 Löcher machen, je nachdem, wie viel Platz du hast.
3. Optional: Flaschen bemalen: Wenn du möchtest, kannst du die Flaschen jetzt noch mit Sprühfarbe bemalen. Das ist natürlich Geschmackssache, aber es macht den Pflanzturm optisch ansprechender. Lass die Farbe gut trocknen, bevor du weitermachst!
Der Aufbau des Erdbeerpflanzers:
Jetzt geht es ans Eingemachte! Wir bauen unseren Erdbeerpflanzer zusammen.
1. Die erste Flasche: Nimm die erste Flasche und fülle sie mit Pflanzerde. Drücke die Erde leicht an.
2. Die erste Erdbeerpflanze: Setze die erste Erdbeerpflanze vorsichtig in eines der Löcher. Achte darauf, dass die Wurzeln gut mit Erde bedeckt sind. Wiederhole das für alle Löcher in dieser Flasche.
3. Die zweite Flasche: Schneide den Boden der zweiten Flasche ab. Das wird unser Trichter, durch den wir später gießen.
4. Die zweite Flasche platzieren: Setze die zweite Flasche (ohne Boden) auf die erste Flasche. Die abgeschnittene Seite zeigt nach oben.
5. Erde einfüllen: Fülle auch diese Flasche mit Pflanzerde und setze weitere Erdbeerpflanzen in die Löcher.
6. Wiederholen: Wiederhole die Schritte 3-5 für alle weiteren Flaschen, bis dein Pflanzturm die gewünschte Höhe erreicht hat.
7. Die oberste Flasche: Die oberste Flasche bleibt ganz und dient als Gießkanne. Fülle sie mit Erde und setze eine Erdbeerpflanze oben hinein.
Das Gießen und die Pflege:
Damit deine Erdbeeren gut gedeihen, ist die richtige Pflege wichtig.
1. Gießen: Gieße den Erdbeerpflanzer regelmäßig, aber nicht zu viel. Das Wasser sollte durch die Drainagelöcher abfließen können. Am besten gießt du von oben in die oberste Flasche, so verteilt sich das Wasser gleichmäßig.
2. Düngen: Dünge die Erdbeerpflanzen regelmäßig mit einem speziellen Erdbeerdünger. Beachte dabei die Anweisungen auf der Packung.
3. Standort: Stelle den Erdbeerpflanzer an einen sonnigen Standort. Erdbeeren lieben die Sonne!
4. Schutz vor Schädlingen: Kontrolliere die Pflanzen regelmäßig auf Schädlinge wie Blattläuse oder Schnecken. Bei Bedarf kannst du natürliche Schädlingsbekämpfungsmittel einsetzen.
5. Ernte: Wenn die Erdbeeren rot und reif sind, kannst du sie ernten. Lass sie am besten noch ein paar Tage an der Pflanze, damit sie ihr volles Aroma entwickeln können.
Zusätzliche Tipps und Tricks:
* Die richtige Erde: Verwende am besten spezielle Erdbeer- oder Gemüseerde. Diese ist nährstoffreich und bietet den Pflanzen optimale Wachstumsbedingungen.
* Die richtigen Pflanzen: Achte darauf, dass du kleine Erdbeersorten verwendest, die nicht so viel Platz brauchen. Hängeerdbeeren eignen sich besonders gut für den Pflanzturm.
* Die Bewässerung: Du kannst auch ein automatisches Bewässerungssystem installieren, wenn du nicht so oft gießen möchtest. Es gibt spezielle Tropfschläuche, die du in die Flaschen legen kannst.
* Die Dekoration: Du kannst den Pflanzturm noch mit anderen Pflanzen oder Dekorationselementen verschönern. Wie wäre es mit ein paar Kräutern oder bunten Blumen?
* Die Stabilität: Wenn der Pflanzturm sehr hoch wird, kann er etwas instabil werden. Du kannst ihn mit einem Stock oder einer Stange stabilisieren.
Noch ein paar Ideen zur Variation:
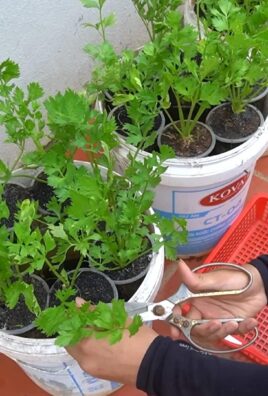
* Vertikaler Kräutergarten: Anstatt Erdbeeren kannst du auch Kräuter in den Flaschen anpflanzen. Das ist besonders praktisch, wenn du wenig Platz in der Küche hast.
* Blumenampel: Du kannst die Flaschen auch als Blumenampel verwenden. Hänge sie einfach an einem Haken auf und bepflanze sie mit bunten Blumen.
* Gemüseanbau: Auch kleine Gemüsesorten wie Salat oder Radieschen lassen sich in den Flaschen anbauen.
Ich hoffe, diese Anleitung hat dir gefallen und du hast jetzt Lust bekommen, deinen eigenen Erdbeerpflanzer aus Plastikflaschen zu bauen. Es ist wirklich ein tolles Projekt, das nicht nur Spaß macht, sondern auch noch nachhaltig ist. Viel Erfolg und eine reiche Ernte!

Conclusion
So, there you have it! Transforming ordinary plastic bottles into a thriving vertical strawberry garden is not just a fun project; it’s a sustainable, space-saving, and incredibly rewarding way to enjoy fresh, homegrown strawberries. This DIY strawberry planter bottles method is a game-changer for urban gardeners, apartment dwellers, or anyone looking to maximize their yield in a limited space. Forget expensive planters and complicated setups – this simple trick allows you to recycle, reduce waste, and cultivate delicious berries all in one go.
But why is this DIY trick a must-try? Beyond the obvious benefits of fresh strawberries, consider the environmental impact. By repurposing plastic bottles, you’re actively participating in reducing plastic waste, a significant concern in today’s world. You’re also creating a beautiful and functional piece of art for your balcony, patio, or even indoors with proper lighting. The visual appeal of a cascading wall of green foliage dotted with vibrant red strawberries is undeniable, adding a touch of nature and tranquility to any environment.
Furthermore, the vertical nature of these planters promotes better air circulation around the plants, reducing the risk of fungal diseases and pests. This means healthier, happier strawberry plants and a more abundant harvest for you. It’s a win-win situation!
Looking for variations? Absolutely! Don’t limit yourself to just strawberries. This method works wonderfully for other small plants like herbs (basil, mint, thyme), lettuce, spinach, or even small flowering plants like petunias or pansies. Experiment with different bottle sizes and arrangements to create a truly unique and personalized vertical garden. You can also paint the bottles to match your décor or add decorative elements to make them even more visually appealing. Consider using different types of soil mixes depending on the plants you choose to grow. For example, herbs might prefer a well-draining soil mix, while strawberries thrive in a slightly acidic soil.
Ready to embark on this exciting gardening adventure? We encourage you to give this DIY strawberry planter bottles project a try. It’s easier than you think, and the rewards are well worth the effort. Imagine the satisfaction of harvesting your own juicy, sun-ripened strawberries, knowing that you grew them yourself in a planter you created from recycled materials.
But don’t just take our word for it! We want to hear about your experiences. Share your photos, tips, and variations on social media using #DIYStrawberryPlanterBottles. Let’s create a community of passionate gardeners who are making a difference, one recycled bottle at a time. We are eager to see your creative setups and learn from your successes (and even your challenges!). Your feedback will help us refine this method and inspire others to join the movement. So, grab your bottles, gather your supplies, and get ready to grow! Happy gardening!
FAQ
What type of plastic bottles are best for this project?
Ideally, you should use sturdy, food-grade plastic bottles. Look for bottles that are relatively thick and can withstand the weight of the soil and plants. Two-liter soda bottles or larger water bottles work well. Avoid using bottles that have contained harsh chemicals or cleaning products, as these could contaminate the soil and harm your plants. Make sure to thoroughly clean the bottles with soap and water before using them.
What kind of soil should I use for my strawberry plants?
Strawberries prefer well-draining, slightly acidic soil. A good mix would be equal parts potting soil, compost, and perlite or vermiculite. The potting soil provides nutrients, the compost adds organic matter, and the perlite or vermiculite improves drainage. You can also purchase a pre-made strawberry potting mix from your local garden center. Avoid using garden soil, as it can be too heavy and compacted for container gardening.
How often should I water my strawberry plants in these bottle planters?
Watering frequency depends on the weather, the type of soil you’re using, and the size of your plants. Generally, you should water your strawberry plants when the top inch of soil feels dry to the touch. Water thoroughly until water drains out of the bottom of the bottles. Avoid overwatering, as this can lead to root rot. During hot, dry weather, you may need to water your plants daily. In cooler, wetter weather, you may only need to water them every few days.
How much sunlight do strawberry plants need?
Strawberry plants need at least 6-8 hours of direct sunlight per day to produce a good crop of berries. Choose a location for your bottle planters that receives plenty of sunlight. If you don’t have a sunny spot outdoors, you can grow your strawberries indoors under grow lights.
How do I fertilize my strawberry plants in bottle planters?
Strawberry plants need regular fertilization to thrive. Use a balanced fertilizer specifically formulated for strawberries or berries. Follow the instructions on the fertilizer package for application rates. You can also use organic fertilizers like compost tea or fish emulsion. Fertilize your plants every 2-4 weeks during the growing season.
How do I prevent pests and diseases in my strawberry plants?
To prevent pests and diseases, start with healthy plants and use a good quality potting mix. Ensure good air circulation around your plants by spacing the bottles properly. Regularly inspect your plants for signs of pests or diseases. If you find any pests, you can try spraying them with insecticidal soap or neem oil. For fungal diseases, you can use a fungicide. Avoid overwatering, as this can create a favorable environment for fungal diseases.
Can I grow other plants besides strawberries in these bottle planters?
Yes, you can grow other small plants in these bottle planters, such as herbs (basil, mint, thyme), lettuce, spinach, or small flowering plants like petunias or pansies. Just make sure to choose plants that have similar growing requirements in terms of sunlight, water, and soil.
How do I overwinter my strawberry plants in bottle planters?
In colder climates, you’ll need to protect your strawberry plants from freezing temperatures. You can move the bottle planters indoors to a cool, bright location. Alternatively, you can wrap the bottles with burlap or bubble wrap to insulate them. Water sparingly during the winter months. In the spring, gradually acclimate your plants to outdoor conditions before moving them back outside permanently.
How long will my strawberry plants last in these bottle planters?
With proper care, your strawberry plants can last for several years in these bottle planters. However, you may need to repot them every year or two to refresh the soil and provide more space for the roots to grow.
What are some creative ways to decorate my DIY strawberry planter bottles?
There are many ways to personalize your DIY strawberry planter bottles. You can paint them with bright colors, add decorative elements like ribbons or beads, or even create a mosaic design. You can also use different types of bottles to create a unique and interesting display. Get creative and have fun!
Is this method suitable for all strawberry varieties?
While most strawberry varieties will grow in these planters, everbearing and day-neutral varieties are often preferred for container gardening as they produce fruit throughout the growing season. June-bearing varieties produce a large crop all at once, which might be less ideal for continuous harvesting from a small space. Research the specific needs of the variety you choose to ensure optimal growth.

Leave a Comment