
Tomato Growing Tips for Beginners: Ever dream of biting into a sun-warmed, juicy tomato, bursting with flavor, that you grew yourself? I know I have! There’s something incredibly satisfying about nurturing a plant from a tiny seed to a bountiful harvest. But let’s be honest, the world of gardening, especially when it comes to tomatoes, can seem a little daunting for newbies.
Tomatoes have a rich history, originating in South America and gradually making their way into cuisines worldwide. From the vibrant sauces of Italy to the refreshing salads of the Mediterranean, tomatoes are a culinary staple. But beyond their deliciousness, growing your own tomatoes connects you to a tradition of self-sufficiency and fresh, healthy eating.
That’s where this DIY guide comes in! I’m going to share some simple, effective tomato growing tips for beginners that will help you avoid common pitfalls and maximize your yield. Forget complicated techniques and expensive equipment. We’ll focus on practical, easy-to-implement strategies that will have you harvesting delicious tomatoes in no time. Whether you have a sprawling backyard or just a sunny balcony, these tips will empower you to grow your own delicious tomatoes and enjoy the fruits (or should I say, vegetables!) of your labor. Let’s get started!
Tomatenanbau für Anfänger: Mein ultimativer DIY-Leitfaden für eine reiche Ernte
Hallo liebe Gartenfreunde! Ich freue mich riesig, euch heute meine besten Tipps und Tricks für den Tomatenanbau mitzugeben. Ich weiß, dass es am Anfang etwas einschüchternd wirken kann, aber glaubt mir, mit ein bisschen Geduld und den richtigen Kniffen werdet ihr schon bald eure eigenen, saftigen Tomaten ernten können. Los geht’s!
Die Grundlagen: Was Tomaten zum Glücklichsein brauchen
Bevor wir uns ins Detail stürzen, lasst uns kurz die wichtigsten Bedürfnisse unserer Tomatenpflanzen klären. Das ist wie bei uns Menschen: Wenn wir wissen, was wir brauchen, können wir uns besser darum kümmern.
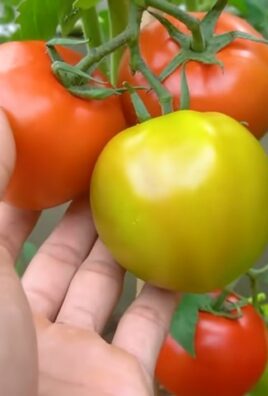
* Sonne, Sonne, Sonne: Tomaten sind Sonnenanbeter! Sie brauchen mindestens 6-8 Stunden direkte Sonneneinstrahlung pro Tag. Je mehr, desto besser.
* Guter Boden: Der Boden sollte locker, gut durchlässig und reich an Nährstoffen sein. Staunässe ist Gift für Tomaten.
* Regelmäßige Bewässerung: Tomaten brauchen ausreichend Wasser, besonders während der Fruchtbildung. Aber Achtung: Nicht übertreiben!
* Unterstützung: Tomatenpflanzen können ganz schön groß und schwer werden. Eine Rankhilfe oder ein Stab ist unerlässlich.
* Liebe und Aufmerksamkeit: Ja, das klingt kitschig, aber es stimmt! Beobachtet eure Pflanzen regelmäßig und reagiert auf ihre Bedürfnisse.
Schritt-für-Schritt-Anleitung: Vom Samen zur saftigen Tomate
Jetzt geht’s ans Eingemachte! Hier ist meine detaillierte Anleitung, wie ihr eure eigenen Tomaten ziehen könnt.
1. Die Vorbereitung: Samen aussäen (ca. 6-8 Wochen vor dem letzten Frost)
1. Samen auswählen: Es gibt unzählige Tomatensorten! Überlegt euch, welche Tomaten ihr am liebsten esst und wählt dementsprechend eure Samen aus. Ich persönlich liebe San Marzano für Soßen und Cherrytomaten für den direkten Verzehr.
2. Aussaatgefäße vorbereiten: Ihr könnt kleine Töpfe, Anzuchtschalen oder sogar Eierkartons verwenden. Wichtig ist, dass sie Löcher im Boden haben, damit das Wasser ablaufen kann.
3. Aussaaterde verwenden: Normale Blumenerde ist oft zu nährstoffreich für junge Keimlinge. Verwendet spezielle Aussaaterde, die feiner und weniger gedüngt ist.
4. Samen aussäen: Füllt die Gefäße mit Erde und drückt sie leicht an. Legt dann 1-2 Samen pro Gefäß auf die Erde und bedeckt sie mit einer dünnen Schicht Erde (ca. 0,5 cm).
5. Angießen: Gießt die Erde vorsichtig an, am besten mit einer Sprühflasche, damit die Samen nicht weggespült werden.
6. Warm und hell stellen: Stellt die Gefäße an einen warmen und hellen Ort (z.B. auf eine Fensterbank). Die ideale Keimtemperatur liegt bei 20-25°C.
7. Feucht halten: Die Erde sollte immer leicht feucht sein, aber nicht nass.
8. Geduld haben: Nach ca. 1-2 Wochen sollten die ersten Keimlinge zu sehen sein.
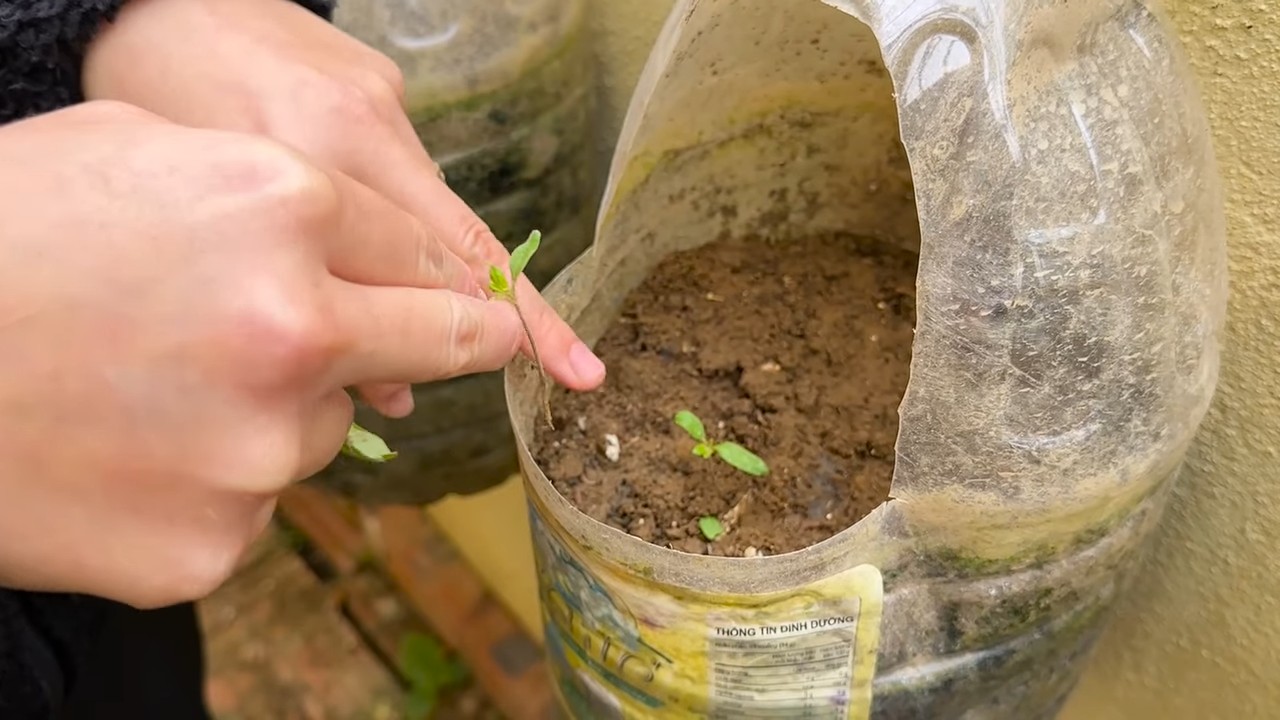
2. Pikieren: Den kleinen Pflänzchen mehr Platz geben
Sobald die Keimlinge ihre ersten richtigen Blätter (neben den Keimblättern) entwickelt haben, ist es Zeit zum Pikieren. Das bedeutet, dass ihr die kleinen Pflänzchen in größere Töpfe umpflanzt, damit sie mehr Platz zum Wachsen haben.
1. Vorbereitung: Füllt größere Töpfe (ca. 8-10 cm Durchmesser) mit Anzuchterde oder einer Mischung aus Anzuchterde und Blumenerde.
2. Pflänzchen vorsichtig ausheben: Löst die Pflänzchen vorsichtig mit einem Pikierstab oder einem Löffel aus der Erde. Achtet darauf, die Wurzeln nicht zu beschädigen.
3. Einpflanzen: Setzt die Pflänzchen in die neuen Töpfe und füllt sie mit Erde auf. Die Pflänzchen können etwas tiefer gesetzt werden als zuvor, das fördert die Wurzelbildung.
4. Angießen: Gießt die Pflänzchen vorsichtig an.
5. Heller Standort: Stellt die pikierten Pflänzchen an einen hellen Standort, aber vermeidet direkte Sonneneinstrahlung in den ersten Tagen.
3. Abhärten: Die Pflänzchen an das Leben im Freien gewöhnen
Bevor ihr eure Tomatenpflanzen ins Freie pflanzt, müsst ihr sie abhärten. Das bedeutet, dass ihr sie langsam an die Bedingungen im Freien (Sonne, Wind, Temperaturunterschiede) gewöhnt.
1. Beginn ca. 1-2 Wochen vor dem Auspflanzen: Stellt die Pflänzchen tagsüber für ein paar Stunden ins Freie, an einen geschützten Ort.
2. Dauer langsam steigern: Steigert die Dauer im Freien jeden Tag um ein paar Stunden.
3. Direkte Sonne vermeiden: Vermeidet direkte Sonneneinstrahlung in den ersten Tagen.
4. Nachts wieder reinholen: Holt die Pflänzchen nachts wieder ins Haus, besonders wenn es noch kalt ist.
4. Auspflanzen: Endlich raus in den Garten!
Sobald keine Frostgefahr mehr besteht (in der Regel Mitte Mai nach den Eisheiligen), könnt ihr eure Tomatenpflanzen ins Freie pflanzen.
1. Standort auswählen: Wählt einen sonnigen und geschützten Standort.
2. Boden vorbereiten: Lockert den Boden auf und reichert ihn mit Kompost oder organischem Dünger an.
3. Pflanzlöcher graben: Grabt Pflanzlöcher, die etwas größer sind als die Töpfe der Pflänzchen.
4. Pflänzchen einsetzen: Setzt die Pflänzchen in die Pflanzlöcher und füllt sie mit Erde auf. Die Pflänzchen können etwas tiefer gesetzt werden als zuvor.
5. Angießen: Gießt die Pflänzchen gründlich an.
6. Rankhilfe anbringen: Bringt sofort eine Rankhilfe oder einen Stab an, damit die Pflanzen Halt haben.
5. Pflege: Gießen, Düngen, Ausgeizen und mehr
Die Pflege ist das A und O für eine reiche Tomatenernte. Hier sind meine wichtigsten Tipps:
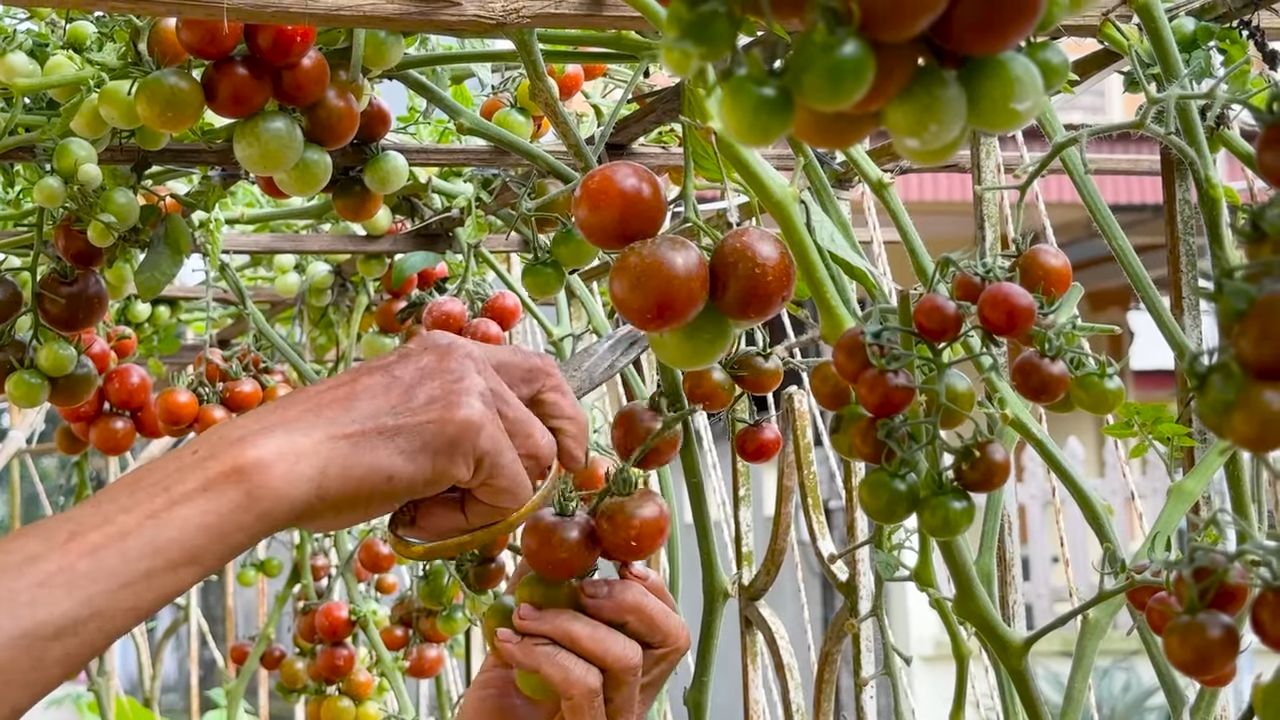
* Gießen: Gießt die Tomatenpflanzen regelmäßig, besonders während der Fruchtbildung. Gießt am besten morgens, damit die Blätter abtrocknen können und Pilzkrankheiten vermieden werden. Vermeidet Staunässe.
* Düngen: Tomaten sind Starkzehrer und brauchen regelmäßig Dünger. Verwendet einen speziellen Tomatendünger oder organischen Dünger wie Kompost oder Hornspäne. Düngt alle 2-3 Wochen.
* Ausgeizen: Das Ausgeizen ist wichtig, um die Bildung von Seitentrieben zu verhindern. Diese nehmen der Pflanze unnötig Kraft und Energie. Brecht die Seitentriebe, die in den Blattachseln wachsen, regelmäßig aus.
* Mulchen: Mulcht den Boden um die Tomatenpflanzen mit Stroh oder Rasenschnitt. Das hält den Boden feucht, unterdrückt Unkraut und schützt die Früchte vor Spritzwasser.
* Krankheiten und Schädlinge: Beobachtet eure Pflanzen regelmäßig auf Krankheiten und Schädlinge. Bei Bedarf könnt ihr biologische Pflanzenschutzmittel einsetzen.
Spezialtipps für eine noch bessere Ernte
Hier sind noch ein paar zusätzliche Tipps, die euch helfen werden, eure Tomatenernte zu maximieren:
* Tomaten überdachen: Ein Regenschutz schützt die Pflanzen vor Regen und beugt Pilzkrankheiten vor.
* Sortenvielfalt: Probiert verschiedene Tomatensorten aus, um herauszufinden, welche euch am besten schmecken und in eurem Garten am besten wachsen.
* Eigene Samen gewinnen: Wenn ihr eine besonders gute Tomate habt, könnt ihr die Samen für das nächste Jahr gewinnen.
* Beipflanzung: Pflanzt Basilikum, Ringelblumen oder Kapuzinerkresse neben eure Tomaten. Diese Pflanzen halten Schädlinge fern und fördern das Wachstum.
Häufige Fehler vermeiden: Was ihr nicht tun sol
Conclusion
So, there you have it! Transforming your tomato-growing game with these simple yet effective DIY tricks is not just about saving money; it’s about fostering a deeper connection with your garden and understanding the needs of your plants. We’ve explored how to create nutrient-rich soil amendments, build protective structures, and even propagate new plants, all using readily available materials. These techniques empower you to take control of your tomato cultivation, ensuring a bountiful harvest of delicious, homegrown tomatoes.
Why is this a must-try? Because it works! These methods are rooted in sound horticultural principles, adapted for the home gardener. They address common challenges like nutrient deficiencies, pest infestations, and environmental stressors, all while minimizing your reliance on expensive and potentially harmful chemicals. Imagine biting into a juicy, sun-ripened tomato, knowing you nurtured it from seed to table using sustainable and resourceful practices. That’s the reward waiting for you.
But don’t stop there! Experiment with variations to suit your specific needs and climate. For instance, if you live in a particularly windy area, consider reinforcing your DIY tomato cages with extra stakes or using a heavier-gauge wire. If your soil is naturally acidic, you might need to adjust the amount of lime you add to your soil amendments. And if you’re feeling adventurous, try grafting different tomato varieties onto a single rootstock for a truly unique and productive plant.
The possibilities are endless!
We’ve focused on practical, cost-effective solutions, but the real magic happens when you personalize these techniques to your own garden. Consider adding coffee grounds to your compost for an extra nitrogen boost, or using eggshells to deter slugs and snails. Observe your plants closely, and adjust your approach as needed.
Ultimately, successful tomato growing is a journey of learning and adaptation. These DIY tricks are just the starting point. We encourage you to embrace the process, experiment with different techniques, and discover what works best for you.
Now, it’s your turn! We’re confident that these DIY tomato growing tips will transform your garden and your harvest. So, get your hands dirty, put these ideas into practice, and watch your tomato plants thrive.
Don’t forget to share your experiences with us! We’d love to hear about your successes, your challenges, and any variations you’ve discovered. Post photos of your thriving tomato plants, share your tips and tricks, and join the community of passionate gardeners who are committed to growing the best tomatoes possible. Let’s learn from each other and create a world where everyone can enjoy the taste of homegrown goodness.
Ready to grow the best tomatoes ever?
We believe in the power of shared knowledge and collective experience. By sharing your stories, you’ll not only inspire others but also contribute to a growing body of knowledge that benefits all gardeners. So, don’t be shy! Let us know how these DIY tomato growing tips worked for you.
Frequently Asked Questions (FAQ)
Q: What if I don’t have all the materials listed for the DIY soil amendments?
A: Don’t worry! The beauty of DIY is its flexibility. The listed materials are suggestions, but you can adapt them based on what you have available. For example, if you don’t have bone meal, you can substitute it with rock phosphate or even well-composted manure. The key is to provide a balanced mix of nutrients, including nitrogen, phosphorus, and potassium. Focus on using organic materials that are readily available in your area. Compost is always a great base, and you can supplement it with other amendments as needed. Even grass clippings, shredded leaves, and kitchen scraps can be valuable additions to your soil mix. Remember to research the nutrient content of any alternative materials you use to ensure your tomato plants receive the nourishment they need.
Q: How often should I apply the DIY soil amendments to my tomato plants?
A: The frequency of application depends on the specific amendment and the needs of your plants. Generally, you should incorporate the amendments into the soil before planting. Then, you can side-dress your plants with additional amendments every 4-6 weeks during the growing season. Observe your plants closely for signs of nutrient deficiencies, such as yellowing leaves or stunted growth. If you notice any of these signs, you may need to increase the frequency of application. Avoid over-fertilizing, as this can lead to other problems. A soil test can also help you determine the specific nutrient needs of your soil and guide your amendment schedule.
Q: Are these DIY tomato cages strong enough to support large tomato plants?
A: The strength of your DIY tomato cages will depend on the materials you use and the construction method. For large, indeterminate tomato varieties, you’ll need to use sturdy materials like heavy-gauge wire or thick bamboo stakes. Reinforce the cages with extra stakes or ties as needed. You can also consider building a more robust support system, such as a trellis or a stake-and-weave structure. The key is to provide adequate support for the plants as they grow, preventing them from collapsing under the weight of the fruit. Regularly inspect your cages and make any necessary repairs or adjustments.
Q: Can I use these DIY tricks for other types of plants besides tomatoes?
A: Absolutely! Many of these DIY tricks can be adapted for other types of plants as well. For example, DIY soil amendments can be used for a wide variety of vegetables, fruits, and flowers. DIY plant supports can be used for climbing plants like cucumbers, beans, and peas. The key is to understand the specific needs of each plant and adjust the techniques accordingly. Research the nutrient requirements, support needs, and environmental preferences of the plants you’re growing, and adapt these DIY tricks to meet those needs.
Q: What if I don’t have a lot of space for a traditional garden? Can I still use these tips?
A: Yes! These DIY tomato growing tips are perfect for small spaces and container gardening. You can easily adapt the soil amendment recipes for use in pots and containers. DIY tomato cages can be scaled down to fit smaller spaces. You can even grow tomatoes in hanging baskets or vertical gardens. The key is to choose compact tomato varieties that are well-suited for container growing. Provide adequate drainage and sunlight, and water regularly. With a little creativity and resourcefulness, you can grow delicious tomatoes even in the smallest of spaces.
Q: How do I know if my DIY soil amendments are working?
A: The best way to assess the effectiveness of your DIY soil amendments is to observe your plants closely. Look for signs of healthy growth, such as vibrant green leaves, strong stems, and abundant fruit production. Compare the growth of your plants to those grown in untreated soil. You can also conduct a soil test to measure the nutrient levels in your soil before and after applying the amendments. This will give you a more objective assessment of their effectiveness. If you notice any signs of nutrient deficiencies, adjust your amendment schedule or recipe as needed.
Q: What are some common mistakes to avoid when using these DIY tomato growing tips?
A: Some common mistakes to avoid include over-fertilizing, under-watering, and neglecting to provide adequate support for the plants. Over-fertilizing can lead to nutrient imbalances and other problems. Under-watering can stress the plants and reduce fruit production. Failing to provide adequate support can cause the plants to collapse under the weight of the fruit. Another common mistake is not protecting the plants from pests and diseases. Regularly inspect your plants for signs of infestation or disease, and take appropriate action. By avoiding these common mistakes, you can increase your chances of success with these DIY tomato growing tips.
Leave a Comment