
Growing Chili Peppers at Home can seem daunting, but trust me, it’s more achievable (and rewarding!) than you might think. Forget those bland, store-bought peppers – imagine plucking fiery, flavorful chilies straight from your own garden! For centuries, chili peppers have been more than just a spice; they’ve been woven into the culinary and cultural tapestry of civilizations around the globe, from the ancient Aztecs to modern-day kitchens.
But why should you bother with this DIY project? Well, for starters, the taste of a homegrown chili pepper is simply unmatched. Plus, you control everything – from the soil to the sunlight – ensuring you’re getting the freshest, most organic ingredients possible. And let’s be honest, there’s a certain satisfaction that comes with nurturing a plant from seed to harvest.
In this article, I’m going to share some of my favorite home gardening tricks and DIY hacks for successfully growing chili peppers at home, even if you have limited space or experience. We’ll cover everything from choosing the right varieties to troubleshooting common problems, so you can enjoy a bountiful harvest of spicy goodness. Get ready to turn up the heat in your garden!
Growing Fiery Chili Peppers at Home: A DIY Guide
Hey there, fellow spice enthusiasts! Ever dreamt of having a constant supply of fresh, fiery chili peppers right at your fingertips? Well, you’ve come to the right place! I’m going to walk you through everything you need to know to successfully grow chili peppers at home, from seed to sizzling harvest. Trust me, there’s nothing quite like the satisfaction of adding your own homegrown heat to your favorite dishes.
Choosing Your Chili Pepper Variety
Before we dive into the nitty-gritty, let’s talk about choosing the right chili pepper for you. The world of chili peppers is vast and varied, ranging from mild and sweet to face-meltingly hot. Consider your taste preferences and how you plan to use your peppers.
Here are a few popular options to get you started:
* Jalapeño: A classic choice, offering a moderate level of heat and versatility. Great for stuffing, pickling, or adding to salsas.
* Serrano: A bit hotter than jalapeños, with a bright, fresh flavor. Perfect for adding a kick to Mexican dishes.
* Cayenne: Known for its intense heat and used in many hot sauces and spice blends.
* Habanero: One of the hotter peppers, with a fruity flavor and a serious punch. Use with caution!
* Ghost Pepper (Bhut Jolokia): Enter at your own risk! This pepper is extremely hot and should be handled with care.
* Bell Pepper: If you are just starting out and want to learn the basics, bell peppers are a great option. They are easy to grow and require the same care as hot peppers.
Once you’ve chosen your variety, you can either purchase seeds or start with seedlings from a local nursery. I personally prefer starting from seed, as it gives me more control over the entire process.
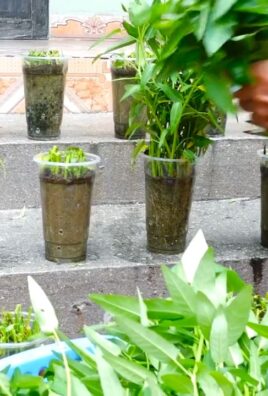
Starting Your Chili Peppers from Seed
Starting from seed requires a bit more patience, but it’s incredibly rewarding. Here’s how I do it:
1. Gather Your Supplies:
* Chili pepper seeds
* Seed starting trays or small pots
* Seed starting mix (a light, well-draining soil)
* Spray bottle
* Heat mat (optional, but recommended)
* Grow light (optional, but beneficial)
* Clear plastic dome or plastic wrap
2. Sow the Seeds:
* Moisten the seed starting mix with water. It should be damp but not soggy.
* Fill the seed starting trays or pots with the moistened mix.
* Sow the seeds about ¼ inch deep, placing 2-3 seeds per cell or pot.
* Gently cover the seeds with more seed starting mix.
* Lightly mist the surface with water using the spray bottle.
3. Create a Humid Environment:
* Cover the seed starting trays or pots with a clear plastic dome or plastic wrap to create a humid environment. This helps the seeds germinate.
4. Provide Warmth and Light:
* Place the seed starting trays or pots on a heat mat to maintain a soil temperature of around 75-85°F (24-29°C). This is crucial for germination.
* If you’re using a grow light, position it a few inches above the trays or pots. Provide 14-16 hours of light per day. If you don’t have a grow light, place the trays or pots in a warm, sunny location.
5. Monitor and Water:
* Check the soil moisture daily. Keep the soil consistently moist, but not waterlogged. Mist with water as needed.
* Once the seeds germinate (usually within 7-14 days), remove the plastic dome or plastic wrap.
6. Thin the Seedlings:
* Once the seedlings have developed their first true leaves (the leaves that appear after the initial seed leaves), thin them out by snipping off the weaker seedlings at the soil line. Leave only the strongest seedling in each cell or pot.
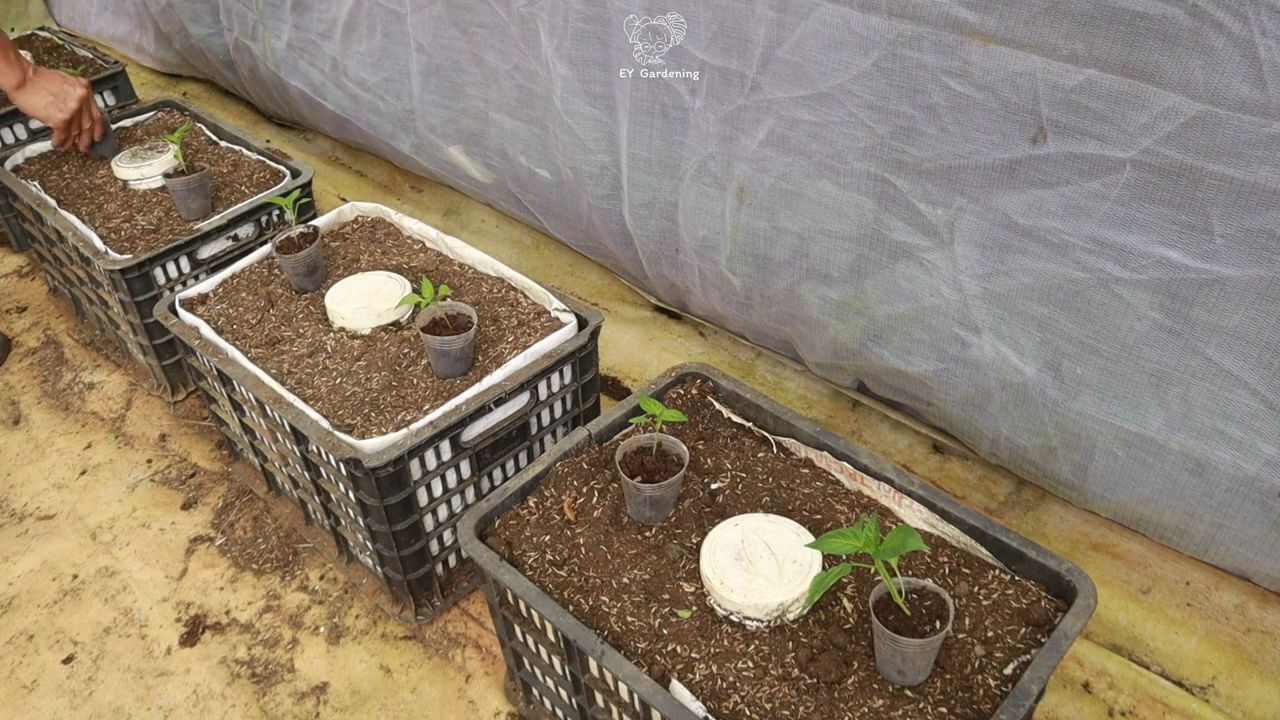
Transplanting Your Chili Pepper Seedlings
Once your seedlings have grown a few inches tall and have a strong root system, it’s time to transplant them into larger pots or directly into your garden.
1. Harden Off the Seedlings:
* Before transplanting, you need to “harden off” the seedlings. This means gradually exposing them to outdoor conditions to acclimate them to the sun, wind, and temperature changes.
* Start by placing the seedlings outdoors in a sheltered location for an hour or two each day, gradually increasing the amount of time they spend outside over the course of a week.
2. Prepare the Soil:
* Chili peppers thrive in well-draining soil that is rich in organic matter. Amend your garden soil with compost or aged manure before planting.
* If you’re growing in containers, use a high-quality potting mix.
3. Transplant the Seedlings:
* Dig a hole that is slightly larger than the root ball of the seedling.
* Gently remove the seedling from its pot, being careful not to damage the roots.
* Place the seedling in the hole and backfill with soil, gently firming it around the base of the plant.
* Water thoroughly after transplanting.
4. Spacing:
* Space your chili pepper plants about 18-24 inches apart in the garden. If you’re growing in containers, choose pots that are at least 5 gallons in size.
Caring for Your Chili Pepper Plants
Now that your chili pepper plants are in their permanent homes, it’s time to provide them with the care they need to thrive.
1. Watering:
* Water your chili pepper plants regularly, especially during hot, dry weather. Aim to keep the soil consistently moist, but not waterlogged.
* Water deeply and less frequently, rather than shallowly and often. This encourages the roots to grow deeper and stronger.
2. Fertilizing:
* Chili peppers are heavy feeders and benefit from regular fertilization.
* Use a balanced fertilizer (e.g., 10-10-10) or a fertilizer specifically formulated for tomatoes and peppers.
* Fertilize every 2-3 weeks during the growing season.
3. Sunlight:
* Chili peppers need at least 6-8 hours of sunlight per day. Choose a sunny location in your garden or place your containers in a sunny spot.
4. Support:
* As your chili pepper plants grow, they may need support to prevent them from toppling over, especially when they are laden with fruit.
* Use stakes or cages to provide support.
5. Pruning:
* Pruning can help to improve air circulation and encourage bushier growth.
* Remove any yellowing or dead leaves.
* You can also pinch off the tips of the branches to encourage more branching.
Dealing with Pests and Diseases
Like all plants, chili peppers can be susceptible to pests and diseases. Here are a few common problems and how to deal with them:
* Aphids: These tiny insects suck the sap from plants, causing them to weaken and distort. Spray aphids with a strong stream of water or use insecticidal soap.
* Spider Mites: These tiny pests create webs on plants and cause the leaves to become mottled and yellow. Spray spider mites with insecticidal soap or neem oil.
* Blossom End Rot: This condition causes the bottom of the fruit to rot. It is usually caused by calcium deficiency or inconsistent watering. Ensure consistent watering and amend the soil with calcium if necessary.
* Fungal Diseases: Chili peppers can be susceptible to fungal diseases such as powdery mildew and leaf spot. Improve air circulation by pruning and avoid overhead watering. Use a fungicide if necessary.
Harvesting Your Chili Peppers
The moment you’ve been waiting for! Harvesting your chili peppers is the most rewarding part of the process.
1. When to Harvest:
* The best time to harvest chili peppers depends on the variety and your personal preference.
* Generally, chili peppers are ready to harvest when they have reached their mature color and size.
* You can also harvest them when they are green, but they will be less flavorful and less spicy.
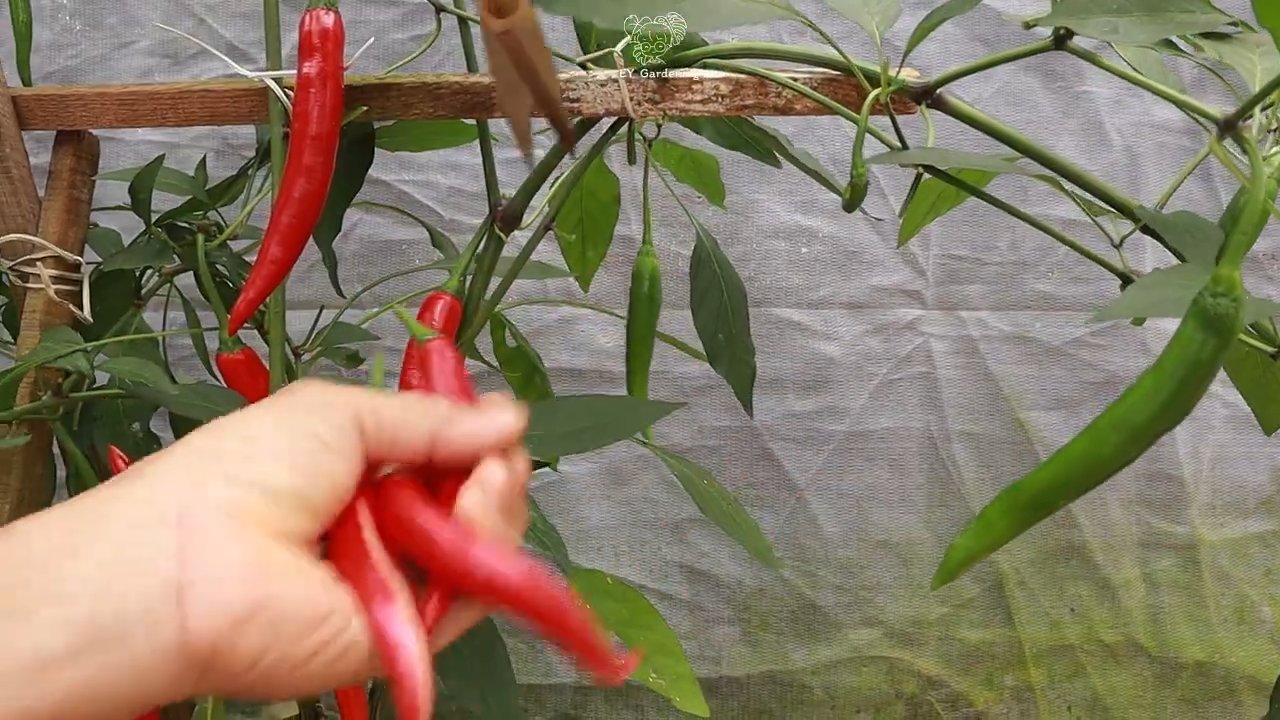
2. How to Harvest:
* Use pruning shears or scissors to cut the peppers from the plant, leaving a small stem attached.
* Avoid pulling the peppers off the plant, as this can damage the plant.
3. Handling Hot Peppers:
* When handling hot peppers, it’s important to wear gloves to protect your skin from the capsaicin, the compound that makes peppers hot.
* Avoid touching your eyes or face
Conclusion
So, there you have it! Growing chili peppers at home isn’t just a fun hobby; it’s a gateway to a world of fresh, flavorful possibilities. From the satisfaction of nurturing a tiny seed into a vibrant, fruit-bearing plant to the sheer joy of harvesting your own fiery bounty, the rewards are immeasurable. This DIY trick, focusing on optimizing soil conditions and providing consistent watering, is a game-changer for both novice and experienced gardeners alike. It’s the secret weapon to unlocking a pepper paradise right in your backyard, balcony, or even windowsill.
Why is this a must-try? Because it simplifies the process, maximizes your yield, and ensures your chili peppers are bursting with flavor and heat. Forget complicated fertilizers and confusing watering schedules. This method focuses on the essentials, providing your plants with exactly what they need to thrive. Imagine the pride you’ll feel serving up a dish seasoned with chili peppers you grew yourself – the ultimate farm-to-table experience!
But don’t stop there! Experiment with different varieties of chili peppers to discover your favorites. From the mild and fruity poblano to the scorching habanero, the possibilities are endless. Try different container sizes to see what works best for your space. Consider companion planting with herbs like basil or oregano to deter pests and enhance the flavor of your peppers. You can even explore different methods of drying or preserving your harvest to enjoy your homegrown chili peppers year-round.
Ready to embark on your chili pepper growing adventure? We encourage you to give this DIY trick a try. It’s simple, effective, and incredibly rewarding. And most importantly, don’t be afraid to experiment and adapt the method to suit your specific needs and environment.
Once you’ve harvested your first batch of homegrown chili peppers, we’d love to hear about your experience! Share your photos, tips, and stories in the comments below. Let’s build a community of chili pepper enthusiasts and learn from each other’s successes (and even the occasional failures!). Together, we can unlock the secrets to growing the hottest, most flavorful chili peppers imaginable. So, grab your seeds, prepare your soil, and get ready to experience the thrill of growing your own chili peppers at home! You won’t regret it.
Frequently Asked Questions (FAQ)
What type of soil is best for growing chili peppers?
Chili peppers thrive in well-draining, fertile soil with a slightly acidic to neutral pH (around 6.0 to 7.0). A good mix consists of equal parts potting soil, compost, and perlite or vermiculite. The potting soil provides a base, the compost adds nutrients and improves drainage, and the perlite or vermiculite enhances aeration, preventing the soil from becoming waterlogged. Avoid using garden soil directly in containers, as it can compact and hinder drainage. You can also purchase specialized potting mixes formulated for vegetables, which often contain slow-release fertilizers. Remember, proper soil drainage is crucial to prevent root rot, a common problem for chili pepper plants.
How often should I water my chili pepper plants?
Watering frequency depends on several factors, including the size of the container, the climate, and the stage of plant growth. Generally, water deeply when the top inch of soil feels dry to the touch. Avoid overwatering, as this can lead to root rot. During hot, dry weather, you may need to water daily, while in cooler, more humid conditions, watering every few days may suffice. Check the soil moisture regularly and adjust your watering schedule accordingly. When watering, aim for the base of the plant to avoid wetting the foliage, which can increase the risk of fungal diseases.
What kind of sunlight do chili peppers need?
Chili peppers are sun-loving plants and require at least 6-8 hours of direct sunlight per day to thrive. Insufficient sunlight can result in leggy growth, reduced flowering, and smaller, less flavorful peppers. If you’re growing chili peppers indoors, place them near a south-facing window or use grow lights to supplement natural sunlight. Rotate the plants regularly to ensure even light exposure on all sides. If you’re growing them outdoors, choose a location that receives full sun throughout the day. Be mindful of afternoon shade in extremely hot climates, as excessive heat can stress the plants.
How do I fertilize my chili pepper plants?
Chili peppers benefit from regular fertilization, especially during the flowering and fruiting stages. Use a balanced fertilizer with an NPK ratio (nitrogen, phosphorus, potassium) of around 5-10-10 or 10-10-10. Follow the instructions on the fertilizer package for application rates and frequency. Avoid over-fertilizing, as this can lead to excessive foliage growth at the expense of fruit production. You can also supplement with organic fertilizers like compost tea or fish emulsion. These provide essential nutrients and beneficial microbes to the soil. Stop fertilizing a few weeks before harvest to allow the peppers to develop their full flavor and heat.
How do I protect my chili pepper plants from pests and diseases?
Regularly inspect your chili pepper plants for signs of pests and diseases. Common pests include aphids, spider mites, and whiteflies. These can be controlled with insecticidal soap, neem oil, or by handpicking them off the plants. Diseases like powdery mildew and fungal leaf spots can be prevented by ensuring good air circulation, avoiding overhead watering, and applying a fungicide if necessary. Companion planting with herbs like basil or marigolds can also help deter pests. If you notice any signs of infestation or disease, isolate the affected plant to prevent it from spreading to others.
When is the best time to harvest chili peppers?
The best time to harvest chili peppers depends on the variety and your desired level of heat. Generally, peppers are ready to harvest when they have reached their mature color and size. For example, jalapenos are typically harvested when they are dark green and firm, while habaneros are harvested when they turn bright orange or red. You can also test the heat level by tasting a small piece of the pepper. Use pruning shears or scissors to cut the peppers from the plant, leaving a small stem attached. Harvesting peppers regularly encourages the plant to produce more fruit.
Can I grow chili peppers indoors?
Yes, you can successfully grow chili peppers indoors, provided you provide them with adequate sunlight, warmth, and humidity. Choose a sunny location near a south-facing window or use grow lights to supplement natural sunlight. Use a well-draining potting mix and water regularly, allowing the soil to dry slightly between waterings. Maintain a consistent temperature of around 70-80°F (21-27°C) and provide adequate humidity by misting the plants or using a humidifier. Pollinate the flowers by hand using a small brush or cotton swab. With proper care, you can enjoy a bountiful harvest of homegrown chili peppers indoors.
What are some variations I can try when growing chili peppers?
There are numerous variations you can explore when growing chili peppers. Try growing different varieties of chili peppers to discover your favorites. Experiment with different container sizes and materials. Consider using self-watering containers or hydroponic systems. Try different fertilizers and soil amendments. Explore companion planting with herbs and vegetables that benefit chili peppers. You can also experiment with different methods of drying or preserving your harvest. The possibilities are endless! The key is to be patient, observant, and willing to learn from your experiences.
Leave a Comment