
Growing Malabar Spinach Baskets: Imagine cascading curtains of vibrant green, not just adorning your porch, but also providing you with a continuous supply of delicious, nutritious greens! That’s the magic of growing Malabar Spinach in hanging baskets, and I’m here to show you how to make it happen.
For centuries, Malabar Spinach, also known as Basella alba, has been a culinary staple in Asian and African cuisines. Its mild, slightly peppery flavor and succulent leaves make it a fantastic addition to salads, stir-fries, and soups. But beyond its culinary appeal, this vining beauty offers a unique opportunity to elevate your home gardening game.
Why settle for ordinary hanging baskets when you can have edible masterpieces? In this DIY guide, I’ll walk you through the simple steps of creating stunning Malabar Spinach baskets that are both aesthetically pleasing and incredibly practical. Forget trips to the grocery store for your greens; with this trick, you’ll have a fresh, organic supply right at your fingertips. Plus, growing Malabar Spinach Baskets is a fantastic way to maximize space, especially if you have a small balcony or patio. Let’s get started and transform your outdoor space into a lush, edible paradise!
Growing Malabar Spinach in Hanging Baskets: A DIY Guide
Hey there, fellow gardening enthusiasts! I’m so excited to share one of my favorite gardening hacks with you: growing Malabar spinach in hanging baskets! It’s a fantastic way to add vertical interest to your garden, maximize space, and enjoy a delicious and nutritious leafy green. Plus, it looks absolutely stunning!
Malabar spinach, also known as Ceylon spinach or vine spinach, isn’t actually a true spinach. It’s a heat-loving vine that thrives in warm weather, making it perfect for summer gardens. Its leaves are thick, slightly succulent, and have a mild, earthy flavor. I love using it in stir-fries, soups, and salads.
Here’s everything you need to know to create your own thriving Malabar spinach hanging baskets:
What You’ll Need
Before we get started, let’s gather our supplies. This is what I typically use:
* Hanging Basket: Choose a basket that’s at least 12 inches in diameter. I prefer wire baskets with coco coir liners, as they provide good drainage and aeration. Plastic hanging baskets work too, but make sure they have drainage holes.
* Coco Coir Liner (if needed): If you’re using a wire basket, you’ll need a liner to hold the soil.
* Potting Mix: Use a high-quality potting mix that’s well-draining and rich in organic matter. I like to use a mix specifically formulated for containers.
* Malabar Spinach Seeds or Seedlings: You can start Malabar spinach from seeds or purchase seedlings from a local nursery. I’ve had success with both methods.
* Slow-Release Fertilizer: This will provide your plants with a steady supply of nutrients throughout the growing season.
* Watering Can or Hose: For watering your plants, of course!
* Trowel or Small Shovel: For transferring soil and plants.
* Gloves: To keep your hands clean.
* Scissors or Pruning Shears: For trimming and harvesting.
* Optional: Trellis or Support: While Malabar spinach can trail down, providing a small trellis or support within the basket can encourage upward growth and create a fuller look.
Step-by-Step Instructions: Planting Your Malabar Spinach
Okay, let’s get our hands dirty! Here’s how I plant my Malabar spinach in hanging baskets:
1. Prepare the Basket: If you’re using a wire basket, insert the coco coir liner. Make sure it fits snugly and covers the entire inside of the basket.
2. Add Potting Mix: Fill the basket with potting mix, leaving about 2-3 inches of space at the top. Gently pat down the soil to remove any air pockets.
3. Planting from Seeds: If you’re starting from seeds, sow them directly into the potting mix. I usually plant 3-4 seeds per basket, spacing them evenly. Cover the seeds with a thin layer of soil (about 录 inch) and gently water them. Keep the soil consistently moist until the seeds germinate, which usually takes about 7-14 days.
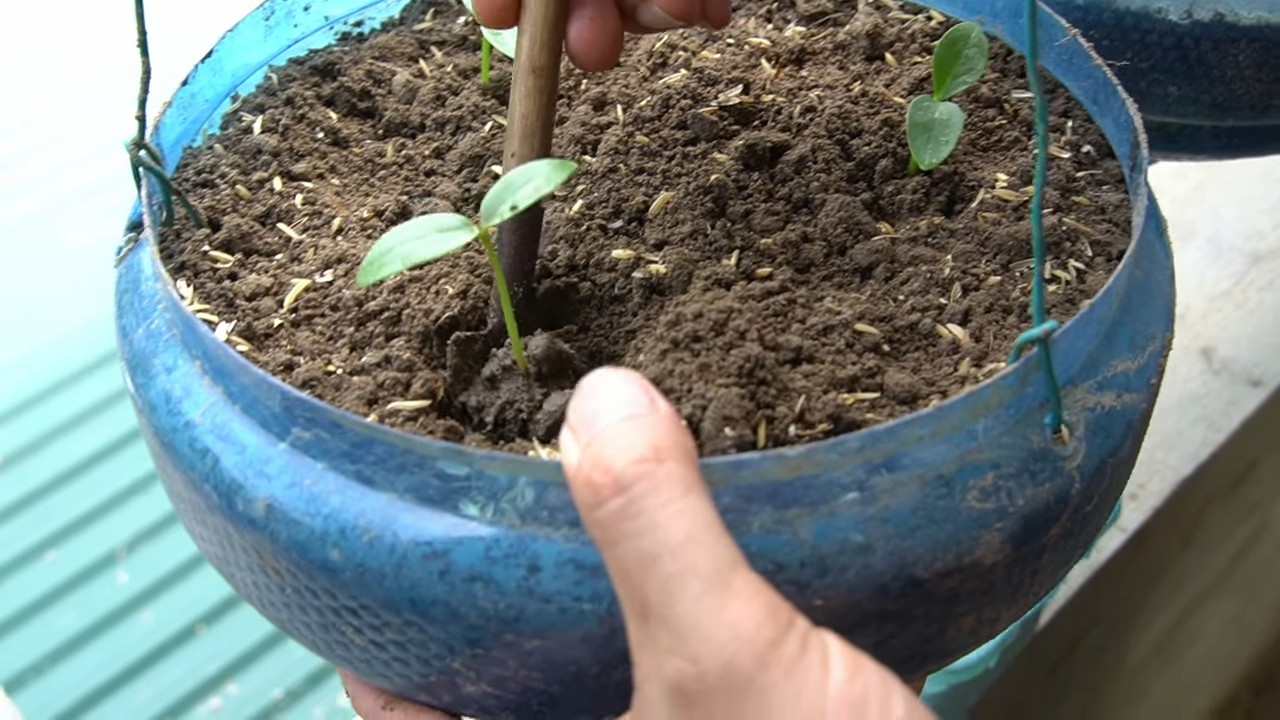
4. Planting Seedlings: If you’re using seedlings, gently remove them from their containers. Loosen the roots slightly before planting. Dig small holes in the potting mix, spacing the seedlings evenly. I usually plant 2-3 seedlings per basket. Place the seedlings in the holes and gently backfill with soil. Water thoroughly.
5. Add Slow-Release Fertilizer: Sprinkle a layer of slow-release fertilizer over the surface of the soil, following the instructions on the fertilizer package. This will provide your plants with a steady supply of nutrients.
6. Water Thoroughly: Water the basket thoroughly until water drains out of the bottom. This will help settle the soil and ensure that the roots are well-hydrated.
7. Hang Your Basket: Choose a location that receives at least 6 hours of sunlight per day. Hang your basket securely, making sure it’s strong enough to support the weight of the basket, soil, and plants.
Caring for Your Malabar Spinach
Now that your Malabar spinach is planted, it’s time to learn how to care for it. Here’s what I do to keep my plants healthy and productive:
* Watering: Malabar spinach needs consistent moisture, especially during hot weather. Water your basket regularly, checking the soil moisture daily. The soil should be moist but not soggy. I usually water deeply every 1-2 days, depending on the weather.
* Fertilizing: In addition to the slow-release fertilizer, I like to supplement with a liquid fertilizer every 2-3 weeks. Use a balanced fertilizer or one specifically formulated for leafy greens. Follow the instructions on the fertilizer package.
* Sunlight: Malabar spinach thrives in full sun, so make sure your basket is located in a sunny spot. If you live in a particularly hot climate, you may need to provide some afternoon shade to prevent the leaves from scorching.
* Pruning: Pruning is essential for encouraging bushier growth and preventing the vine from becoming too leggy. Regularly pinch back the tips of the vines to promote branching. You can also remove any yellowing or damaged leaves.
* Pest Control: Malabar spinach is relatively pest-resistant, but it can occasionally be affected by aphids or spider mites. If you notice any pests, try spraying them off with a strong stream of water. You can also use insecticidal soap or neem oil if necessary.
* Support (Optional): As the Malabar spinach grows, it will start to trail down from the basket. If you want to encourage upward growth, you can add a small trellis or support within the basket. This will also help keep the leaves off the ground and prevent them from getting dirty. I sometimes use bamboo stakes or even just some sturdy twigs.
Harvesting Your Malabar Spinach
The best part of growing Malabar spinach is, of course, harvesting it! You can start harvesting the leaves as soon as they are large enough to eat, usually about 6-8 weeks after planting.
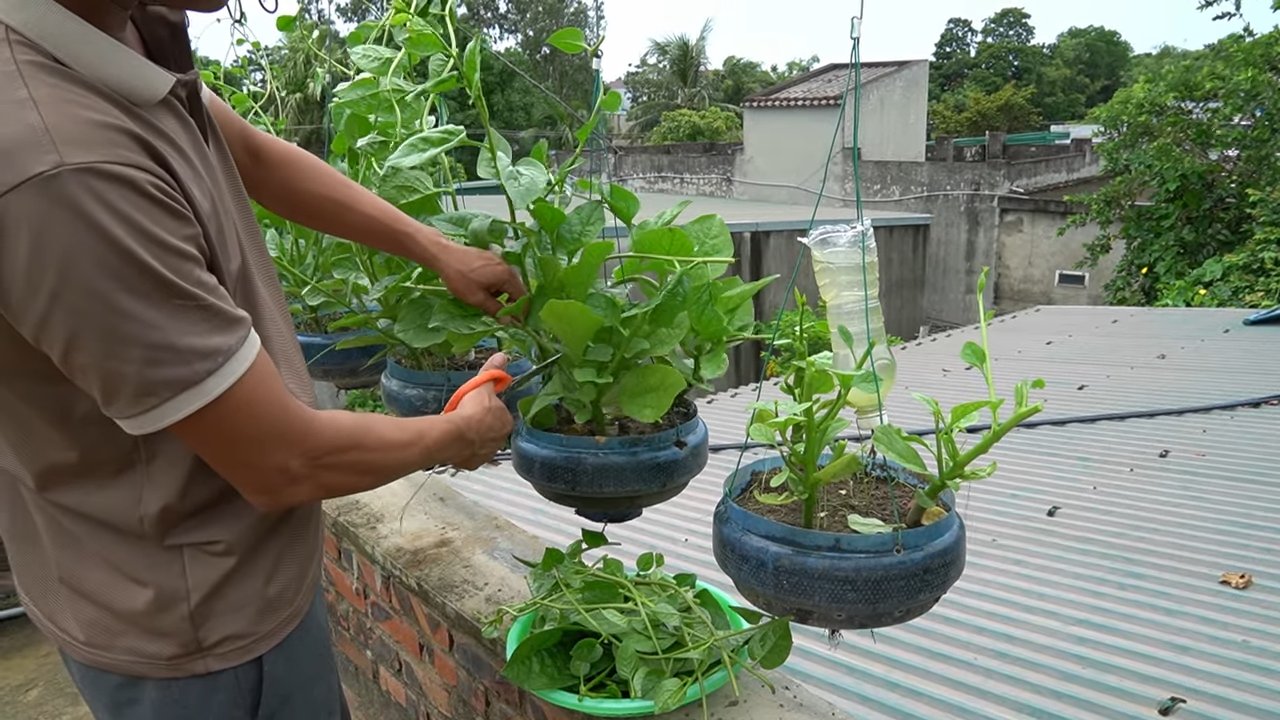
* How to Harvest: To harvest, simply snip off the leaves with scissors or pruning shears. You can harvest individual leaves or entire stems. I usually harvest the outer leaves first, allowing the inner leaves to continue growing.
* Harvesting Frequency: You can harvest Malabar spinach regularly throughout the growing season. The more you harvest, the more the plant will produce. I usually harvest a few times a week, depending on how much I need.
* Storage: Malabar spinach leaves are best used fresh, but they can also be stored in the refrigerator for a few days. Wrap the leaves in a damp paper towel and store them in a plastic bag.
Troubleshooting
Even with the best care, you might encounter some problems while growing Malabar spinach. Here are a few common issues and how to address them:
* Yellowing Leaves: Yellowing leaves can be caused by a variety of factors, including overwatering, underwatering, nutrient deficiencies, or pests. Check the soil moisture and adjust your watering accordingly. If you suspect a nutrient deficiency, fertilize with a balanced fertilizer. Inspect the leaves for pests and treat as needed.
* Slow Growth: Slow growth can be caused by insufficient sunlight, poor soil, or lack of nutrients. Make sure your basket is located in a sunny spot and that the soil is well-draining and rich in organic matter. Fertilize regularly with a balanced fertilizer.
* Pests: As mentioned earlier, Malabar spinach can occasionally be affected by aphids or spider mites. Spray them off with a strong stream of water or use insecticidal soap or neem oil.
* Leaf Spot: Leaf spot is a fungal disease that can cause brown or black spots on the leaves. To prevent leaf spot, avoid overhead watering and ensure good air circulation. If you notice leaf spot, remove the affected leaves and treat with a fungicide.
Tips for Success
Here are a few extra tips to help you succeed with growing Malabar spinach in hanging baskets:
* Choose the Right Variety: There are several varieties of Malabar spinach available, so choose one that’s well-suited to your climate. Some varieties are more heat-tolerant than others.
* Start Early: If you live in a cooler climate, you can start your Malabar spinach seeds indoors a few weeks before the last frost. This will give them a head start on the growing season.
* Provide Support: As mentioned earlier, providing a small trellis or support within the basket can encourage upward growth and create a fuller look.
* Don’t Overwater: Overwatering can lead to root rot, so be sure to check the soil moisture before watering. The soil should be moist but not soggy.
* Harvest Regularly: Harvesting regularly will encourage the plant to produce more leaves.
* Enjoy Your Harvest! Malabar spinach is a delicious and nutritious leafy green that can be used in a variety of dishes. Experiment with different recipes and enjoy the
Conclusion
So, there you have it! Transforming ordinary hanging baskets into thriving Malabar spinach gardens is not just a gardening project; it’s an invitation to cultivate fresh, nutritious greens right at your fingertips. We’ve explored the simple steps, from selecting the right basket and soil to nurturing your vibrant vines. But why is this DIY trick a must-try?
Firstly, it’s about accessibility. Imagine stepping outside your door and harvesting crisp, succulent Malabar spinach leaves for your salad or stir-fry. No more trips to the grocery store, no more wondering about the freshness of your produce. This method brings the garden to you, especially beneficial for those with limited space or mobility.
Secondly, it’s about control. You dictate the growing environment, ensuring your Malabar spinach is free from harmful pesticides and herbicides. You choose the soil, the fertilizer, and the watering schedule, creating the perfect conditions for optimal growth and flavor. This level of control translates to healthier, tastier greens for you and your family.
Thirdly, it’s about aesthetics. A cascading curtain of lush, green Malabar spinach adds a touch of natural beauty to any outdoor space. It’s a conversation starter, a visual delight, and a testament to your green thumb. Forget boring, generic hanging baskets; embrace the vibrant, edible elegance of Malabar spinach.
But the beauty of this DIY project lies in its adaptability. Feel free to experiment with different basket sizes and materials. Wicker, metal, or even repurposed containers can all work beautifully. Consider adding companion plants like marigolds or basil to deter pests and enhance the flavor of your spinach. You can also train the vines to grow in different directions, creating unique and eye-catching designs. For example, try creating a living wall effect by attaching multiple baskets to a trellis.
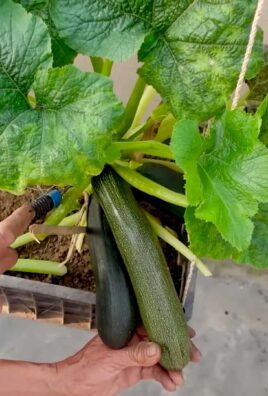
And don’t limit yourself to just Malabar spinach! While this climbing spinach thrives in hanging baskets, you can adapt the same principles to grow other vining vegetables like cherry tomatoes or even certain types of beans. The key is to provide adequate support and ensure the basket is large enough to accommodate the plant’s root system.
Ready to embark on your Malabar spinach adventure? We wholeheartedly encourage you to give this DIY trick a try. It’s a rewarding experience that combines gardening, sustainability, and delicious, homegrown food.
Once you’ve created your own Malabar spinach basket, we’d love to hear about your experience! Share your photos, tips, and challenges in the comments below. Let’s build a community of Malabar spinach enthusiasts and inspire others to embrace the joy of growing their own food. Your insights could be invaluable to fellow gardeners, helping them overcome obstacles and achieve even greater success. So, grab your basket, your soil, and your Malabar spinach seeds, and let’s get growing! Remember, the most rewarding gardens are the ones we create ourselves.
Frequently Asked Questions (FAQ)
What is Malabar spinach, and why should I grow it?
Malabar spinach (Basella alba or Basella rubra) is a heat-loving, vining vegetable that’s not actually a true spinach. It offers a mild, slightly peppery flavor and a succulent texture, making it a delicious addition to salads, stir-fries, soups, and stews. It’s also incredibly nutritious, packed with vitamins A and C, iron, and calcium. Growing it yourself ensures you have access to fresh, organic greens, and it’s a beautiful and productive addition to any garden, especially in hanging baskets.
What kind of hanging basket is best for growing Malabar spinach?
Almost any hanging basket will work, but consider these factors:
* **Size:** Choose a basket that’s at least 12 inches in diameter to provide enough room for the roots to grow. Larger baskets (14-16 inches) are even better.
* **Material:** Wicker, plastic, metal, or even repurposed containers can be used. Ensure the basket has adequate drainage holes to prevent waterlogging.
* **Liner:** A liner is essential to retain moisture and prevent soil from washing out. Coco coir liners are a popular and eco-friendly option. You can also use burlap or even a thick layer of newspaper.
What type of soil should I use?
Use a well-draining potting mix that’s rich in organic matter. A mix of compost, peat moss (or coco coir), and perlite or vermiculite is ideal. Avoid using garden soil, as it can become compacted in a container and hinder drainage. You can also add a slow-release fertilizer to the soil to provide nutrients throughout the growing season.
How much sunlight does Malabar spinach need?
Malabar spinach thrives in full sun (6-8 hours of direct sunlight per day). However, it can tolerate partial shade, especially in hotter climates. If you live in a very hot region, providing some afternoon shade can prevent the leaves from scorching.
How often should I water my Malabar spinach basket?
Water regularly, especially during hot, dry weather. The soil should be consistently moist but not waterlogged. Check the soil moisture by sticking your finger about an inch deep. If it feels dry, it’s time to water. Hanging baskets tend to dry out quickly, so you may need to water daily, especially during the peak of summer.
How do I fertilize my Malabar spinach?
Feed your Malabar spinach every 2-3 weeks with a balanced liquid fertilizer or compost tea. Avoid over-fertilizing, as this can lead to excessive foliage growth at the expense of flavor. You can also side-dress the plants with compost or worm castings every few weeks.
How do I harvest Malabar spinach?
Harvest the leaves and tender stems regularly to encourage continued growth. Simply snip off the leaves and stems with scissors or pruning shears. You can harvest individual leaves or entire stems. The more you harvest, the more the plant will produce.
Does Malabar spinach need support?
Yes, Malabar spinach is a vining plant and needs support to climb. You can provide support by training the vines up a trellis, fence, or even the sides of the hanging basket. You can also use twine or plant ties to secure the vines to the support structure.
Is Malabar spinach susceptible to pests or diseases?
Malabar spinach is generally pest and disease-resistant. However, it can occasionally be affected by aphids, spider mites, or fungal diseases. Inspect your plants regularly and take action promptly if you notice any problems. Insecticidal soap or neem oil can be used to control aphids and spider mites. Ensure good air circulation to prevent fungal diseases.
Can I grow Malabar spinach indoors?
While Malabar spinach prefers outdoor conditions, it can be grown indoors if you provide adequate light and humidity. Place the basket near a sunny window or use grow lights to supplement natural light. Increase humidity by misting the plants regularly or placing a tray of water near the basket.
How do I save seeds from Malabar spinach?
Allow some of the flowers to develop into berries. Once the berries turn dark purple or black, they are ripe. Harvest the berries and remove the seeds. Dry the seeds thoroughly before storing them in an airtight container in a cool, dark place.
Is Malabar spinach a perennial or an annual?
Malabar spinach is a perennial in tropical and subtropical climates (zones 9-11). In colder climates, it is typically grown as an annual. However, you can overwinter the plants indoors by bringing the basket inside before the first frost.
Can I eat the flowers and berries of Malabar spinach?
The flowers are edible and have a mild flavor. The berries are also edible, but they contain a dye that can stain your hands and clothes. They are often used as a natural food coloring.
What are some variations I can try with my Malabar spinach basket?
* **Companion Planting:** Plant marigolds, basil, or other herbs in the basket to deter pests and enhance the flavor of the spinach.
* **Vertical Gardening:** Create a living wall by attaching multiple baskets to a trellis or fence.
* **Mixed Greens:** Combine Malabar spinach with other leafy greens like lettuce or kale in the same basket.
* **Edible Flowers:** Add edible flowers like nasturtiums or pansies to the basket for a pop of color and flavor.
How can I encourage more branching and bushier growth?
Pinching back the tips of the vines regularly will encourage more branching and bushier growth. This will result in a fuller, more productive plant.
Leave a Comment