
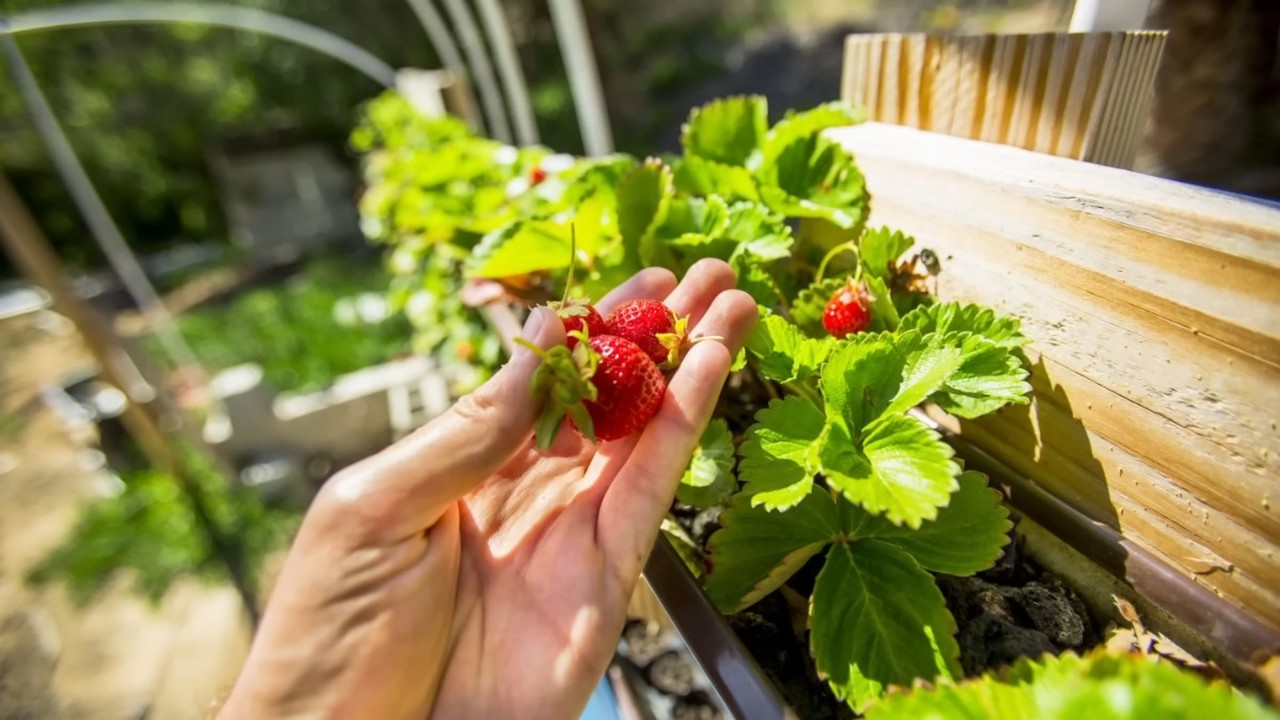
Maximize Strawberry Harvest: Dreaming of baskets overflowing with juicy, sun-ripened strawberries, fresh from your own garden? I know I am! There’s nothing quite like the taste of a homegrown strawberry, bursting with flavor that store-bought berries just can’t match. But sometimes, getting that abundant harvest feels like a distant dream. You’ve nurtured your plants, provided water and sunshine, yet the yield is…underwhelming.
For centuries, gardeners have sought the secrets to bountiful strawberry crops. From ancient Roman farmers to modern-day enthusiasts, the quest for the perfect strawberry has driven innovation and experimentation. Strawberries, symbols of love and abundance, have been cultivated and cherished across cultures, appearing in folklore, art, and cuisine. But let’s face it, history doesn’t fill our baskets!
That’s where these DIY tricks and hacks come in. We’re going to dive into simple, effective strategies to maximize strawberry harvest, even if you’re a beginner gardener. These aren’t complicated techniques requiring expensive equipment. Instead, we’ll focus on practical tips you can implement right now to boost your strawberry production and enjoy a truly rewarding harvest. Because who wouldn’t want more of those sweet, red gems? Let’s get started!
Maximize Your Strawberry Harvest: A DIY Guide to Bumper Crops!
Hey there, fellow strawberry lovers! Are you tired of tiny strawberry harvests that barely cover the bottom of your bowl? I know I was! That’s why I’ve spent the last few seasons experimenting with different techniques to maximize my strawberry yield. And guess what? I’ve cracked the code! I’m going to share all my secrets with you so you can enjoy a strawberry bonanza this year. Get ready for juicy, sweet strawberries galore!
Choosing the Right Strawberry Variety
Before we dive into the nitty-gritty, it’s crucial to pick the right strawberry variety for your climate and growing conditions. Not all strawberries are created equal!
* June-Bearing Strawberries: These produce one large crop, usually in late spring or early summer. They’re great if you want a big batch for jam-making or freezing. Varieties like ‘Chandler’ and ‘Honeoye’ are popular choices.
* Everbearing Strawberries: As the name suggests, these produce strawberries throughout the growing season, with peaks in spring and fall. They’re perfect for continuous snacking! ‘Seascape’ and ‘Albion’ are reliable everbearing options.
* Day-Neutral Strawberries: These are similar to everbearing varieties, producing fruit continuously as long as the temperature is between 35°F and 85°F. ‘Tristar’ and ‘Ozark Beauty’ are good choices.
Consider your local climate, the amount of sunlight your garden receives, and your personal preferences when selecting your strawberry plants.
Optimizing Your Strawberry Patch: The DIY Hacks
Okay, now for the fun part! Here are my tried-and-true DIY hacks to boost your strawberry harvest:
* Soil Preparation is Key: Strawberries thrive in slightly acidic soil (pH 5.5-6.5) that is rich in organic matter and well-draining.
* Sunlight is Your Friend: Strawberries need at least 6-8 hours of direct sunlight per day to produce abundant fruit.
* Proper Watering is Essential: Consistent moisture is crucial, especially during flowering and fruiting.
* Fertilize Strategically: Regular feeding with a balanced fertilizer will keep your plants healthy and productive.
* Weed Control is a Must: Weeds compete with strawberries for nutrients and water, so keep them at bay.
* Pest and Disease Management: Keep an eye out for common strawberry pests and diseases and take action promptly.
* Mulching Magic: Mulch helps retain moisture, suppress weeds, and keep the berries clean.
* Pruning for Productivity: Proper pruning encourages new growth and maximizes fruit production.
* Vertical Gardening for Space Saving: If you’re short on space, consider growing strawberries vertically.
* Companion Planting Power: Certain plants can help deter pests and improve strawberry growth.
Step-by-Step Instructions: From Planting to Harvesting
Let’s break down each of these hacks into actionable steps:
1. Soil Preparation: Laying the Foundation for Success
1. Test Your Soil: Before you plant anything, test your soil’s pH. You can purchase a soil testing kit at your local garden center or send a sample to a soil testing lab.
2. Amend the Soil: Based on your soil test results, amend the soil to achieve a pH of 5.5-6.5. Add sulfur to lower the pH or lime to raise it.
3. Incorporate Organic Matter: Dig in plenty of compost, well-rotted manure, or other organic matter to improve soil drainage and fertility. I usually add about 4-6 inches of compost.
4. Create Raised Beds (Optional): If your soil is poorly draining, consider creating raised beds to improve drainage and prevent root rot.
2. Planting Your Strawberry Plants: Giving Them a Good Start
1. Choose a Sunny Location: Select a spot in your garden that receives at least 6-8 hours of direct sunlight per day.
2. Space Your Plants Properly: Space June-bearing strawberries 18-24 inches apart in rows that are 3-4 feet apart. Space everbearing and day-neutral strawberries 12 inches apart in rows that are 2-3 feet apart.
3. Plant at the Correct Depth: Make sure the crown of the plant (where the roots meet the stem) is level with the soil surface. Planting too deep can cause the crown to rot, while planting too shallow can dry out the roots.
4. Water Thoroughly: After planting, water your strawberry plants thoroughly to help them establish their roots.
3. Watering: Keeping Them Hydrated
1. Water Regularly: Water your strawberry plants regularly, especially during dry spells. Aim to keep the soil consistently moist but not waterlogged.
2. Water Deeply: When you water, water deeply to encourage deep root growth.
3. Use a Soaker Hose or Drip Irrigation: These methods deliver water directly to the roots, minimizing water loss and reducing the risk of fungal diseases. I find that soaker hoses are the easiest to manage.
4. Water in the Morning: Water in the morning to allow the foliage to dry before nightfall, which can help prevent fungal diseases.
4. Fertilizing: Feeding Your Plants for Maximum Production
1. Apply a Balanced Fertilizer: Use a balanced fertilizer (e.g., 10-10-10) according to the package directions.
2. Fertilize in Spring and Fall: Fertilize your strawberry plants in early spring, before they start to flower, and again in the fall, after they have finished fruiting.
3. Use a Strawberry-Specific Fertilizer: Consider using a fertilizer specifically formulated for strawberries, as these often contain the nutrients that strawberries need most.
4. Avoid Over-Fertilizing: Over-fertilizing can lead to excessive foliage growth at the expense of fruit production.
5. Weed Control: Protecting Your Plants from Competition
1. Hand-Pull Weeds Regularly: The best way to control weeds is to hand-pull them regularly.
2. Use a Hoe: A hoe can be used to cultivate the soil and remove small weeds. Be careful not to damage the strawberry plants’ roots.
3. Apply a Pre-Emergent Herbicide: A pre-emergent herbicide can be used to prevent weed seeds from germinating. Be sure to follow the package directions carefully.
4. Mulch Heavily: Mulch helps suppress weed growth by blocking sunlight.
6. Pest and Disease Management: Keeping Them Healthy
1. Inspect Your Plants Regularly: Regularly inspect your strawberry plants for signs of pests or diseases.
2. Identify the Problem: If you find any problems, identify the pest or disease so you can take appropriate action.
3. Use Organic Pest Control Methods: Consider using organic pest control methods, such as insecticidal soap or neem oil, to control pests.
4. Remove Diseased Foliage: Remove any diseased foliage to prevent the spread of disease.
5. Practice Good Sanitation: Practice good sanitation by removing fallen leaves and debris from around your strawberry plants.
7. Mulching: Creating a Protective Layer
1. Choose the Right Mulch: Use organic mulch, such as straw, wood chips, or pine needles. I prefer straw because it’s readily available and breaks down over time, adding nutrients to the soil.
2. Apply a Thick Layer: Apply a 2-4 inch layer of mulch around your strawberry plants.
3. Keep Mulch Away from the Crown: Keep the mulch away from the crown of the plant to prevent rot.
4. Replenish Mulch as Needed: Replenish the mulch as needed throughout the growing season.
8. Pruning: Encouraging New Growth
1. Remove Runners: For June-bearing strawberries, remove runners (the long, trailing stems that produce new plants) to encourage the plants to focus their energy on fruit production.
2. Pinch Off Flowers: For everbearing and day-neutral strawberries, pinch off the flowers for the first 6 weeks after planting to encourage the plants to establish their roots.
3. Remove Old Foliage: In the fall, after the plants have finished fruiting, remove any old or damaged foliage.
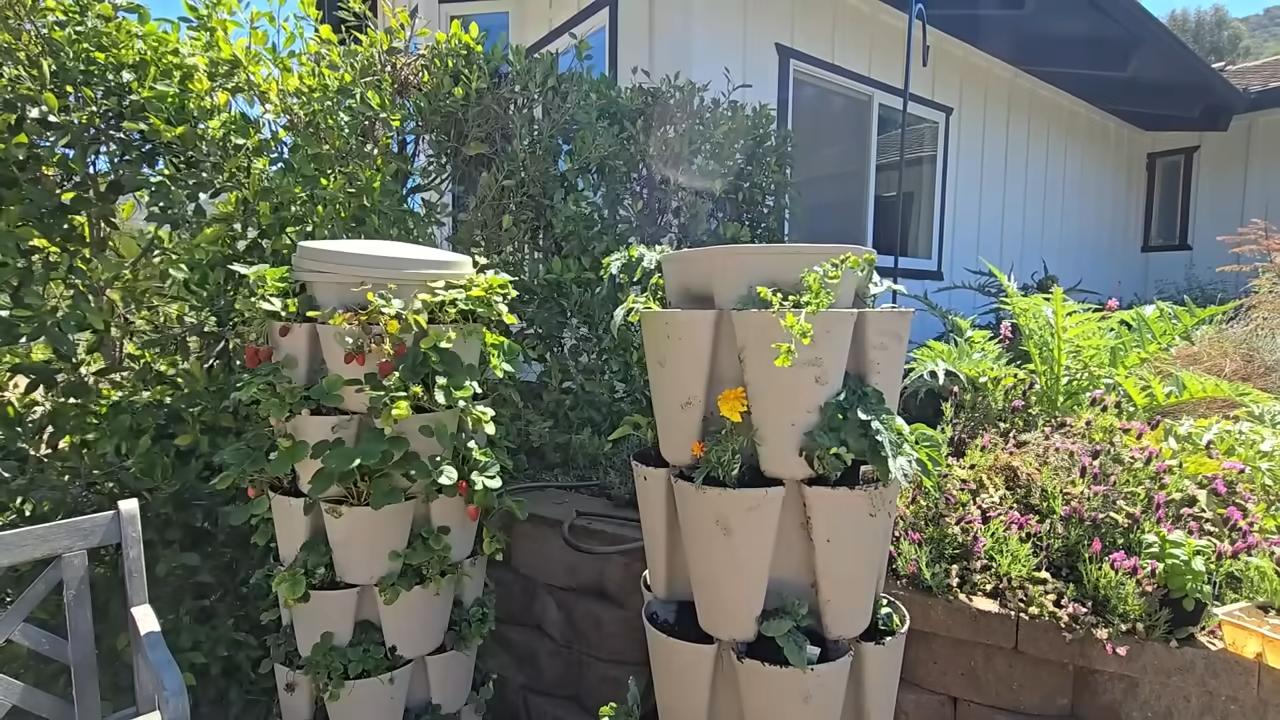
9. Vertical Gardening: Growing Upwards
1. Choose a Vertical Gardening System: There are many different vertical gardening systems available, such as strawberry towers, hanging baskets, and pallet planters.
2. Fill with Potting Mix: Fill your vertical gardening system with a high-quality potting mix.
3. Plant Your Strawberries: Plant your strawberry plants in the vertical gardening system, spacing them according to the instructions.
4. Water and Fertilize Regularly: Water and fertilize your strawberry plants regularly.
10. Companion
Conclusion
So, there you have it! This simple, yet incredibly effective DIY trick to maximize strawberry harvest is a game-changer for any gardener, whether you’re a seasoned pro or just starting out. We’ve walked you through the process, highlighting the benefits of increased yield, healthier plants, and a more bountiful supply of those delicious, sun-ripened berries.
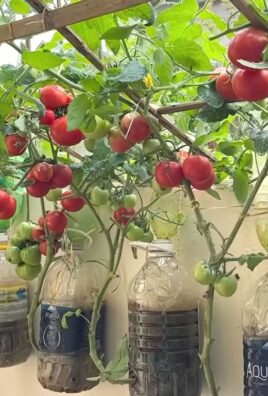
Why is this a must-try? Because it addresses some of the most common challenges faced by strawberry growers. It tackles issues like soil contact, which can lead to rot and disease, and it optimizes sunlight exposure, ensuring that each berry gets the energy it needs to develop its full flavor and sweetness. Plus, it’s a cost-effective and environmentally friendly solution, utilizing materials you likely already have on hand.
But the beauty of this DIY approach lies in its adaptability. Feel free to experiment with different materials for your supports. Instead of plastic bottles, consider using repurposed yogurt containers, terracotta pots, or even small, strategically placed rocks. The key is to elevate the berries and keep them off the ground.
For those of you growing strawberries in containers, this trick is especially beneficial. It helps to improve air circulation around the plants, preventing fungal diseases that can thrive in the confined space of a pot. You can also adjust the height of the supports to maximize sunlight exposure, even on a balcony or patio.
Don’t be afraid to get creative with your setup. You could even build a small, tiered structure to support your strawberry plants, creating a visually appealing and highly productive garden. The possibilities are endless!
We are confident that this DIY trick will significantly improve your strawberry harvest. Imagine the joy of picking basket after basket of juicy, red berries, knowing that you played a part in their abundance. Think of the delicious pies, jams, and smoothies you can create with your homegrown bounty.
But don’t just take our word for it. We encourage you to try this DIY trick for yourself and see the difference it makes. We’re eager to hear about your experiences, your successes, and any variations you come up with. Share your photos and stories with us in the comments section below. Let’s build a community of strawberry enthusiasts who are passionate about maximizing their harvest and enjoying the fruits (or rather, berries) of their labor.
So, grab your supplies, head out to your garden, and get ready to maximize your strawberry harvest like never before! Happy gardening!
Frequently Asked Questions (FAQ)
What type of strawberries does this DIY trick work best for?
This DIY trick is beneficial for virtually all types of strawberries, including June-bearing, everbearing, and day-neutral varieties. The principle of elevating the berries to prevent soil contact and improve sunlight exposure applies regardless of the specific strawberry type. However, you might need to adjust the height and spacing of the supports depending on the size and growth habit of your particular variety. For example, larger, more sprawling varieties might require taller supports or a wider spacing between plants.
Can I use this trick in raised garden beds?
Absolutely! In fact, this DIY trick can be even more effective in raised garden beds. Raised beds already provide improved drainage and soil quality, and by adding the supports, you’re further enhancing the growing environment for your strawberries. The supports will help to keep the berries clean and dry, reducing the risk of rot and disease. Just make sure the supports are stable and won’t tip over in windy conditions.
What if I don’t have plastic bottles or other suitable materials?
No problem! There are plenty of alternative materials you can use. Small rocks, pieces of wood, terracotta pots, or even commercially available strawberry supports can all work well. The key is to find something that is sturdy, non-toxic, and won’t decompose quickly in the garden. You can also get creative and repurpose other items you have around the house, such as old plant labels or plastic cutlery.
How often should I adjust the supports as the strawberries grow?
You may need to adjust the supports as the strawberries grow larger and heavier. Keep an eye on the berries and make sure they are still adequately supported and not touching the ground. You might need to add additional supports or adjust the height of the existing ones. It’s also a good idea to check the supports regularly for any signs of damage or wear and tear.
Will this trick protect my strawberries from pests and animals?
While this DIY trick primarily focuses on preventing soil contact and improving sunlight exposure, it can also offer some indirect protection from pests and animals. By elevating the berries, you’re making it slightly more difficult for slugs, snails, and other ground-dwelling pests to reach them. However, you may still need to take additional measures to protect your strawberries from birds, squirrels, and other larger animals. Consider using netting or other protective barriers to keep them away.
Is this trick suitable for organic gardening?
Yes, this DIY trick is perfectly suitable for organic gardening. It relies on simple, natural principles and doesn’t require the use of any harmful chemicals or pesticides. In fact, by preventing soil contact and improving air circulation, you’re reducing the risk of fungal diseases, which can often be treated with organic solutions. Just make sure to use materials that are safe and non-toxic for your plants and the environment.
How does this DIY trick help maximize strawberry harvest?
This DIY trick contributes to a maximized strawberry harvest in several ways. First, by keeping the berries off the ground, it prevents them from rotting or becoming infected with soilborne diseases. This means that more of your berries will ripen successfully. Second, by improving sunlight exposure, it ensures that each berry receives the energy it needs to develop its full flavor and sweetness. This results in larger, juicier, and more flavorful berries. Finally, by promoting better air circulation around the plants, it reduces the risk of fungal diseases, which can weaken the plants and reduce their overall yield.
What other tips can I use to maximize my strawberry harvest?
In addition to this DIY trick, there are several other things you can do to maximize your strawberry harvest. These include:
* Choosing the right strawberry variety for your climate and growing conditions.
* Planting your strawberries in well-drained soil that is rich in organic matter.
* Providing your strawberries with adequate water and fertilizer.
* Protecting your strawberries from pests and diseases.
* Harvesting your strawberries at the peak of ripeness.
* Mulching around your strawberry plants to retain moisture and suppress weeds.
* Removing runners to encourage the plants to focus their energy on producing fruit.
By following these tips, you can significantly increase your strawberry harvest and enjoy a bountiful supply of delicious, homegrown berries.
Leave a Comment