
Growing Pepino Melons might sound like an exotic adventure reserved for seasoned gardeners, but trust me, it’s a surprisingly achievable and rewarding DIY project, even for beginners! Have you ever dreamed of plucking a sweet, juicy melon right from your own backyard? Imagine the satisfaction of serving a unique fruit that you nurtured from seed to table. This isn’t just about gardening; it’s about connecting with nature and enjoying the fruits (literally!) of your labor.
The Pepino Melon, also known as the Melon Pear, boasts a fascinating history, originating in the Andean regions of South America. For centuries, it has been a staple in local diets, prized for its refreshing flavor and nutritional benefits. Now, you can bring a piece of that history to your own garden!
Why should you embark on this DIY journey? Well, store-bought Pepino Melons can be expensive and sometimes lack the vibrant flavor of homegrown varieties. Plus, growing Pepino Melons yourself allows you to control the growing conditions, ensuring a healthy and delicious harvest free from unwanted chemicals. In this article, I’ll share my tried-and-true tips and tricks, making the process simple, fun, and incredibly satisfying. Get ready to transform your garden and impress your friends with this unique and delicious fruit!
Growing Pepino Melons: A DIY Guide to Sweet Success
Okay, so you want to grow pepino melons? Awesome! They’re a bit unusual, but trust me, the sweet, juicy reward is totally worth the effort. I’ve been growing them for a few years now, and I’ve learned a few tricks along the way. This guide will walk you through everything you need to know, from starting seeds to harvesting your own delicious pepinos.
What You’ll Need
Before we dive in, let’s gather our supplies. Here’s a list of what you’ll need to grow pepino melons successfully:
* **Pepino Melon Seeds or Cuttings:** You can find seeds online or at some specialty nurseries. Cuttings are another option, especially if you know someone who already grows them.
* **Seed Starting Trays or Small Pots:** For starting your seeds indoors.
* **Seed Starting Mix:** A light, well-draining mix is crucial for germination.
* **Larger Pots (at least 5 gallons):** Pepino melons need room to grow, especially if you’re growing them in containers.
* **Well-Draining Potting Soil:** A good quality potting mix is essential for healthy growth.
* **Fertilizer:** A balanced fertilizer (like 10-10-10) and a fertilizer higher in phosphorus (like 15-30-15) to encourage fruiting.
* **Trellis or Stakes:** Pepino melon plants can get quite sprawling, so they need support.
* **Watering Can or Hose:** For regular watering.
* **Pruning Shears:** For trimming and shaping the plant.
* **Sunny Location:** Pepino melons need at least 6-8 hours of sunlight per day.
* **Optional: Grow Lights:** If you’re starting seeds indoors and don’t have enough natural light.
* **Optional: Insecticidal Soap or Neem Oil:** For dealing with pests.
Starting from Seed: A Step-by-Step Guide
Starting from seed is a rewarding way to grow pepino melons, but it requires a little patience. Here’s how I do it:
1. **Sow the Seeds Indoors:** Pepino melon seeds need a warm environment to germinate. I usually start them indoors about 6-8 weeks before the last expected frost. Fill your seed starting trays or small pots with seed starting mix. Moisten the mix thoroughly. Sow the seeds about ¼ inch deep and gently cover them with soil.
2. **Provide Warmth and Light:** Pepino melon seeds germinate best at temperatures between 70-80°F (21-27°C). You can use a heat mat to provide bottom heat. Place the trays or pots in a bright location, or under grow lights if needed. I usually keep my grow lights on for about 14-16 hours a day.
3. **Keep the Soil Moist:** Don’t let the soil dry out, but avoid overwatering. I usually mist the soil surface with a spray bottle to keep it consistently moist.
4. **Wait for Germination:** Pepino melon seeds can take anywhere from 1-3 weeks to germinate, so be patient. Once the seedlings emerge, continue to provide them with warmth and light.
5. **Transplant Seedlings:** Once the seedlings have developed a few sets of true leaves (the leaves that look like miniature versions of the adult leaves), they’re ready to be transplanted into larger pots. Gently remove the seedlings from the seed starting trays or pots and transplant them into individual pots filled with well-draining potting soil.
Taking Cuttings: A Faster Route
If you have access to a pepino melon plant, taking cuttings is a faster way to get started. Here’s how to do it:
1. **Select a Healthy Stem:** Choose a healthy stem that’s about 4-6 inches long.
2. **Make the Cut:** Use clean pruning shears to make a clean cut just below a node (the point where a leaf or branch grows from the stem).
3. **Remove Lower Leaves:** Remove the leaves from the bottom 2 inches of the stem.
4. **Rooting Hormone (Optional):** Dip the cut end of the stem in rooting hormone to encourage root development. This isn’t essential, but it can increase your success rate.
5. **Plant the Cutting:** Insert the cut end of the stem into a small pot filled with moist seed starting mix or perlite.
6. **Create a Humid Environment:** Cover the pot with a plastic bag or place it in a humidity dome to create a humid environment. This will help prevent the cutting from drying out.
7. **Provide Warmth and Light:** Place the pot in a warm, bright location, but avoid direct sunlight.
8. **Wait for Roots to Develop:** It can take several weeks for roots to develop. You can gently tug on the cutting to see if it has rooted. If it resists, it has likely developed roots.
9. **Transplant the Cutting:** Once the cutting has developed a good root system, transplant it into a larger pot filled with well-draining potting soil.
Transplanting and Growing On
Whether you started from seed or cuttings, the next step is to transplant your pepino melon plants into larger pots or into the ground.
1. **Harden Off the Plants:** Before transplanting your pepino melon plants outdoors, you need to harden them off. This means gradually exposing them to outdoor conditions over a period of about a week. Start by placing them in a sheltered location for a few hours each day, gradually increasing the amount of time they spend outdoors.
2. **Choose a Sunny Location:** Pepino melons need at least 6-8 hours of sunlight per day. Choose a location that gets plenty of sun.
3. **Prepare the Soil:** Pepino melons prefer well-draining soil that’s rich in organic matter. Amend the soil with compost or other organic matter before planting.
4. **Transplant the Plants:** Dig a hole that’s slightly larger than the root ball of the plant. Gently remove the plant from its pot and place it in the hole. Backfill the hole with soil and gently firm the soil around the plant.
5. **Water Thoroughly:** Water the plants thoroughly after transplanting.
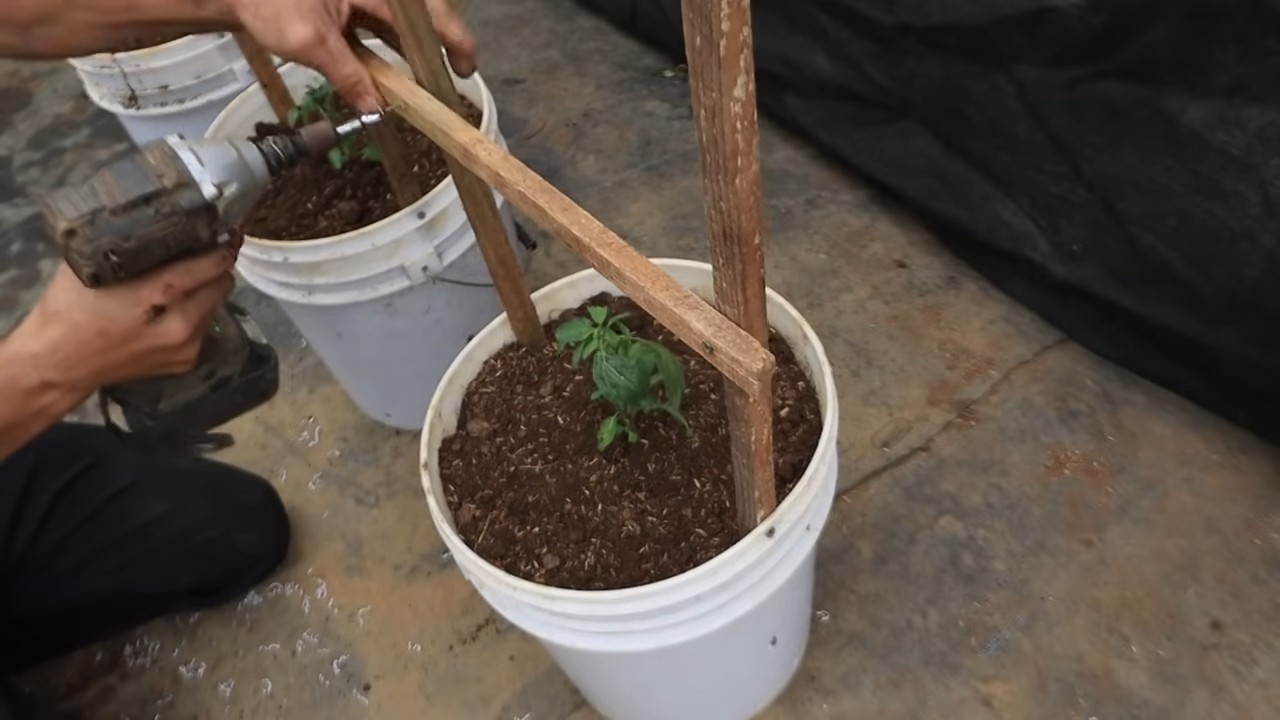
6. **Provide Support:** Pepino melon plants can get quite sprawling, so they need support. Install a trellis or stakes to support the plants. I’ve found that a tomato cage works well too.
7. **Fertilize Regularly:** Pepino melons are heavy feeders, so they need regular fertilization. I usually fertilize them every 2-3 weeks with a balanced fertilizer. Once the plants start to flower, switch to a fertilizer that’s higher in phosphorus to encourage fruiting.
8. **Water Regularly:** Pepino melons need consistent moisture, especially during hot weather. Water them deeply whenever the soil feels dry to the touch.
9. **Prune the Plants:** Pruning can help to improve air circulation and encourage fruit production. Remove any suckers (small shoots that grow from the base of the plant) and any dead or diseased leaves. You can also pinch back the tips of the stems to encourage branching.
Dealing with Pests and Diseases
Pepino melons are generally relatively pest and disease resistant, but they can be susceptible to a few problems.
* **Aphids:** These small, sap-sucking insects can infest pepino melon plants. You can control aphids by spraying them with insecticidal soap or neem oil.
* **Whiteflies:** These tiny, white insects can also infest pepino melon plants. You can control whiteflies by spraying them with insecticidal soap or neem oil.
* **Spider Mites:** These tiny mites can cause yellowing and stippling of the leaves. You can control spider mites by spraying them with insecticidal soap or neem oil.
* **Powdery Mildew:** This fungal disease can cause a white, powdery coating on the leaves. You can prevent powdery mildew by providing good air circulation and avoiding overhead watering. If powdery mildew does occur, you can treat it with a fungicide.
Harvesting Your Pepino Melons
The moment you’ve been waiting for! Harvesting your own pepino melons is so satisfying.
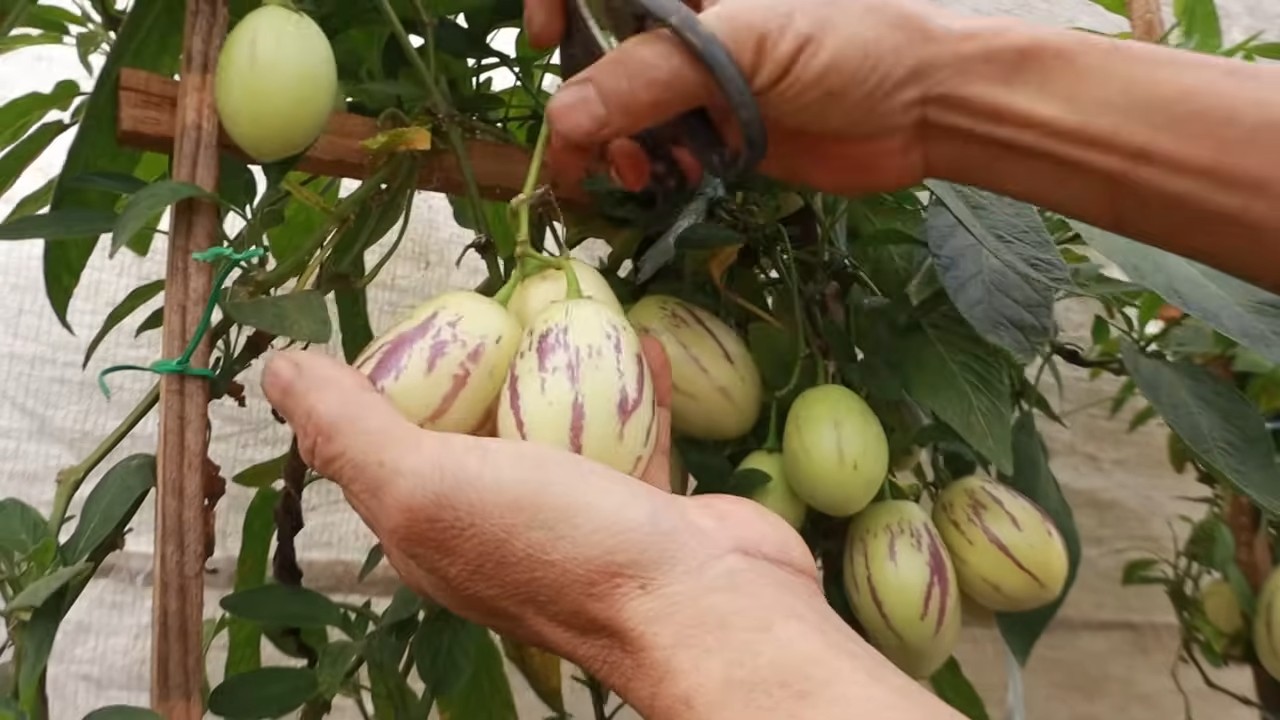
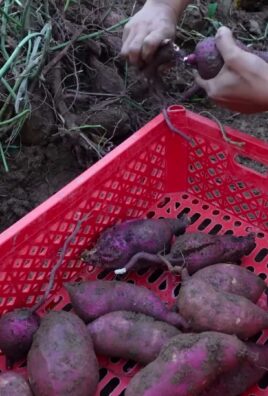
1. **Watch for Color Change:** Pepino melons are ready to harvest when they turn from green to a pale yellow or cream color. They may also develop purple stripes.
2. **Check for Softness:** The fruit should be slightly soft to the touch.
3. **Gently Twist:** Gently twist the fruit from the vine. If it’s ripe, it should come off easily.
4. **Enjoy!** Pepino melons can be eaten fresh, added to salads, or used in desserts. They have a sweet, melon-like flavor with hints of cucumber.
Tips for Success
Here are a few extra tips to help you grow pepino melons successfully:
* Consistent Watering is Key: Don’t let the soil dry out, especially during hot weather.
* Provide Adequate Support: Pepino melon plants can get quite heavy with fruit, so make sure they
Conclusion
So, there you have it – a simple, effective, and surprisingly rewarding method for propagating your own Pepino Melons. Forget expensive nursery starts and embrace the satisfaction of nurturing new life from a single, healthy plant. This DIY trick isn’t just about saving money; it’s about connecting with the natural world, understanding the life cycle of your favorite fruit, and enjoying the abundance that comes from your own efforts.
Why is this a must-try? Because it unlocks a world of possibilities. Imagine having a constant supply of Pepino Melon plants, ready to fill your garden or share with friends and family. Think of the joy of watching tiny cuttings transform into thriving, fruit-bearing vines. And consider the environmental benefits of reducing your reliance on commercially grown plants, often transported long distances.
But the beauty of this DIY approach lies in its adaptability. While we’ve focused on stem cuttings, don’t be afraid to experiment. Some gardeners have success with rooting Pepino Melon leaves, although this method can be slower and less reliable. You can also vary the rooting medium – try a mix of perlite and vermiculite, or even just plain water. The key is to provide a consistently moist environment and plenty of indirect light.
For those looking to take their Pepino Melon propagation to the next level, consider experimenting with different rooting hormones. While not strictly necessary, a rooting hormone can significantly speed up the process and increase your success rate. Just be sure to follow the instructions carefully and choose a product specifically designed for softwood cuttings.
And don’t limit yourself to just one variety of Pepino Melon! Once you’ve mastered the art of propagation, you can start collecting different cultivars, each with its own unique flavor and appearance. Imagine a garden filled with a rainbow of Pepino Melons, from the classic cream-colored varieties to those with vibrant purple stripes.
Ultimately, the success of this DIY trick hinges on your willingness to experiment and learn. Pay attention to your plants, observe their growth patterns, and adjust your techniques accordingly. Don’t be discouraged if your first attempt isn’t perfect – propagation is a skill that improves with practice.
We wholeheartedly encourage you to give this DIY trick a try. It’s a fun, educational, and incredibly rewarding experience. And once you’ve successfully propagated your own Pepino Melons, we want to hear about it! Share your experiences, tips, and photos in the comments below. Let’s build a community of Pepino Melon enthusiasts and help each other grow the best possible fruit. So get out there, get your hands dirty, and discover the joy of propagating your own Pepino Melons! This method is a game changer for any gardener looking to expand their Pepino Melon patch.
Frequently Asked Questions (FAQ)
What is the best time of year to propagate Pepino Melons?
The ideal time to propagate Pepino Melons is during the spring or early summer, when the plants are actively growing. This is when they have the most energy and are most likely to root successfully. However, with proper care and environmental control (like using a grow light and humidity dome), you can propagate Pepino Melons at other times of the year as well. Avoid propagating during the hottest part of summer or the coldest part of winter, as extreme temperatures can stress the cuttings and reduce their chances of survival.
How long does it take for Pepino Melon cuttings to root?
Rooting time can vary depending on several factors, including the variety of Pepino Melon, the temperature, the humidity, and the rooting medium. Generally, you can expect to see roots forming within 2-4 weeks. Be patient and avoid disturbing the cuttings too much during this time. You can gently check for root development by carefully lifting the cutting from the rooting medium. If you feel resistance, it’s likely that roots have formed.
What kind of rooting medium should I use?
A well-draining rooting medium is essential for successful Pepino Melon propagation. A mix of perlite and vermiculite is a popular choice, as it provides good aeration and moisture retention. You can also use a commercial seed-starting mix, but make sure it’s not too heavy or compacted. Some gardeners have success with rooting cuttings in plain water, but this method can be less reliable and may require more frequent water changes.
Do I need to use rooting hormone?
While not strictly necessary, rooting hormone can significantly improve your success rate, especially if you’re working with difficult-to-root varieties of Pepino Melon. Rooting hormone contains auxins, which are plant hormones that stimulate root development. Simply dip the cut end of the cutting in the rooting hormone powder or gel before planting it in the rooting medium. Be sure to follow the instructions on the rooting hormone package carefully.
How much light do Pepino Melon cuttings need?
Pepino Melon cuttings need bright, indirect light to thrive. Avoid placing them in direct sunlight, as this can scorch the leaves and dry out the cuttings. A north-facing window is often a good choice, or you can use a grow light to provide supplemental lighting. If you’re using a grow light, keep it a few inches away from the cuttings to prevent overheating.
How often should I water Pepino Melon cuttings?
It’s important to keep the rooting medium consistently moist, but not waterlogged. Water the cuttings whenever the top inch of the rooting medium feels dry to the touch. Avoid overwatering, as this can lead to root rot. You can also increase humidity by misting the cuttings regularly or placing them in a humidity dome.
How do I know when the Pepino Melon cuttings are ready to be transplanted?
The cuttings are ready to be transplanted when they have developed a strong root system. This typically takes 4-6 weeks. You should see several healthy roots emerging from the bottom of the rooting medium. Gently remove the cuttings from the rooting medium and transplant them into individual pots filled with well-draining potting soil.
What kind of soil should I use for Pepino Melons?
Pepino Melons prefer well-draining, fertile soil with a slightly acidic pH (6.0-6.8). A good potting mix for Pepino Melons should contain a blend of peat moss, perlite, and vermiculite. You can also amend the soil with compost or other organic matter to improve its fertility and drainage.
How do I care for newly transplanted Pepino Melon plants?
After transplanting, water the plants thoroughly and place them in a location with bright, indirect light. Keep the soil consistently moist, but not waterlogged. Fertilize the plants regularly with a balanced fertilizer. As the plants grow, you may need to provide support, such as a trellis or stake.
Can I grow Pepino Melons in containers?
Yes, Pepino Melons can be successfully grown in containers. Choose a large container (at least 12 inches in diameter) with good drainage. Use a well-draining potting mix and fertilize the plants regularly. Container-grown Pepino Melons may need more frequent watering than those grown in the ground.
What are some common problems with Pepino Melons?
Some common problems with Pepino Melons include aphids, whiteflies, and spider mites. These pests can be controlled with insecticidal soap or neem oil. Pepino Melons can also be susceptible to fungal diseases, such as powdery mildew. To prevent fungal diseases, provide good air circulation and avoid overwatering.
How do I get my Pepino Melon plants to produce fruit?
Pepino Melons are self-pollinating, but they may benefit from hand-pollination, especially if they are grown indoors or in areas with low bee activity. To hand-pollinate, use a small brush to transfer pollen from the male flowers to the female flowers. Female flowers have a small fruit developing behind the petals, while male flowers do not. Ensure the plants receive adequate sunlight, water, and nutrients to support fruit production.
Leave a Comment