
Grow Pineapple in Plastic Chair? Sounds a little crazy, right? But trust me, this quirky DIY project is not only possible, but it’s also a fantastic way to add a tropical touch to your garden, even if you’re short on space! For centuries, pineapples have symbolized hospitality and welcome, a tradition rooted in the Caribbean where they were often displayed as a sign of warmth and generosity. Now, you can bring that same welcoming vibe to your home with this unexpected gardening hack.
Let’s be honest, traditional gardening can be intimidating. Large plots, complicated soil mixes, and the constant battle against pests can quickly turn a relaxing hobby into a stressful chore. That’s where this DIY pineapple-growing trick comes in. Imagine harvesting your own juicy, homegrown pineapple without needing a sprawling garden! This method is perfect for apartment dwellers, balcony gardeners, or anyone looking for a fun and unique way to grow pineapple in a plastic chair. I’m going to show you how to repurpose an ordinary plastic chair into a thriving pineapple planter, saving space, reducing weeds, and adding a conversation starter to your outdoor space. Get ready to impress your friends and enjoy the sweet taste of success with this simple and rewarding project!
Growing Pineapples in a Plastic Chair: A Quirky DIY Guide
Hey there, fellow plant enthusiasts! Ever thought about growing a pineapple? And ever thought about growing one *in* a plastic chair? Probably not! But trust me, it’s a fun, space-saving, and surprisingly effective way to cultivate this tropical treat. I’m going to walk you through the whole process, from prepping your pineapple top to harvesting your very own homegrown fruit. Get ready to turn that old plastic chair into a pineapple paradise!
What You’ll Need
Before we dive in, let’s gather our supplies. This is a pretty low-cost project, which is always a win!
* A ripe pineapple with a healthy-looking top (the greener, the better!)
* A plastic chair (the sturdier, the better – think those classic garden chairs)
* Potting mix (well-draining is key!)
* Perlite or vermiculite (for added drainage)
* A sharp knife
* A large pot or container (at least 12 inches in diameter)
* Rooting hormone (optional, but recommended)
* Watering can or hose
* Gloves (optional, but pineapple leaves can be a bit prickly)
* Patience (this is a long-term project!)
Preparing the Pineapple Top
This is the most crucial step, so pay close attention! We need to coax those roots out of the pineapple top.
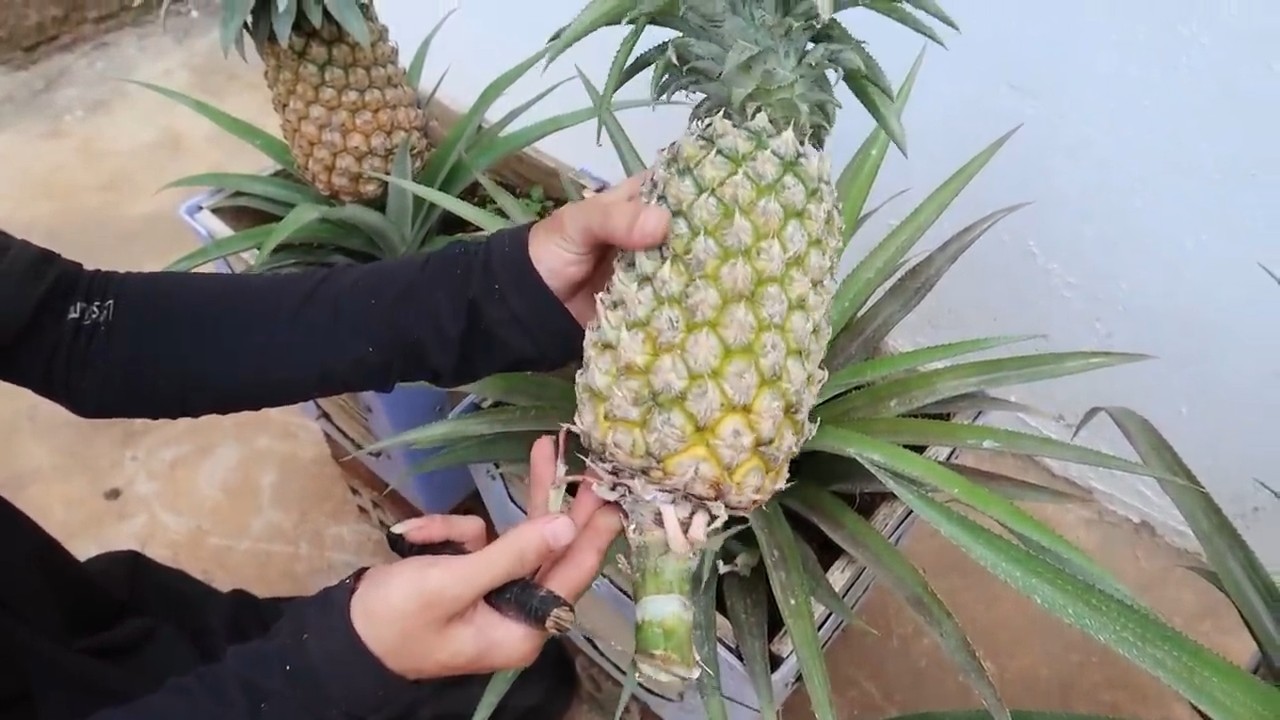
1. Twist and Shout (Gently!): The easiest way to remove the top is to firmly grasp the leaves near the base and twist it off the pineapple. If it doesn’t come off easily, you can use your sharp knife.
2. Slice and Dice (Carefully!): If twisting didn’t work, or if there’s still a lot of fruit attached to the base, carefully slice away the fruit from the bottom of the pineapple top. You want to remove all the fleshy part, as it can rot and prevent rooting.
3. Leaf Stripping Time: Now, gently peel off the bottom few layers of leaves from the base of the pineapple top. This will expose the root nodes, which are the little bumps where the roots will emerge. Be careful not to damage these nodes.
4. Rooting Hormone Dip (Optional): Dip the base of the pineapple top in rooting hormone powder or liquid. This will encourage faster and more robust root growth. I highly recommend this step, especially if you’re in a cooler climate.
5. Drying Out: Let the pineapple top dry out for 2-3 days in a cool, dry place. This allows the cut end to callous over, which helps prevent rot. Don’t skip this step!
Creating Your Pineapple Chair Planter
Now for the fun part – transforming that plastic chair into a pineapple-growing haven!
1. Pot Placement: Place your large pot or container on the seat of the plastic chair. Make sure the chair is stable and can support the weight of the pot, soil, and eventually, the pineapple plant.
2. Drainage is Key: Ensure your pot has adequate drainage holes. Pineapples don’t like soggy roots! If your pot doesn’t have enough holes, you can drill a few more.
3. Soil Mix Magic: Fill the pot with your well-draining potting mix. I like to mix in some perlite or vermiculite to improve drainage even further. A good ratio is about 80% potting mix and 20% perlite/vermiculite.
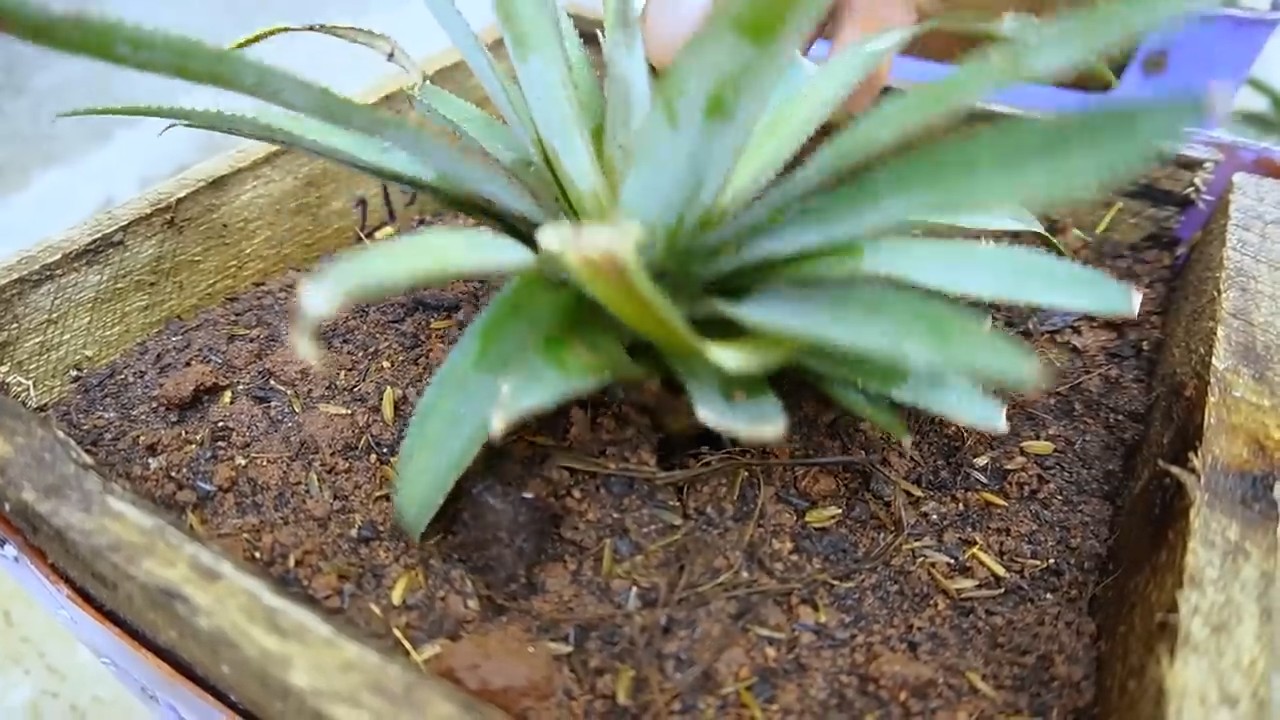
4. Planting Time: Make a hole in the center of the potting mix, deep enough to accommodate the base of the pineapple top. Gently place the pineapple top into the hole and firm the soil around it.
5. Watering In: Water the newly planted pineapple top thoroughly. You want the soil to be moist but not waterlogged.
Caring for Your Pineapple Plant
This is where the patience comes in. Pineapples are slow growers, so don’t expect to see fruit overnight.
1. Sun, Sun, Sun!: Pineapples love sunshine! Place your plastic chair planter in a location that receives at least 6 hours of direct sunlight per day. A south-facing location is ideal.
2. Watering Wisely: Water your pineapple plant when the top inch of soil feels dry to the touch. Avoid overwatering, as this can lead to root rot. In the winter, you’ll need to water less frequently.
3. Fertilizing Fun: Feed your pineapple plant with a balanced liquid fertilizer every 2-3 months during the growing season (spring and summer). Follow the instructions on the fertilizer label.
4. Temperature Troubles: Pineapples are tropical plants and prefer warm temperatures. Protect your plant from frost and freezing temperatures. If you live in a colder climate, you may need to bring your pineapple plant indoors during the winter.
5. Pest Patrol: Keep an eye out for pests such as mealybugs and scale. If you spot any pests, treat them with insecticidal soap or neem oil.
6. Patience, Grasshopper: It can take anywhere from 2 to 3 years for a pineapple plant to produce fruit. Don’t get discouraged if you don’t see a pineapple right away. Just keep providing it with the right care, and eventually, you’ll be rewarded with a delicious homegrown treat!
Encouraging Fruiting (The Ethylene Trick!)
Sometimes, even with the best care, your pineapple plant might be a bit stubborn and refuse to fruit. Here’s a little trick you can try to encourage fruiting:
1. The Apple Trick: Place a ripe apple core or a banana peel near the base of the pineapple plant. Apples and bananas release ethylene gas, which can stimulate flowering.
2. Bag It Up: Cover the pineapple plant and the apple core/banana peel with a clear plastic bag. This will trap the ethylene gas and increase its effectiveness.
3. Wait and See: Leave the bag in place for about a week, then remove it. Hopefully, this will trigger the plant to start flowering.
Harvesting Your Pineapple
After what feels like an eternity, you’ll finally see a pineapple forming! Here’s how to know when it’s ready to harvest:
1. Color Check: The pineapple will start to turn from green to yellow or golden-brown. The color change usually starts at the base of the fruit and gradually moves upwards.
2. Smell Test: A ripe pineapple will have a sweet, fragrant aroma.
3. Gentle Tug: The pineapple should be easy to twist off the plant. If it’s still firmly attached, it’s not quite ripe yet.
4. Slice and Enjoy!: Once you’ve harvested your pineapple, let it ripen for a few more days at room temperature. Then, slice it up and enjoy the fruits (literally!) of your labor.
Troubleshooting
Even with the best intentions, things can sometimes go wrong. Here are a few common problems and how to fix them:
* Yellowing Leaves: This could be a sign of overwatering, underwatering, or nutrient deficiency. Check the soil moisture and adjust your watering accordingly. Fertilize your plant if it’s been a while since the last feeding.
* Brown Leaf Tips: This is often caused by dry air or inconsistent watering. Increase humidity by misting the plant regularly or placing a tray of water near it.
* Root Rot: This is usually caused by overwatering. If you suspect root rot, carefully remove the plant from the pot and inspect the roots. Cut away any rotten, mushy roots and repot the plant in fresh, well-draining soil.
* No Fruit: As mentioned earlier, pineapples can take a long time to fruit. Make sure your plant is getting enough sunlight and fertilizer. Try the ethylene trick to encourage flowering.
Why a Plastic Chair?
You might be wondering, “Why a plastic chair?” Well, there are a few reasons:
* Space-Saving: It elevates the pot, making it easier to access and care for the plant, especially if you have limited space.
* Drainage: It allows for better drainage, as the pot isn’t sitting directly on the ground.
* Aesthetics: Let’s be honest, it’s a quirky and fun way to display your pineapple plant! It adds a touch of tropical flair to your garden or patio.
* Upcycling: It’s a great way to repurpose an old plastic chair that you might otherwise throw away.
So, there you have it! A complete guide to growing pineapples in a plastic chair. It’s a fun, rewarding, and surprisingly easy project that anyone can do. Just remember to be patient, provide your plant with the right care, and you’ll be enjoying homegrown pineapples in no time. Happy growing!
Conclusion
So, there you have it! Growing your own pineapple in a plastic chair might sound unconventional, but it’s a surprisingly effective and rewarding way to cultivate this tropical delight, especially if you’re short on garden space or live in a cooler climate. This method offers several advantages: it elevates the pineapple, providing better air circulation and drainage, it’s easily portable, allowing you to chase the sun or protect your plant from unexpected frost, and it’s a fantastic conversation starter!
This DIY trick isn’t just about saving money; it’s about the satisfaction of nurturing a plant from a simple pineapple top to a mature, fruit-bearing specimen. Imagine the pride you’ll feel when you harvest your own homegrown pineapple, knowing you played an active role in its creation. The taste of a homegrown pineapple is simply unmatched – sweeter, juicier, and bursting with flavor compared to store-bought varieties.
Don’t be afraid to experiment with variations on this method. You could try using different types of plastic chairs – perhaps one with a more intricate design for added visual appeal. Consider lining the chair’s seat with landscape fabric before adding your potting mix to further improve drainage and prevent soil loss. For those in colder climates, you might even consider creating a mini-greenhouse around the chair during the winter months to provide extra warmth and protection. You can also try different potting mixes, some people prefer a mix that is more acidic, while others prefer a more neutral mix.
The key to success with this method is patience and consistent care. Remember to water your pineapple regularly, fertilize it appropriately, and protect it from extreme temperatures. With a little bit of effort and attention, you’ll be enjoying the fruits (literally!) of your labor in no time.
We wholeheartedly encourage you to give this DIY pineapple growing method a try. It’s a fun, engaging, and ultimately rewarding project that will bring a touch of the tropics to your home. And once you’ve harvested your first pineapple, be sure to share your experience with us! We’d love to see photos of your pineapple plants and hear about any tips or tricks you’ve discovered along the way. Let’s create a community of pineapple enthusiasts, all united by our love of this delicious and versatile fruit and the joy of growing our own. So, grab a pineapple top, find a plastic chair, and get ready to embark on a tropical adventure! This method of growing a pineapple in a plastic chair is a game changer.
FAQ
Frequently Asked Questions About Growing Pineapples in Plastic Chairs
Q: What kind of pineapple should I use to start?
A: You’ll want to use a fresh pineapple from the grocery store. Look for one with healthy, green leaves and no signs of rot or damage at the base. The variety doesn’t matter as much, but some people find that certain varieties, like Smooth Cayenne, are easier to propagate. Make sure the pineapple is ripe, but not overripe. Overripe pineapples may have a harder time rooting.
Q: How do I prepare the pineapple top for planting?
A: First, carefully twist or cut off the top of the pineapple, leaving about an inch or two of fruit attached. Remove the lower leaves from the base of the top, exposing about an inch or two of the stem. This will encourage root growth. Let the pineapple top dry out for a few days to allow the cut end to callous over. This helps prevent rot.
Q: What kind of potting mix should I use?
A: Pineapples prefer well-draining, slightly acidic soil. A good mix would be equal parts potting soil, perlite, and peat moss. You can also add some compost for extra nutrients. Avoid using heavy clay soil, as it can retain too much moisture and lead to root rot.
Q: How do I plant the pineapple top in the plastic chair?
A: Choose a plastic chair with a sturdy seat that can support the weight of the soil and the growing pineapple plant. Line the seat of the chair with landscape fabric or a similar material to prevent soil from falling through the holes. Fill the chair’s seat with your chosen potting mix. Make a hole in the center of the soil and plant the pineapple top, burying the exposed stem. Water thoroughly after planting.
Q: How often should I water my pineapple plant?
A: Water your pineapple plant regularly, keeping the soil consistently moist but not waterlogged. Allow the top inch of soil to dry out between waterings. In hot, dry weather, you may need to water more frequently. During the winter months, reduce watering.
Q: How much sunlight does a pineapple plant need?
A: Pineapples need at least six hours of direct sunlight per day. Place your plastic chair in a sunny location where the plant will receive plenty of light. If you live in a climate with intense sunlight, you may need to provide some afternoon shade to prevent the leaves from scorching.
Q: How do I fertilize my pineapple plant?
A: Fertilize your pineapple plant every two to three months with a balanced fertilizer. You can use a liquid fertilizer diluted to half strength or a slow-release granular fertilizer. Apply the fertilizer according to the package directions.
Q: How long does it take for a pineapple plant to produce fruit?
A: It can take anywhere from one to three years for a pineapple plant to produce fruit, depending on the variety, climate, and growing conditions. Be patient and continue to provide proper care, and eventually, you’ll be rewarded with a delicious homegrown pineapple.
Q: How do I know when my pineapple is ripe?
A: A ripe pineapple will have a sweet fragrance and a slightly golden color. The eyes (the individual segments of the pineapple) will be more flattened and the fruit will feel slightly soft to the touch. You can also try gently pulling on one of the leaves; if it comes off easily, the pineapple is likely ripe.
Q: Can I grow a pineapple indoors using this method?
A: Yes, you can grow a pineapple indoors using the plastic chair method, but you’ll need to provide it with plenty of light. Place the chair near a sunny window or use grow lights to supplement the natural light. Indoor-grown pineapples may take longer to fruit than those grown outdoors.
Q: What if my pineapple plant develops brown spots on its leaves?
A: Brown spots on the leaves can be a sign of several problems, including overwatering, underwatering, or fungal disease. Check the soil moisture and adjust your watering accordingly. If you suspect a fungal disease, treat the plant with a fungicide.
Q: Can I move the plastic chair with the pineapple plant in it?
A: Yes, one of the advantages of this method is that you can easily move the plastic chair to chase the sun or protect the plant from frost. However, be careful when moving the chair, as the soil can be heavy and the plant can be top-heavy.
Q: What are some common pests that affect pineapple plants?
A: Common pests that can affect pineapple plants include mealybugs, scale, and spider mites. Inspect your plant regularly for signs of pests and treat them with an appropriate insecticide or horticultural oil.
Q: How do I encourage my pineapple plant to flower?
A: Sometimes, pineapple plants need a little encouragement to flower. One trick is to place an apple core near the base of the plant. The ethylene gas released by the apple can stimulate flowering. You can also try using a commercial ethylene-releasing product.
Q: What do I do after I harvest my pineapple?
A: After you harvest your pineapple, the mother plant will eventually die. However, it will often produce “pups” or suckers at the base of the plant. These pups can be removed and planted to grow new pineapple plants, continuing the cycle.

Leave a Comment