
Backyard Grape Growing Tips: Imagine stepping into your backyard and plucking a sun-warmed, juicy grape straight from the vine. Sounds like a dream, right? Well, it doesn’t have to be! For centuries, grapes have been cultivated, not just for their delicious fruit and the wines they produce, but also as a symbol of abundance and prosperity. From ancient Egypt to the vineyards of Europe, grapes have held a special place in human history.
But you don’t need a sprawling vineyard to enjoy the fruits of your labor. I’m here to tell you that backyard grape growing tips are more accessible than you might think! Many people shy away from growing grapes, believing it’s too complicated or requires too much space. But with the right knowledge and a little bit of effort, you can successfully cultivate your own grapevines, even in a small backyard.
This DIY guide will unlock the secrets to successful backyard grape growing. We’ll cover everything from selecting the right grape variety for your climate to pruning techniques that will maximize your harvest. So, ditch the store-bought grapes and get ready to enjoy the satisfaction of growing your own delicious, homegrown fruit. Let’s get started!
DIY: Dein eigener Mini-Weinberg im Garten – So klappt’s!
Hey Leute! Habt ihr euch jemals vorgestellt, euren eigenen Wein im Garten anzubauen? Klingt fancy, oder? Aber keine Sorge, es ist einfacher als ihr denkt! Ich zeige euch, wie ihr mit ein paar einfachen Schritten und etwas Geduld eure eigenen Trauben ernten könnt. Los geht’s!
Was du brauchst: Die Vorbereitung
Bevor wir loslegen, brauchen wir natürlich das richtige Equipment. Hier ist eine Liste mit allem, was ihr benötigt:
* Reben: Wählt eine Rebsorte, die für euer Klima geeignet ist. Fragt am besten in einer lokalen Baumschule nach. Ich empfehle Sorten wie Regent, Solaris oder Johanniter für kühlere Regionen.
* Pflanzwerkzeug: Spaten, Schaufel, Gartenschere, eventuell eine Hacke.
* Pflanzpfähle: Diese geben den jungen Reben Halt. Bambusstäbe oder Holzpfähle sind super.
* Bindematerial: Weiches Material wie Bast oder spezielle Rebenbinder, um die Reben an den Pfählen zu befestigen.
* Kompost oder organischer Dünger: Für einen guten Start der Pflanzen.
* Mulch: Um die Feuchtigkeit im Boden zu halten und Unkraut zu unterdrücken.
* Draht oder Rankhilfe: Für die spätere Erziehung der Reben.
* Gießkanne oder Gartenschlauch: Zum Bewässern.
* Geduld: Weinbau braucht Zeit!
Schritt-für-Schritt-Anleitung: Vom Setzling zur Traube
Jetzt geht’s ans Eingemachte! Hier ist eine detaillierte Anleitung, wie ihr eure Reben pflanzt und pflegt:
1. Die richtige Rebsorte wählen
Das A und O ist die Wahl der richtigen Rebsorte. Nicht jede Sorte gedeiht überall. Informiert euch gut, welche Sorten in eurer Region gut wachsen und resistent gegen Krankheiten sind. Lokale Baumschulen sind hier Gold wert! Sie können euch genau sagen, welche Sorten für eure Bedingungen am besten geeignet sind. Achtet auch darauf, ob ihr lieber rote oder weiße Trauben möchtet.
2. Den perfekten Standort finden
Reben lieben die Sonne! Sucht euch einen sonnigen Platz im Garten aus, der mindestens 6-8 Stunden Sonne am Tag bekommt. Der Boden sollte gut durchlässig sein, damit keine Staunässe entsteht. Ein leicht erhöhter Standort ist ideal, da er für eine gute Drainage sorgt. Vermeidet Standorte, an denen es oft windig ist, da dies die Reben austrocknen kann.
3. Den Boden vorbereiten
Ein guter Boden ist die halbe Miete! Lockert den Boden gründlich auf und entfernt Unkraut und Steine. Mischt Kompost oder organischen Dünger unter, um den Boden mit Nährstoffen anzureichern. Der Boden sollte locker und luftig sein, damit die Wurzeln gut wachsen können.
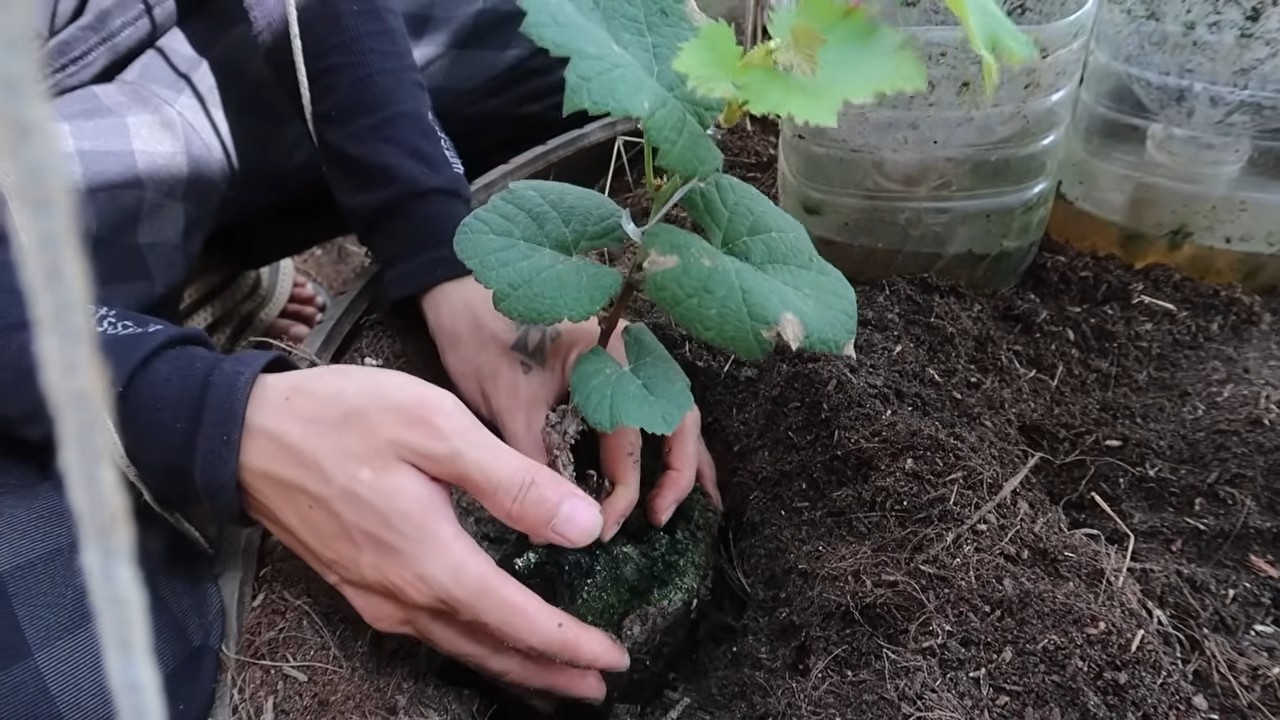
4. Die Reben pflanzen
Jetzt kommt der spannende Teil: das Pflanzen!
1. Pflanzlöcher ausheben: Die Pflanzlöcher sollten etwa doppelt so groß sein wie der Wurzelballen der Reben.
2. Reben einsetzen: Setzt die Reben vorsichtig in die Löcher und achtet darauf, dass die Veredelungsstelle (die Verdickung am Stamm) etwa 5-10 cm über der Erde liegt.
3. Löcher auffüllen: Füllt die Löcher mit Erde auf und drückt sie leicht an.
4. Angießen: Gießt die Reben gründlich an, damit sich die Erde um die Wurzeln setzt.
5. Pflanzpfähle setzen: Setzt direkt neben jede Rebe einen Pflanzpfahl, an dem ihr die Rebe befestigen könnt.
5. Die Reben anbinden
Bindet die jungen Reben locker an die Pflanzpfähle. Verwendet weiches Material wie Bast oder spezielle Rebenbinder, um die Stämme nicht zu beschädigen. Die Reben sollten aufrecht wachsen, um eine gute Entwicklung zu gewährleisten.
6. Bewässerung und Düngung
Gerade in den ersten Wochen nach dem Pflanzen ist eine regelmäßige Bewässerung wichtig. Die Erde sollte immer leicht feucht sein, aber nicht nass. Düngt die Reben im Frühjahr mit Kompost oder organischem Dünger, um sie mit Nährstoffen zu versorgen. Vermeidet eine Überdüngung, da dies zu einem übermäßigen Wachstum der Blätter und zu weniger Früchten führen kann.
7. Unkrautbekämpfung und Mulchen
Haltet den Bereich um die Reben frei von Unkraut. Mulchen hilft, die Feuchtigkeit im Boden zu halten und Unkraut zu unterdrücken. Verwendet organische Materialien wie Stroh, Holzhackschnitzel oder Rasenschnitt zum Mulchen.
Die Erziehung der Reben: Ein wichtiger Schritt
Die Erziehung der Reben ist entscheidend für eine gute Ernte. Es gibt verschiedene Erziehungssysteme, aber ich zeige euch hier eine einfache Variante, die sich gut für den Hausgarten eignet:
1. Das erste Jahr: Aufbau des Stammes
Im ersten Jahr geht es darum, einen kräftigen Stamm aufzubauen. Lasst nur einen Trieb wachsen und entfernt alle anderen. Bindet diesen Trieb regelmäßig an den Pflanzpfahl.
2. Das zweite Jahr: Aufbau der Seitentriebe
Im zweiten Jahr schneidet ihr den Stamm auf die gewünschte Höhe zurück (etwa 60-80 cm). Aus den Knospen unterhalb der Schnittstelle werden sich Seitentriebe entwickeln. Wählt zwei kräftige Seitentriebe aus, die in entgegengesetzte Richtungen wachsen, und bindet sie an einen Draht oder eine Rankhilfe. Diese Seitentriebe bilden die Basis für die zukünftige Fruchtholzbildung.
3. Die folgenden Jahre: Fruchtholzbildung und Erhaltungsschnitt
In den folgenden Jahren geht es darum, das Fruchtholz zu erhalten und zu erneuern. Das Fruchtholz sind die Triebe, an denen die Trauben wachsen. Schneidet im Winter (Januar/Februar) die Seitentriebe, die im Vorjahr Früchte getragen haben, auf kurze Zapfen (2-3 Knospen) zurück. Aus diesen Knospen werden im Frühjahr neue Triebe wachsen, die dann im Sommer Früchte tragen. Entfernt außerdem alle unnötigen Triebe und Wasserschosse (Triebe, die direkt aus dem Stamm wachsen).
Schutz vor Krankheiten und Schädlingen
Auch Reben können von Krankheiten und Schädlingen befallen werden. Hier sind einige Tipps, wie ihr eure Reben schützen könnt:
* Pilzkrankheiten: Mehltau und Falscher Mehltau sind häufige Pilzkrankheiten bei Reben. Achtet auf eine gute Belüftung der Reben und entfernt befallene Blätter. Bei Bedarf könnt ihr auch mit biologischen Fungiziden behandeln.
* Schädlinge: Blattläuse, Reblaus und Traubenwickler können den Reben schaden. Kontrolliert die Reben regelmäßig auf Schädlinge und bekämpft sie bei Bedarf mit biologischen Insektiziden.
* Vogelschutz: Vögel lieben reife Trauben! Schützt eure Trauben mit Netzen, um sie vor Vogelfraß zu bewahren.
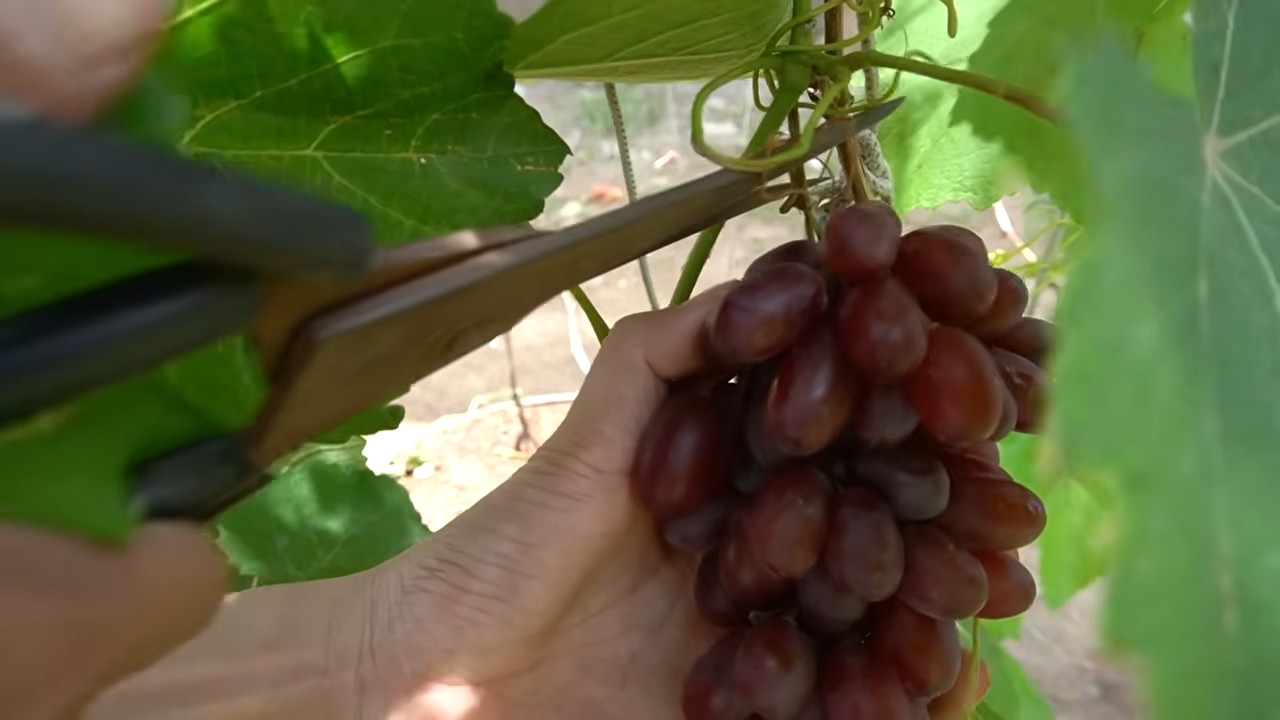
Die Ernte: Der Lohn der Arbeit
Nach all der Arbeit kommt endlich der Lohn: die Ernte! Die Trauben sind reif, wenn sie ihre typische Farbe haben und sich leicht vom Stiel lösen lassen. Probiert eine Traube, um den Reifegrad zu testen. Die Trauben sollten süß und aromatisch sein. Schneidet die Trauben vorsichtig mit einer Schere ab und genießt eure selbst geernteten Trauben!
Zusätzliche Tipps für den erfolgreichen Weinbau im Garten
* Bodenanalyse: Eine Bodenanalyse kann euch helfen, den Nährstoffgehalt des Bodens zu bestimmen und gezielt zu düngen.
* Regelmäßige Kontrolle: Kontrolliert eure Reben regelmäßig auf Krankheiten und Schädlinge. Je früher ihr Probleme erkennt, desto besser könnt ihr sie bekämpfen.
* Schnittkurse: Besucht einen Schnittkurs, um die richtige Schnitttechnik zu erlernen. Ein korrekter Schnitt ist entscheidend für eine gute Ernte.
* Austausch mit anderen Gärtnern: Tauscht euch mit anderen Gärtnern aus, die ebenfalls Wein anbauen. Ihr könnt voneinander lernen und euch gegenseitig Tipps geben.
Ich hoffe, diese Anleitung hilft euch dabei, euren eigenen Mini
Conclusion
So, there you have it! Mastering backyard grape growing isn’t some unattainable dream reserved for seasoned viticulturists. With a little planning, the right techniques, and a dash of patience, you can transform your backyard into a thriving vineyard, yielding delicious grapes for eating, juicing, or even winemaking. We’ve covered everything from selecting the perfect grape variety for your climate and soil to providing essential support structures and implementing effective pest and disease control measures.
The beauty of backyard grape growing lies in its adaptability. Feel free to experiment with different training methods, such as the single-curtain or cordon system, to find what works best for your space and grape variety. Consider interplanting companion plants like rosemary or lavender to deter pests naturally and enhance the overall biodiversity of your garden. Don’t be afraid to try different fertilizers or soil amendments to optimize the nutrient levels for your specific grapevines.
Remember, successful backyard grape growing is a journey, not a destination. There will be challenges along the way, from unexpected weather patterns to the occasional pest infestation. But with each challenge comes an opportunity to learn and refine your techniques. The reward, of course, is the satisfaction of harvesting your own homegrown grapes, bursting with flavor and freshness.
Why is this a must-try? Because nothing compares to the taste of grapes you’ve nurtured from vine to table. It’s a connection to nature, a source of pride, and a delicious way to enjoy the fruits (literally!) of your labor. Plus, growing your own grapes is a sustainable and eco-friendly way to reduce your reliance on commercially produced fruit.
We wholeheartedly encourage you to embark on this rewarding adventure of backyard grape growing. Take the plunge, get your hands dirty, and experience the joy of cultivating your own vineyard. And most importantly, share your experiences with us! We’d love to hear about your successes, challenges, and any unique tips or tricks you discover along the way. Post photos of your thriving vines, share your favorite grape recipes, and connect with fellow grape enthusiasts in the comments section below. Let’s build a community of backyard grape growers, sharing knowledge and inspiring each other to cultivate the sweetest, most bountiful harvests possible. Happy growing!
Frequently Asked Questions (FAQ)
What are the best grape varieties for beginners?
For beginners, it’s best to start with disease-resistant and relatively low-maintenance varieties. Some excellent choices include:
* **’Concord’:** A classic American grape known for its distinctive flavor and ease of growing. It’s perfect for juice, jams, and jellies.
* **’Niagara’:** A white grape with a sweet, musky flavor, ideal for fresh eating and juice.
* **’Reliance’:** A seedless red grape that’s very cold-hardy and disease-resistant.
* **’Marquette’:** A cold-hardy red grape developed for winemaking in colder climates. It’s also suitable for fresh eating.
* **’Venus’:** A seedless blue grape that’s known for its vigor and disease resistance.
When selecting a variety, consider your local climate and soil conditions. Contact your local agricultural extension office for recommendations specific to your region.
How much space do I need to grow grapes?
Grapevines need ample space to grow and thrive. A general guideline is to allow at least 8-10 feet between vines in a row and 10-12 feet between rows. However, the exact spacing will depend on the variety and the training system you choose. For example, a grapevine trained on a single-curtain system may require less space than one trained on a cordon system. Consider the mature size of the vine and the amount of sunlight it will need when determining spacing. If you have limited space, consider growing grapes on an arbor or trellis to maximize vertical space.
How often should I water my grapevines?
Watering frequency depends on several factors, including the climate, soil type, and age of the vine. Newly planted grapevines need more frequent watering than established vines. In general, water deeply and infrequently, allowing the soil to dry out slightly between waterings. During hot, dry periods, you may need to water more frequently. Avoid overwatering, as this can lead to root rot. A good rule of thumb is to water when the top inch of soil feels dry to the touch. Consider using a soaker hose or drip irrigation system to deliver water directly to the roots.
When is the best time to prune grapevines?
Pruning is essential for maintaining the health and productivity of grapevines. The best time to prune is during the dormant season, typically in late winter or early spring, before the buds begin to swell. Pruning removes dead, damaged, and unproductive wood, allowing the vine to focus its energy on producing high-quality fruit. The specific pruning techniques will vary depending on the grape variety and the training system. Consult a local expert or refer to a pruning guide for detailed instructions.
How do I protect my grapevines from pests and diseases?
Pest and disease control is crucial for successful backyard grape growing. Common pests include Japanese beetles, grape phylloxera, and grape berry moth. Common diseases include powdery mildew, downy mildew, and black rot. Implement preventative measures such as:
* **Choosing disease-resistant varieties:** This is the most effective way to minimize disease problems.
* **Maintaining good air circulation:** Prune vines to allow for good airflow, which helps to prevent fungal diseases.
* **Removing weeds and debris:** This eliminates potential hiding places for pests and diseases.
* **Using organic pest control methods:** Consider using insecticidal soap, neem oil, or Bacillus thuringiensis (Bt) to control pests.
* **Applying fungicides:** If necessary, use a fungicide to control fungal diseases. Choose a fungicide that is specifically labeled for use on grapes and follow the instructions carefully.
Regularly inspect your vines for signs of pests or diseases and take action promptly to prevent them from spreading.
How long does it take for grapevines to produce fruit?
Grapevines typically take 2-3 years to begin producing fruit. The first year is focused on establishing the root system and developing the main structure of the vine. In the second year, the vine will start to produce some fruit, but the yield will be relatively small. By the third year, the vine should be producing a more substantial crop. The exact time frame will depend on the variety, growing conditions, and pruning practices. Be patient and provide your vines with the care they need, and you’ll be rewarded with a bountiful harvest in due time.
Can I grow grapes in containers?
Yes, you can grow grapes in containers, but it requires careful planning and attention. Choose a large container (at least 20 gallons) with good drainage. Select a dwarf or compact grape variety that is well-suited for container growing. Use a high-quality potting mix and fertilize regularly. Container-grown grapes will need more frequent watering than those grown in the ground. Provide a trellis or support structure for the vines to climb. Be aware that container-grown grapes may be more susceptible to temperature fluctuations and may need to be protected during extreme weather.
What kind of soil is best for growing grapes?
Grapes prefer well-drained soil with a slightly acidic to neutral pH (6.0-7.0). The soil should be rich in organic matter and have good drainage to prevent root rot. Before planting, conduct a soil test to determine the pH and nutrient levels. Amend the soil as needed with compost, manure, or other organic matter. Avoid planting grapes in heavy clay soil or poorly drained areas. If your soil is not ideal, consider planting grapes in raised beds or containers.
How do I know when my grapes are ripe?
Determining when grapes are ripe can be tricky, but there are several indicators to look for:
* **Color:** The color of the grapes should be uniform and characteristic of the variety.
* **Taste:** The grapes should taste sweet and flavorful, with a balance of acidity.
* **Texture:** The grapes should be plump and juicy, with a slightly soft texture.
* **Ease of removal:** The grapes should come off the vine easily with a gentle tug.
* **Seed color:** The seeds should be brown and fully developed.
The best way to determine ripeness is to taste the grapes regularly as they approach maturity. Harvest the grapes when they reach your desired level of sweetness and flavor.
What are some creative ways to use my homegrown grapes?
Beyond eating them fresh, there are countless ways to enjoy your homegrown grapes:
* **Juice:** Make your own fresh grape juice.
* **Jams and jellies:** Preserve the flavor of your grapes in homemade jams and jellies.
* **Wine:** If you have enough grapes, try your hand at winemaking.
* **Grape pies and tarts:** Bake delicious grape pies and tarts.
* **Grape salads:** Add grapes to salads for a burst of sweetness and flavor.
* **Frozen grapes:** Freeze grapes for a refreshing and healthy snack.
* **Grape leaves:** Use grape leaves to make dolmades (stuffed grape leaves).
* **Grape seed oil:** Extract grape seed oil for cooking or skincare.
Let your creativity guide you and explore the many culinary possibilities


Leave a Comment