
Bag growing strawberries: Imagine plucking juicy, sun-ripened strawberries right from your own backyard, even if you only have a tiny balcony or patio! For centuries, people have cultivated strawberries, cherishing their sweet flavor and vibrant color. From ancient Roman gardens to modern-day farms, these little red gems have always been a symbol of summer and deliciousness. But what if I told you that you don’t need acres of land to enjoy a bountiful strawberry harvest?
That’s right! This DIY guide will unlock the secrets to bag growing strawberries, a simple and space-saving technique that’s perfect for urban gardeners and anyone looking to maximize their yield. In today’s busy world, finding time and space for traditional gardening can be a challenge. But with this clever hack, you can bypass the need for large garden beds and enjoy fresh, homegrown strawberries with minimal effort.
I’m going to show you how to transform ordinary bags into thriving strawberry patches, bringing a touch of nature and a burst of flavor to your life. Get ready to roll up your sleeves and discover the joy of growing your own delicious strawberries, one bag at a time!
Grow Strawberries Upside Down in a Bag: A DIY Guide
Hey there, fellow gardening enthusiasts! Have you ever seen those cool upside-down strawberry planters and thought, “I want to try that!”? Well, you’re in the right place. I’m going to walk you through how to create your own hanging strawberry garden using a simple bag. It’s a fun, space-saving way to grow delicious strawberries, and trust me, it’s easier than you think!
What You’ll Need
Before we dive in, let’s gather our supplies. Here’s what you’ll need to create your upside-down strawberry bag:
* A sturdy, dark-colored plastic bag: Think a large, heavy-duty garbage bag or a builder’s bag. Dark colors help retain heat and discourage algae growth. I’ve even used old compost bags after thoroughly cleaning them!
* Strawberry plants: Choose everbearing varieties for a continuous harvest throughout the season. I usually get mine from a local nursery to ensure they’re healthy.
* Potting mix: A good quality potting mix is crucial for healthy strawberry growth. Avoid using garden soil, as it can compact and hinder drainage.
* Landscape fabric or burlap: This will help create pockets for your strawberry plants and prevent soil from spilling out.
* A sharp knife or scissors: For cutting holes in the bag and landscape fabric.
* Measuring tape or ruler: To ensure even spacing of the holes.
* A permanent marker: For marking the hole locations.
* Watering can or hose: For watering your strawberries.
* A strong rope or chain: For hanging your strawberry bag.
* Gloves: To keep your hands clean.
* Optional: Slow-release fertilizer: To provide your plants with a steady supply of nutrients.
Preparing the Bag
This is where we get our hands a little dirty! Don’t worry, it’s the fun kind of dirty.
1. Clean the Bag: If you’re reusing a bag, make sure to clean it thoroughly with soap and water. Rinse it well to remove any residue.
2. Reinforce the Top (Optional): If your bag seems a bit flimsy, you can reinforce the top edge by folding it over a few times and securing it with duct tape. This will help prevent tearing when you hang it.
3. Mark the Planting Holes: This is important for even spacing.
* First, decide how many strawberry plants you want to grow in your bag. I usually aim for about 6-8 plants in a large bag.
* Using your measuring tape and marker, evenly space the planting holes around the bag. I typically leave about 6-8 inches between each hole.
* Make sure the holes are large enough to accommodate the strawberry plants, about 2-3 inches in diameter.
4. Cut the Planting Holes: Carefully cut out the marked circles using your knife or scissors. Be careful not to make the holes too large, as you want the soil to stay in place.
Creating the Landscape Fabric Pockets
These pockets are essential for holding the soil around the strawberry plants and preventing it from spilling out.
1. Cut the Landscape Fabric: Cut out squares of landscape fabric or burlap that are slightly larger than the planting holes. I usually go for about 4×4 inch squares. You’ll need one square for each planting hole.
2. Make a Slit: Cut a small slit in the center of each landscape fabric square. This slit should be large enough to fit the stem of your strawberry plant through.
3. Attach the Fabric to the Holes: From the inside of the bag, push the landscape fabric square through the planting hole, centering the slit. You can secure it with a bit of hot glue if you want, but the soil will usually hold it in place.
Planting the Strawberries
Now for the exciting part – planting our strawberries!
1. Prepare the First Layer of Soil: Add a layer of potting mix to the bottom of the bag, about 6-8 inches deep. If you’re using slow-release fertilizer, mix it into the soil at this stage.
2. Plant the Bottom Strawberry: Gently remove a strawberry plant from its container and loosen the roots. Carefully push the roots through the slit in the landscape fabric at the bottom of the bag. Make sure the crown of the plant (where the stems meet the roots) is facing outwards.
3. Add More Soil: Add more potting mix to the bag, covering the roots of the strawberry plant. Pack the soil gently around the plant to secure it in place.
4. Repeat for Each Hole: Continue adding soil and planting strawberries in each of the prepared holes, working your way up the bag.
5. Plant the Top Strawberries: Once you’ve planted all the strawberries in the sides of the bag, fill the remaining space at the top with potting mix. Plant a few more strawberry plants on top of the bag, spacing them evenly.
6. Water Thoroughly: Water the entire bag thoroughly until water drains out of the bottom. This will help settle the soil and ensure the roots are well-hydrated.
Hanging Your Strawberry Bag
Almost there! Now we just need to hang our beautiful strawberry creation.
1. Attach the Rope or Chain: Securely attach the rope or chain to the top of the bag. Make sure it’s strong enough to support the weight of the bag when it’s full of soil and water. I usually use a strong knot or a metal hook.
2. Choose a Sunny Location: Strawberries need at least 6-8 hours of sunlight per day, so choose a location that gets plenty of sun. A patio, balcony, or even a sturdy tree branch can work well.
3. Hang the Bag: Carefully lift the bag and hang it in your chosen location. Make sure it’s hanging securely and won’t be blown around by the wind.
Caring for Your Upside-Down Strawberry Garden
Now that your strawberry bag is hanging, it’s important to provide proper care to ensure a bountiful harvest.
* Watering: Water your strawberry bag regularly, especially during hot, dry weather. Check the soil moisture by sticking your finger into the soil. If it feels dry, it’s time to water. Water slowly and deeply until water drains out of the bottom of the bag.
* Fertilizing: Strawberries are heavy feeders, so fertilize them regularly with a balanced fertilizer. Follow the instructions on the fertilizer package. I like to use a liquid fertilizer diluted in water every few weeks.
* Pruning: Remove any dead or yellowing leaves to keep your plants healthy and productive. You can also trim back any runners (long stems that grow out from the plant) to encourage more fruit production.
* Pest Control: Keep an eye out for pests like aphids, slugs, and snails. If you spot any pests, treat them with an appropriate insecticide or organic pest control method. I often use insecticidal soap for aphids.
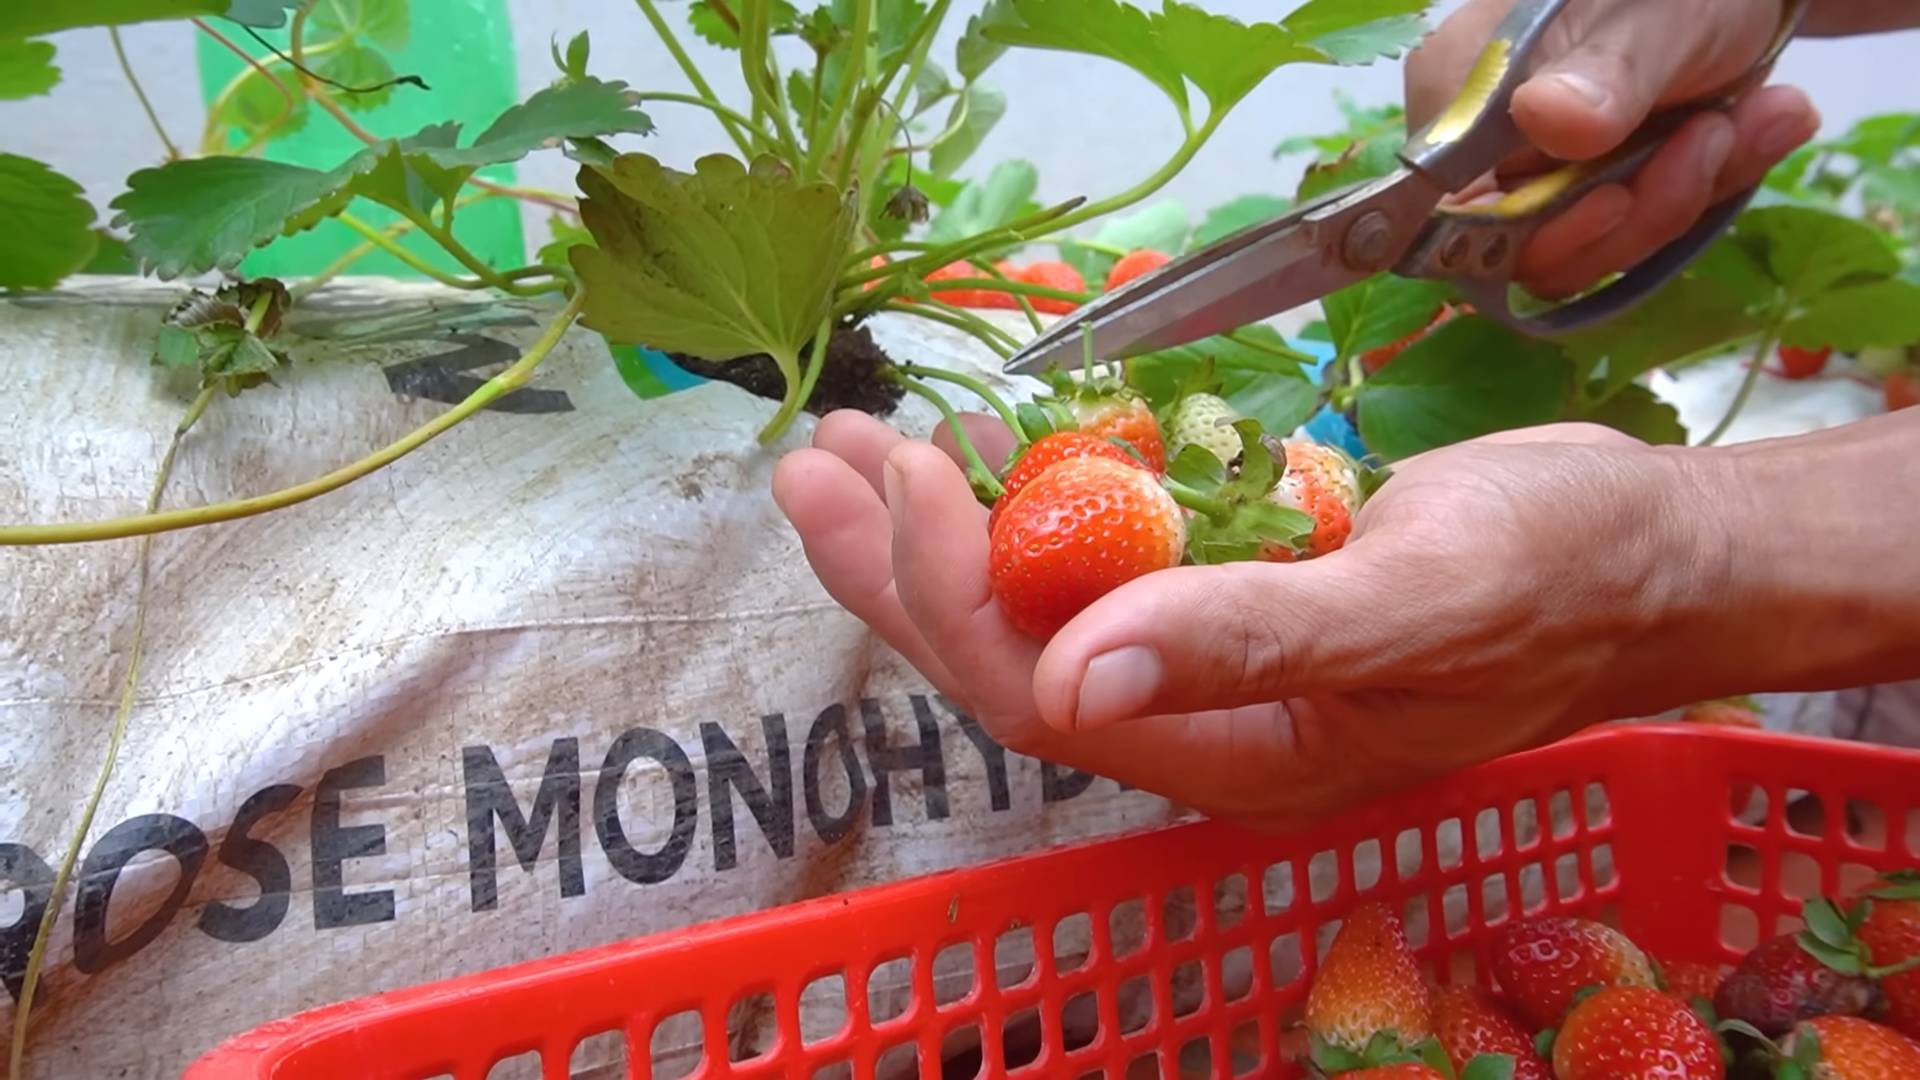
* Harvesting: Harvest your strawberries when they are fully ripe and red. Gently twist the berries off the plant, being careful not to damage the surrounding foliage. The more you harvest, the more your plants will produce!
* Overwintering: In colder climates, you’ll need to protect your strawberry plants during the winter. You can either bring the bag indoors to a cool, bright location, or wrap it in burlap or blankets to insulate it from the cold.
Troubleshooting
Sometimes things don’t go exactly as planned. Here are a few common issues you might encounter and how to fix them:
* Soil Drying Out Too Quickly: If your soil is drying out too quickly, try adding some water-retaining crystals to the potting mix. You can also mulch the top of the bag with straw or wood chips to help retain moisture.
* Plants Not Producing Fruit: If your plants aren’t producing fruit, it could be due to a lack of sunlight, nutrients, or pollination. Make sure your plants are getting enough sunlight and fertilize them regularly. You can also hand-pollinate the flowers by gently brushing them with a small paintbrush.
* Bag Tearing: If your bag starts to tear, reinforce it with duct tape or transfer the plants to a new bag.
Enjoy Your Homegrown Strawberries!
And there you have it! You’ve successfully created your own upside-down strawberry garden. Now, sit back, relax, and enjoy the fruits (literally!) of your labor. There’s nothing quite like the taste of fresh, homegrown strawberries. I love adding them to my morning yogurt, making strawberry jam, or just eating them straight from the plant. Happy gardening!

Conclusion
So, there you have it! Transforming a simple bag into a thriving strawberry patch is not just a fun project; it’s a game-changer for anyone who loves fresh, homegrown berries. We’ve walked you through the process, highlighting the ease and efficiency of this method. But why is this DIY trick a must-try?
Firstly, it’s incredibly space-saving. Whether you have a sprawling garden or a tiny balcony, bag growing strawberries allows you to cultivate these delicious fruits virtually anywhere. Secondly, it offers excellent drainage, preventing root rot and ensuring your plants stay healthy and productive. Thirdly, it’s a cost-effective way to enjoy organic strawberries without breaking the bank. You’re recycling materials and reducing your reliance on store-bought produce.
Beyond the basic method, there’s plenty of room for experimentation. Consider using different types of bags – burlap sacks for a rustic look, or even repurposed shopping bags for an eco-friendly approach. You can also vary the soil mix to suit your specific climate and strawberry variety. Adding compost or other organic matter will further enrich the soil and boost your plants’ growth.
For those looking to maximize their yield, try planting multiple strawberry plants in a single bag, spacing them evenly around the sides. Just be sure to provide adequate support as the plants grow and the berries ripen. Another variation is to create a tiered system by stacking multiple bags on top of each other, creating a vertical strawberry garden that’s both visually appealing and highly productive.
Don’t be afraid to get creative with your bag growing strawberries setup. You can hang the bags from a fence, railing, or even a sturdy tree branch. Just make sure the location receives plenty of sunlight – at least six to eight hours a day is ideal. And remember to water regularly, especially during hot, dry weather.
The beauty of this DIY project lies in its simplicity and adaptability. It’s a fantastic way to get your hands dirty, connect with nature, and enjoy the fruits (literally!) of your labor. We’re confident that once you try bag growing strawberries, you’ll be hooked.
So, what are you waiting for? Gather your supplies, follow our simple steps, and get ready to harvest your own delicious, homegrown strawberries. We encourage you to share your experiences with us! Post photos of your strawberry bags, tell us about any variations you’ve tried, and let us know how your plants are thriving. We can’t wait to see your strawberry gardens flourish! Happy growing!
FAQ
What type of bag is best for growing strawberries?
The ideal bag is sturdy, durable, and allows for good drainage. Woven polypropylene bags (like those used for animal feed or potting soil) are excellent choices because they are strong, breathable, and relatively inexpensive. Burlap sacks offer a more rustic aesthetic and are also a good option, but they may decompose more quickly. Avoid using plastic bags, as they don’t allow for proper drainage and can lead to root rot. If you must use a plastic bag, be sure to poke plenty of drainage holes in the bottom. The size of the bag depends on how many plants you want to grow. A bag that is approximately 18-24 inches in diameter and 12-18 inches deep is a good starting point for 3-5 plants.
What kind of soil should I use for bag growing strawberries?
Strawberries thrive in well-draining, slightly acidic soil. A good mix consists of equal parts potting soil, compost, and perlite or vermiculite. The potting soil provides a base for the plants to grow in, the compost adds nutrients and improves soil structure, and the perlite or vermiculite enhances drainage and aeration. You can also add a slow-release fertilizer to the soil mix to provide a steady supply of nutrients to your plants. Avoid using garden soil, as it can be too heavy and may contain pests or diseases.
How often should I water my strawberry plants in bags?
The frequency of watering depends on the weather, the type of bag you’re using, and the size of your plants. In general, you should water your strawberry plants whenever the top inch of soil feels dry to the touch. During hot, dry weather, you may need to water them daily. Be sure to water thoroughly, until the water drains out of the bottom of the bag. Avoid overwatering, as this can lead to root rot. A good way to check if your plants need water is to stick your finger into the soil. If the soil feels dry, it’s time to water.
How much sunlight do strawberry plants need in bags?
Strawberry plants need at least six to eight hours of direct sunlight per day to produce a good crop of berries. Choose a location for your strawberry bags that receives plenty of sunlight throughout the day. If you live in a hot climate, you may need to provide some afternoon shade to protect your plants from scorching. You can also rotate the bags periodically to ensure that all sides of the plants receive adequate sunlight.
How do I fertilize my strawberry plants in bags?
Strawberry plants are heavy feeders and benefit from regular fertilization. You can use a slow-release fertilizer at planting time, and then supplement with a liquid fertilizer every two to three weeks during the growing season. Choose a fertilizer that is specifically formulated for strawberries or other berry plants. Follow the instructions on the fertilizer label carefully to avoid over-fertilizing, which can damage your plants. Organic options like compost tea or fish emulsion are also excellent choices.
How do I protect my strawberry plants in bags from pests and diseases?
Regularly inspect your strawberry plants for signs of pests or diseases. Common pests include aphids, spider mites, and slugs. You can control aphids and spider mites with insecticidal soap or neem oil. Slugs can be controlled with slug bait or by hand-picking them off the plants. Common diseases include powdery mildew and gray mold. To prevent these diseases, ensure good air circulation around your plants and avoid overwatering. If you notice signs of disease, remove the affected leaves or berries immediately. You can also use a fungicide to control fungal diseases.
Can I grow strawberries in bags indoors?
Yes, you can grow strawberries in bags indoors, but you will need to provide them with adequate light. A sunny window that receives at least six hours of direct sunlight per day is ideal. If you don’t have a sunny window, you can use grow lights to supplement the natural light. Be sure to use grow lights that are specifically designed for plants. You will also need to pollinate the flowers manually, as there will be no bees or other insects to do it for you. You can use a small paintbrush to transfer pollen from one flower to another.
What do I do with my strawberry plants in bags during the winter?
If you live in a cold climate, you will need to protect your strawberry plants from freezing temperatures during the winter. You can move the bags to a sheltered location, such as a garage or shed. Alternatively, you can cover the bags with a layer of mulch or straw to insulate the plants. Water the plants sparingly during the winter, only when the soil is dry to the touch. In the spring, remove the mulch or straw and move the bags back to their sunny location.
How long will my strawberry plants in bags produce berries?
Strawberry plants are perennial, meaning they can live for several years. However, their productivity may decline after a few years. To keep your plants producing well, it’s a good idea to replace them every three to four years. You can propagate new plants from runners, which are stems that grow out from the main plant. Simply plant the runners in small pots of soil and allow them to root. Once the runners have rooted, you can transplant them into new bags.
Leave a Comment