
Balcony Chili Growing Tips: Unleash Your Inner Gardener, One Pepper at a Time!
Imagine stepping onto your balcony and being greeted by vibrant green foliage dotted with fiery red, yellow, or even purple chilies. Sounds like a dream, right? Well, it doesn’t have to be! For centuries, chilies have added spice and flavor to cuisines around the world, originating in South America and spreading globally through trade and exploration. Now, you can bring that same vibrant history and delicious heat right to your own home, even if you only have a small balcony space.
Many people think you need a sprawling garden to grow your own food, but that’s simply not true. With the right knowledge and a little bit of effort, balcony chili growing tips can transform your outdoor space into a thriving mini-farm. This DIY guide is packed with easy-to-follow instructions and clever hacks that will help you cultivate a bountiful harvest of your favorite chilies, no matter how limited your space may be.
Why should you bother with balcony chili growing? Well, besides the obvious benefit of having fresh, organic chilies at your fingertips, it’s also incredibly rewarding! There’s something truly special about nurturing a plant from seed to harvest. Plus, growing your own food is a fantastic way to reduce your carbon footprint and connect with nature, even in the heart of the city. So, let’s dive in and discover the secrets to successful balcony chili growing!
Balkon-Chilis: Dein Leitfaden für eine reiche Ernte
Hallo liebe Chili-Enthusiasten! Hast du Lust, deinen Balkon in eine kleine, feurige Oase zu verwandeln? Chilis anzubauen ist einfacher als du denkst und bringt nicht nur frische Zutaten für deine Küche, sondern ist auch ein echter Hingucker. Ich zeige dir, wie du mit ein paar einfachen Tricks und Kniffen eine reiche Chili-Ernte auf deinem Balkon erzielen kannst. Los geht’s!
Die richtige Chili-Sorte wählen
Bevor wir loslegen, ist es wichtig, die richtige Chili-Sorte für deinen Balkon auszuwählen. Nicht alle Chilis sind gleich! Einige werden riesig, andere bleiben klein und kompakt. Für den Balkon eignen sich besonders gut:
* Kompakte Sorten: Thai-Chilis, Pimientos de Padrón, Jalapeños (bleiben relativ klein und sind pflegeleicht)
* Dekorative Sorten: Chili ‘Black Pearl’ (mit dunklem Laub und leuchtend roten Früchten), Chili ‘Medusa’ (mit vielen kleinen, bunten Früchten)
* Anfängerfreundliche Sorten: Jalapeños, Anaheim (sind robust und verzeihen kleine Pflegefehler)
Denk daran, dass der Schärfegrad (Scoville-Skala) stark variiert. Informiere dich also vorher, wie scharf die jeweilige Sorte ist, damit du später keine böse Überraschung erlebst!
Die Vorbereitung: Was du brauchst
Bevor du mit dem Pflanzen beginnst, solltest du sicherstellen, dass du alles Notwendige zur Hand hast. Hier ist eine Liste der Dinge, die du brauchst:
* Chili-Samen oder Jungpflanzen: Am besten kaufst du hochwertige Samen oder gesunde Jungpflanzen im Fachhandel.
* Anzuchterde: Spezielle Anzuchterde ist nährstoffarm und locker, ideal für die Keimung der Samen.
* Töpfe oder Kübel: Wähle Töpfe mit ausreichend Volumen (mindestens 10 Liter pro Pflanze) und guter Drainage.
* Pflanzerde: Hochwertige Pflanzerde mit guter Drainage und Nährstoffversorgung.
* Dünger: Flüssigdünger oder Langzeitdünger speziell für Gemüse oder Chili-Pflanzen.
* Gießkanne oder Schlauch: Zum regelmäßigen Gießen.
* Pflanzstäbe (optional): Für größere Chili-Sorten, um die Pflanzen zu stützen.
* Sprühflasche (optional): Zum Befeuchten der Blätter.
* Handschuhe: Zum Schutz deiner Hände.
Aussaat und Anzucht
Die Anzucht ist ein wichtiger Schritt, um gesunde und kräftige Chili-Pflanzen zu bekommen. Ich beginne meistens schon im Februar oder März mit der Aussaat, damit die Pflanzen genügend Zeit haben, bis zum Sommer groß zu werden.
1. Samen vorbereiten: Lege die Chili-Samen für 24 Stunden in lauwarmes Wasser. Das beschleunigt die Keimung.
2. Aussaat: Fülle kleine Anzuchttöpfe oder eine Anzuchtschale mit Anzuchterde. Drücke die Erde leicht an und säe die Samen etwa 0,5 cm tief ein.
3. Gießen: Befeuchte die Erde vorsichtig mit einer Sprühflasche. Die Erde sollte feucht, aber nicht nass sein.
4. Wärme: Stelle die Anzuchttöpfe an einen warmen Ort (22-28°C). Eine Heizmatte oder ein Mini-Gewächshaus können helfen, die Temperatur konstant zu halten.
5. Licht: Sobald die ersten Keimlinge erscheinen, brauchen sie viel Licht. Stelle sie an einen hellen Ort oder verwende eine Pflanzenlampe.
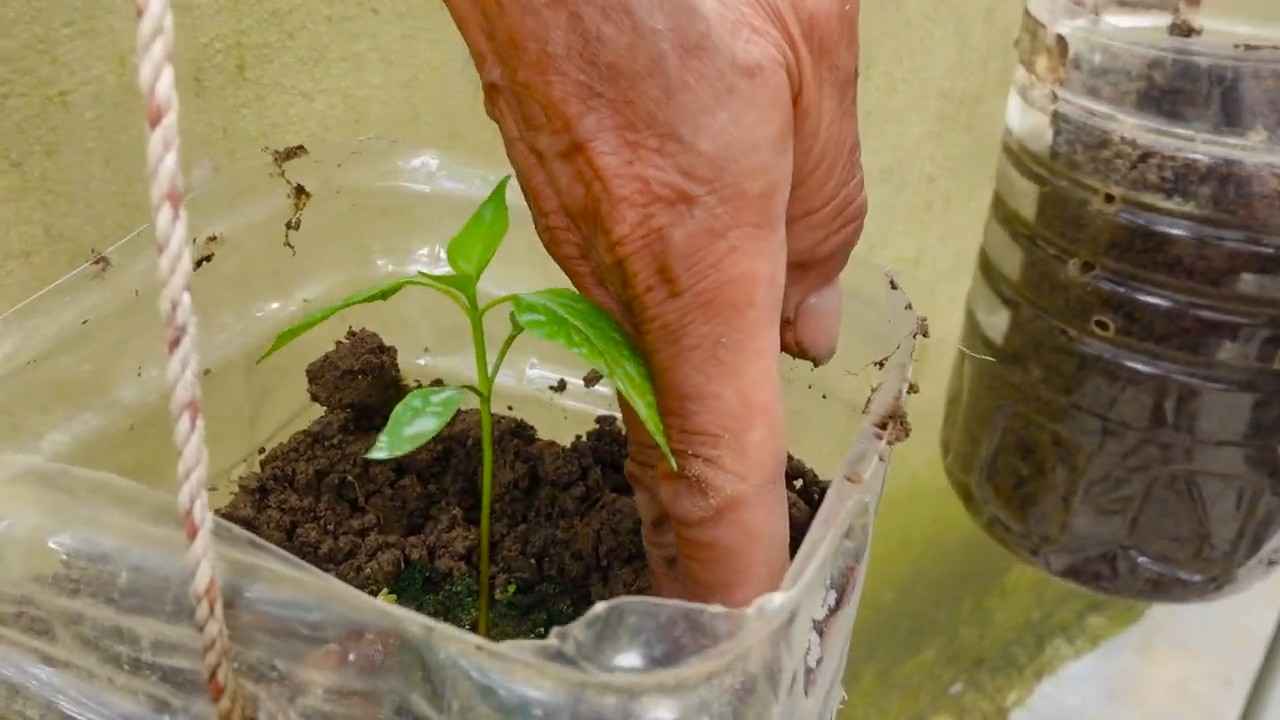
6. Pikieren: Wenn die Keimlinge ihre ersten richtigen Blätter (nach den Keimblättern) entwickelt haben, ist es Zeit, sie zu pikieren. Das bedeutet, dass du sie vorsichtig in größere Töpfe mit Pflanzerde umpflanzt. Achte darauf, die Wurzeln nicht zu beschädigen.
Umtopfen und Standortwahl
Sobald die Jungpflanzen kräftig genug sind (etwa 15-20 cm hoch), können sie in ihre endgültigen Töpfe oder Kübel umgepflanzt werden.
1. Topf vorbereiten: Wähle einen Topf mit ausreichend Volumen (mindestens 10 Liter) und guter Drainage. Fülle den Topf mit Pflanzerde.
2. Pflanze umtopfen: Grabe ein Loch in die Erde, das groß genug ist, um den Wurzelballen der Chili-Pflanze aufzunehmen. Nimm die Pflanze vorsichtig aus dem Anzuchttopf und setze sie in das Loch. Fülle den Topf mit Erde auf und drücke sie leicht an.
3. Gießen: Gieße die Pflanze gründlich an.
4. Standort wählen: Chilis lieben die Sonne! Stelle die Töpfe an einen sonnigen und warmen Standort auf deinem Balkon. Achte darauf, dass die Pflanzen vor starkem Wind geschützt sind. Ein windgeschützter Platz an einer Hauswand ist ideal.
Pflege: Gießen, Düngen und mehr
Die richtige Pflege ist entscheidend für eine reiche Chili-Ernte. Hier sind einige Tipps, die du beachten solltest:
* Gießen: Gieße die Chili-Pflanzen regelmäßig, besonders an heißen Tagen. Die Erde sollte immer leicht feucht sein, aber nicht nass. Vermeide Staunässe, da dies zu Wurzelfäule führen kann. Am besten gießt du morgens oder abends, wenn die Sonne nicht mehr so stark scheint.
* Düngen: Chilis sind Starkzehrer und brauchen regelmäßig Dünger. Beginne etwa 2-3 Wochen nach dem Umtopfen mit dem Düngen. Verwende einen Flüssigdünger oder Langzeitdünger speziell für Gemüse oder Chili-Pflanzen. Befolge die Anweisungen auf der Verpackung. Ich dünge meine Chilis meistens alle 2 Wochen mit einem Flüssigdünger.
* Ausgeizen: Entferne regelmäßig die Seitentriebe, die zwischen dem Hauptstamm und den Blättern wachsen. Das Ausgeizen fördert das Wachstum der Haupttriebe und sorgt für eine bessere Belüftung der Pflanze.
* Schädlinge und Krankheiten: Achte regelmäßig auf Schädlinge wie Blattläuse, Spinnmilben oder Weiße Fliegen. Bei einem Befall kannst du die Pflanzen mit einem natürlichen Insektizid behandeln oder die Schädlinge von Hand entfernen. Achte auch auf Anzeichen von Krankheiten wie Mehltau oder Grauschimmel. Entferne befallene Blätter und sorge für eine gute Belüftung der Pflanzen.
* Bestäubung: Chilis sind Selbstbestäuber, aber du kannst die Bestäubung unterstützen, indem du die Blüten vorsichtig schüttelst oder mit einem Pinsel bestäubst. Das ist besonders wichtig, wenn die Pflanzen im Innenbereich stehen oder wenn es wenig Wind gibt.
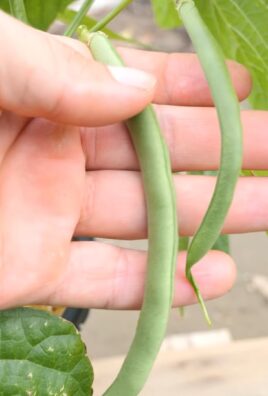
Erntezeit!
Die Erntezeit ist der schönste Teil! Je nach Sorte und Standort kannst du die ersten Chilis etwa 2-3 Monate nach dem Umtopfen ernten.
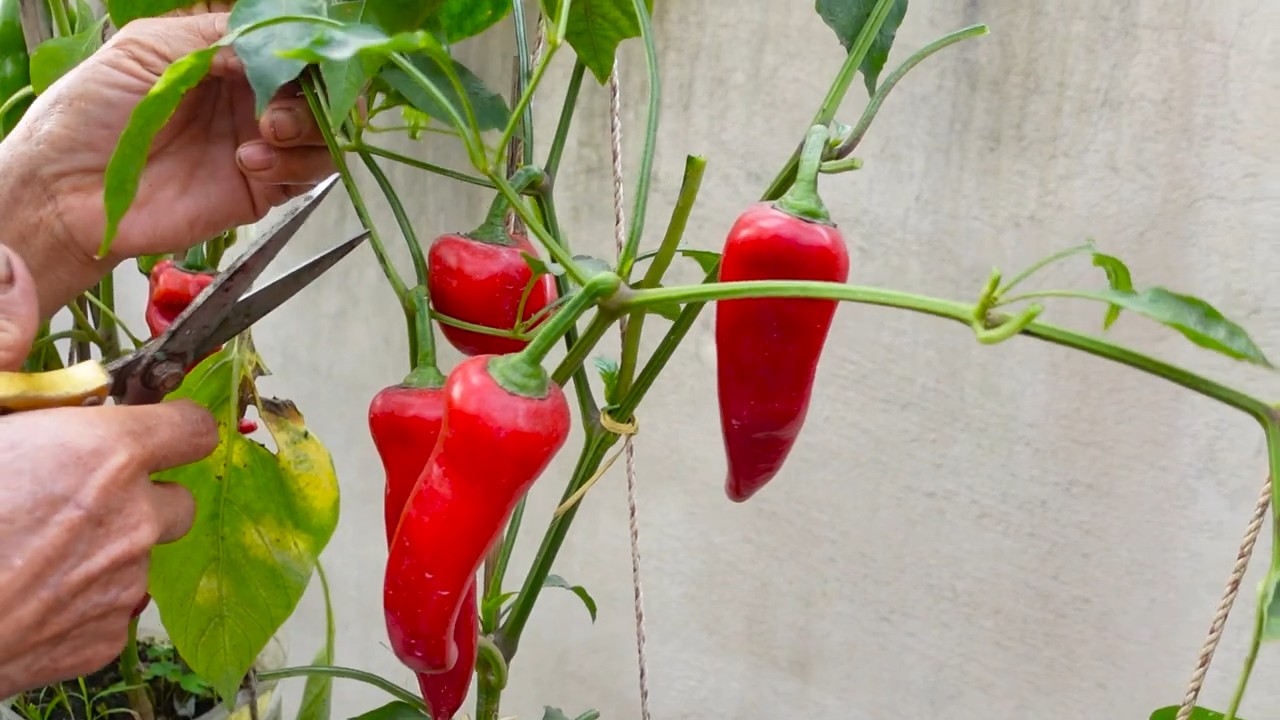
* Reife erkennen: Die Farbe der Chilis ändert sich, wenn sie reif sind. Grüne Chilis werden rot, gelb oder orange, je nach Sorte. Die Chilis sollten sich fest anfühlen und leicht vom Stiel lösen lassen.
* Ernten: Schneide die Chilis mit einer Schere oder einem Messer ab. Trage dabei Handschuhe, um Hautreizungen zu vermeiden.
* Verwendung: Frische Chilis können sofort verwendet werden. Du kannst sie aber auch trocknen, einfrieren oder zu Chili-Öl, Chili-Pulver oder Chili-Soße verarbeiten.
Zusätzliche Tipps für eine erfolgreiche Chili-Ernte
* Mulchen: Eine Mulchschicht aus Stroh oder Rindenmulch hilft, die Feuchtigkeit im Boden zu halten und Unkraut zu unterdrücken.
* Pflanzpartner: Pflanze Basilikum, Ringelblumen oder Kapuzinerkresse in die Nähe deiner Chilis. Diese Pflanzen können Schädlinge abwehren und das Wachstum der Chilis fördern.
* Überwintern: Wenn du deine Chili-Pflanzen überwintern möchtest, schneide sie im Herbst zurück und stelle sie an einen hellen und kühlen Ort (10-1
Conclusion
So, there you have it! Transforming your balcony into a vibrant chili pepper paradise is not only achievable, but incredibly rewarding. We’ve explored the key steps, from selecting the right varieties and containers to mastering watering and pest control. But why is this DIY balcony chili growing trick a must-try?
Firstly, it’s about fresh, flavorful chilies right at your fingertips. Imagine adding a fiery kick to your meals with chilies you’ve nurtured yourself. The taste difference between homegrown and store-bought is undeniable. Secondly, it’s a fantastic way to connect with nature, even in a limited space. The simple act of tending to your chili plants can be incredibly therapeutic and satisfying. Watching them grow from tiny seedlings to mature plants laden with colorful peppers is a truly rewarding experience. Thirdly, it’s a sustainable and cost-effective way to enjoy your favorite chilies. You’ll reduce your reliance on store-bought produce, minimize packaging waste, and potentially save money in the long run.
But the beauty of balcony chili growing lies in its adaptability. Feel free to experiment with different chili varieties to find your perfect heat level. Try growing companion plants like basil or marigolds to deter pests and enhance the flavor of your chilies. Consider adding a small trellis or support structure for taller varieties to keep them upright and healthy.
Don’t be afraid to get creative!
Here are a few variations to consider:
* Vertical Gardening: Utilize vertical space with hanging baskets or stacked planters to maximize your chili yield in a small balcony.
* Hydroponics: Explore hydroponic systems for a soilless growing method that can be incredibly efficient and productive.
* Organic Pest Control: Experiment with natural pest control methods like neem oil or insecticidal soap to keep your chilies healthy without harmful chemicals.
* Chili Infusions: Once you’ve harvested your chilies, try infusing them in oil or vinegar for a flavorful condiment. You can also dry them for later use.
Ultimately, balcony chili growing is about embracing the joy of gardening and enjoying the fruits (or rather, chilies) of your labor. It’s a chance to learn, experiment, and connect with nature in a meaningful way.
We wholeheartedly encourage you to give this DIY trick a try. Start small, be patient, and don’t be afraid to make mistakes. Every gardener learns through trial and error. And most importantly, have fun!
Once you’ve embarked on your balcony chili growing adventure, we’d love to hear about your experience. Share your photos, tips, and challenges in the comments below. Let’s create a community of balcony chili growers and inspire others to transform their small spaces into thriving gardens. What are you waiting for? Get planting!
Frequently Asked Questions (FAQ)
What are the best chili varieties to grow on a balcony?
The best chili varieties for balcony growing are typically compact and well-suited to container gardening. Some popular choices include:
* Thai Chilies: These small, fiery chilies are perfect for adding a kick to Asian dishes. They are relatively easy to grow and produce a prolific harvest.
* Jalapeños: A classic choice for stuffing, pickling, or adding to salsas. Jalapeños are relatively mild and easy to grow in containers.
* Serrano Peppers: Slightly hotter than jalapeños, serranos are great for adding a bit more heat to your cooking.
* Cayenne Peppers: These long, thin chilies are perfect for drying and grinding into chili powder.
* Habaneros: For those who like it hot, habaneros are a great choice. However, they require a bit more care and attention.
* Poblano Peppers: These mild peppers are great for stuffing and roasting. They are relatively large, so make sure you have a container that is big enough.
Consider the size of your balcony and the amount of sunlight it receives when choosing your chili varieties.
What size container do I need for growing chili peppers?
The ideal container size depends on the chili variety you choose. As a general rule, aim for a container that is at least 12 inches in diameter and 12 inches deep. Larger varieties like poblano peppers may require even larger containers. Make sure the container has drainage holes to prevent waterlogging.
How much sunlight do chili peppers need?
Chili peppers thrive in full sun, which means they need at least 6-8 hours of direct sunlight per day. If your balcony doesn’t receive enough sunlight, you may need to supplement with grow lights.
How often should I water my chili plants?
Water your chili plants regularly, especially during hot, dry weather. The soil should be consistently moist, but not waterlogged. Check the soil moisture by sticking your finger about an inch into the soil. If it feels dry, it’s time to water.
What kind of soil should I use for growing chili peppers?
Use a well-draining potting mix that is rich in organic matter. Avoid using garden soil, as it can be too heavy and compact for container gardening. You can also amend your potting mix with compost or other organic materials to improve its fertility.
How do I fertilize my chili plants?
Fertilize your chili plants regularly with a balanced fertilizer. Follow the instructions on the fertilizer package. You can also use organic fertilizers like compost tea or fish emulsion.
How do I protect my chili plants from pests and diseases?
Monitor your chili plants regularly for pests and diseases. Common pests include aphids, spider mites, and whiteflies. You can control these pests with insecticidal soap or neem oil. Common diseases include powdery mildew and fungal leaf spots. You can prevent these diseases by providing good air circulation and avoiding overwatering.
When should I harvest my chili peppers?
Harvest your chili peppers when they have reached their mature color and size. The exact timing will depend on the variety. Use scissors or pruning shears to cut the peppers from the plant.
Can I grow chili peppers indoors?
Yes, you can grow chili peppers indoors, but you will need to provide them with plenty of light. Place them near a sunny window or use grow lights. You will also need to pollinate the flowers by hand, as there will be no bees or other pollinators indoors.
What do I do with my chili peppers after I harvest them?
There are many things you can do with your chili peppers after you harvest them. You can use them fresh in your cooking, dry them for later use, or pickle them. You can also make chili oil or chili powder.
How can I increase the heat of my chili peppers?
Several factors can influence the heat level of your chili peppers. Stressing the plants slightly by withholding water can sometimes increase the capsaicin content (the compound that makes chilies hot). Also, allowing the peppers to fully ripen on the plant will generally result in a hotter pepper. Remember that genetics play a significant role, so some varieties are naturally hotter than others.
My chili plant is flowering, but no peppers are forming. What could be the problem?
Several factors can contribute to flower drop in chili plants. Insufficient pollination is a common cause, especially indoors. You can hand-pollinate the flowers by gently using a small brush to transfer pollen from one flower to another. Temperature extremes (too hot or too cold) can also cause flower drop. Ensure your plants are in a location with stable temperatures. Over-fertilizing with nitrogen can also lead to excessive foliage growth at the expense of fruit production. Use a balanced fertilizer or one slightly higher in phosphorus and potassium.
Leave a Comment