
Balcony Chili Plant Growing can seem daunting, especially if you’re new to gardening. But trust me, with a few clever tricks and a little DIY spirit, you can transform your balcony into a vibrant, chili-pepper paradise! Imagine plucking fresh, fiery chilies right from your own plants, ready to spice up your favorite dishes. That’s the power of balcony gardening!
Chili peppers have a rich history, dating back thousands of years to South America, where they were cultivated for both culinary and medicinal purposes. Over time, they spread across the globe, becoming a staple in cuisines from Mexico to Thailand. Now, you can bring that global flavor right to your doorstep, even without a sprawling garden.
Why should you try balcony chili plant growing? Well, for starters, it’s incredibly rewarding! There’s nothing quite like nurturing a plant from seed to harvest. Plus, growing your own chilies means you’ll always have fresh, organic ingredients on hand. And let’s be honest, store-bought chilies just don’t compare to the flavor and heat of homegrown ones. This DIY guide will equip you with the knowledge and simple hacks to successfully grow chilies on your balcony, regardless of your experience level. We’ll cover everything from choosing the right varieties to pest control, ensuring you have a bountiful harvest. So, grab your gardening gloves, and let’s get started!
DIY Balcony Chili Plant Paradise: From Seed to Spice!
Okay, chili lovers, gather ’round! I’m going to walk you through creating your very own chili pepper paradise right on your balcony. Forget those bland supermarket chilies – we’re talking fresh, fiery flavor grown with your own two hands. This guide is super detailed, so even if you’ve never grown anything before, you’ll be harvesting chilies in no time. Let’s get spicy!
What You’ll Need: The Chili Plant Starter Pack
Before we dive in, let’s make sure you have everything you need. This list might seem long, but trust me, it’s worth it for the delicious results!
* Chili Seeds: Obviously! Choose varieties that suit your taste and balcony size. Some good options for beginners are Jalapeños, Serrano, Thai chilies, or even ornamental varieties like Bolivian Rainbow. I recommend starting with a few different types to see what thrives best in your space.
* Seed Starting Tray or Small Pots: These are essential for getting your seeds off to a good start. You can use plastic trays with individual cells, peat pots, or even recycled yogurt containers (just make sure to poke drainage holes!).
* Seed Starting Mix: This is a light, airy soil mix specifically designed for seedlings. Don’t use regular potting soil for starting seeds; it’s often too heavy and can hinder germination.
* Larger Pots (at least 5 gallons): Once your seedlings are big enough, they’ll need to be transplanted into larger pots. Choose pots with good drainage holes. Terracotta pots are great because they allow the soil to breathe, but plastic pots are also fine.
* Potting Soil: Use a high-quality potting mix that’s well-draining and contains nutrients. Look for a mix specifically formulated for vegetables or herbs.
* Watering Can or Hose with a Gentle Spray Nozzle: You’ll need a way to water your plants without damaging them.
* Plant Food (Fertilizer): Chili plants are heavy feeders, so you’ll need to fertilize them regularly. Use a balanced fertilizer (e.g., 10-10-10) or one specifically formulated for tomatoes or peppers.
* Gardening Gloves: Protect your hands from dirt and potential irritants.
* Small Shovel or Trowel: For transplanting seedlings.
* Plant Labels and a Permanent Marker: To keep track of your chili varieties. Trust me, you’ll forget otherwise!
* Optional:
* Heat Mat: Can speed up germination, especially in cooler climates.
* Grow Light: If your balcony doesn’t get enough sunlight.
* Pest Control: Neem oil or insecticidal soap for dealing with aphids or other pests.
* Tomato Cages or Stakes: To support taller chili varieties.
Phase 1: Seed Starting – Nurturing Tiny Sprouts
This is where the magic begins! Starting your seeds indoors gives them a head start and protects them from harsh weather.
1. Prepare Your Seed Starting Tray or Pots: Fill your seed starting tray or small pots with seed starting mix. Gently press down the soil to create a firm surface.
2. Sow the Seeds: Place 2-3 chili seeds in each cell or pot, about ¼ inch deep. This increases your chances of at least one seed germinating.
3. Cover the Seeds: Lightly cover the seeds with more seed starting mix.
4. Water Gently: Water the soil gently using a spray bottle or watering can with a fine spray nozzle. You want to moisten the soil without disturbing the seeds.
5. Provide Warmth and Light: Place the seed starting tray or pots in a warm location (ideally 70-80°F). A heat mat can be helpful if your home is cool. If you don’t have a heat mat, a warm windowsill can work, but be sure to monitor the temperature.
6. Maintain Moisture: Keep the soil consistently moist, but not soggy. Check the soil daily and water as needed. You can cover the tray with a clear plastic lid or plastic wrap to help retain moisture, but be sure to remove it once the seeds start to germinate to prevent fungal diseases.
7. Wait Patiently: Germination can take anywhere from 7 to 21 days, depending on the chili variety and temperature. Be patient and keep the soil moist.
8. Thin Seedlings (If Necessary): Once the seedlings emerge and have a few true leaves (the second set of leaves that appear after the initial seed leaves), thin them out to one seedling per cell or pot. Choose the strongest, healthiest-looking seedling and gently snip off the others at the soil line. Don’t pull them out, as this can disturb the roots of the remaining seedling.
Phase 2: Transplanting – Giving Your Chilies Room to Grow
Once your seedlings have developed a few sets of true leaves and are a few inches tall, it’s time to transplant them into larger pots.
1. Harden Off the Seedlings: Before transplanting your seedlings outdoors, you need to “harden them off.” This process gradually acclimates them to the outdoor environment and prevents transplant shock. Start by placing the seedlings outdoors in a sheltered location for a few hours each day, gradually increasing the amount of time they spend outside over the course of a week. Protect them from direct sunlight and strong winds during this process.
2. Prepare the Larger Pots: Fill your larger pots with potting soil, leaving a few inches of space at the top.
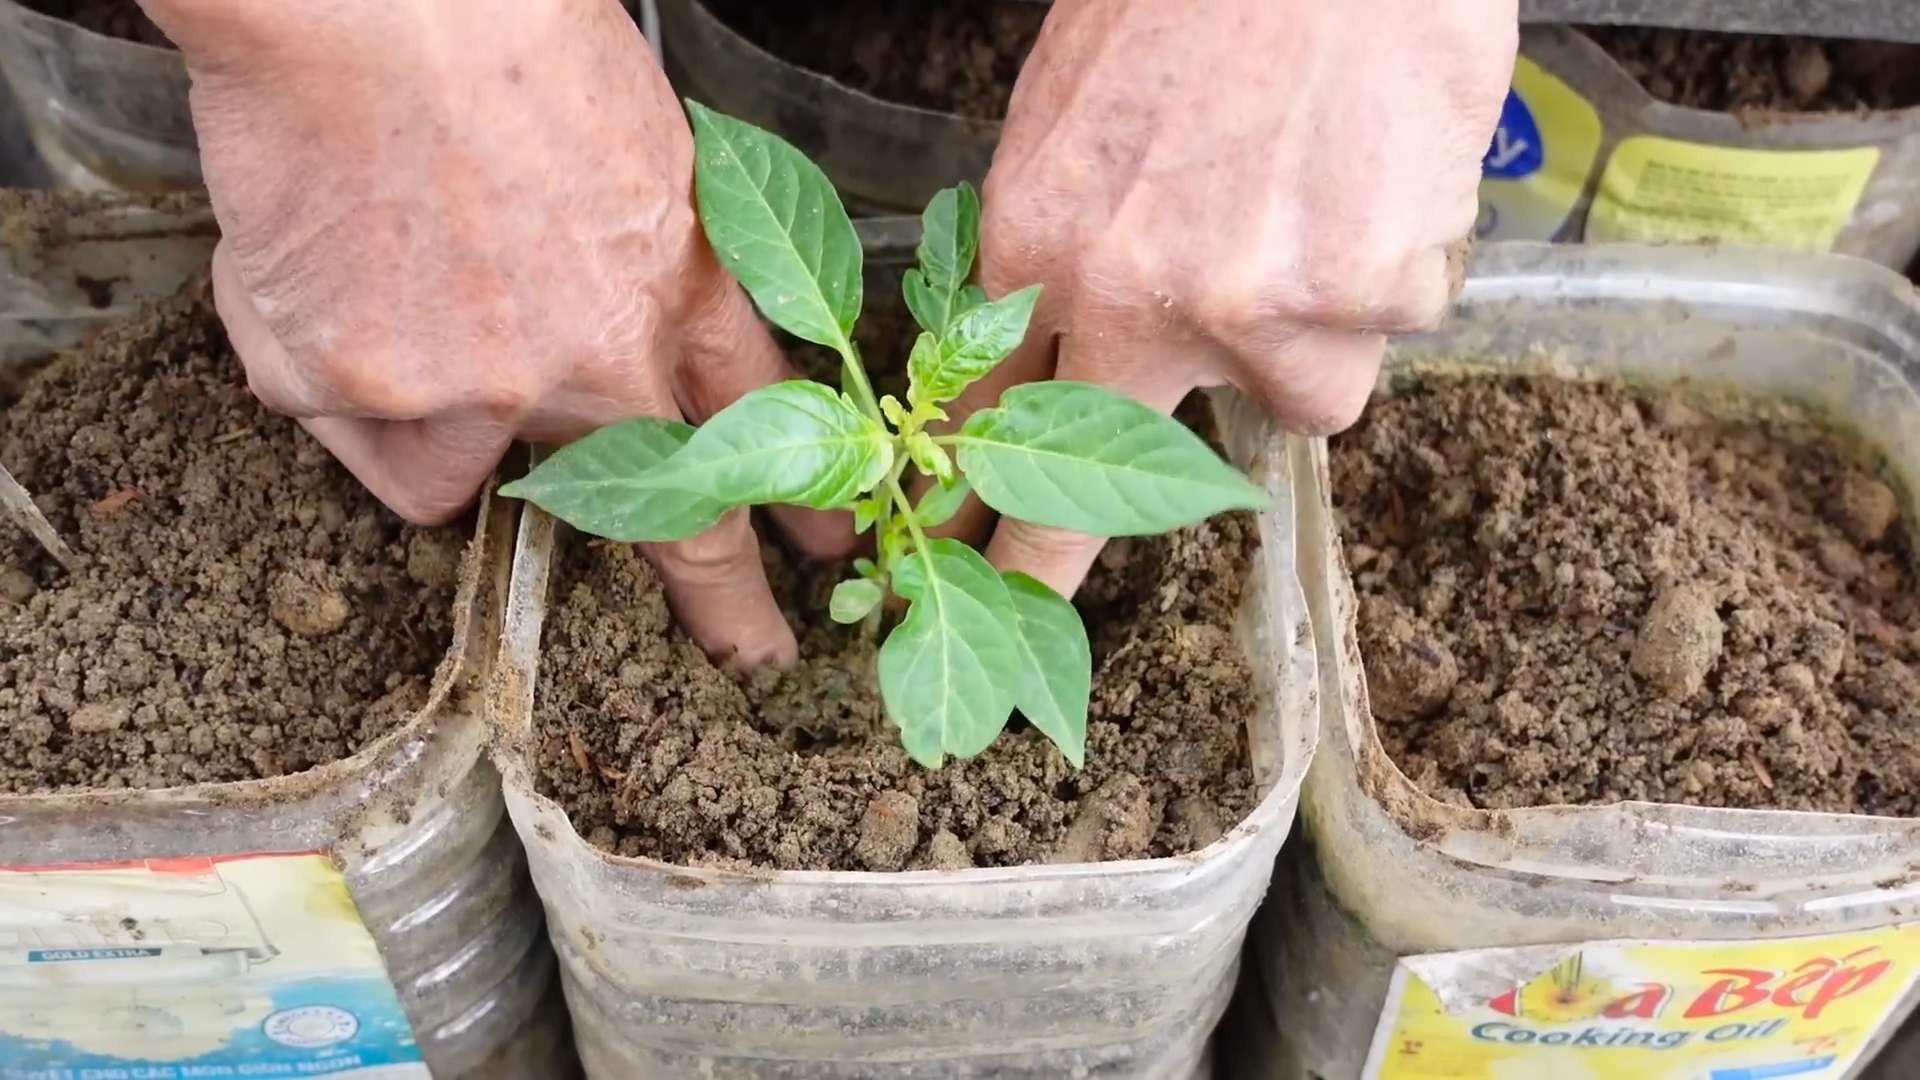
3. Carefully Remove the Seedlings: Gently remove the seedlings from their seed starting tray or pots. Be careful not to damage the roots. If the seedlings are in peat pots, you can plant the entire pot directly into the larger pot.
4. Plant the Seedlings: Dig a hole in the potting soil large enough to accommodate the root ball of the seedling. Place the seedling in the hole and gently backfill with potting soil.
5. Water Thoroughly: Water the newly transplanted seedlings thoroughly.
6. Provide Support (If Necessary): If you’re growing taller chili varieties, insert a tomato cage or stake into the pot to provide support.
7. Choose a Sunny Location: Place the pots in a sunny location on your balcony that receives at least 6-8 hours of direct sunlight per day.
Phase 3: Ongoing Care – Keeping Your Chili Plants Happy
Now that your chili plants are in their permanent homes, it’s important to provide them with the care they need to thrive.
1. Watering: Water your chili plants regularly, especially during hot, dry weather. Check the soil moisture by sticking your finger into the soil. If the top inch of soil is dry, it’s time to water. Avoid overwatering, as this can lead to root rot.
2. Fertilizing: Chili plants are heavy feeders and need regular fertilization to produce a good crop of chilies. Fertilize them every 2-3 weeks with a balanced fertilizer or one specifically formulated for tomatoes or peppers. Follow the instructions on the fertilizer label.
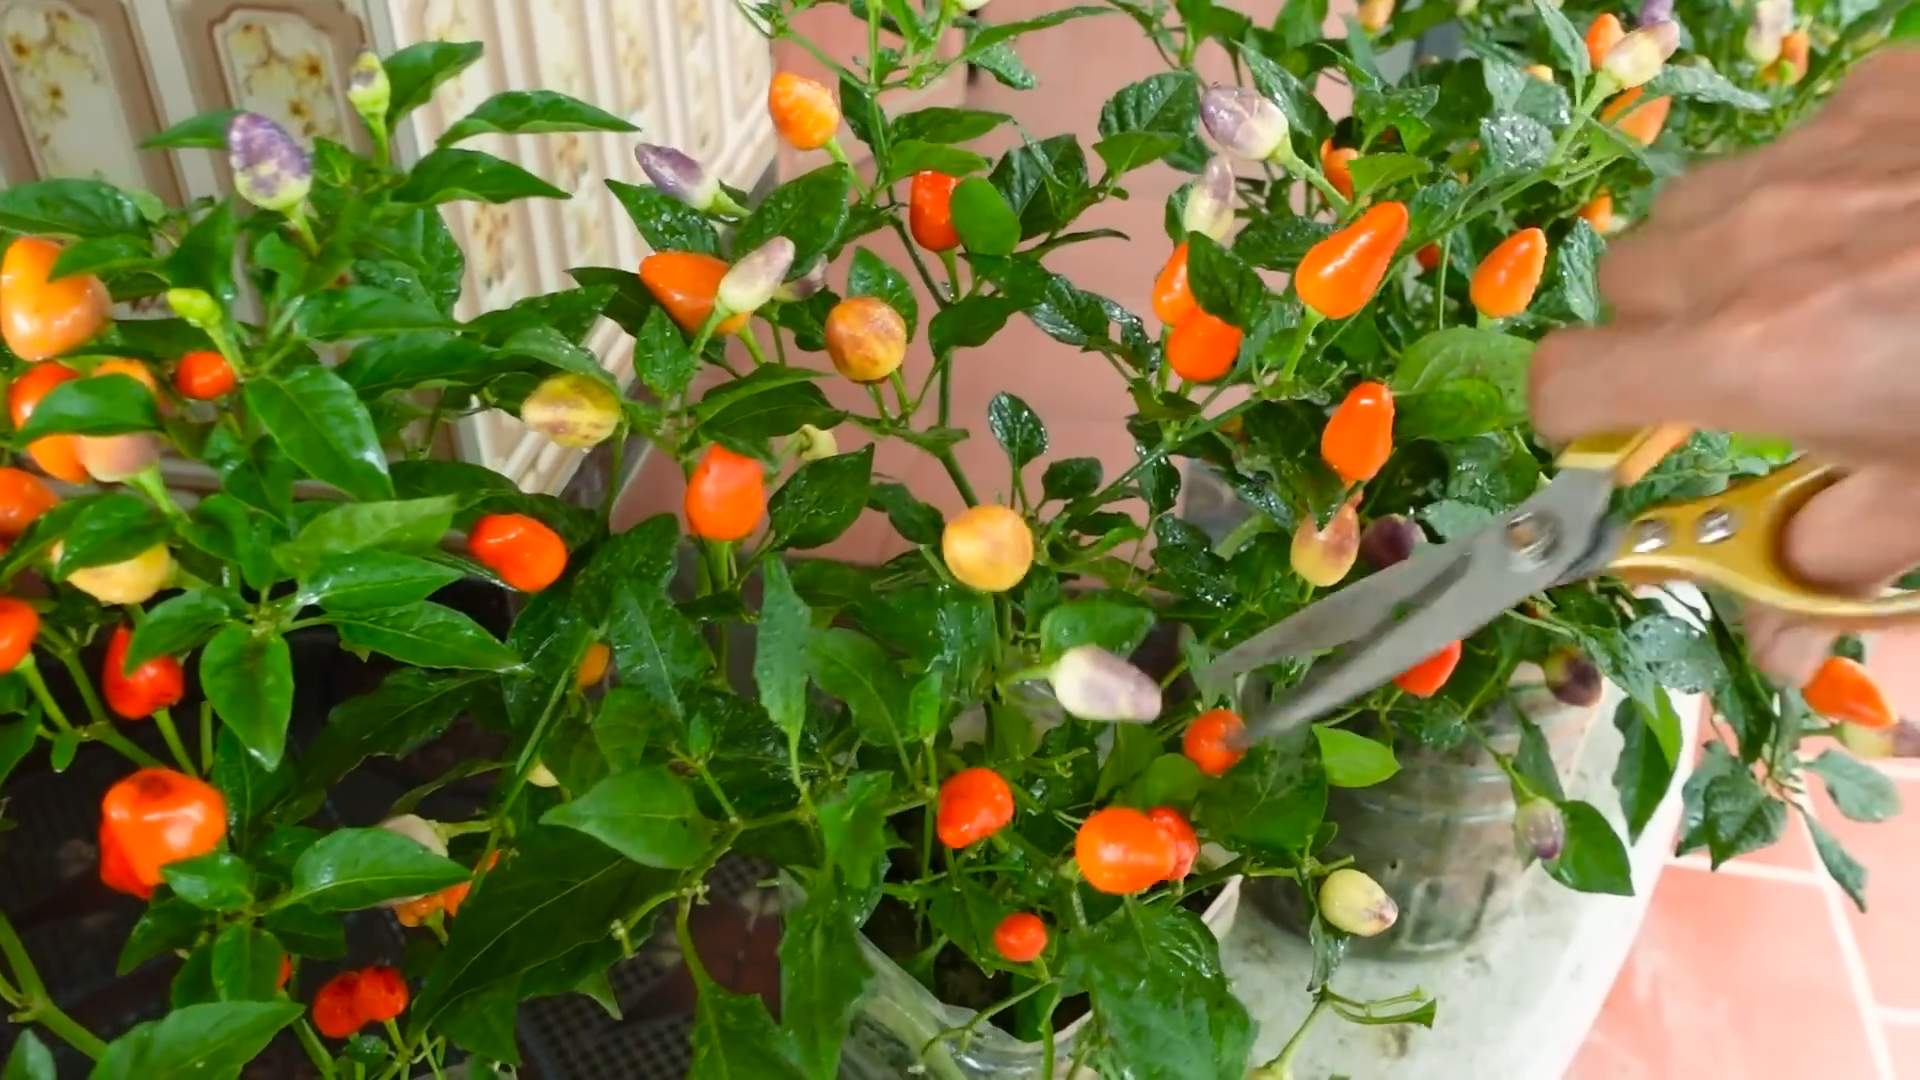
3. Pruning: Pruning can help to improve air circulation and encourage bushier growth. Remove any yellowing or dead leaves. You can also pinch off the tips of the branches to encourage more branching.
4. Pest Control: Keep an eye out for pests such as aphids, spider mites, and whiteflies. If you notice any pests, treat them with neem oil or insecticidal soap. Follow the instructions on the product label.
5. Pollination: Chili plants are self-pollinating, but you can help them along by gently shaking the plants or using a small paintbrush to transfer pollen from one flower to another. This is especially important if you’re growing your plants indoors or in a sheltered location where there are few pollinators.
6. Sunlight: Ensure your plants are getting adequate sunlight. If your balcony is shaded for part of the day, consider using a grow light to supplement the natural sunlight.
7. Temperature: Chili plants thrive in warm temperatures (70-85°F). Protect them from frost and freezing temperatures. If you live in a cold climate, you may need to bring your plants indoors during the winter.
8. Support: As your chili plants grow and produce fruit, they may need additional support. Use tomato cages or stakes to prevent the branches from breaking under the weight of the chilies.
Phase 4: Harvesting – The Spicy Reward!
The best part! Knowing when to harvest your chilies is key to getting the flavor you want.
1. Harvest Time: The time it takes for chilies to mature depends on the variety. Generally, chilies are ready to harvest when they have reached their mature size and color.
2. Color Changes: Most chilies start out green and then change color as they ripen. The final color depends on the variety and can be red
Conclusion
So, there you have it! Growing your own chili plants on your balcony isn’t just a fun project; it’s a gateway to fresh, flavorful ingredients right at your fingertips. Imagine the satisfaction of plucking a ripe chili pepper, grown with your own care, and adding it to your favorite dish. It’s a taste experience that store-bought chilies simply can’t replicate. This DIY balcony chili plant growing adventure is more than just a hobby; it’s a sustainable way to add spice to your life and connect with nature, even in the heart of the city.
Why is this a must-try? Because it’s empowering! You control the entire process, from seed to harvest, ensuring your chilies are free from unwanted chemicals and grown with love. Plus, it’s incredibly rewarding to watch your little seedlings transform into thriving plants, laden with vibrant peppers. And let’s not forget the cost savings! Over time, you’ll be saving money on those expensive store-bought chilies, all while enjoying a superior product.
But the best part? The possibilities are endless! Experiment with different varieties of chili peppers to find your perfect heat level and flavor profile. Try growing Thai chilies for authentic Asian cuisine, jalapeños for classic Mexican dishes, or habaneros for those who dare to embrace the fiery side. You can even get creative with your container gardening, using recycled materials or vertical planters to maximize space and add a touch of personality to your balcony.
Consider companion planting to boost your chili plant’s health and yield. Basil, for example, is known to repel pests and improve the flavor of chilies. Marigolds are another excellent choice, adding a splash of color while deterring harmful insects. And don’t be afraid to experiment with different fertilizers to find what works best for your plants. A balanced organic fertilizer will provide your chilies with the nutrients they need to thrive.
Furthermore, think about the presentation! Your balcony chili plants can be more than just a source of food; they can be a beautiful addition to your outdoor space. Choose attractive pots and arrange them in a visually appealing way. Add some decorative elements, like pebbles or small sculptures, to create a mini-garden oasis.
We wholeheartedly encourage you to embark on this exciting journey of balcony chili plant growing. It’s a simple, yet incredibly fulfilling, way to connect with nature, enhance your culinary creations, and add a touch of spice to your life. Don’t be intimidated if you’re a beginner; with a little research and patience, you’ll be harvesting your own chilies in no time.
So, grab some seeds, prepare your pots, and get ready to experience the joy of growing your own chilies. And most importantly, we want to hear about your experiences! Share your tips, successes, and challenges in the comments below. Let’s create a community of balcony chili growers, sharing our knowledge and inspiring each other to cultivate the spiciest and most flavorful chilies possible. We can’t wait to see what you grow!
Frequently Asked Questions (FAQ)
What is the best time of year to start growing chili plants on my balcony?
The best time to start growing chili plants depends on your climate. In general, you should start your seeds indoors 6-8 weeks before the last expected frost. This gives the seedlings a head start before transplanting them outdoors. If you live in a warmer climate with mild winters, you can start your seeds directly outdoors in early spring. However, be sure to protect them from any late frosts.
What kind of soil should I use for my balcony chili plants?
Chili plants thrive in well-draining soil that is rich in organic matter. A good potting mix specifically formulated for vegetables is ideal. You can also amend your own soil by adding compost, aged manure, or other organic materials. Avoid using heavy clay soil, as it can retain too much water and lead to root rot.
How much sunlight do chili plants need?
Chili plants need at least 6-8 hours of direct sunlight per day to thrive. Choose a location on your balcony that receives plenty of sunlight throughout the day. If your balcony doesn’t get enough direct sunlight, you may need to supplement with grow lights.
How often should I water my chili plants?
Water your chili plants regularly, especially during hot and dry weather. The soil should be kept consistently moist, but not waterlogged. Check the soil moisture by sticking your finger into the soil. If the top inch feels dry, it’s time to water. Avoid overwatering, as this can lead to root rot.
What kind of fertilizer should I use for my chili plants?
Chili plants benefit from regular fertilization, especially during the growing season. Use a balanced organic fertilizer that is specifically formulated for vegetables. Follow the instructions on the fertilizer package for application rates. You can also supplement with compost tea or other organic amendments.
How do I protect my chili plants from pests and diseases?
Regularly inspect your chili plants for pests and diseases. Common pests include aphids, spider mites, and whiteflies. You can control these pests with insecticidal soap, neem oil, or other organic pest control methods. Diseases such as powdery mildew and fungal leaf spots can be prevented by providing good air circulation and avoiding overwatering.
How do I know when my chili peppers are ripe?
Chili peppers are typically ripe when they have reached their mature color and size. The color will vary depending on the variety of chili pepper. For example, jalapeños are typically ripe when they are dark green, while habaneros are ripe when they are orange or red. The peppers should also be firm to the touch.
Can I grow different varieties of chili peppers in the same container?
While it’s possible to grow different varieties of chili peppers in the same container, it’s generally not recommended. Different varieties may have different growth habits and nutrient requirements, which can make it difficult to provide them with the optimal growing conditions. It’s best to grow each variety in its own separate container.
What should I do if my chili plant is not producing peppers?
There are several reasons why your chili plant may not be producing peppers. It could be due to insufficient sunlight, overwatering, underwatering, lack of nutrients, or pollination problems. Make sure your plant is getting enough sunlight, water, and fertilizer. You may also need to hand-pollinate the flowers if there are no bees or other pollinators in your area.
How do I overwinter my chili plants?
In colder climates, chili plants can be overwintered indoors. Before the first frost, prune back the plant and transplant it into a smaller pot. Bring the plant indoors and place it in a sunny location. Water sparingly during the winter months. In the spring, you can transplant the plant back into a larger pot and move it back outdoors.
Can I save seeds from my chili peppers to grow next year?
Yes, you can save seeds from your chili peppers to grow next year. Allow the peppers to fully ripen on the plant before harvesting them. Remove the seeds from the peppers and dry them thoroughly. Store the seeds in an airtight container in a cool, dark place.
What are some good companion plants for chili peppers?
Good companion plants for chili peppers include basil, marigolds, onions, garlic, and carrots. Basil repels pests and improves the flavor of chilies. Marigolds deter harmful insects. Onions and garlic repel aphids and other pests. Carrots attract beneficial insects that prey on pests.
How can I make my chili peppers spicier?
The spiciness of chili peppers is determined by the amount of capsaicin they contain. To increase the spiciness of your chili peppers, you can stress the plants by withholding water or fertilizer. You can also grow them in a hotter climate or expose them to more sunlight.
Is it safe to eat chili peppers if they have white lines or streaks on them?
White lines or streaks on chili peppers are usually caused by a calcium deficiency. This is a common problem and does not make the peppers unsafe to eat. You can prevent calcium deficiency by adding calcium to the soil or by using a calcium-rich fertilizer.
What are some creative ways to use my homegrown chili peppers?
There are endless ways to use your homegrown chili peppers! You can use them fresh in salsas, sauces, and stir-fries. You can dry them and grind them into chili powder. You can pickle them or make chili oil. You can even use them to make hot sauce. Get creative and experiment with different recipes to find your favorite ways to use your homegrown chilies.


Leave a Comment