
Carrot Planting Home Garden: Ever dream of pulling vibrant, crunchy carrots straight from your own backyard? I know I have! There’s something incredibly satisfying about growing your own food, and carrots are surprisingly easy to cultivate with the right know-how. Forget those bland, store-bought carrots – imagine the sweet, earthy flavor of homegrown goodness gracing your dinner table.
For centuries, carrots have been a staple in diets around the world. Originating in Persia and Afghanistan, these root vegetables were initially cultivated for their aromatic leaves and seeds, not their roots! Over time, selective breeding transformed them into the sweet, orange delights we know and love today. From ancient medicinal uses to modern culinary creations, the carrot’s journey is a testament to its versatility and enduring appeal.
But why should you bother with carrot planting home garden techniques? Well, in today’s world, knowing how to grow your own food is becoming increasingly important. Not only does it offer a sustainable and cost-effective way to access fresh produce, but it also provides a connection to nature and a sense of accomplishment. Plus, let’s be honest, who wouldn’t want to impress their friends and family with their green thumb? This DIY guide will equip you with simple yet effective tricks and hacks to ensure a bountiful carrot harvest, even if you’re a complete beginner. So, grab your gardening gloves, and let’s get started!

DIY: Grow Your Own Delicious Carrots at Home!
Hey there, fellow garden enthusiasts! I’m so excited to share my tried-and-true method for growing plump, juicy carrots right in your own backyard (or even in containers!). Forget those bland, store-bought carrots – nothing beats the flavor of homegrown goodness. This guide will walk you through every step, from choosing the right variety to harvesting your bounty. Let’s get our hands dirty!
Choosing the Right Carrot Variety
Before we even think about planting, let’s talk carrots! Not all carrots are created equal, and choosing the right variety for your space and climate is crucial.
* Consider your soil: Short, stubby varieties like ‘Thumbelina’ or ‘Parisian’ are perfect for heavy or rocky soil. Longer varieties like ‘Nantes’ or ‘Imperator’ need loose, well-drained soil to thrive.
* Think about your climate: Some varieties are better suited for warmer climates, while others can tolerate cooler temperatures. ‘Nantes’ and ‘Chantenay’ are generally adaptable to a wide range of climates.
* Space constraints? Container gardening? ‘Thumbelina’ and ‘Little Finger’ are excellent choices for smaller spaces.
* Personal preference: Do you prefer sweet carrots or a more earthy flavor? ‘Nantes’ are known for their sweetness, while ‘Imperator’ tend to have a more robust flavor.
I personally love growing ‘Nantes’ because they’re sweet, crisp, and relatively easy to grow. But feel free to experiment and find your own favorite!
Preparing the Soil: The Foundation for Success
Carrots need loose, well-drained soil to grow long and straight. This is arguably the most important step, so don’t skip it!
* Soil Testing (Optional but Recommended): A soil test will tell you the pH level and nutrient content of your soil. Carrots prefer a slightly acidic soil with a pH between 6.0 and 6.8. You can buy a soil testing kit at most garden centers or send a sample to your local agricultural extension office.
* Clear the Area: Remove any rocks, sticks, weeds, and other debris from the planting area. Carrots need unobstructed space to grow.
* Loosen the Soil: Use a garden fork or tiller to loosen the soil to a depth of at least 12 inches (30 cm). This is especially important for longer carrot varieties.
* Amend the Soil: Amend the soil with plenty of organic matter, such as compost, well-rotted manure, or peat moss. This will improve drainage, aeration, and nutrient content. I usually add a generous layer of compost to my carrot beds.
* Avoid Fresh Manure: Fresh manure can cause forking and hairy roots. Make sure the manure is well-rotted before adding it to the soil.
* No-Nitrogen Fertilizer: Avoid using fertilizers that are high in nitrogen, as this can promote leafy growth at the expense of root development. Instead, opt for a fertilizer that is higher in phosphorus and potassium. Bone meal is a great option.
* Create Raised Beds (Optional): If your soil is particularly heavy or poorly drained, consider creating raised beds. This will improve drainage and allow the soil to warm up faster in the spring.
Planting the Carrot Seeds: Tiny Seeds, Big Potential
Carrot seeds are tiny, so planting them can be a bit tricky. But with a little patience, you’ll be rewarded with a bountiful harvest.
* Timing is Key: Carrots are a cool-season crop, so plant them in early spring or late summer for a fall harvest. Check your local frost dates to determine the best planting time for your area. I usually start planting my carrots about 2-3 weeks before the last expected frost.
* Direct Sowing: Carrots are best direct-sown, meaning you plant the seeds directly into the garden soil. They don’t transplant well.
* Create Shallow Furrows: Use a hoe or your finger to create shallow furrows about 1/4 to 1/2 inch (0.6 to 1.2 cm) deep and 1-2 inches (2.5-5 cm) apart.
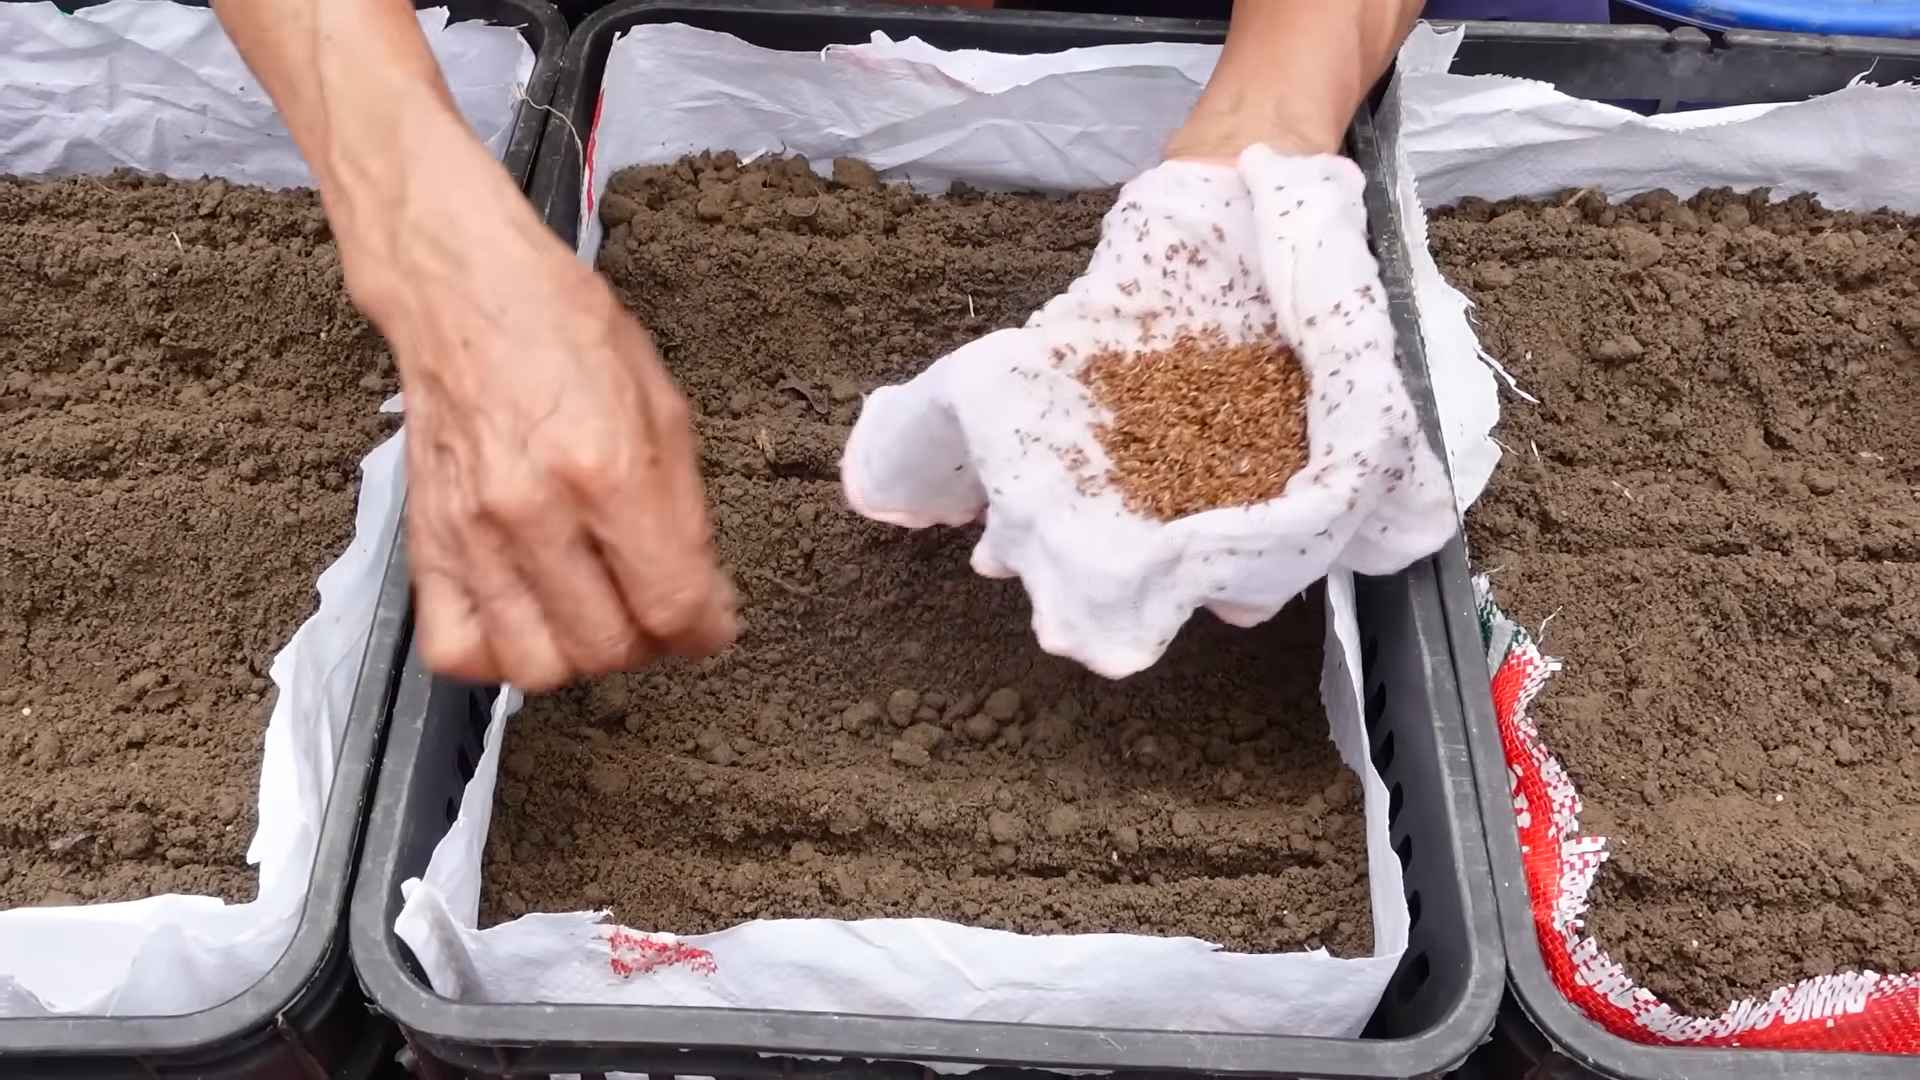
* Sow the Seeds Sparsely: Sprinkle the carrot seeds thinly along the furrows. This is the trickiest part! Carrot seeds are tiny, and it’s easy to sow them too thickly. Try mixing the seeds with sand or coffee grounds to make them easier to handle.
* Cover the Seeds: Gently cover the seeds with a thin layer of soil or compost.
* Water Gently: Water the area gently with a watering can or hose with a gentle spray nozzle. Avoid washing away the seeds.
* Keep the Soil Moist: Keep the soil consistently moist until the seeds germinate. This may require watering daily, especially in dry weather.
* Mark the Rows: Label your rows with the carrot variety and planting date. This will help you keep track of what you’ve planted.
Thinning the Seedlings: Giving Carrots Room to Grow
Thinning is essential for giving your carrots enough space to develop properly. If you don’t thin them, they’ll be crowded and stunted.
* When to Thin: Thin the seedlings when they are about 1-2 inches (2.5-5 cm) tall.
* How to Thin: Gently pull out the weaker seedlings, leaving the strongest ones spaced about 1-2 inches (2.5-5 cm) apart.
* Water After Thinning: Water the area after thinning to help settle the soil around the remaining seedlings.
* Second Thinning (Optional): If the carrots are still crowded after the first thinning, you can thin them again when they are about 4-6 inches (10-15 cm) tall, leaving them spaced about 2-3 inches (5-7.5 cm) apart.
Caring for Your Carrot Plants: Watering, Weeding, and Feeding
Once your carrots are established, they’ll need regular care to thrive.
* Watering: Water your carrot plants regularly, especially during dry weather. Carrots need consistent moisture to develop properly. Aim for about 1 inch (2.5 cm) of water per week.
* Weeding: Keep the area around your carrot plants free of weeds. Weeds compete with carrots for water and nutrients. Hand-pull weeds carefully to avoid disturbing the carrot roots.
* Mulching: Apply a layer of mulch around your carrot plants to help retain moisture, suppress weeds, and regulate soil temperature. Straw, hay, or wood chips are good choices.
* Fertilizing: Carrots are not heavy feeders, but they will benefit from a light feeding of fertilizer every few weeks. Use a fertilizer that is low in nitrogen and high in phosphorus and potassium. Bone meal or compost tea are good options.
* Pest Control: Carrots can be susceptible to certain pests, such as carrot rust flies and aphids. Inspect your plants regularly for signs of pests and take action if necessary. Insecticidal soap or neem oil can be used to control aphids. Row covers can help prevent carrot rust flies from laying their eggs on the plants.
Harvesting Your Carrots: The Sweet Reward
The moment you’ve been waiting for! Harvesting your own homegrown carrots is incredibly satisfying.
* When to Harvest: Carrots are typically ready to harvest 60-80 days after planting, depending on the variety. Check the seed packet for specific maturity dates.
* Signs of Maturity: The tops of the carrots will be visible above the soil. You can gently brush away some soil to check the size of the carrots.
* How to Harvest: Loosen the soil around the carrots with a garden fork or trowel. Gently pull the carrots out of the ground by their tops. If the soil is dry, water the area before harvesting to make it easier to pull the carrots.
* Washing and Storing: Wash the carrots thoroughly to remove any dirt. Trim the tops, leaving about 1/2 inch (1.2 cm) of stem. Store the carrots in the refrigerator in a plastic bag or container. They should keep for several weeks.
Troubleshooting: Common Carrot Growing Problems
Even with the best care, you may encounter some problems while growing carrots. Here are a few common issues and how to address them:
* Forked Roots: Forked roots are often caused by rocky soil or compacted soil. Make sure to prepare the soil properly before planting and remove any rocks or debris.
* Hairy Roots: Hairy roots can be caused by excessive nitrogen in the soil or by nematodes. Avoid using fertilizers that are high in nitrogen and consider using a soil amendment that contains beneficial nematodes.
* Cracked Roots: Cracked roots can be caused by inconsistent watering. Make sure to water your carrots regularly, especially during dry weather.
* Pests and Diseases: Inspect your plants regularly for signs of pests and diseases and take action if necessary.
Container Gardening: Car
Conclusion
So, there you have it! Mastering the art of carrot planting in your home garden is not only achievable but also incredibly rewarding. We’ve explored a simple yet effective DIY trick that can significantly boost your carrot yield and overall gardening success. This isn’t just about growing carrots; it’s about connecting with nature, understanding the nuances of plant life, and enjoying the fruits (or rather, vegetables!) of your labor.
Why is this DIY trick a must-try? Because it addresses some of the most common challenges faced by home gardeners when growing carrots: poor germination, uneven spacing, and stunted growth. By implementing this method, you’re essentially giving your carrot seeds a head start, ensuring they have the best possible environment to thrive. Think of it as a little boost of confidence for your carrots!
But the beauty of gardening lies in its adaptability. Feel free to experiment with variations of this DIY trick to suit your specific needs and preferences. For instance, instead of using paper towels, you could try using coffee filters or even biodegradable seed tape. The key is to maintain a moist environment for germination and to handle the seedlings with care when transplanting.
Another variation to consider is the type of soil you use. While we’ve emphasized the importance of well-draining soil, you can further enhance its quality by adding compost or other organic matter. This will provide your carrots with the nutrients they need to grow strong and healthy. You can also experiment with different carrot varieties to find the ones that grow best in your local climate and soil conditions. Nantes, Chantenay, and Danvers are all popular choices, each with its own unique characteristics.
Don’t be afraid to get your hands dirty and embrace the learning process. Gardening is a journey, not a destination. There will be successes and failures along the way, but each experience will teach you something valuable. And remember, even if your first attempt isn’t perfect, don’t give up! Keep experimenting, keep learning, and keep growing.
We are confident that this DIY trick will make a significant difference in your carrot planting endeavors. It’s a simple, cost-effective, and environmentally friendly way to improve your gardening success. So, what are you waiting for? Grab your carrot seeds, gather your supplies, and get ready to experience the joy of growing your own delicious, homegrown carrots.
We’re eager to hear about your experiences with this DIY trick. Did it work for you? Did you try any variations? What challenges did you face? Share your stories, tips, and photos in the comments section below. Let’s create a community of passionate gardeners who are dedicated to helping each other succeed. Your insights could be invaluable to someone else who is just starting out. Together, we can make the world a greener and more bountiful place, one carrot at a time. Happy carrot planting!
Frequently Asked Questions (FAQ)
What kind of carrot seeds should I use for this DIY trick?
The best type of carrot seeds to use depends on your local climate, soil conditions, and personal preferences. However, some popular and reliable varieties include Nantes, Chantenay, and Danvers. Nantes carrots are known for their sweet flavor and cylindrical shape, making them ideal for slicing and eating raw. Chantenay carrots are shorter and stouter, making them well-suited for heavier soils. Danvers carrots are a classic variety with a slightly tapered shape and a good balance of sweetness and flavor. Consider researching which varieties are known to thrive in your region and choose accordingly. You can also experiment with different varieties to see which ones you like best.
How long does it take for carrot seeds to germinate using this method?
Generally, carrot seeds germinate within 7-14 days under optimal conditions. Using this DIY trick, you can often see germination within 5-10 days because you’re providing a consistently moist and warm environment. However, germination time can vary depending on factors such as temperature, humidity, and the freshness of the seeds. Keep the paper towels consistently moist, but not soaking wet, and maintain a warm temperature (around 70-75°F) to encourage faster germination. If you don’t see any signs of germination after 14 days, it’s possible that the seeds are old or that the conditions are not ideal.
What kind of soil is best for transplanting the germinated carrot seedlings?
Carrots thrive in loose, well-draining soil that is rich in organic matter. Avoid heavy clay soils, as they can hinder root development and result in misshapen carrots. Amend your soil with compost, aged manure, or other organic materials to improve drainage and fertility. The ideal soil pH for carrots is between 6.0 and 6.8. Before transplanting, loosen the soil to a depth of at least 12 inches to allow for proper root growth. You can also add a slow-release fertilizer to the soil to provide the seedlings with a boost of nutrients.
How far apart should I space the carrot seedlings when transplanting them?
Proper spacing is crucial for allowing carrots to develop to their full potential. Aim to space the seedlings about 2-3 inches apart in rows that are 12-18 inches apart. This will give the carrots enough room to grow without overcrowding each other. If you’re growing smaller varieties, you can space them slightly closer together. If you’re growing larger varieties, you may need to space them further apart. Thinning the seedlings after they’ve emerged is also important to ensure that each carrot has enough space to grow.
How often should I water the carrot seedlings after transplanting?
Water the carrot seedlings regularly, especially during dry periods. Keep the soil consistently moist, but avoid overwatering, as this can lead to root rot. Water deeply and less frequently, rather than shallowly and more often. This will encourage the roots to grow deeper into the soil, making the plants more drought-tolerant. Mulching around the plants can also help to retain moisture and suppress weeds.
What are some common pests and diseases that affect carrots, and how can I prevent them?
Carrots are susceptible to several pests and diseases, including carrot rust flies, aphids, nematodes, and fungal diseases. To prevent these problems, practice good garden hygiene, such as removing plant debris and weeds. Rotate your crops each year to avoid the buildup of pests and diseases in the soil. Use row covers to protect the plants from insect pests. Consider using organic pest control methods, such as insecticidal soap or neem oil, to control aphids and other pests. Ensure good air circulation around the plants to prevent fungal diseases.
Can I grow carrots in containers using this DIY trick?
Yes, you can definitely grow carrots in containers using this DIY trick. Choose a container that is at least 12 inches deep and wide to allow for proper root development. Use a well-draining potting mix that is rich in organic matter. Follow the same steps for germinating the seeds and transplanting the seedlings as you would for growing carrots in the ground. Water the plants regularly and fertilize them with a balanced fertilizer every few weeks. Container-grown carrots may require more frequent watering than those grown in the ground.
How do I know when my carrots are ready to harvest?
Carrots are typically ready to harvest when they reach the desired size and color. The exact size and color will depend on the variety you’re growing. Generally, carrots are ready to harvest when they are about 1-2 inches in diameter at the top and have a vibrant orange color. You can gently pull back the soil around the top of the carrot to check its size. To harvest, loosen the soil around the carrot and gently pull it out of the ground. If the soil is dry, water it thoroughly before harvesting to make it easier to pull the carrots out.
What can I do if my carrots are forked or misshapen?
Forked or misshapen carrots are often caused by compacted soil, rocks, or other obstacles in the soil. To prevent this, make sure to prepare your soil thoroughly before planting, removing any rocks or debris. Amend the soil with compost or other organic matter to improve drainage and texture. Avoid using heavy clay soils, as they can hinder root development. If you’re growing carrots in containers, make sure the container is large enough and that the potting mix is loose and well-draining.
Is it necessary to thin carrot seedlings?
Yes, thinning carrot seedlings is essential for ensuring that each carrot has enough space to grow and develop properly. If the seedlings are too crowded, they will compete for resources, resulting in smaller and misshapen carrots. Thin the seedlings when they are about 1-2 inches tall, spacing them about 2-3 inches apart. You can use scissors or your fingers to carefully remove the unwanted seedlings.
Leave a Comment