
Cauliflower Growing Hack: Unlock the secrets to bountiful harvests right in your backyard! Have you ever dreamed of plucking perfectly formed, creamy white cauliflower heads straight from your garden? It’s a rewarding experience, but let’s be honest, growing cauliflower can sometimes feel like a frustrating battle against pests, diseases, and unpredictable weather. But don’t worry, I’m here to share a game-changing cauliflower growing hack that will transform your gardening game.
Cauliflower, a member of the Brassica family, has a rich history dating back to ancient times. Originating in the Mediterranean region, it was prized by the Romans and has since become a staple in cuisines worldwide. For centuries, gardeners have strived to cultivate this nutritious and delicious vegetable, but achieving consistent success has often been a challenge.
That’s where this DIY trick comes in! Many gardeners struggle with common cauliflower problems like buttoning (premature head formation), bolting (going to seed too early), and pest infestations. This simple yet effective cauliflower growing hack addresses these issues head-on, providing you with a practical solution to achieve larger, healthier, and more abundant cauliflower crops. I’m excited to share this with you, so you can enjoy the satisfaction of growing your own delicious cauliflower at home!
Unlock Giant Caulifower Heads: My Foolproof Growing Hack!
Okay, cauliflower. Let’s be honest, it can be a bit of a diva in the garden. But don’t let that scare you! I’ve spent years experimenting, and I’ve finally cracked the code to growing massive, beautiful cauliflower heads. This isn’t just about getting *any* cauliflower; it’s about getting cauliflower that will make your neighbors jealous! This guide will walk you through my tried-and-true method, step-by-step. Get ready to harvest some serious cauliflower goodness!
Understanding Cauliflower’s Needs
Before we dive into the hack itself, it’s crucial to understand what cauliflower craves. Think of it as a demanding houseplant 鈥?it needs specific conditions to thrive.
* Sunlight: Cauliflower needs at least 6 hours of direct sunlight per day. More is always better!
* Soil: Well-draining soil that’s rich in organic matter is essential. Cauliflower is a heavy feeder, so nutrient-rich soil is a must.
* Water: Consistent moisture is key. Cauliflower hates drying out, especially when it’s forming its head.
* Temperature: Cauliflower prefers cooler temperatures, ideally between 60-70掳F (15-21掳C). This is why it’s often grown as a spring or fall crop.
* Nutrients: As I mentioned, cauliflower is a heavy feeder. It needs a steady supply of nitrogen, phosphorus, and potassium, as well as micronutrients.
* pH: Cauliflower thrives in soil with a pH between 6.0 and 7.0.
The Secret Weapon: Epsom Salt and Borax
Now, for the magic ingredient! The key to my giant cauliflower hack lies in a simple combination of Epsom salt and Borax. These two readily available ingredients provide essential micronutrients that cauliflower often lacks, leading to bigger, healthier heads.
* Epsom Salt (Magnesium Sulfate): Magnesium is crucial for chlorophyll production, which is essential for photosynthesis. It also helps cauliflower absorb other nutrients more efficiently.
* Borax (Sodium Borate): Boron is a micronutrient that plays a vital role in cell development and calcium utilization. A boron deficiency can lead to hollow stems and small, misshapen heads.
Important Note: While Epsom salt and Borax are beneficial, it’s crucial to use them sparingly. Overdoing it can be harmful to your plants and the soil. We’re aiming for a boost, not an overdose!
Step-by-Step Guide to Giant Cauliflower
Alright, let’s get our hands dirty! Here’s how to use the Epsom salt and Borax hack to grow massive cauliflower heads:
1. Prepare the Soil: This is the foundation of our success. Before planting, amend your soil with plenty of compost or well-rotted manure. This will provide a nutrient-rich base for your cauliflower to thrive. I usually dig in about 2-3 inches of compost per square foot. Also, test your soil pH. If it’s too acidic (below 6.0), add some lime to raise it.
2. Start with Healthy Seedlings: You can either start your cauliflower seeds indoors or purchase seedlings from a reputable nursery. If you’re starting from seed, sow them about 6-8 weeks before the last expected frost in spring or about 12-14 weeks before the first expected frost in fall. Make sure your seedlings have at least 4-6 true leaves before transplanting them outdoors.
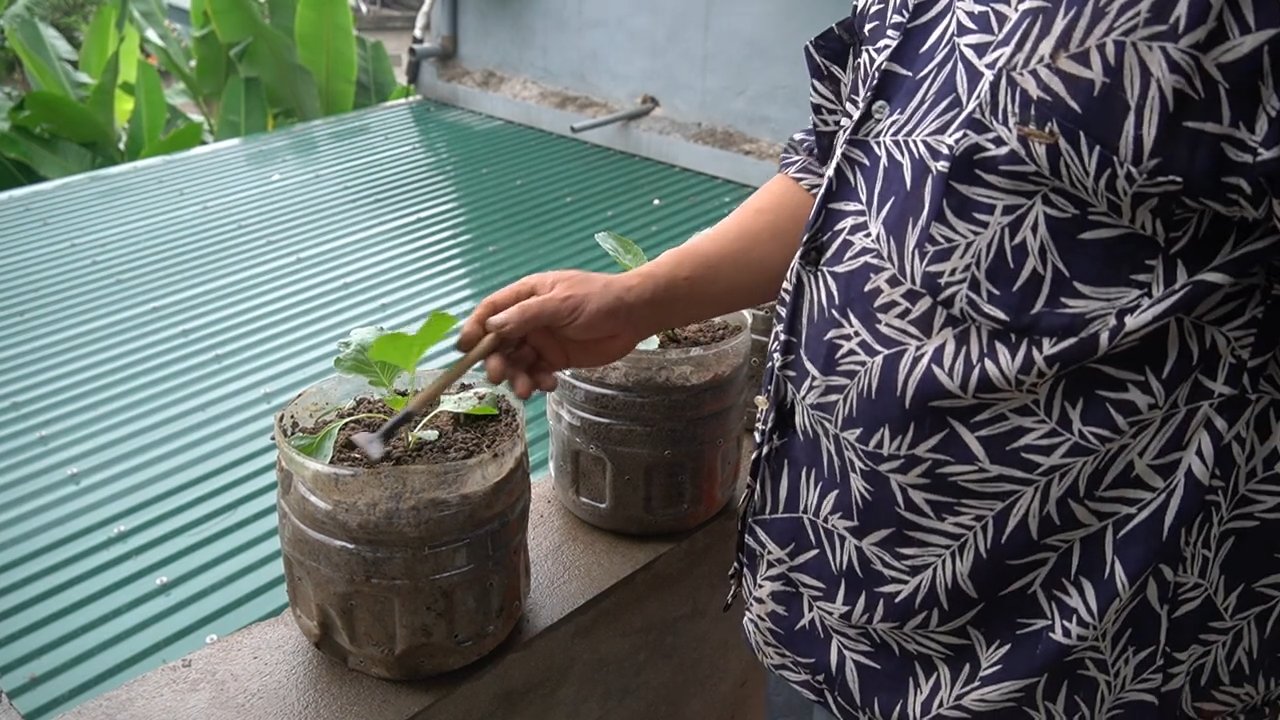
3. Transplant Carefully: When transplanting your cauliflower seedlings, space them about 18-24 inches apart. This gives them enough room to grow and prevents overcrowding. Dig a hole slightly larger than the root ball, gently remove the seedling from its container, and place it in the hole. Backfill with soil and water thoroughly.
4. The First Epsom Salt Boost: About two weeks after transplanting, it’s time for the first Epsom salt application. Dissolve 1 tablespoon of Epsom salt in 1 gallon of water. Water each cauliflower plant with this solution, making sure to soak the soil around the base of the plant. This will give them a nice magnesium boost early on.
5. The Borax Boost (Use with Caution!): This is where we introduce the Borax. This is potent stuff, so be careful! Dissolve 1/4 teaspoon of Borax in 1 gallon of water. I know it sounds like a tiny amount, but trust me, it’s enough. About 3-4 weeks after transplanting (or about 2 weeks after the Epsom salt application), water each cauliflower plant with this Borax solution. Again, soak the soil around the base of the plant.
6. Regular Watering: Keep the soil consistently moist, but not waterlogged. Cauliflower needs about 1-1.5 inches of water per week. Use a soaker hose or drip irrigation to deliver water directly to the roots. Avoid overhead watering, as this can lead to fungal diseases.
7. Fertilize Regularly: Cauliflower is a heavy feeder, so regular fertilization is essential. Use a balanced fertilizer (e.g., 10-10-10) every 2-3 weeks. You can also use a liquid fertilizer, such as fish emulsion or seaweed extract, for a more gentle feeding. Follow the instructions on the fertilizer package.
8. The Second Epsom Salt Boost: About 4-5 weeks after the Borax application, give your cauliflower plants another Epsom salt boost. Dissolve 1 tablespoon of Epsom salt in 1 gallon of water and water each plant thoroughly.
9. Blanching (Optional): Some cauliflower varieties need to be blanched to prevent the head from turning yellow or brown. When the head is about 2-3 inches in diameter, gently fold the leaves over the head and secure them with twine or rubber bands. This will protect the head from the sun and keep it white.
10. Monitor for Pests and Diseases: Keep an eye out for common cauliflower pests, such as cabbage worms, aphids, and flea beetles. Handpick pests whenever possible. You can also use insecticidal soap or neem oil to control infestations. Preventative measures, like crop rotation and companion planting, can also help. Common diseases include black rot and clubroot. Ensure good air circulation and avoid overhead watering to minimize disease risk. If you spot signs of disease, remove affected leaves immediately.
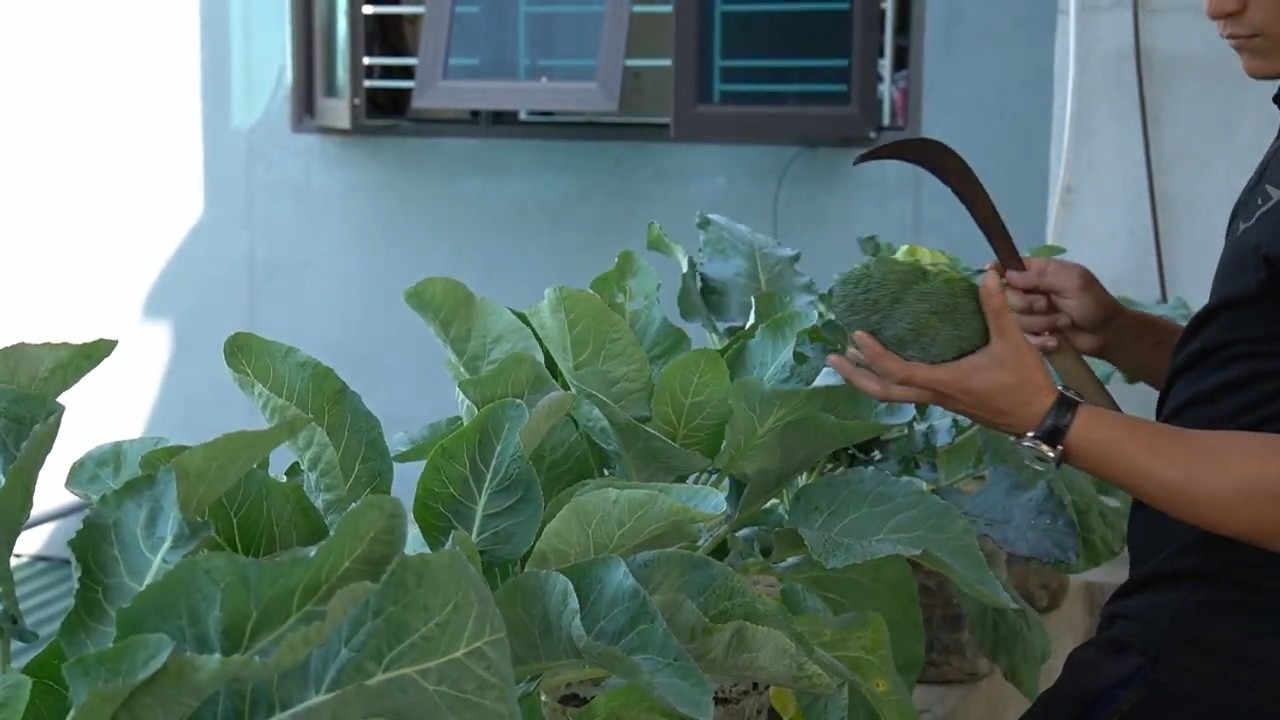
11. Harvest at the Right Time: Harvest your cauliflower when the head is firm, compact, and about 6-8 inches in diameter. Use a sharp knife to cut the head from the plant, leaving a few leaves attached. Don’t wait too long to harvest, as the head can become loose and grainy.
Troubleshooting Tips
Even with the best efforts, things can sometimes go wrong. Here are some common cauliflower problems and how to fix them:
* Small Heads: This is often due to a lack of nutrients or water. Make sure you’re fertilizing regularly and watering consistently. The Epsom salt and Borax boost can also help.
* Yellowing Heads: This can be caused by sun exposure. Blanching the head will prevent it from turning yellow.
* Loose or Grainy Heads: This means you’ve waited too long to harvest. Harvest the cauliflower as soon as the head is firm and compact.
* Hollow Stems: This is often a sign of boron deficiency. The Borax application should help prevent this.
* Pest Infestations: Regularly inspect your plants for pests and take action immediately.
* Diseases: Preventative measures are key. Ensure good air circulation, avoid overhead watering, and practice crop rotation.
Extra Tips for Cauliflower Success
* Choose the Right Variety: Some cauliflower varieties are more heat-tolerant than others. If you live in a warm climate, choose a heat-tolerant variety.
* Succession Planting: Plant cauliflower every few weeks to ensure a continuous harvest.
* Companion Planting: Plant cauliflower with companion plants, such as marigolds, nasturtiums, and rosemary, to deter pests.
* Mulching: Mulch around your cauliflower plants to help retain moisture and suppress weeds.
* Record Keeping: Keep a record of your planting dates, fertilizer applications, and any problems you encounter. This will help you improve your cauliflower growing skills over time.
Why This Hack Works
The magic of this hack lies in addressing the specific micronutrient needs of cauliflower. While most fertilizers provide the primary nutrients (nitrogen, phosphorus, and potassium), they often lack sufficient magnesium and boron. Epsom salt and Borax provide these essential micronutrients, allowing cauliflower to reach its full potential.
By providing the right nutrients, consistent moisture, and protection from pests and diseases, you can grow massive, beautiful cauliflower heads that will be the envy of your neighborhood. So, give this hack a try, and get ready to harvest some serious cauliflower goodness! Happy gardening!
Conclusion
So, there you have it! This simple yet incredibly effective cauliflower growing hack is a game-changer for both novice and experienced gardeners alike. We’ve explored how this method can significantly improve your cauliflower yields, reduce pest problems, and ultimately, make your gardening experience more rewarding.
Why is this a must-try? Because it addresses some of the most common challenges faced when growing cauliflower. The increased air circulation minimizes the risk of fungal diseases, a frequent culprit behind crop failure. The physical barrier provided by the DIY collar deters many ground-dwelling pests, saving you time and money on potentially harmful pesticides. And, perhaps most importantly, it creates a more stable and supportive environment for your cauliflower plants to thrive, leading to larger, healthier, and more delicious heads.
But the beauty of this hack lies in its adaptability. Feel free to experiment with different materials for your collars. Recycled plastic containers, cardboard tubes, or even repurposed fabric can all work effectively. Consider adding a layer of mulch around the base of the plant within the collar to further retain moisture and suppress weeds. For those in particularly hot climates, using a lighter-colored material for the collar can help reflect sunlight and prevent the soil from overheating.
Don’t be afraid to get creative and tailor this method to your specific gardening conditions and preferences. Perhaps you’ll discover a new variation that works even better for you! The key is to understand the underlying principles 鈥?improved air circulation, pest deterrence, and soil stabilization 鈥?and then adapt the technique to maximize its benefits in your own garden.
We are confident that this cauliflower growing hack will transform your cauliflower growing endeavors. It’s a small investment of time and effort that yields significant returns in terms of crop quality and overall gardening success.
Now, it’s your turn! We wholeheartedly encourage you to try this DIY trick in your own garden. Plant your cauliflower, create your protective collars, and watch your plants flourish. We are eager to hear about your experiences. Share your results, your variations, and any tips you discover along the way in the comments section below. Let’s build a community of thriving cauliflower growers, all benefiting from this simple yet powerful technique. Happy gardening!
Frequently Asked Questions (FAQ)
What exactly is the purpose of the collar in this cauliflower growing hack?
The collar serves multiple crucial purposes. Firstly, it provides a physical barrier against ground-dwelling pests like cutworms, slugs, and snails, preventing them from reaching and damaging the young cauliflower stems. Secondly, it helps to improve air circulation around the base of the plant, reducing the risk of fungal diseases that thrive in damp conditions. Thirdly, it helps to stabilize the soil around the plant, preventing erosion and providing a more supportive environment for root development. Finally, it can help to retain moisture in the soil, especially when combined with mulch.
What materials can I use to make the collar?
The beauty of this hack is its versatility. You can use a wide range of materials to create the collar. Some popular options include:
* **Recycled plastic containers:** Cut the bottom off a plastic container (like a yogurt tub or a milk jug) to create a cylindrical collar.
* **Cardboard tubes:** Toilet paper rolls or paper towel rolls can be used for smaller seedlings. For larger plants, you can cut and shape cardboard boxes.
* **Repurposed fabric:** Stiff fabric, like burlap or canvas, can be cut and shaped into a collar.
* **Thin metal sheeting:** Be careful of sharp edges.
* **Commercial plant collars:** These are readily available at most garden centers.
The best material will depend on your personal preferences, the size of your cauliflower plants, and the resources you have available.
How high should the collar be?
The height of the collar should be sufficient to protect the stem from pests and provide adequate air circulation. A height of 2-3 inches above the soil line is generally sufficient for young seedlings. As the plant grows, you may need to adjust the height of the collar or replace it with a larger one.
When should I put the collar around the cauliflower plant?
The collar should be placed around the cauliflower plant as soon as you transplant it into the garden. This will provide immediate protection from pests and help to establish a stable environment for the plant.
Will the collar restrict the growth of the cauliflower plant?
No, the collar should not restrict the growth of the cauliflower plant as long as it is appropriately sized. As the plant grows, the leaves will extend beyond the collar. You may need to remove or replace the collar as the plant matures to ensure that it does not become too restrictive.
Can I use this hack for other plants besides cauliflower?
Yes, this hack can be beneficial for other plants that are susceptible to ground-dwelling pests or fungal diseases. Cabbage, broccoli, and other members of the brassica family can also benefit from this technique. You can also use it for tomatoes, peppers, and other vegetables that are prone to cutworm damage.
What if I live in a very windy area? Will the collar blow away?
If you live in a windy area, you may need to secure the collar to prevent it from blowing away. You can do this by pushing the collar deeper into the soil or by using stakes to hold it in place. You can also use heavier materials for the collar, such as thicker plastic or metal.
How often should I water my cauliflower plants when using this hack?
Watering frequency will depend on your climate and soil conditions. However, the collar can help to retain moisture in the soil, so you may not need to water as frequently as you would without the collar. Check the soil moisture regularly and water when the top inch of soil feels dry.
What kind of fertilizer should I use for my cauliflower plants?
Cauliflower plants are heavy feeders and require a nutrient-rich soil. Use a balanced fertilizer that is specifically formulated for vegetables. Follow the instructions on the fertilizer package for application rates. You can also amend the soil with compost or other organic matter to improve its fertility.
How do I know when my cauliflower is ready to harvest?
Cauliflower is ready to harvest when the head is firm, compact, and white (or whatever color the variety is). The curds should be tightly packed together and not starting to separate. The size of the head will vary depending on the variety, but a general guideline is to harvest when the head is about 6-8 inches in diameter.


Leave a Comment