
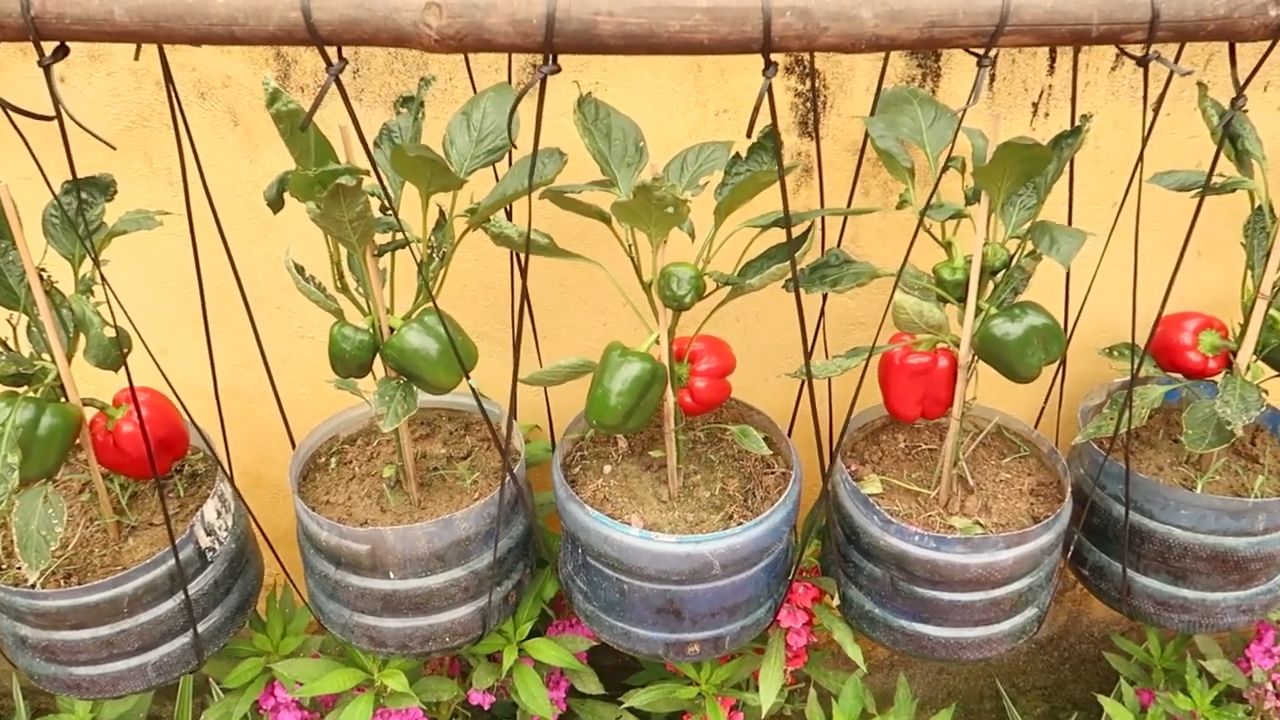
Chili Pepper Growing Tips are what you need to transform your garden into a vibrant, flavorful paradise! Imagine plucking fiery red, green, or even yellow chili peppers straight from your own backyard, ready to spice up your favorite dishes. Forget bland meals – with a little know-how, you can cultivate a thriving chili pepper patch that will have your taste buds singing.
The history of chili peppers is as rich and colorful as the peppers themselves. Originating in South America, these fiery fruits have been cultivated for thousands of years, playing a vital role in cuisines and cultures worldwide. From ancient Aztec rituals to modern-day culinary masterpieces, chili peppers have always added a touch of excitement and zest.
But why should *you* dive into the world of chili pepper growing? Well, store-bought peppers can be expensive and often lack the intense flavor of homegrown varieties. Plus, there’s nothing quite like the satisfaction of nurturing a plant from seed to harvest. I’m here to share some simple, effective chili pepper growing tips and DIY hacks that will help you overcome common challenges and maximize your yield. Whether you’re a seasoned gardener or a complete beginner, these tips will empower you to grow the hottest, most flavorful chili peppers you’ve ever tasted. Let’s get started!
Chili-Pflanzen selber ziehen: Mein ultimativer DIY-Guide für eine feurige Ernte
Hallo liebe Chili-Enthusiasten! Ich liebe es, meine eigenen Chilis anzubauen. Es ist nicht nur super befriedigend, sondern man hat auch die volle Kontrolle über die Schärfe und den Geschmack. In diesem Guide zeige ich euch, wie ihr eure eigenen Chili-Pflanzen von Anfang bis Ende erfolgreich züchten könnt. Keine Angst, es ist einfacher als ihr denkt!
Was du brauchst: Die richtige Ausrüstung und Materialien
Bevor wir loslegen, hier eine Liste mit allem, was du für den Start benötigst:
* Chili-Samen: Wähle deine Lieblingssorten! Von milden Jalapeños bis zu höllisch scharfen Habaneros – die Auswahl ist riesig. Achte auf qualitativ hochwertige Samen von einem vertrauenswürdigen Anbieter.
* Anzuchterde: Normale Blumenerde ist zu nährstoffreich für die empfindlichen Keimlinge. Anzuchterde ist locker, steril und bietet die perfekten Bedingungen für die Keimung.
* Anzuchtgefäße: Kleine Töpfe, Anzuchtplatten oder Torfquelltöpfe sind ideal. Ich persönlich bevorzuge Anzuchtplatten mit transparentem Deckel, da sie die Luftfeuchtigkeit gut halten.
* Sprühflasche: Zum Befeuchten der Erde.
* Wärmematte (optional): Chili-Samen keimen am besten bei warmen Temperaturen (25-30°C). Eine Wärmematte kann den Prozess beschleunigen.
* Pflanzlampen (optional): Gerade in den dunkleren Monaten sind Pflanzlampen Gold wert, um den Keimlingen ausreichend Licht zu geben.
* Töpfe zum Umpflanzen: Wenn die Pflanzen größer werden, brauchen sie mehr Platz.
* Blumenerde: Nach der Anzucht benötigen die Pflanzen nährstoffreiche Blumenerde.
* Dünger: Ein spezieller Chili-Dünger sorgt für eine reiche Ernte.
* Gießkanne oder Schlauch: Zum Bewässern der Pflanzen.
* Gartenschere: Zum Beschneiden der Pflanzen.
* Pflanzstäbe (optional): Für Sorten, die dazu neigen, umzukippen.
Phase 1: Die Aussaat – Der Grundstein für deine Chili-Ernte
Die Aussaat ist der erste und wichtigste Schritt. Hier zeige ich dir, wie du es richtig machst:
1. Vorbereitung der Anzuchtgefäße: Fülle die Anzuchtgefäße mit Anzuchterde. Drücke die Erde leicht an, aber nicht zu fest.
2. Aussaat der Samen: Lege pro Gefäß 1-2 Samen auf die Erde. Bedecke die Samen mit einer dünnen Schicht Anzuchterde (ca. 0,5 cm).
3. Befeuchten der Erde: Besprühe die Erde vorsichtig mit einer Sprühflasche, bis sie feucht, aber nicht nass ist.
4. Schaffen eines feuchten Klimas: Decke die Anzuchtgefäße mit einem transparenten Deckel oder Frischhaltefolie ab. Dies erhöht die Luftfeuchtigkeit und fördert die Keimung.
5. Platzierung an einem warmen Ort: Stelle die Anzuchtgefäße an einen warmen Ort (25-30°C). Eine Wärmematte kann hier sehr hilfreich sein.
6. Regelmäßige Kontrolle: Kontrolliere die Erde täglich und besprühe sie bei Bedarf, um sie feucht zu halten.
7. Geduld haben: Die Keimung kann je nach Sorte und Temperatur 1-3 Wochen dauern.
Phase 2: Die Aufzucht – Vom Keimling zur Jungpflanze
Sobald die ersten Keimlinge aus der Erde sprießen, beginnt die Aufzuchtphase. Hier sind meine Tipps:
1. Entfernen des Deckels: Sobald die Keimlinge aus der Erde kommen, entferne den Deckel oder die Frischhaltefolie, um Schimmelbildung zu vermeiden.
2. Ausreichend Licht: Stelle die Keimlinge an einen hellen Ort. Wenn du keine Fensterbank mit ausreichend Sonnenlicht hast, verwende Pflanzlampen. Die Keimlinge benötigen mindestens 12-14 Stunden Licht pro Tag.
3. Regelmäßiges Gießen: Gieße die Keimlinge regelmäßig, aber vermeide Staunässe. Die Erde sollte immer leicht feucht sein.
4. Vereinzeln der Pflanzen: Wenn du mehrere Samen pro Gefäß ausgesät hast, musst du die Pflanzen vereinzeln, sobald sie einige Blätter haben. Wähle die stärkste Pflanze aus und schneide die anderen vorsichtig ab.
5. Langsame Gewöhnung an die Außenwelt (Abhärten): Bevor du die Pflanzen ins Freie pflanzt, musst du sie langsam an die Außenbedingungen gewöhnen. Stelle sie tagsüber für einige Stunden ins Freie und hole sie abends wieder rein. Steigere die Zeit im Freien jeden Tag.
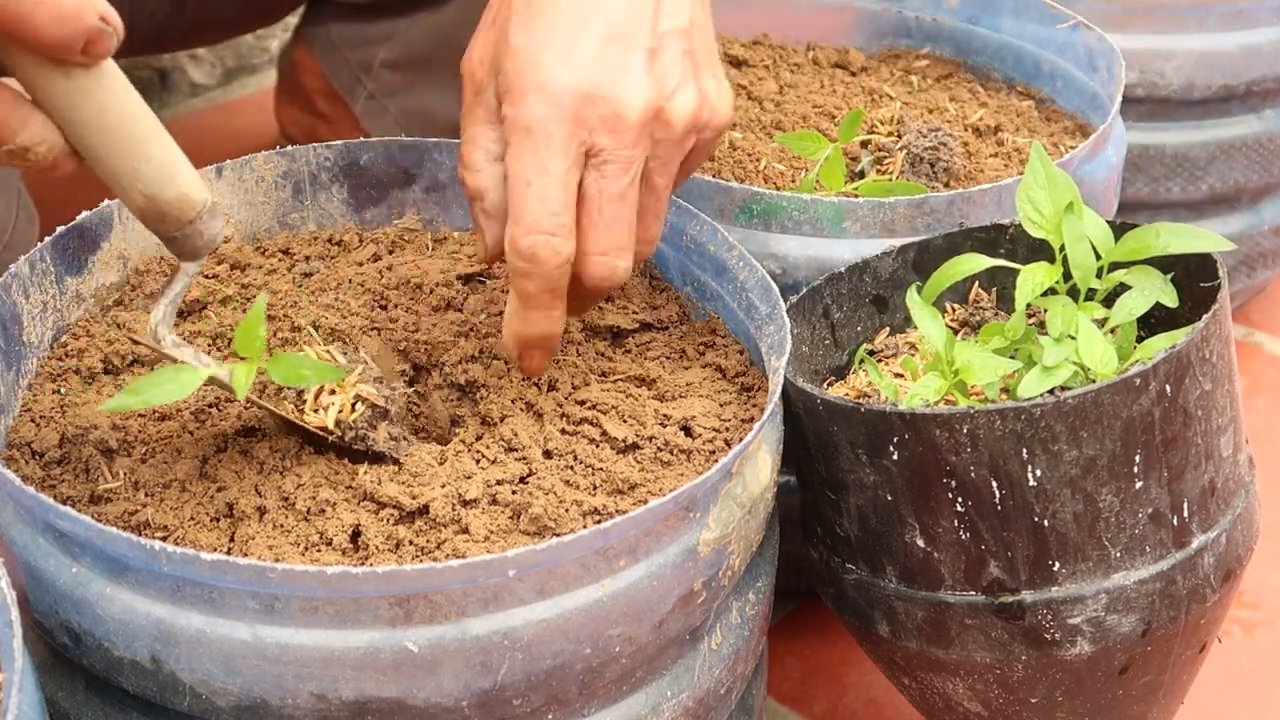
Phase 3: Das Umpflanzen – Mehr Platz zum Wachsen
Wenn die Pflanzen groß genug sind (ca. 10-15 cm), ist es Zeit, sie in größere Töpfe umzupflanzen.
1. Vorbereitung der Töpfe: Fülle die Töpfe mit Blumenerde.
2. Vorsichtiges Herausnehmen der Pflanzen: Nimm die Pflanzen vorsichtig aus den Anzuchtgefäßen. Achte darauf, die Wurzeln nicht zu beschädigen.
3. Einsetzen der Pflanzen: Setze die Pflanzen in die Töpfe und fülle die Töpfe mit Erde auf. Drücke die Erde leicht an.
4. Angießen: Gieße die Pflanzen nach dem Umpflanzen gründlich an.
5. Platzierung an einem sonnigen Ort: Stelle die Pflanzen an einen sonnigen Ort.
Phase 4: Die Pflege – Für eine reiche Chili-Ernte
Die richtige Pflege ist entscheidend für eine reiche Chili-Ernte. Hier sind meine wichtigsten Tipps:
1. Regelmäßiges Gießen: Gieße die Pflanzen regelmäßig, aber vermeide Staunässe. Die Erde sollte immer leicht feucht sein.
2. Düngen: Dünge die Pflanzen regelmäßig mit einem speziellen Chili-Dünger. Beachte die Anweisungen auf der Verpackung.
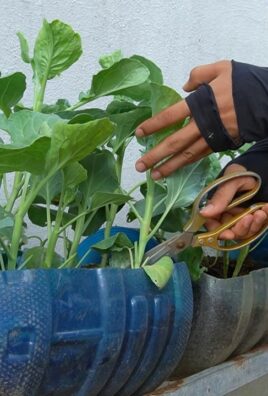
3. Beschneiden (optional): Das Beschneiden der Pflanzen kann die Ernte erhöhen. Entferne dazu die Seitentriebe, die zwischen dem Hauptstamm und den Blättern wachsen.
4. Schutz vor Schädlingen: Kontrolliere die Pflanzen regelmäßig auf Schädlinge wie Blattläuse oder Spinnmilben. Bei Befall kannst du natürliche Schädlingsbekämpfungsmittel verwenden.
5. Unterstützung der Pflanzen: Bei Sorten, die dazu neigen, umzukippen, kannst du Pflanzstäbe verwenden, um die Pflanzen zu stützen.
6. Regelmäßige Kontrolle: Überprüfe deine Pflanzen regelmäßig auf Anzeichen von Krankheiten oder Schädlingen. Je früher du Probleme erkennst, desto einfacher ist es, sie zu beheben.
Phase 5: Die Ernte – Der Lohn deiner Mühe
Endlich ist es soweit: Die Chilis sind reif und können geerntet werden!
1. Erntezeitpunkt: Der Erntezeitpunkt hängt von der Sorte ab. In der Regel sind die Chilis reif, wenn sie ihre endgültige Farbe erreicht haben und sich leicht vom Stiel lösen lassen.
2. Ernten der Chilis: Schneide die Chilis mit einer Gartenschere vom Stiel ab.
3. Verwendung der Chilis: Du kannst die Chilis frisch verwenden, trocknen, einlegen oder zu Soßen und Pulvern verarbeiten.
Zusätzliche Tipps für eine erfolgreiche Chili-Zucht
* Wähle den richtigen Standort: Chilis lieben Sonne! Stelle deine Pflanzen an einen sonnigen Ort mit mindestens 6 Stunden direkter Sonneneinstrahlung pro Tag.
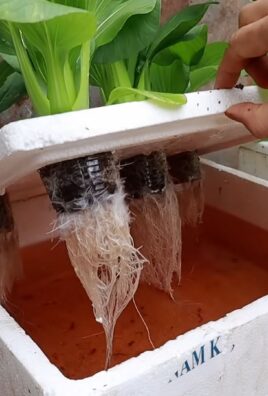
* Achte auf eine gute Drainage: Staunässe kann zu Wurzelfäule führen. Stelle sicher, dass die Töpfe Löcher haben, damit das Wasser ablaufen kann.
* Verwende hochwertige Erde: Gute Erde ist die Grundlage für gesunde Pflanzen. Verwende spezielle Chili-Erde oder mische Blumenerde mit Kompost und Sand.
* Sei geduldig:
Conclusion
So, there you have it! Mastering the art of growing chili peppers doesn’t require a green thumb blessed by the gardening gods. It’s about understanding their needs, providing the right environment, and employing a few clever DIY tricks to boost their growth and protect them from common pitfalls. This guide has armed you with the knowledge to cultivate a thriving chili pepper patch, even if you’re a complete beginner.
The DIY aspect, specifically focusing on creating your own nutrient-rich soil amendments and natural pest control solutions, is what truly sets this approach apart. Store-bought fertilizers and pesticides can be expensive and often contain harsh chemicals that can harm the environment and even affect the flavor of your peppers. By embracing the DIY route, you’re not only saving money but also ensuring that your chili peppers are grown in a healthy, sustainable way.
Think about the satisfaction of harvesting vibrant, fiery chili peppers that you nurtured from seed to fruit, knowing that you did it all with your own hands and with natural ingredients. Imagine the delicious salsas, sauces, and spicy dishes you can create with your homegrown bounty!
But the journey doesn’t end here. Feel free to experiment with different varieties of chili peppers, from the mild and fruity Poblano to the scorching hot Habanero. Try different DIY soil mixes to see what works best for your specific climate and soil conditions. Consider companion planting to attract beneficial insects and deter pests naturally. For example, basil is a great companion plant for chili peppers, as it repels aphids and whiteflies. Marigolds are also excellent for deterring nematodes in the soil.
Don’t be afraid to get creative with your DIY pest control solutions. A simple spray made from garlic, onion, and chili peppers can be incredibly effective against a wide range of pests. You can also try attracting beneficial insects like ladybugs and lacewings to your garden by planting flowers that they love, such as dill, fennel, and yarrow.
The key to successful **chili pepper growing** is observation and adaptation. Pay close attention to your plants and adjust your care routine as needed. If you notice any signs of pests or diseases, take action immediately. And don’t be discouraged if you encounter setbacks along the way. Gardening is a learning process, and every mistake is an opportunity to grow (pun intended!).
We strongly encourage you to try these DIY tricks and embark on your own chili pepper growing adventure. Share your experiences, successes, and challenges with us in the comments below. Let’s create a community of chili pepper enthusiasts who are passionate about growing their own food in a sustainable and rewarding way. We can all learn from each other and help each other grow the best chili peppers possible. So, grab your seeds, get your hands dirty, and get ready to experience the fiery joy of homegrown chili peppers!
FAQ
What are the most common problems people face when growing chili peppers, and how can I prevent them?
The most common problems include pest infestations (aphids, whiteflies, spider mites), diseases (blossom end rot, fungal infections), and nutrient deficiencies. To prevent these issues, start with healthy seedlings or seeds, provide well-draining soil, ensure adequate sunlight (at least 6-8 hours per day), and water consistently but not excessively. Regularly inspect your plants for signs of pests or diseases and take action immediately if you spot any problems. Use organic pest control methods like neem oil or insecticidal soap. For blossom end rot, ensure consistent watering and add calcium to the soil. Proper air circulation can help prevent fungal infections.
How often should I water my chili pepper plants?
Watering frequency depends on several factors, including the climate, soil type, and size of the plant. In general, water deeply when the top inch of soil feels dry to the touch. Avoid overwatering, as this can lead to root rot. During hot, dry weather, you may need to water more frequently. Use a moisture meter to accurately gauge the moisture level in the soil. Mulching around the base of the plants can help retain moisture and reduce the need for frequent watering.
What kind of fertilizer should I use for chili pepper plants?
Chili peppers benefit from a balanced fertilizer with a slightly higher phosphorus content, which promotes flowering and fruiting. Look for a fertilizer with an NPK ratio of around 5-10-5 or 10-20-10. You can also use organic fertilizers like compost tea, bone meal, and fish emulsion. Avoid using fertilizers that are too high in nitrogen, as this can promote excessive foliage growth at the expense of fruit production. Apply fertilizer according to the manufacturer’s instructions, typically every 2-4 weeks during the growing season.
How do I protect my chili pepper plants from frost?
Chili peppers are sensitive to frost and can be damaged or killed by freezing temperatures. If frost is predicted, cover your plants with blankets, sheets, or plastic tarps. You can also move potted plants indoors to a protected location. Another option is to use frost cloths, which are lightweight fabrics specifically designed to protect plants from frost. Make sure the covering extends to the ground to trap heat. Remove the coverings during the day when temperatures rise above freezing.
When is the best time to harvest chili peppers?
The best time to harvest chili peppers depends on the variety and your personal preference. Most chili peppers are ready to harvest when they have reached their mature color and size. The color will vary depending on the variety, ranging from green to red, yellow, orange, or purple. The peppers should feel firm and slightly waxy to the touch. You can also taste a small piece of the pepper to check for ripeness and heat level. Use pruning shears or scissors to cut the peppers from the plant, leaving a small stem attached.
Can I grow chili peppers indoors?
Yes, you can grow chili peppers indoors, but you’ll need to provide them with adequate light and warmth. Choose a sunny location near a south-facing window or use grow lights to supplement natural light. Use a well-draining potting mix and water regularly. You may also need to hand-pollinate the flowers to ensure fruit production. Indoor chili pepper plants may not produce as many peppers as outdoor plants, but they can still provide a rewarding harvest.
How can I make my chili peppers hotter?
Several factors can influence the heat level of chili peppers, including genetics, growing conditions, and stress. To increase the heat of your peppers, provide them with plenty of sunlight, well-draining soil, and consistent watering. Avoid overwatering or over-fertilizing. You can also try stressing the plants slightly by withholding water for a few days before harvesting. Some growers believe that adding Epsom salts to the soil can also increase the heat level of chili peppers.
What are some good companion plants for chili peppers?
Good companion plants for chili peppers include basil, tomatoes, carrots, onions, garlic, and marigolds. Basil repels aphids and whiteflies, while tomatoes provide shade and support. Carrots and onions deter nematodes in the soil. Garlic repels a variety of pests. Marigolds attract beneficial insects and deter nematodes. Avoid planting chili peppers near fennel, as it can inhibit their growth.
How do I save seeds from my chili peppers?
To save seeds from your chili peppers, allow the peppers to fully ripen on the plant until they are dry and wrinkled. Cut the peppers open and remove the seeds. Spread the seeds out on a paper towel to dry completely. Once the seeds are dry, store them in an airtight container in a cool, dark, and dry place. Label the container with the variety of chili pepper and the date of harvest. The seeds should remain viable for several years.
What do I do if my chili pepper plant is not producing any peppers?
There are several reasons why your chili pepper plant may not be producing any peppers. The most common reasons include lack of sunlight, poor pollination, nutrient deficiencies, and stress. Ensure that your plant is receiving at least 6-8 hours of sunlight per day. Hand-pollinate the flowers if necessary. Fertilize the plant with a balanced fertilizer or compost tea. Avoid overwatering or underwatering. Protect the plant from extreme temperatures and pests. If you address these issues, your plant should start producing peppers soon.
Leave a Comment