
Container tomatoes simple trick: Imagine biting into a juicy, sun-ripened tomato, bursting with flavor, all grown right on your balcony or patio! Sounds idyllic, right? But the reality of growing tomatoes in containers can sometimes be a little… less than perfect. We’ve all been there – struggling with stunted growth, blossom end rot, or just plain disappointing yields.
For centuries, cultivating tomatoes has been a cherished tradition, from their origins in South America to their adoption by cultures worldwide. They represent freshness, home-cooked goodness, and a connection to the earth. But let’s face it, not everyone has acres of land to dedicate to a sprawling tomato patch. That’s where container gardening comes in, bringing the joy of homegrown tomatoes to even the smallest spaces.
That’s why I’m so excited to share this container tomatoes simple trick that will revolutionize your container gardening game! This isn’t just another gardening tip; it’s a game-changer that addresses the most common challenges of growing tomatoes in pots. Whether you’re a seasoned gardener or just starting out, this easy-to-implement hack will help you achieve bigger, healthier, and more delicious tomatoes than you ever thought possible. Get ready to unlock the secrets to thriving container tomatoes and enjoy a bountiful harvest all season long!
Grow Bountiful Tomatoes in Containers: My Secret Trick for Success!
Hey there, fellow gardening enthusiasts! I’m so excited to share my go-to trick for growing incredibly productive tomato plants in containers. Forget those spindly, sad-looking container tomatoes – with this method, you’ll be harvesting juicy, delicious fruits all season long. This isn’t just about throwing some seeds in a pot; it’s about creating the perfect environment for your tomato plants to thrive, even in a limited space. Let’s dive in!
Choosing the Right Container and Tomato Variety
Before we get our hands dirty, it’s crucial to select the right container and tomato variety. This is the foundation of our success!
* Container Size: Bigger is better! I recommend a container that’s at least 20 gallons in size. A 25-gallon container is even better. This gives the roots plenty of room to spread out and absorb nutrients. Smaller containers will restrict growth and lead to less fruit.
* Container Material: Plastic, resin, or even fabric grow bags are all good options. Just make sure the container has drainage holes! Standing water is a tomato plant’s worst enemy.
* Tomato Variety: This is where you need to consider your space and preferences.
* Determinate Tomatoes: These are bush-type tomatoes that grow to a certain size and then produce all their fruit at once. They’re a good choice for smaller spaces, but you’ll only get one main harvest. Examples include Roma, Celebrity, and Patio.
* Indeterminate Tomatoes: These are vining tomatoes that keep growing and producing fruit throughout the season. They require staking or caging, but they’ll give you a continuous harvest. Examples include Beefsteak, Cherry, and most heirloom varieties. I personally prefer indeterminate varieties for their extended harvest.
* Dwarf Tomatoes: These are compact varieties specifically bred for containers. They’re a great option if you’re really short on space.
The Secret Trick: Burying the Stem!
Okay, here’s the magic ingredient! This is the trick that has transformed my container tomato harvests. The secret? Burying a significant portion of the tomato plant’s stem when you transplant it.
* Why This Works: Tomato plants have the amazing ability to grow roots from their stems. By burying the stem, you’re essentially creating a much larger root system. This means the plant can absorb more water and nutrients, leading to stronger growth and more fruit. It’s like giving your tomato plant a supercharged engine!
* How Much to Bury: Aim to bury about two-thirds of the stem. Remove the lower leaves from the stem before planting, leaving only the top few sets of leaves.
Step-by-Step Planting Guide
Now, let’s get down to the nitty-gritty of planting. Follow these steps carefully for the best results.
1. Prepare Your Container: Fill your chosen container about one-third full with a high-quality potting mix. Don’t use garden soil; it’s too heavy and doesn’t drain well in containers. I like to use a mix that’s specifically formulated for vegetables.
2. Amend the Soil (Optional but Recommended): This is where you can add some extra goodies to boost your tomato plant’s growth. I like to mix in a handful of slow-release fertilizer, some bone meal (for strong root development), and some Epsom salts (for magnesium, which helps prevent blossom-end rot).
3. Remove Lower Leaves: Gently remove the leaves from the bottom two-thirds of your tomato plant’s stem. Be careful not to damage the stem.
4. Dig a Deep Hole: Dig a hole in the center of the container that’s deep enough to accommodate the buried stem. Remember, we’re aiming to bury about two-thirds of the plant.
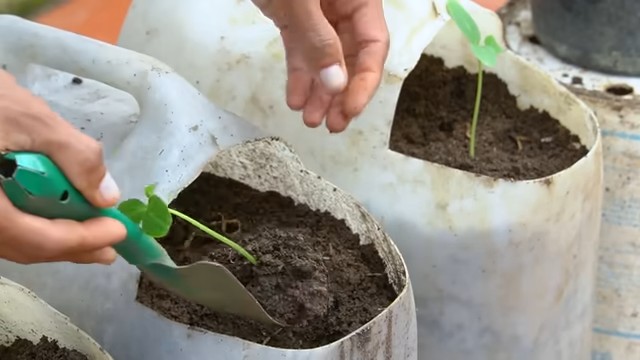
5. Plant the Tomato: Carefully lower the tomato plant into the hole, making sure the bottom leaves are just above the soil surface.
6. Backfill with Soil: Gently backfill the hole with potting mix, firming the soil around the stem.
7. Water Thoroughly: Water the plant deeply until water drains out of the bottom of the container. This helps settle the soil and encourages root growth.
8. Add Support: Install a tomato cage or stake to support the plant as it grows. Indeterminate varieties will need this support to prevent them from sprawling. I prefer cages because they provide all-around support.
9. Mulch (Optional): Add a layer of mulch around the base of the plant to help retain moisture and suppress weeds. Straw, wood chips, or even shredded leaves work well.
Ongoing Care: Watering, Fertilizing, and Pruning
Planting is just the beginning! To keep your tomato plants thriving, you’ll need to provide consistent care throughout the growing season.
* Watering: Tomato plants need consistent moisture, especially when they’re fruiting. Water deeply whenever the top inch of soil feels dry to the touch. Avoid overhead watering, as this can lead to fungal diseases. Drip irrigation or a soaker hose is ideal.
* Fertilizing: Tomato plants are heavy feeders, so regular fertilization is essential. Use a balanced fertilizer (e.g., 10-10-10) every few weeks, or a tomato-specific fertilizer according to the package directions. I also like to give my plants a boost with liquid seaweed extract every now and then.
* Pruning: Pruning is important for indeterminate tomato varieties to improve airflow and encourage fruit production.
* Suckers: Remove the suckers that grow in the “armpit” between the main stem and the branches. These suckers will steal energy from the plant and reduce fruit production.
* Lower Leaves: As the plant grows, remove any yellowing or diseased leaves from the bottom of the plant. This helps improve airflow and prevent the spread of disease.
* Sunlight: Tomato plants need at least 6-8 hours of sunlight per day. Choose a sunny location for your containers.
* Pest and Disease Control: Keep an eye out for common tomato pests like aphids, whiteflies, and tomato hornworms. Treat infestations promptly with insecticidal soap or neem oil. Also, watch out for diseases like early blight and blossom-end rot. Proper watering, good airflow, and regular fertilization can help prevent these problems.
Troubleshooting Common Problems
Even with the best care, you might encounter some problems along the way. Here are a few common issues and how to address them:
* Blossom-End Rot: This is caused by a calcium deficiency, usually due to inconsistent watering. Make sure you’re watering regularly and consider adding some calcium to the soil (bone meal or crushed eggshells work well).
* Early Blight: This is a fungal disease that causes dark spots on the leaves. Remove infected leaves and treat the plant with a fungicide.
* Aphids: These tiny pests suck the sap from the leaves, causing them to curl and yellow. Spray the plant with insecticidal soap or neem oil.
* Tomato Hornworms: These large green caterpillars can quickly defoliate a tomato plant. Pick them off by hand or treat the plant with Bacillus thuringiensis (Bt).
Harvesting Your Tomatoes
The best part of growing tomatoes is, of course, harvesting them!
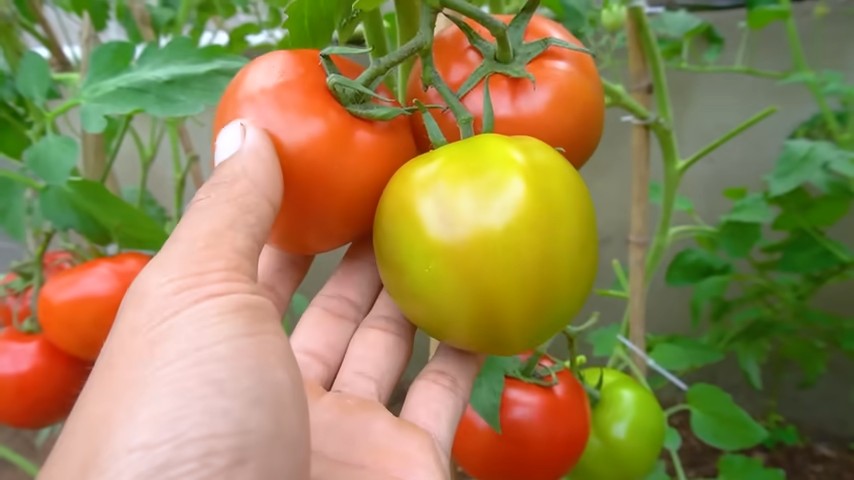
* When to Harvest: Tomatoes are ripe when they’re fully colored and slightly soft to the touch. The color will depend on the variety you’re growing.
* How to Harvest: Gently twist the tomato off the vine. Avoid pulling, as this can damage the plant.
* Storage: Store ripe tomatoes at room temperature. Refrigerating them can affect their flavor and texture.
Extra Tips for Supercharged Tomato Growth
Here are a few extra tips that I’ve found helpful over the years:
* Companion Planting: Plant basil, marigolds, or other beneficial plants near your tomatoes to deter pests and attract pollinators.
* Eggshells: Crush eggshells and add them to the soil around your tomato plants. They provide calcium and other nutrients.
* Coffee Grounds: Sprinkle coffee grounds around the base of your tomato plants. They add nitrogen to the soil and help repel slugs.
* Rotate Your Crops: If you’re growing tomatoes in the same containers year after year, rotate the soil to prevent the buildup of pests and diseases.
Growing tomatoes in containers can be incredibly rewarding. With a little bit of planning and the right techniques, you can enjoy a bountiful harvest of delicious, homegrown tomatoes, even if you don’t have a traditional garden. Remember the key: bury that stem! Happy gardening!
Conclusion
So, there you have it! This simple, yet incredibly effective, DIY trick for growing bountiful container tomatoes is a game-changer for any gardener, regardless of experience level. We’ve walked you through the process, highlighting how easy it is to implement and the significant impact it can have on your tomato yield. Forget struggling with leggy plants, nutrient deficiencies, or disappointing harvests. This method addresses those common issues head-on, providing your container tomatoes with the optimal environment to thrive.
Why is this a must-try? Because it’s about more than just growing tomatoes; it’s about maximizing your gardening efforts and enjoying the fruits (or vegetables!) of your labor. Imagine biting into a juicy, sun-ripened tomato that you nurtured from a tiny seedling, all thanks to this simple technique. The satisfaction is unparalleled. Plus, it’s a cost-effective solution. You likely already have many of the materials on hand, making it an accessible option for everyone.
But don’t just take our word for it. The real magic happens when you put this into practice. We encourage you to experiment with different variations to suit your specific needs and preferences. For example, if you live in a particularly hot climate, consider using a lighter-colored container to prevent the soil from overheating. Or, if you’re growing a larger variety of tomato, you might need to increase the size of your container accordingly. You can also experiment with different types of organic matter to enrich your soil. Consider adding compost tea for an extra boost of nutrients, or incorporating worm castings for improved drainage and aeration.
Another variation to consider is the type of support you provide for your tomato plants. While a standard tomato cage works well, you might find that a stake or trellis offers better support for larger, heavier varieties. Experiment with different methods to find what works best for your plants and your growing space.
This DIY trick isn’t just about the mechanics; it’s about understanding the needs of your tomato plants and providing them with the best possible environment to flourish. It’s about connecting with nature and experiencing the joy of growing your own food.
We are confident that this simple trick will revolutionize your container tomato gardening experience. It’s a small change that yields big results. So, grab your supplies, get your hands dirty, and prepare to be amazed by the abundance of delicious tomatoes you’ll be harvesting in no time.
Don’t forget to share your experiences with us! We’d love to hear about your successes, challenges, and any variations you’ve tried. Post photos of your thriving container tomatoes on social media and tag us. Let’s create a community of gardeners who are passionate about growing their own food and sharing their knowledge with others. Let’s all become experts in growing amazing container tomatoes!
Frequently Asked Questions (FAQ)
What type of container is best for this DIY trick?
The ideal container size depends on the variety of tomato you’re growing. For smaller, determinate varieties like bush tomatoes, a 5-gallon container may suffice. However, for larger, indeterminate varieties like beefsteak or heirloom tomatoes, a 10-gallon or even larger container is recommended. The container should also have adequate drainage holes to prevent waterlogging. As for material, plastic, terracotta, or even repurposed containers can work well. Just ensure the container is clean and free of any harmful chemicals. Dark-colored containers can heat up quickly in direct sunlight, so consider using lighter-colored containers or shading them during the hottest part of the day.
What kind of soil should I use for container tomatoes?
Avoid using garden soil in containers, as it tends to compact and doesn’t provide adequate drainage. Instead, opt for a high-quality potting mix specifically formulated for containers. Look for a mix that contains ingredients like peat moss, perlite, vermiculite, and compost. These ingredients provide good drainage, aeration, and nutrient retention. You can also amend your potting mix with additional organic matter, such as compost or worm castings, to further enrich the soil. A slightly acidic pH of around 6.0 to 6.8 is ideal for tomato plants.
How often should I water my container tomatoes?
Watering frequency depends on several factors, including the weather, the size of the container, and the type of tomato you’re growing. Generally, you should water your container tomatoes deeply whenever the top inch of soil feels dry to the touch. Avoid overwatering, as this can lead to root rot. During hot, dry weather, you may need to water your plants daily, or even twice a day. In cooler, wetter weather, you may only need to water them every few days. The best time to water is in the morning, so the foliage has time to dry before nightfall, reducing the risk of fungal diseases.
How much sunlight do container tomatoes need?
Tomato plants need at least 6-8 hours of direct sunlight per day to thrive. Choose a location for your container tomatoes that receives plenty of sunlight throughout the day. If you live in a particularly hot climate, you may want to provide some afternoon shade to prevent the plants from overheating. If you don’t have a sunny spot, you can supplement with grow lights.
What kind of fertilizer should I use for container tomatoes?
Tomato plants are heavy feeders and require regular fertilization to produce a bountiful harvest. Use a balanced fertilizer specifically formulated for tomatoes, such as a 5-10-5 or 10-10-10. Follow the instructions on the fertilizer package for application rates. You can also use organic fertilizers, such as compost tea or fish emulsion. Fertilize your tomato plants every 2-3 weeks throughout the growing season.
How do I prevent pests and diseases in my container tomatoes?
Prevention is key when it comes to pests and diseases. Start by choosing disease-resistant tomato varieties. Inspect your plants regularly for signs of pests or diseases. Remove any infected leaves or plants immediately. Use organic pest control methods, such as insecticidal soap or neem oil, to control pests. Ensure good air circulation around your plants to prevent fungal diseases. Avoid overhead watering, as this can create a humid environment that encourages disease.
What are some common problems with container tomatoes and how do I fix them?
Some common problems with container tomatoes include blossom end rot, leaf curl, and pest infestations. Blossom end rot is caused by a calcium deficiency and can be prevented by adding calcium to the soil. Leaf curl can be caused by a variety of factors, including heat stress, nutrient deficiencies, and viral diseases. Identify the cause of the leaf curl and address it accordingly. Pest infestations can be controlled with organic pest control methods.
Can I grow container tomatoes indoors?
Yes, you can grow container tomatoes indoors, but you’ll need to provide them with adequate light and warmth. Use grow lights to supplement natural sunlight. Choose a sunny window that receives at least 6-8 hours of direct sunlight per day. Maintain a consistent temperature of around 70-75 degrees Fahrenheit. Pollinate the flowers by hand using a small brush.
How do I prune my container tomatoes?
Pruning can help improve air circulation, reduce disease, and encourage fruit production. Remove suckers, which are the small shoots that grow between the main stem and the branches. Prune off any yellowing or diseased leaves. You can also prune the lower leaves to improve air circulation and prevent soil-borne diseases.
How long does it take to harvest container tomatoes?
The time it takes to harvest container tomatoes depends on the variety you’re growing. Generally, it takes about 60-85 days from transplanting to harvest. The fruits are ready to harvest when they are fully colored and slightly soft to the touch. Gently twist the fruit off the vine.

Leave a Comment