
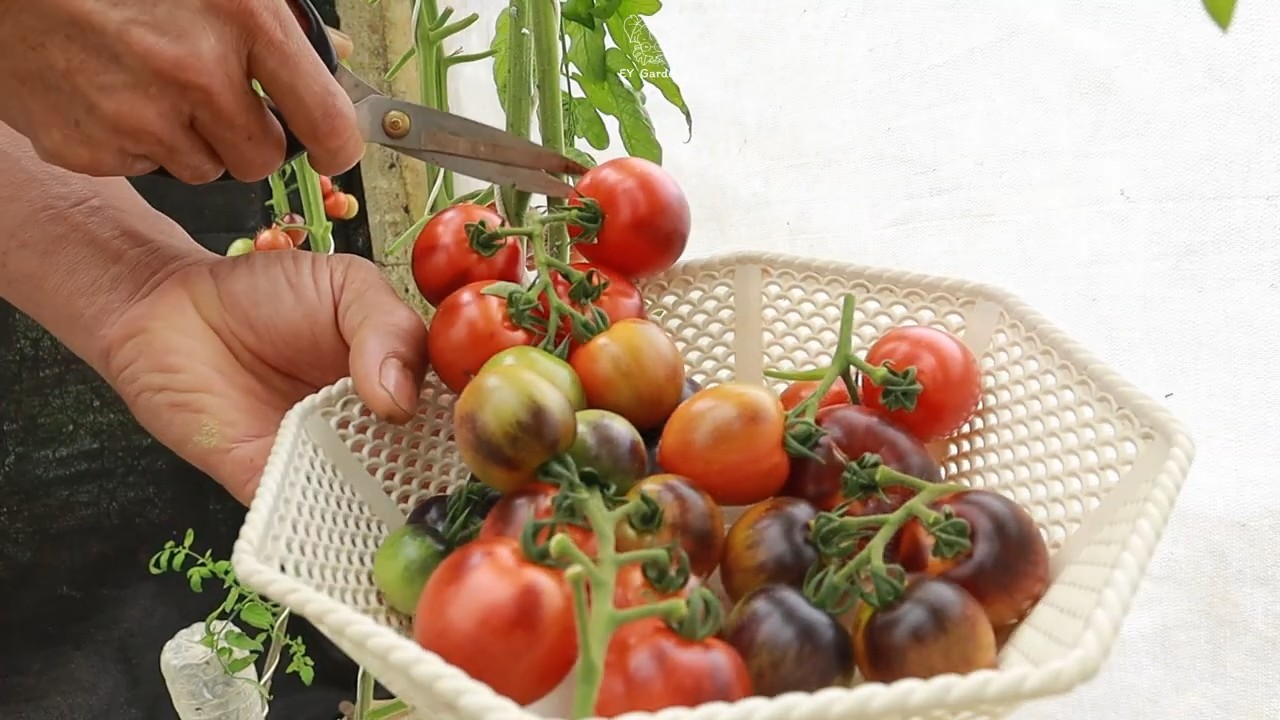
Dark tomato variety: Ever dreamt of biting into a juicy, almost black tomato, bursting with an intense, smoky sweetness unlike anything you’ve ever tasted? I know I have! For years, I was intimidated by the idea of growing these mysterious beauties, thinking they were only for expert gardeners. But guess what? I’ve cracked the code, and I’m here to share my secrets to successfully cultivating your very own dark tomato variety right in your backyard!
These intriguing tomatoes, often with names like ‘Black Krim’ or ‘Cherokee Purple,’ boast a rich history, with some varieties tracing back to regions like Crimea and the Cherokee Nation. They’re not just a modern fad; they represent a connection to heirloom gardening and a celebration of unique flavors. But beyond their fascinating past, why should you bother with a dark tomato variety? Well, for starters, they offer a flavor profile that’s simply unmatched by your average red tomato. They’re also packed with antioxidants, making them a healthy and delicious addition to your diet.
This DIY guide is your passport to unlocking the secrets of growing these captivating fruits. I’ll walk you through everything from selecting the right seeds and preparing your soil to troubleshooting common problems and harvesting your bounty. Forget the grocery store – with a little know-how, you can enjoy the unparalleled taste and satisfaction of homegrown dark tomato variety all season long. So, grab your gardening gloves, and let’s get started!
DIY: From Garden to Jar – Making Rich, Dark Tomato Paste
Okay, tomato lovers, gather ’round! Today, we’re diving into the wonderful world of homemade tomato paste, specifically using those gorgeous, dark tomato varieties you’ve been nurturing (or eyeing at the farmer’s market). Forget the bland, store-bought stuff – we’re talking about intensely flavored, deeply colored paste that will elevate your sauces, stews, and everything in between. This isn’t a quick process, but trust me, the results are worth every minute.
Why Dark Tomatoes?
Dark tomatoes, like Black Krim, Cherokee Purple, or Paul Robeson, are prized for their complex, smoky, and slightly sweet flavor profiles. These characteristics translate beautifully into a tomato paste that’s far more interesting than anything you can buy. Plus, their naturally lower acidity often means a smoother, less tangy final product.
What You’ll Need
Before we get started, let’s make sure you have everything you need. This is crucial for a smooth and enjoyable paste-making experience.
* Dark Tomatoes: Aim for about 10-15 pounds. The riper, the better! Bruised spots are fine, just cut them away.
* Large Stockpot or Dutch Oven: This needs to be big enough to hold all your tomatoes comfortably.
* Food Mill or Tomato Press: This is essential for removing the skins and seeds. A food mill gives a smoother result, but a tomato press works well too.
* Fine-Mesh Sieve: For extra straining, if desired.
* Cheesecloth (Optional): For even further straining, if you want a super-smooth paste.
* Baking Sheets: At least two, preferably with a rim.
* Parchment Paper or Silicone Baking Mats: To line the baking sheets.
* Oven: Capable of holding a low temperature (200-250°F / 93-121°C).
* Spatula or Wooden Spoon: For stirring.
* Jars and Lids (for canning, optional): If you plan to can your paste for long-term storage. Make sure they are properly sterilized.
* Canning Equipment (optional): If you’re canning, you’ll need a water bath canner, jar lifter, and other canning essentials.
* Optional Add-ins: Salt, herbs (like basil, oregano, or thyme), garlic, olive oil.
Step-by-Step Instructions: Making the Paste
Alright, let’s get down to business! Here’s how to transform those beautiful dark tomatoes into a concentrated flavor bomb.
Phase 1: Preparing the Tomatoes
1. Wash and Core: Thoroughly wash your tomatoes to remove any dirt or debris. Then, using a paring knife, carefully core each tomato, removing the tough stem end.
2. Rough Chop (Optional): While not strictly necessary, roughly chopping the tomatoes into smaller pieces can speed up the initial cooking process. I usually quarter or halve them, depending on their size.
3. Initial Cook Down: Place the chopped (or whole) tomatoes in your large stockpot or Dutch oven. Turn the heat to medium-low. You don’t need to add any water – the tomatoes will release their own juices as they cook.
4. Simmer and Stir: Let the tomatoes simmer gently, stirring occasionally to prevent sticking. As they cook, they will break down and release their liquid. This process can take anywhere from 1 to 2 hours, depending on the size of your pot and the juiciness of your tomatoes. You’re looking for the tomatoes to be very soft and pulpy.
Phase 2: Removing Skins and Seeds
This is where the food mill or tomato press comes in handy. This step is crucial for achieving that smooth, velvety texture we’re after.
5. Process the Tomatoes: Working in batches, ladle the cooked tomatoes into your food mill or tomato press. Turn the handle to separate the pulp from the skins and seeds. The pulp will be collected in a bowl underneath, while the skins and seeds will be discarded (or composted!).
6. Second Pass (Optional): For an even smoother paste, you can run the pulp through the food mill or press a second time. This will remove any remaining bits of skin or seeds that might have slipped through the first time.
7. Fine-Mesh Sieve (Optional): If you *really* want a super-smooth paste, you can strain the pulp through a fine-mesh sieve lined with cheesecloth. This will remove any last traces of solids. However, be aware that this will also reduce the overall volume of your paste.
Phase 3: Concentrating the Flavor
Now comes the patient part – reducing the tomato pulp to a thick, concentrated paste. This is where the magic happens!
8. Return to the Pot: Pour the strained tomato pulp back into your stockpot or Dutch oven.
9. Low and Slow Simmer: Turn the heat to the lowest setting possible. You want a very gentle simmer, barely bubbling. The key here is patience. We’re going to be cooking this down for several hours, so don’t rush it.
10. Stir Frequently: This is important! As the tomato pulp reduces, it will become thicker and more prone to sticking and scorching. Stir frequently, especially towards the end of the cooking process, scraping the bottom and sides of the pot to prevent burning.
11. Monitor the Consistency: The cooking time will vary depending on the juiciness of your tomatoes and the humidity in your kitchen. You’re looking for the paste to be very thick and concentrated, with a deep, rich color. It should mound up on a spoon and hold its shape. This can take anywhere from 4 to 8 hours, or even longer.
12. Oven Method (Alternative): If you prefer, you can transfer the tomato pulp to a baking sheet lined with parchment paper or a silicone baking mat. Spread it out in a thin, even layer. Place the baking sheet in a preheated oven at 200-250°F (93-121°C). Stir the paste every hour or so to ensure even drying. This method can take 6-12 hours, or even longer, depending on the thickness of the layer and the oven temperature.
Phase 4: Adding Flavor and Finishing
Once the paste has reached the desired consistency, it’s time to add any additional flavors you want.
13. Add Salt and Seasonings: Stir in salt to taste. I usually start with about 1 teaspoon per pound of tomatoes and adjust from there. You can also add other seasonings at this point, such as dried herbs (basil, oregano, thyme), minced garlic, or a drizzle of olive oil.
14. Final Cook Down (Optional): After adding the seasonings, cook the paste for another 15-30 minutes, stirring constantly, to allow the flavors to meld.
Phase 5: Storing Your Tomato Paste
You have a few options for storing your homemade tomato paste: refrigeration, freezing, or canning.
15. Refrigeration: If you plan to use the paste within a week or two, you can store it in an airtight container in the refrigerator. To prevent mold growth, drizzle a thin layer of olive oil over the surface of the paste before sealing the container.
16. Freezing: For longer storage, freezing is a great option. You can freeze the paste in small portions using ice cube trays or small freezer bags. Once frozen, transfer the cubes or bags to a larger freezer bag for easier storage.
17. Canning (Optional): If you want to can your tomato paste for long-term storage, you’ll need to follow proper canning procedures to ensure safety.
* Sterilize Jars and Lids: Wash your jars and lids in hot, soapy water. Rinse well and sterilize them according to the manufacturer’s instructions.
* Fill Jars: Ladle the hot tomato paste into the sterilized jars, leaving 1/4-inch headspace.
* Remove Air Bubbles: Run a non-metallic spatula or bubble remover around the inside of the jar to release any trapped air bubbles.
* Wipe Rims: Wipe the rims of the jars with a clean, damp cloth.
* Place Lids and Rings: Place the lids on the jars and screw on the rings fingertip-tight.
* Process in Water Bath Canner: Process the jars in a boiling water bath canner for the recommended time, according to your altitude and jar size. Consult a reliable canning resource (like the USDA Complete Guide to Home Canning) for specific processing times.
* Cool and Check Seals: After processing, remove the jars from the canner and let them cool completely on a towel-lined surface. As the jars cool, you should hear a popping sound
Conclusion
So, there you have it! Transforming ordinary tomatoes into a rich, intensely flavored dark tomato variety experience is not only achievable but surprisingly simple. This DIY trick unlocks a depth of flavor that rivals even the most prized heirloom varieties, all from the comfort of your own kitchen. Forget expensive specialty stores and unpredictable farmer’s markets; with a little patience and this easy method, you can enjoy the complex, smoky sweetness of dark tomatoes whenever the craving strikes.
Why is this a must-try? Because it’s more than just a recipe; it’s an experiment in flavor enhancement. It’s about taking control of your culinary experience and elevating everyday ingredients to something truly special. The concentrated umami and subtle sweetness that develop during the roasting process are unlike anything you’ve tasted before. Imagine using these intensely flavored tomatoes in your favorite pasta sauce, bruschetta, or even as a base for a vibrant gazpacho. The possibilities are endless!
Beyond the basic method, there’s plenty of room for experimentation. Consider adding a pinch of smoked paprika to the tomatoes before roasting for an even deeper smoky flavor. Or, try incorporating a drizzle of balsamic vinegar during the last few minutes of roasting to add a touch of tangy sweetness. For a spicier kick, toss in a few dried chili flakes. You can also experiment with different herbs; rosemary, thyme, and oregano all pair beautifully with roasted tomatoes. Don’t be afraid to get creative and tailor the flavors to your own preferences.
This DIY dark tomato variety transformation is not just about saving money or having access to unique ingredients; it’s about the joy of creating something extraordinary with your own hands. It’s about understanding the science of flavor and appreciating the simple magic of transforming ordinary ingredients into culinary masterpieces.
We wholeheartedly encourage you to try this DIY trick. It’s a rewarding experience that will undoubtedly elevate your cooking and impress your friends and family. Once you’ve tasted the difference, you’ll never look at ordinary tomatoes the same way again.
But don’t just take our word for it. Try it yourself and see the incredible transformation firsthand. We’re confident that you’ll be amazed by the results. And most importantly, we want to hear about your experience! Share your photos, tips, and variations in the comments below. Let’s build a community of dark tomato enthusiasts and inspire each other to explore the endless possibilities of flavor. What herbs did you use? What dishes did you create? Did you discover any unexpected flavor combinations? We can’t wait to hear your stories!
Remember, the best part of cooking is sharing the experience and learning from each other. So, get in the kitchen, experiment, and most importantly, have fun! We’re excited to see what culinary creations you come up with using your own homemade dark tomato variety. Happy cooking!
Frequently Asked Questions
What exactly makes a tomato a “dark tomato variety”?
Dark tomato varieties, often referred to as black or purple tomatoes, are characterized by their deep, rich color, which ranges from a dusky reddish-brown to almost black. This coloration is due to high concentrations of anthocyanins, the same antioxidants that give blueberries and other dark fruits their vibrant hues. These tomatoes are also known for their complex, often smoky and slightly sweet flavor profiles, which are distinct from the brighter, more acidic flavors of typical red tomatoes. The flavor is often described as earthy, rich, and almost wine-like.
Can I use any type of tomato for this DIY trick?
While the method works best with ripe, flavorful tomatoes, you can experiment with different varieties. Roma tomatoes, with their meaty texture and lower water content, are a good choice. Beefsteak tomatoes will also work well, but may require a slightly longer roasting time due to their size. Avoid using underripe or overly watery tomatoes, as they won’t develop the same depth of flavor. Cherry tomatoes can also be used, but the roasting time will need to be significantly reduced to prevent them from burning. The key is to choose tomatoes that are already relatively flavorful, as the roasting process will enhance their existing characteristics.
How long will the roasted dark tomatoes last?
Properly stored, roasted dark tomatoes will last for up to 5 days in the refrigerator. Make sure to store them in an airtight container to prevent them from drying out or absorbing odors from other foods. You can also freeze them for longer storage. To freeze, spread the roasted tomatoes in a single layer on a baking sheet lined with parchment paper and freeze until solid. Then, transfer them to a freezer-safe bag or container. Frozen roasted tomatoes will last for up to 3 months. When ready to use, thaw them in the refrigerator overnight or use them directly from frozen in cooked dishes.
Can I use dried herbs instead of fresh herbs?
Yes, you can definitely use dried herbs if fresh herbs are not available. However, keep in mind that dried herbs have a more concentrated flavor than fresh herbs, so you’ll need to use less. As a general rule, use about one-third the amount of dried herbs as you would fresh herbs. For example, if the recipe calls for 1 tablespoon of fresh herbs, use 1 teaspoon of dried herbs. When using dried herbs, it’s best to add them at the beginning of the roasting process to allow their flavors to fully infuse into the tomatoes.
What are some ways I can use these DIY dark tomatoes?
The possibilities are endless! These roasted dark tomatoes are incredibly versatile and can be used in a wide variety of dishes. Here are just a few ideas:
* **Pasta Sauce:** Blend them into a rich and flavorful pasta sauce.
* **Bruschetta:** Top toasted bread with the roasted tomatoes, a drizzle of olive oil, and a sprinkle of fresh basil.
* **Pizza Topping:** Use them as a topping for homemade or store-bought pizza.
* **Soup:** Add them to soups and stews for a boost of flavor.
* **Salad:** Toss them into salads for a touch of sweetness and depth.
* **Sandwiches:** Use them as a spread for sandwiches and wraps.
* **Gazpacho:** Blend them into a vibrant and refreshing gazpacho.
* **Roasted Vegetable Medley:** Add them to a roasted vegetable medley for a complex flavor profile.
* **Omelets and Frittatas:** Incorporate them into omelets and frittatas for a savory and flavorful breakfast.
* **Dips and Spreads:** Blend them with cream cheese or ricotta cheese for a delicious dip or spread.
What if my tomatoes start to burn during roasting?
If you notice that your tomatoes are starting to burn during roasting, there are a few things you can do. First, lower the oven temperature by 25 degrees. Second, cover the baking sheet with aluminum foil to prevent further browning. Third, add a tablespoon or two of water to the baking sheet to create steam and prevent the tomatoes from drying out too much. Keep a close eye on the tomatoes and adjust the roasting time as needed.
Can I use this method to make sun-dried tomatoes?
While this method is similar to making sun-dried tomatoes, it’s not exactly the same. Sun-dried tomatoes are typically dried for a much longer period of time, either in the sun or in a dehydrator, to remove almost all of their moisture. This results in a chewier, more intensely flavored product. You can adapt this method to make something similar to sun-dried tomatoes by roasting the tomatoes at a very low temperature (around 200 degrees Fahrenheit) for a longer period of time (4-6 hours), until they are shriveled and leathery.
What if I don’t have an oven? Can I use a grill or smoker?
Yes, you can definitely use a grill or smoker to achieve a similar effect. Grilling will impart a smoky flavor to the tomatoes, while smoking will add an even deeper, more complex flavor. To grill the tomatoes, place them on a grill pan or directly on the grill grates over medium heat. Grill for about 10-15 minutes, turning occasionally, until they are softened and slightly charred. To smoke the tomatoes, place them in a smoker at a low temperature (around 225 degrees Fahrenheit) for 2-3 hours, or until they are softened and have absorbed the smoky flavor.
Is there a way to make this process faster?
While the slow roasting process is key to developing the deep, complex flavors of the dark tomatoes, there are a few ways to speed things up slightly. You can increase the oven temperature to 350 degrees Fahrenheit, but be sure to keep a close eye on the tomatoes to prevent them from burning. You can also cut the tomatoes into smaller pieces, which will reduce the roasting time. However, keep in mind that these methods may slightly compromise the flavor and texture of the final product.
How do I know when the tomatoes are done roasting?
The tomatoes are done roasting when they are softened, slightly shriveled, and have developed a deep, rich color. They should be easily pierced with a fork. The exact roasting time will depend on the size and type of tomatoes you are using, as well as your oven temperature. Start checking the tomatoes after about an hour and adjust the roasting time as needed.
Leave a Comment