
DIY Bean Sprouts at Home: Imagine biting into a crisp, refreshing salad, knowing you grew one of the key ingredients right on your kitchen counter! Forget those pricey, pre-packaged sprouts from the grocery store. I’m going to show you how incredibly easy and rewarding it is to cultivate your own delicious bean sprouts, and trust me, once you start, you’ll never go back.
Sprouting beans isn’t a new fad; it’s a practice with roots stretching back thousands of years, particularly in Asian cultures. For centuries, bean sprouts have been a staple in cuisines across the continent, valued not only for their taste and texture but also for their nutritional punch, especially during times when fresh produce was scarce. They represent resourcefulness and a connection to the earth, even within the confines of a home.
In today’s fast-paced world, we often crave convenience, but at what cost? Store-bought sprouts can be expensive, and sometimes, their freshness is questionable. That’s where this DIY trick comes in! Growing DIY Bean Sprouts at Home allows you to control the entire process, ensuring you have access to fresh, organic, and affordable sprouts whenever you desire. Plus, it’s a fantastic way to add a boost of vitamins and minerals to your diet, especially during the colder months when access to fresh, locally grown produce might be limited. So, let’s ditch the store-bought stuff and embark on this simple, satisfying journey together!
DIY Sprossen ziehen: Frische Köstlichkeiten aus dem eigenen Zuhause
Hallo liebe DIY-Freunde! Habt ihr euch jemals gefragt, wie man diese knackigen, gesunden Sprossen, die man im Supermarkt findet, ganz einfach zu Hause ziehen kann? Ich zeige euch, wie es geht! Es ist super einfach, kostengünstig und macht richtig Spaß. Außerdem wisst ihr genau, was drin ist – nämlich nur eure ausgewählten Samen und frisches Wasser. Los geht’s!
Was du brauchst: Die Zutaten und Materialien
Bevor wir loslegen, hier eine Liste mit allem, was du benötigst. Keine Sorge, die meisten Sachen hast du wahrscheinlich schon zu Hause!
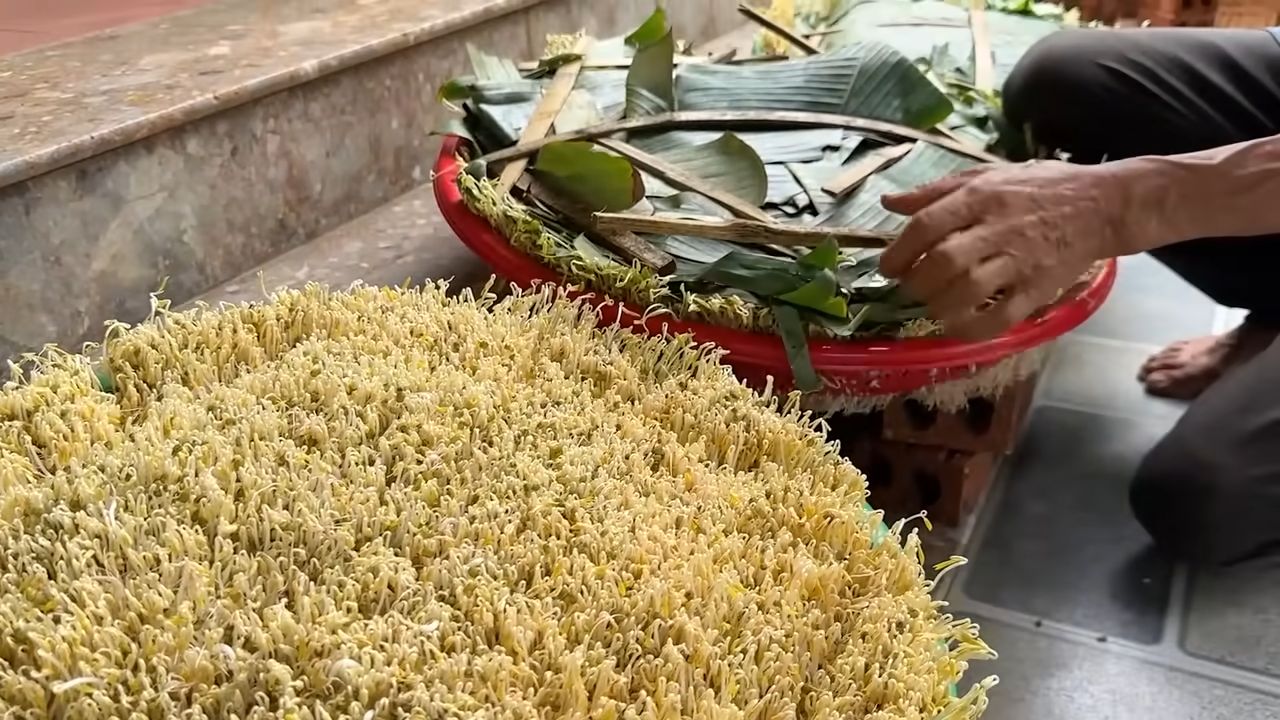
* **Samen:** Das A und O! Du kannst verschiedene Samen verwenden, z.B. Mungbohnen (für klassische Sojasprossen), Alfalfa, Radieschen, Brokkoli, Linsen, Kichererbsen oder Sonnenblumenkerne. Achte darauf, dass die Samen zum Sprossen geeignet sind und nicht behandelt wurden. Bio-Qualität ist immer eine gute Wahl.
* **Ein Sprossenglas oder ein anderes Gefäß:** Ein Einmachglas mit breiter Öffnung ist ideal. Du kannst aber auch eine Plastikschale oder ein Sieb verwenden. Wichtig ist, dass das Gefäß gut belüftet ist und das Wasser gut ablaufen kann.
* **Ein feinmaschiges Sieb oder ein Stück Gaze/Mulltuch:** Damit die Samen nicht durch die Öffnung des Glases fallen.
* **Ein Gummiband oder eine Schnur:** Um das Sieb oder Tuch am Glas zu befestigen.
* **Frisches Wasser:** Am besten gefiltert oder abgekochtes Wasser, um Verunreinigungen zu vermeiden.
* **Ein dunkler Ort:** Sprossen keimen am besten im Dunkeln. Ein Küchenschrank oder eine Schublade sind perfekt.
* **Geduld:** Sprossen brauchen Zeit zum Wachsen. Rechne mit 3-7 Tagen, je nach Sorte.
Die Vorbereitung: Alles klar machen für die Sprossen
Bevor wir mit dem eigentlichen Sprossen beginnen, müssen wir ein paar Vorbereitungen treffen. Das ist wichtig, damit die Sprossen optimal keimen und gesund wachsen.
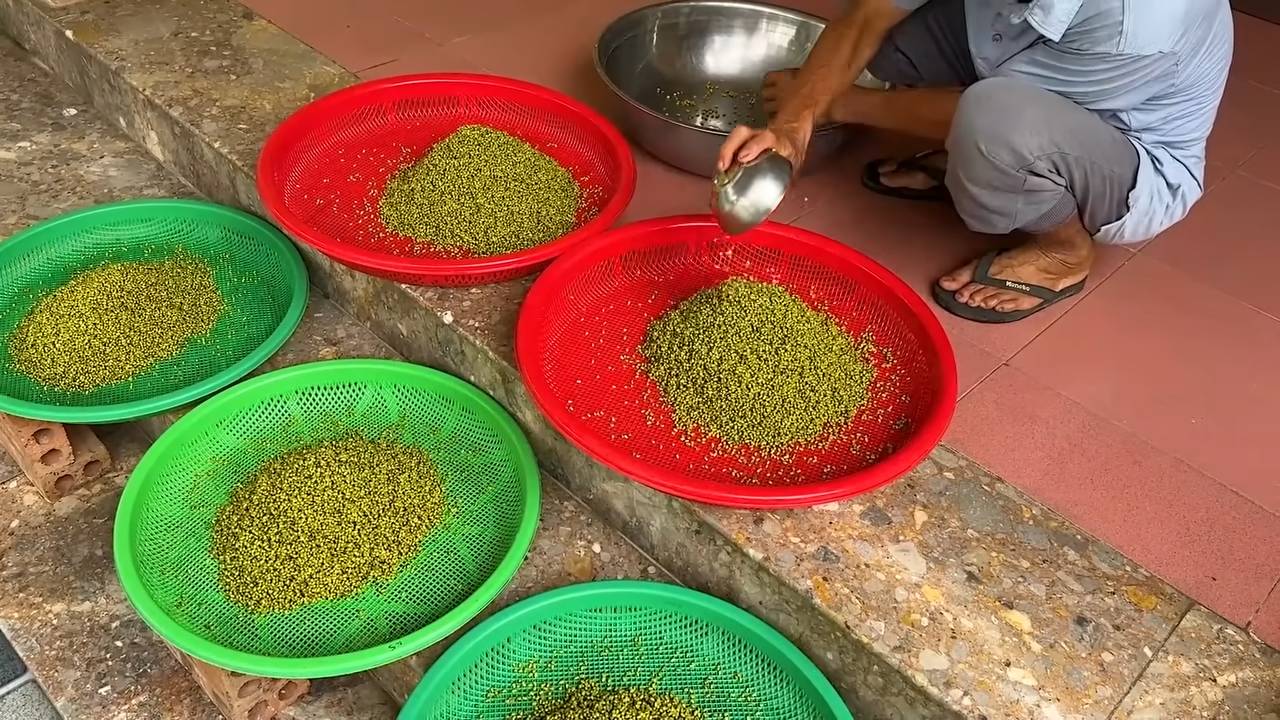
1. **Samen auswählen und vorbereiten:** Wähle deine Lieblingssamen aus und spüle sie gründlich unter fließendem Wasser ab. Entferne dabei beschädigte oder verfärbte Samen.
2. **Einweichen:** Gib die Samen in das Sprossenglas oder eine Schüssel und bedecke sie mit reichlich Wasser. Die Samen quellen auf und benötigen viel Wasser. Die Einweichzeit variiert je nach Sorte:
* Mungbohnen: 8-12 Stunden
* Alfalfa: 4-6 Stunden
* Radieschen: 4-6 Stunden
* Brokkoli: 6-8 Stunden
* Linsen: 8-12 Stunden
* Kichererbsen: 12-24 Stunden
* Sonnenblumenkerne: 4-6 Stunden
3. **Glas vorbereiten:** Reinige das Sprossenglas gründlich mit heißem Wasser und Spülmittel. Spüle es anschließend gut aus, um alle Spülmittelreste zu entfernen.
Der Sprossenvorgang: Schritt für Schritt zu frischen Sprossen
Jetzt kommt der spannende Teil: Das eigentliche Sprossen! Keine Sorge, es ist wirklich kinderleicht.
1. **Wasser abgießen:** Gieße das Einweichwasser ab und spüle die Samen gründlich mit frischem Wasser.
2. **Samen ins Sprossenglas geben:** Gib die eingeweichten Samen in das vorbereitete Sprossenglas. Achte darauf, dass die Samen nicht zu dicht liegen, damit sie genügend Platz zum Wachsen haben.
3. **Sieb oder Tuch befestigen:** Befestige das feinmaschige Sieb oder das Stück Gaze/Mulltuch mit einem Gummiband oder einer Schnur an der Öffnung des Glases.
4. **Glas spülen und abtropfen lassen:** Spüle die Samen im Glas gründlich mit frischem Wasser. Drehe das Glas dabei, damit alle Samen benetzt werden. Lasse das Wasser anschließend gut abtropfen. Das ist wichtig, damit die Sprossen nicht faulen.
5. **Dunkel lagern:** Stelle das Sprossenglas an einen dunklen Ort, z.B. in einen Küchenschrank oder eine Schublade. Achte darauf, dass das Glas schräg steht, damit überschüssiges Wasser gut ablaufen kann.
6. **Spülen und abtropfen lassen (2-3 Mal täglich):** Das ist der wichtigste Schritt! Spüle die Sprossen 2-3 Mal täglich mit frischem Wasser und lasse das Wasser gut abtropfen. Das verhindert Schimmelbildung und sorgt für frische, knackige Sprossen.
7. **Beobachten und Geduld haben:** Beobachte deine Sprossen täglich. Du wirst sehen, wie sie langsam keimen und wachsen. Je nach Sorte dauert es 3-7 Tage, bis die Sprossen erntereif sind.
Die Ernte und Lagerung: Frische Sprossen genießen
Wenn die Sprossen die gewünschte Größe erreicht haben, ist es Zeit für die Ernte!
1. **Ernten:** Spüle die Sprossen noch einmal gründlich mit frischem Wasser.
2. **Grün werden lassen (optional):** Wenn du möchtest, kannst du die Sprossen für ein paar Stunden ins helle Tageslicht stellen (aber nicht in die pralle Sonne). Dadurch bilden sie Chlorophyll und werden grün. Das macht sie noch gesünder und optisch ansprechender.
3. **Lagerung:** Bewahre die Sprossen im Kühlschrank auf. Am besten in einem luftdichten Behälter oder einem sauberen Glas. Sie halten sich dort etwa 3-5 Tage. Spüle sie vor dem Verzehr noch einmal gründlich ab.
Tipps und Tricks für perfekte Sprossen
Hier noch ein paar zusätzliche Tipps, die dir helfen, perfekte Sprossen zu ziehen:
* Qualität der Samen: Verwende nur hochwertige, keimfähige Samen. Billige Samen keimen oft schlecht oder gar nicht.
* Hygiene: Achte auf absolute Sauberkeit! Reinige das Sprossenglas und alle Utensilien gründlich, um Schimmelbildung zu vermeiden.
* Belüftung: Sorge für eine gute Belüftung, damit die Sprossen nicht faulen.
* Temperatur: Die ideale Temperatur zum Sprossen liegt zwischen 18 und 22 Grad Celsius.
* Schimmel vermeiden: Wenn du Schimmel entdeckst, entsorge die Sprossen sofort. Schimmel kann gesundheitsschädlich sein.
* Verschiedene Sorten mischen: Du kannst verschiedene Sorten von Sprossen mischen, um einen interessanten Geschmack zu erzielen.
* Sprossen als Zutat: Verwende Sprossen in Salaten, Suppen, Sandwiches, Wraps oder als Topping für deine Lieblingsgerichte. Sie sind eine tolle Ergänzung für eine gesunde Ernährung.
Häufige Probleme und Lösungen
Auch beim Sprossen ziehen können mal Probleme auftreten. Hier sind einige häufige Probleme und wie du sie lösen kannst:
* **Schimmelbildung:** Ursache: Zu wenig Belüftung, zu hohe Luftfeuchtigkeit, unsaubere Utensilien. Lösung: Sorge für bessere Belüftung, spüle die Sprossen häufiger, reinige das Sprossenglas gründlich.
* **Sprossen faulen:** Ursache: Zu viel Wasser, zu wenig Belüftung. Lösung: Lasse das Wasser nach dem Spülen gut abtropfen, sorge für bessere Belüftung.
* **Samen keimen nicht:** Ursache: Schlechte Samenqualität, falsche Temperatur, zu wenig Feuchtigkeit. Lösung: Verwende hochwertige Samen, achte auf die richtige Temperatur, spüle die Samen regelmäßig.
* **Sprossen schmecken bitter:** Ursache: Zu viel Licht. Lösung: Stelle die Sprossen an einen dunkleren Ort.
Ich hoffe, diese Anleitung hilft dir dabei, deine eigenen Sprossen zu ziehen. Es ist wirklich ein tolles Gefühl, frische, gesunde Lebensmittel selbst anzubauen. Viel Spaß beim Sprossen! Und denk dran: Übung macht den Meister!
Conclusion
So, there you have it! Cultivating your own bean sprouts at home is not only surprisingly simple, but also incredibly rewarding. Forget those limp, flavorless sprouts from the grocery store. With this easy DIY trick, you can enjoy crisp, fresh, and vibrant bean sprouts bursting with flavor and nutrients, all grown right in your own kitchen.
Why is this a must-try? Because you’re taking control of your food source. You know exactly what’s going into your sprouts – no hidden chemicals, no preservatives, just pure, wholesome goodness. Plus, the taste difference is undeniable. Homegrown bean sprouts have a delightful crunch and a clean, refreshing flavor that elevates any dish.
Beyond the basic method outlined, there’s plenty of room for experimentation. Try using different types of beans! Mung beans are the classic choice, but adzuki beans, lentils, or even chickpeas can be sprouted for unique flavor profiles. Consider adjusting the sprouting time based on your preference for sprout length. Some prefer shorter, stubbier sprouts, while others like them long and stringy. You can also play around with the rinsing frequency. In hotter climates, more frequent rinsing might be necessary to prevent mold growth.
Another variation to consider is adding a weight on top of the beans during the sprouting process. This can encourage thicker, more robust sprouts. A small plate or even a clean, sealed bag of water works perfectly. Just be sure the weight is evenly distributed.
And don’t limit yourself to just eating them raw! Bean sprouts are incredibly versatile. Add them to stir-fries for a satisfying crunch, toss them into salads for a boost of nutrients, use them as a topping for sandwiches and wraps, or even incorporate them into soups and noodle dishes. The possibilities are endless!
This DIY bean sprouts at home method is not just about saving money (although it certainly does that!). It’s about connecting with your food, learning a new skill, and enjoying the satisfaction of growing something yourself. It’s a small step towards a more sustainable and healthy lifestyle.
We wholeheartedly encourage you to give this DIY trick a try. It’s easier than you think, and the results are well worth the effort. Once you taste the difference between store-bought and homegrown bean sprouts, you’ll never go back!
We’re eager to hear about your experiences! Did you try a different type of bean? Did you discover a new way to use your homegrown sprouts? Share your tips, tricks, and photos in the comments below. Let’s build a community of sprout enthusiasts and inspire others to embrace the joy of growing their own food. Happy sprouting!
Frequently Asked Questions (FAQ)
What kind of beans are best for sprouting?
The most common and readily available bean for sprouting is the mung bean. Mung beans sprout quickly and reliably, producing the classic bean sprouts you find in most Asian cuisines. However, you can also sprout other types of beans, such as adzuki beans, lentils, chickpeas, and even soybeans (though soybeans require more careful handling due to potential toxicity if not properly cooked after sprouting). Each type of bean will offer a slightly different flavor and texture, so experiment to find your favorites. Just be sure to use beans specifically intended for sprouting or cooking, not ornamental beans, as some ornamental varieties can be toxic.
How long does it take to grow bean sprouts?
Generally, it takes between 3 to 5 days to grow bean sprouts at home using this DIY method. The exact time will depend on several factors, including the type of bean, the temperature of your environment, and your desired sprout length. Warmer temperatures will typically speed up the sprouting process, while cooler temperatures may slow it down. Keep an eye on your sprouts and harvest them when they reach your preferred size.
How do I prevent mold from growing on my bean sprouts?
Mold growth is a common concern when sprouting beans, but it’s easily preventable with proper hygiene and technique. The key is to ensure adequate drainage and ventilation. Rinse your beans thoroughly at least twice a day with cool, clean water. Make sure all the water drains away completely after each rinse. Avoid overcrowding the beans in your sprouting container, as this can restrict airflow. If you live in a humid environment, you may need to rinse your sprouts more frequently. Using a clean sprouting container and fresh, clean water is also crucial. If you do notice any mold, discard the entire batch of sprouts immediately.
Can I eat the bean sprout roots?
Yes, the roots of bean sprouts are perfectly edible and safe to consume. They are a natural part of the sprouting process and contribute to the overall texture and flavor of the sprouts. Some people even prefer the slightly nutty taste of the roots.
How do I store bean sprouts?
Once your bean sprouts have reached your desired length, it’s time to harvest and store them properly to maintain their freshness. Gently rinse the sprouts one last time and drain them thoroughly. Place the sprouts in a clean, airtight container lined with a paper towel. The paper towel will help absorb excess moisture and prevent the sprouts from becoming soggy. Store the container in the refrigerator for up to a week. Check the sprouts regularly and discard any that show signs of spoilage.
My bean sprouts are bitter. What did I do wrong?
Bitterness in bean sprouts can sometimes occur due to a few reasons. One possibility is that the beans were not rinsed thoroughly enough during the sprouting process. Make sure to rinse your sprouts at least twice a day to remove any accumulated byproducts. Another reason could be over-sprouting. If the sprouts are allowed to grow for too long, they can develop a bitter taste. Try harvesting them a day or two earlier next time. Finally, the quality of the beans themselves can also play a role. Using older or lower-quality beans may result in bitter sprouts.
Can I use tap water to sprout beans?
While tap water is generally safe to use for sprouting, it’s best to use filtered water if your tap water contains high levels of chlorine or other chemicals. These chemicals can inhibit the sprouting process and may affect the taste of the sprouts. If you’re unsure about the quality of your tap water, filtered water is always a safe bet.
Are bean sprouts healthy?
Absolutely! Bean sprouts are a nutritional powerhouse, packed with vitamins, minerals, and antioxidants. They are a good source of vitamin C, vitamin K, folate, and fiber. They are also low in calories and fat, making them a healthy addition to any diet. The sprouting process itself increases the bioavailability of certain nutrients, making them even more beneficial.
Can I sprout beans in direct sunlight?
No, it’s best to avoid sprouting beans in direct sunlight. Direct sunlight can overheat the beans and inhibit the sprouting process. It can also promote the growth of algae or mold. Keep your sprouting container in a cool, dark, and well-ventilated area.
What if my beans don’t sprout?
If your beans aren’t sprouting, there could be a few reasons why. First, make sure your beans are viable and intended for sprouting. Old or damaged beans may not sprout properly. Second, ensure that the beans are properly soaked before sprouting. Soaking helps to activate the germination process. Third, check the temperature of your environment. If it’s too cold, the beans may not sprout. Finally, make sure the beans are getting enough moisture. They should be rinsed regularly to keep them hydrated. If you’ve tried all of these things and your beans still aren’t sprouting, try using a different batch of beans.

Leave a Comment