
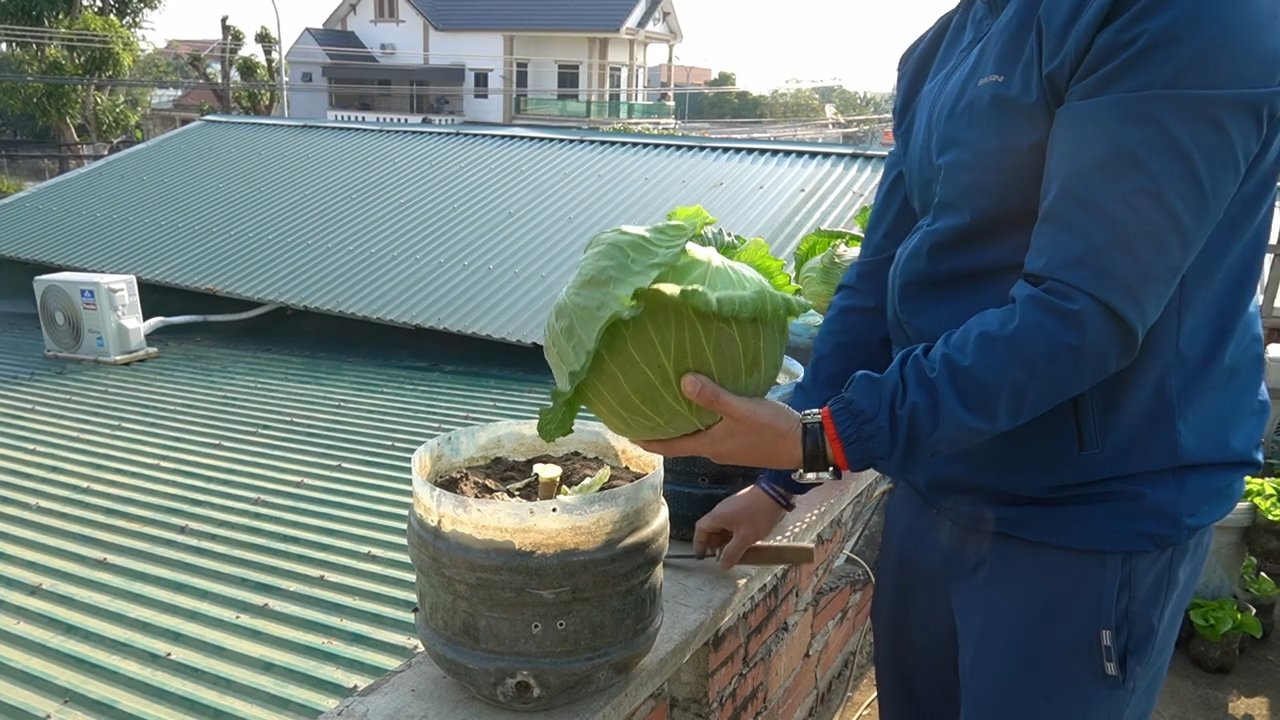
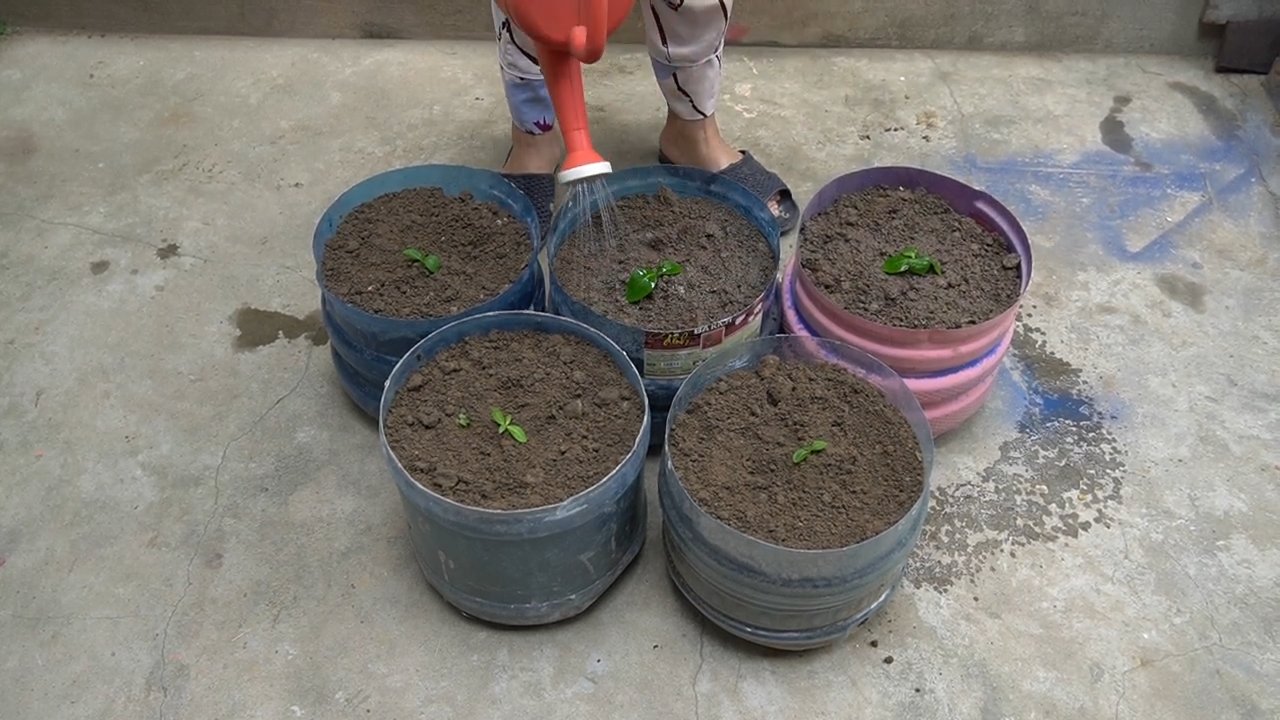
DIY bottle cabbage patch: Ever dreamed of harvesting your own fresh, crisp cabbage but thought you lacked the space or green thumb? Well, dream no more! I’m about to share a super cool and surprisingly simple DIY trick that will have you growing cabbages in recycled plastic bottles 鈥?yes, you read that right!
The concept of container gardening, while seemingly modern, actually has roots stretching back centuries. Think of the Hanging Gardens of Babylon, one of the Seven Wonders of the Ancient World! While we’re not quite aiming for that scale, the spirit of ingenuity and resourcefulness remains the same. People have always found ways to cultivate food, even in the most challenging environments. This DIY bottle cabbage patch method is a testament to that enduring human spirit.
In today’s world, where space is often a premium and concerns about food security are growing, finding innovative ways to grow our own food is more important than ever. This DIY hack is perfect for apartment dwellers, balcony gardeners, or anyone looking to reduce their carbon footprint and enjoy the satisfaction of growing their own produce. Plus, it’s a fantastic way to recycle those plastic bottles that might otherwise end up in a landfill. So, let’s dive in and learn how to create your very own miniature cabbage farm!
DIY Bottle Cabbage Patch Kids: A Nostalgic Craft Project
Hey there, fellow crafters! Remember Cabbage Patch Kids? Those adorable, uniquely-faced dolls that were all the rage? Well, I’m going to show you how to make your own mini versions using recycled plastic bottles! This is a fun, budget-friendly project that’s perfect for kids and adults alike. Get ready to unleash your creativity and bring back some serious childhood memories!
Materials You’ll Need
Before we dive in, let’s gather our supplies. Don’t worry, most of these are things you probably already have around the house!
- Plastic Bottles: You’ll need clean, empty plastic bottles. I recommend using bottles that are relatively smooth and have a consistent shape. Different sizes will give you different sized dolls.
- Fabric Scraps: This is where you can get creative! Choose fabrics in skin tones (beige, brown, tan, peach) for the body and a variety of colors and patterns for the clothes. Felt, cotton, and fleece work well.
- Yarn or Embroidery Floss: For the hair! Choose colors that complement your doll’s skin tone and outfit.
- Stuffing: Cotton balls, fiberfill, or even scraps of fabric will work to stuff the head.
- Acrylic Paint: For the facial features. I suggest a variety of colors like black, white, brown, blue, and pink.
- Paintbrushes: A variety of sizes will be helpful for painting the details on the face.
- Hot Glue Gun and Glue Sticks: For assembling the doll. Be careful when using hot glue!
- Scissors: For cutting fabric and yarn.
- Needle and Thread: For sewing the clothes (optional, you can also use hot glue).
- Buttons, Ribbons, and Other Embellishments: To add extra details to your doll’s outfit.
- Pencil or Marker: For tracing patterns and drawing facial features.
- Paper: For creating patterns.
Preparing the Bottle Body
This is the foundation of our Cabbage Patch Kid! We need to get the bottle ready for its transformation.
- Clean the Bottle: Make sure your plastic bottle is thoroughly cleaned and dried. Remove any labels or sticky residue.
- Cut the Bottle (Optional): Depending on the size of your bottle and the size you want your doll to be, you might need to cut the bottle down. I usually cut off the top portion of the bottle, leaving a cylindrical shape. If you do cut it, be careful of sharp edges! You can smooth them down with sandpaper or cover them with fabric.
- Cover the Bottle with Fabric: Now, we’ll cover the bottle with our skin-tone fabric. Cut a piece of fabric large enough to wrap around the bottle completely.
- Secure the Fabric: Apply hot glue to the bottle in small sections and carefully adhere the fabric. Pull the fabric taut as you go to avoid wrinkles. Overlap the edges of the fabric slightly and glue them together.
- Finishing the Bottom: Fold the excess fabric at the bottom of the bottle inwards and glue it to the bottom of the bottle. Make sure it’s secure and neat.
- Preparing the Top: If you have excess fabric at the top, fold it inside the bottle. This will create a nice, clean edge for attaching the head later.
Creating the Head
The head is what really brings our Cabbage Patch Kid to life! This is where we’ll focus on the unique facial features.
- Cut Fabric for the Head: Cut a circle of skin-tone fabric that’s large enough to form a ball. The size will depend on how big you want the head to be. I usually use a circle that’s about 8-10 inches in diameter.
- Gather the Edges: Using a needle and thread, create a running stitch around the perimeter of the fabric circle. Leave a long tail of thread.
- Stuff the Head: Gently pull the thread to gather the edges of the fabric, creating a pouch. Stuff the pouch with cotton balls, fiberfill, or fabric scraps until it’s firm and round.
- Close the Opening: Once the head is stuffed to your liking, pull the thread tight to close the opening completely. Secure the thread with a knot.
- Shape the Head: Gently mold the head with your hands to create a more rounded and even shape.
- Attach the Head to the Body: Apply hot glue to the top edge of the fabric-covered bottle and carefully attach the head. Make sure it’s centered and secure.
Adding the Hair
No Cabbage Patch Kid is complete without their signature yarn hair!
- Cut Yarn Strands: Cut strands of yarn to your desired hair length. I usually cut them about 6-8 inches long.
- Attach the Yarn: Apply a small amount of hot glue to the top of the head, near the hairline. Attach the yarn strands one by one, overlapping them slightly.
- Continue Adding Yarn: Continue adding yarn strands until the entire top of the head is covered. You can create different hairstyles by varying the placement and length of the yarn.
- Style the Hair: Once all the yarn is attached, you can style the hair with your fingers or a comb. You can create bangs, pigtails, or any other hairstyle you like.
- Secure the Hair (Optional): If you want to make sure the hair stays in place, you can add a few more dabs of hot glue to secure it.
Painting the Facial Features
This is where your doll’s personality really shines through! Take your time and have fun with it.
- Sketch the Features: Use a pencil or marker to lightly sketch the facial features onto the head. This will help you guide your painting. Consider the classic Cabbage Patch Kid features: wide eyes, a small nose, and a sweet smile.
- Paint the Eyes: Use white acrylic paint to paint the whites of the eyes. Let the paint dry completely.
- Add the Irises: Use your chosen eye color (blue, brown, green) to paint the irises. Let the paint dry completely.
- Paint the Pupils: Use black acrylic paint to paint the pupils. Add a small white dot to each pupil to create a highlight.
- Paint the Nose: Use a small brush and a light pink or peach color to paint a small, rounded nose.
- Paint the Mouth: Use a small brush and a red or pink color to paint a sweet, smiling mouth.
- Add Freckles (Optional): Use a brown or orange color to add freckles to the cheeks.
- Add Eyebrows: Use a brown or black color to paint thin eyebrows above the eyes.
- Let the Paint Dry: Allow all the paint to dry completely before moving on to the next step.
Creating the Clothes
Now, let’s dress up our Cabbage Patch Kid! This is another opportunity to get creative and use up those fabric scraps.
- Create Patterns: You can either create your own patterns or use existing patterns for doll clothes. I usually just freehand it! For a simple dress, you’ll need a pattern for the bodice and a pattern for the skirt.
- Cut the Fabric: Use your patterns to cut out the fabric pieces for the clothes. Remember to add a seam allowance (about 1/4 inch) around each piece.
- Sew the Clothes (Optional): If you’re comfortable sewing, you can sew the clothes together using a sewing machine or by hand. If not, you can use hot glue to assemble the clothes.
- Assemble the Dress: Sew or glue the bodice pieces together. Then, sew or glue the skirt to the bodice.
- Dress the Doll: Carefully slip the dress over the doll’s head and body.
- Add Embellishments: Add buttons, ribbons, lace, or other embellishments to the dress to make it even more special.
- Create Pants or Overalls (Optional): If you want to make pants or overalls instead of a dress, follow the same basic steps. Create patterns for the pants or overalls, cut out the fabric pieces, and sew or glue them together.
Adding the Finishing Touches
These little details will really make your Cabbage Patch Kid stand out!
- Add a Bow or Headband: Cut a piece of ribbon or fabric and tie it around the doll’s head to create a
Conclusion
So, there you have it! Transforming ordinary plastic bottles into charming cabbage patch decorations is not only incredibly rewarding but also a fantastic way to embrace sustainability and add a personal touch to your garden or home. This DIY bottle cabbage patch project is more than just a craft; it’s an opportunity to unleash your creativity, reduce waste, and create something beautiful and unique.
Why is this a must-try? Because it’s accessible to everyone, regardless of crafting experience. The materials are readily available 鈥?you’re likely already discarding plastic bottles regularly! Plus, the process is surprisingly therapeutic. There’s something deeply satisfying about taking something destined for the landfill and giving it a new life as a whimsical piece of art. Imagine the joy of watching your neighbors admire your handiwork, knowing that you created it from something so simple.
But the best part is the versatility. Don’t feel limited to just green cabbage! Experiment with different colors to create red cabbage, kale, or even fanciful, imaginary vegetables. Use different sizes of bottles to create a whole family of cabbage patch creations, from tiny sprouts to giant heads. Consider adding embellishments like raffia for a more rustic look, or painting on details like veins and textures for added realism. You could even incorporate solar-powered lights inside for a magical nighttime glow.
For a more durable finish, consider using exterior-grade paint and sealant. This will protect your creations from the elements and ensure they last for seasons to come. If you’re placing your cabbage patch in a windy area, you might want to weigh down the base with pebbles or sand to prevent them from toppling over.
We wholeheartedly encourage you to give this DIY bottle cabbage patch project a try. It’s a fun, affordable, and eco-friendly way to add personality to your space. And most importantly, it’s a chance to connect with your inner artist and create something truly special.
Don’t be afraid to experiment, get creative, and put your own spin on the design. The beauty of DIY is that there are no rules!
Once you’ve created your own bottle cabbage patch, we’d love to see it! Share your photos and stories with us in the comments below or on social media using [Your Hashtag Here]. We can’t wait to see what you create! Let’s inspire each other to embrace sustainable crafting and transform the ordinary into the extraordinary. Happy crafting!
Frequently Asked Questions (FAQ)
What kind of plastic bottles work best for this project?
The best plastic bottles to use are those that are relatively smooth and uniform in shape. Water bottles, soda bottles, and juice bottles all work well. Avoid bottles with excessive ridges or unusual shapes, as they can be more difficult to cut and shape. The thickness of the plastic can also be a factor; thinner plastic is easier to cut but may not be as durable in the long run. Experiment with different types to see what works best for you.
What tools do I need to cut the plastic bottles safely?
Safety is paramount when working with sharp tools. A sharp craft knife or utility knife is ideal for cutting the plastic bottles. Always use a cutting mat to protect your work surface. For thicker plastic, you might consider using heavy-duty scissors or tin snips. Remember to wear gloves to protect your hands from cuts and sharp edges. When using a craft knife, always cut away from your body and keep your fingers clear of the blade. If you’re working with children, supervise them closely and consider using child-safe scissors.
What kind of paint should I use for my bottle cabbage patch?
Acrylic paint is a great choice for painting your bottle cabbage patch. It’s readily available, affordable, and comes in a wide range of colors. For outdoor use, be sure to use exterior-grade acrylic paint, which is designed to withstand the elements. You can also use spray paint, but be sure to apply it in a well-ventilated area and wear a mask to protect yourself from fumes. Consider using a primer before painting to help the paint adhere better to the plastic. After painting, you can apply a clear sealant to protect the paint and make your cabbage patch more durable.
How do I make my bottle cabbage patch more weather-resistant?
To make your bottle cabbage patch more weather-resistant, start by using exterior-grade paint and sealant. This will protect the plastic from fading, cracking, and peeling due to sun exposure and moisture. You can also add a UV protectant spray for extra protection. If you live in an area with strong winds, consider weighing down the base of your cabbage patch with pebbles, sand, or even concrete. This will prevent it from toppling over. Regularly inspect your cabbage patch for any signs of damage and make repairs as needed.
Can I use this technique to create other types of plants or vegetables?
Absolutely! The basic technique of cutting and shaping plastic bottles can be adapted to create a wide variety of plants and vegetables. You can create carrots by shaping orange plastic bottles into cones and adding green bottle tops for the leafy tops. You can make flowers by cutting the bottles into petal shapes and arranging them around a central stem. Let your imagination run wild and experiment with different shapes, colors, and textures to create your own unique garden.
How do I clean the plastic bottles before starting the project?
Cleaning the plastic bottles is an important step to ensure that the paint adheres properly and that your finished project looks its best. Start by rinsing the bottles thoroughly with warm, soapy water. Remove any labels or adhesive residue. You can use a scraper or adhesive remover to help with this. If the bottles are greasy or oily, you can soak them in a solution of water and vinegar for a few minutes. Rinse the bottles again with clean water and allow them to dry completely before starting the project.
What if I don’t have green paint? Can I use other colors?
Of course! While green is the traditional color for cabbage, you can use any color you like. Red cabbage is a popular variation, and you can also create fanciful, imaginary vegetables in any color of the rainbow. You can even mix different colors to create unique shades and textures. Don’t be afraid to experiment and let your creativity shine.
How can I involve children in this DIY project?
This DIY project is a great way to involve children in crafting and recycling. However, it’s important to supervise them closely, especially when using sharp tools. You can have them help with tasks like cleaning the bottles, painting, and arranging the pieces. Consider using child-safe scissors and providing them with pre-cut pieces to work with. This is a great opportunity to teach them about recycling, sustainability, and the importance of protecting the environment.
Where can I find inspiration for my bottle cabbage patch design?
There are many places to find inspiration for your bottle cabbage patch design. You can browse online image galleries, search for cabbage patch crafts on Pinterest, or visit your local garden center for ideas. You can also look at real cabbages and other vegetables for inspiration. Pay attention to the shapes, colors, and textures of the leaves and try to replicate them in your design. Don’t be afraid to put your own spin on the design and create something truly unique.

Leave a Comment