
DIY floor cleaner recipe: Who knew achieving sparkling, spotless floors could be so simple, affordable, and eco-friendly? I’m excited to share some amazing DIY floor cleaner recipes that will transform your cleaning routine! Forget those harsh chemicals and expensive store-bought solutions. We’re diving into the world of natural ingredients and easy-to-follow instructions to create floor cleaners that are not only effective but also safe for your family and pets.
Throughout history, people have relied on natural remedies for cleaning. From ancient civilizations using vinegar and herbs to modern-day enthusiasts embracing sustainable living, the desire for clean and healthy homes has always been a priority. These DIY solutions often draw inspiration from time-tested methods, passed down through generations.
Why do you need this DIY floor cleaner recipe? Well, store-bought cleaners can be packed with harmful chemicals that can irritate your skin, trigger allergies, and even pollute the environment. Plus, they can be quite expensive! By making your own floor cleaner, you have complete control over the ingredients, ensuring a safe and healthy home for everyone. I’ll show you how to whip up effective cleaners using simple ingredients you probably already have in your pantry. Get ready to say goodbye to harsh chemicals and hello to sparkling clean floors, naturally!
DIY Floor Cleaner: Sparkling Floors, Naturally!
Hey there, fellow DIY enthusiasts! Are you tired of harsh chemicals and expensive store-bought floor cleaners? I know I was! That’s why I’ve perfected this amazing DIY floor cleaner recipe that’s not only effective but also eco-friendly and budget-friendly. Get ready to say goodbye to grime and hello to gleaming floors, all while knowing exactly what you’re putting in your home.
This recipe is safe for most sealed hard floors, including tile, linoleum, and sealed hardwood. Always test in an inconspicuous area first to ensure compatibility, especially with delicate surfaces like natural stone.
Here’s what we’re going to cover:
* The magic ingredients and why they work.
* A step-by-step guide to mixing your cleaner.
* Different variations for specific floor types.
* Tips for effective cleaning and maintenance.
The Powerhouse Ingredients
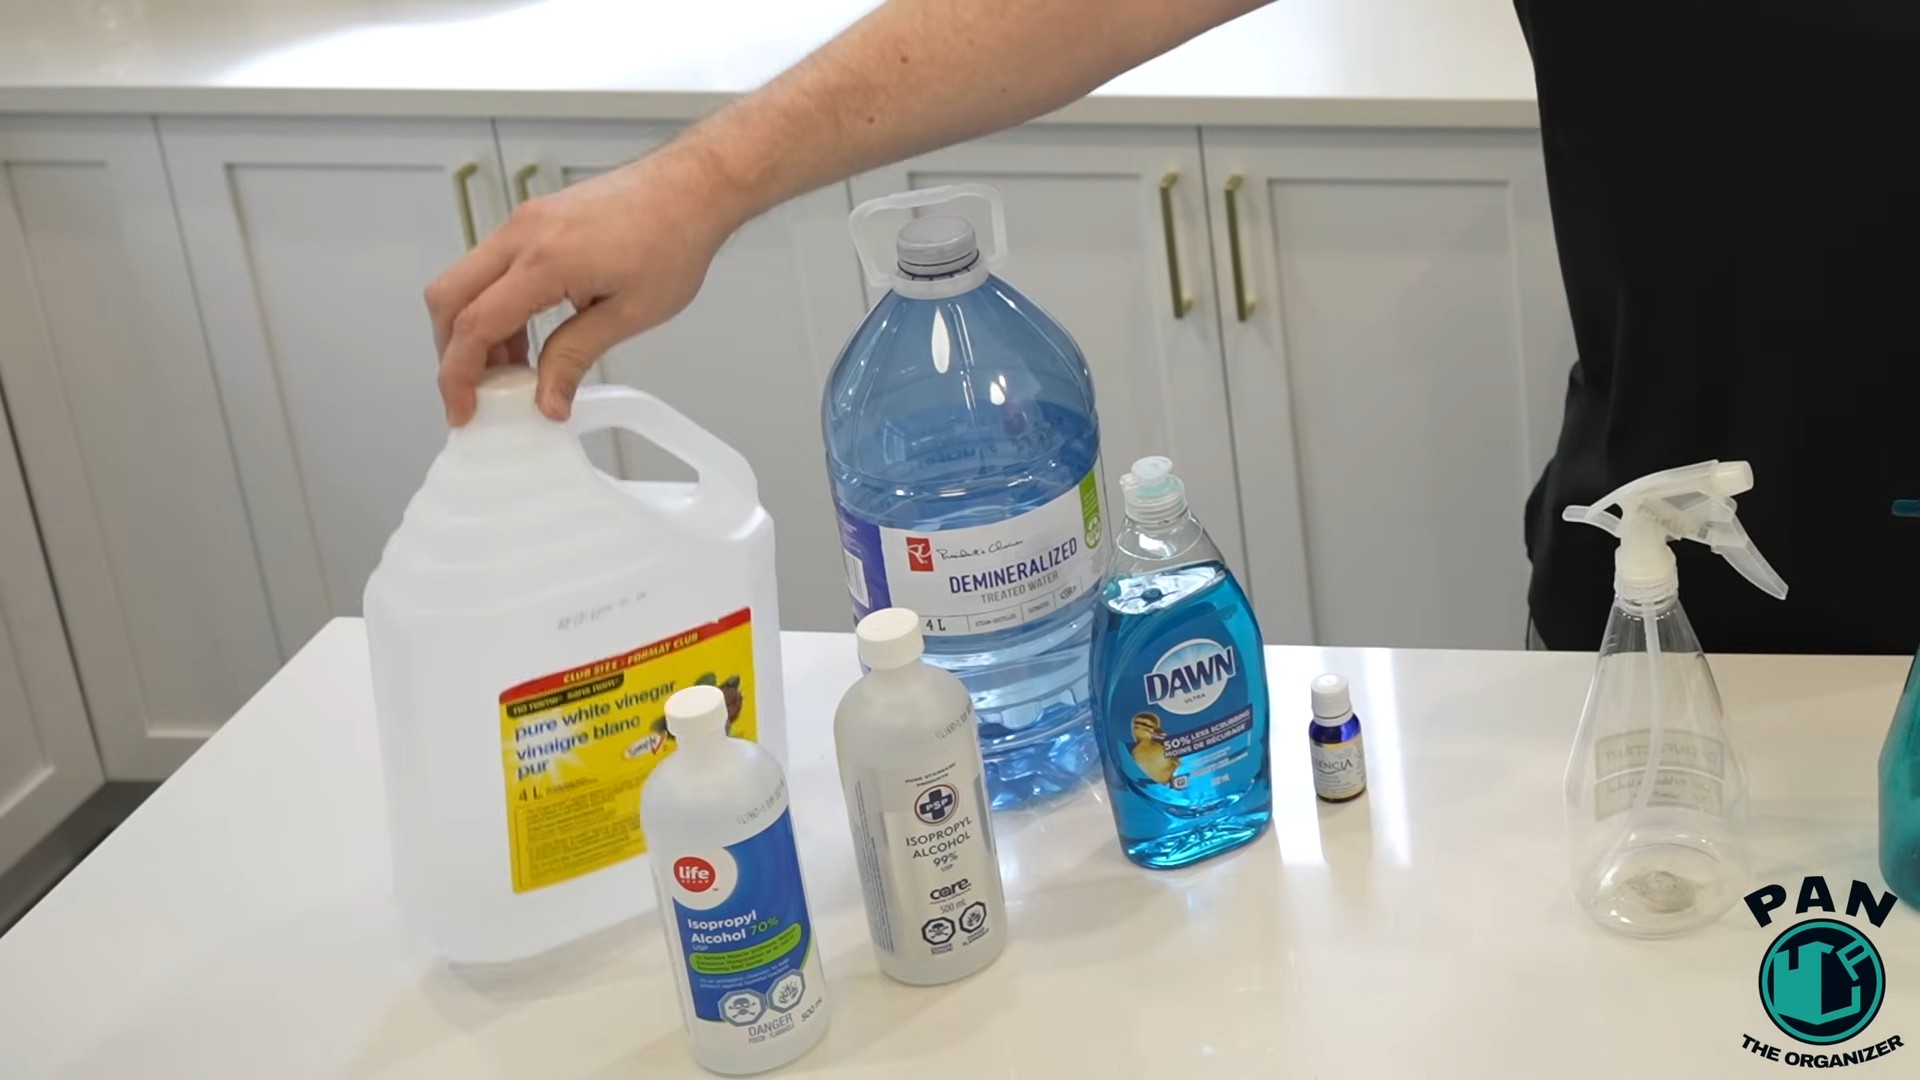
Let’s break down the ingredients and why they’re so effective:
* **Hot Water:** The foundation of our cleaner! Hot water helps dissolve dirt and grime more effectively than cold water.
* **White Vinegar:** This is our secret weapon! Vinegar is a natural disinfectant and deodorizer. Its acidity helps cut through grease and soap scum. Don’t worry about the smell; it dissipates quickly.
* **Dish Soap (Gentle, pH-Neutral):** A small amount of dish soap helps lift dirt and grime. It’s crucial to use a pH-neutral soap to avoid damaging your floors, especially hardwood. Avoid anything with added moisturizers or strong fragrances.
* **Essential Oils (Optional):** For a fresh, natural scent! Lemon, lavender, tea tree, and eucalyptus are all great choices. Tea tree also has antibacterial properties.
Mixing Your DIY Floor Cleaner: The Recipe
Okay, let’s get down to business! This recipe is for a standard bucket of cleaning solution. You can easily adjust the quantities depending on the size of your cleaning area.
**What You’ll Need:**
* A bucket (preferably one you dedicate to cleaning)
* Hot water (about 1 gallon)
* White vinegar (1/2 cup)
* pH-neutral dish soap (1 tablespoon)
* Essential oils (10-20 drops, optional)
* Measuring cups and spoons
**Step-by-Step Instructions:**
1. **Fill the Bucket:** Start by filling your bucket with about a gallon of hot water. Make sure it’s not scalding hot, as that could damage some floor finishes.
2. **Add the Vinegar:** Carefully pour in 1/2 cup of white vinegar. The vinegar smell might be a bit strong at first, but trust me, it will fade quickly.
3. **Add the Dish Soap:** Measure out 1 tablespoon of pH-neutral dish soap and add it to the bucket. Be careful not to add too much, as it can leave a residue on your floors.
4. **Add Essential Oils (Optional):** If you’re using essential oils, add 10-20 drops to the bucket. I personally love lemon for its fresh, clean scent.
5. **Mix Well:** Gently stir the mixture with your mop or a long-handled spoon to ensure all the ingredients are well combined. Avoid creating excessive suds.
Floor-Specific Variations: Tailoring the Recipe
Not all floors are created equal! Here are some variations to customize the recipe for different floor types:
* **Hardwood Floors (Sealed):** Hardwood requires a gentler approach. Reduce the amount of vinegar to 1/4 cup per gallon of water. Excessive vinegar can dull the finish over time. You can also add a tablespoon of olive oil for extra shine (but be careful not to use too much, as it can make the floor slippery).
* **Tile Floors:** Tile is generally more durable and can handle a slightly stronger cleaning solution. You can use the standard recipe as is. For stubborn stains, you can try a paste of baking soda and water applied directly to the stain before mopping.
* **Linoleum Floors:** Linoleum is also quite durable and can handle the standard recipe. However, avoid using abrasive cleaners or scrub brushes, as they can scratch the surface.
* **Laminate Floors:** Laminate floors are susceptible to water damage, so it’s important to use a damp mop rather than a soaking wet one. Reduce the amount of water in the recipe slightly. You can also add a few drops of rubbing alcohol to help the solution dry faster.
* **Natural Stone Floors (Marble, Granite, etc.):** Never use vinegar on natural stone! Vinegar can etch and damage the surface. Instead, use a pH-neutral stone cleaner or a solution of warm water and a very small amount of pH-neutral dish soap.
Cleaning Like a Pro: Tips and Techniques
Now that you have your amazing DIY floor cleaner, let’s talk about how to use it effectively:
1. **Sweep or Vacuum First:** This is crucial! Always remove loose dirt, dust, and debris before mopping. Otherwise, you’ll just be pushing the dirt around.
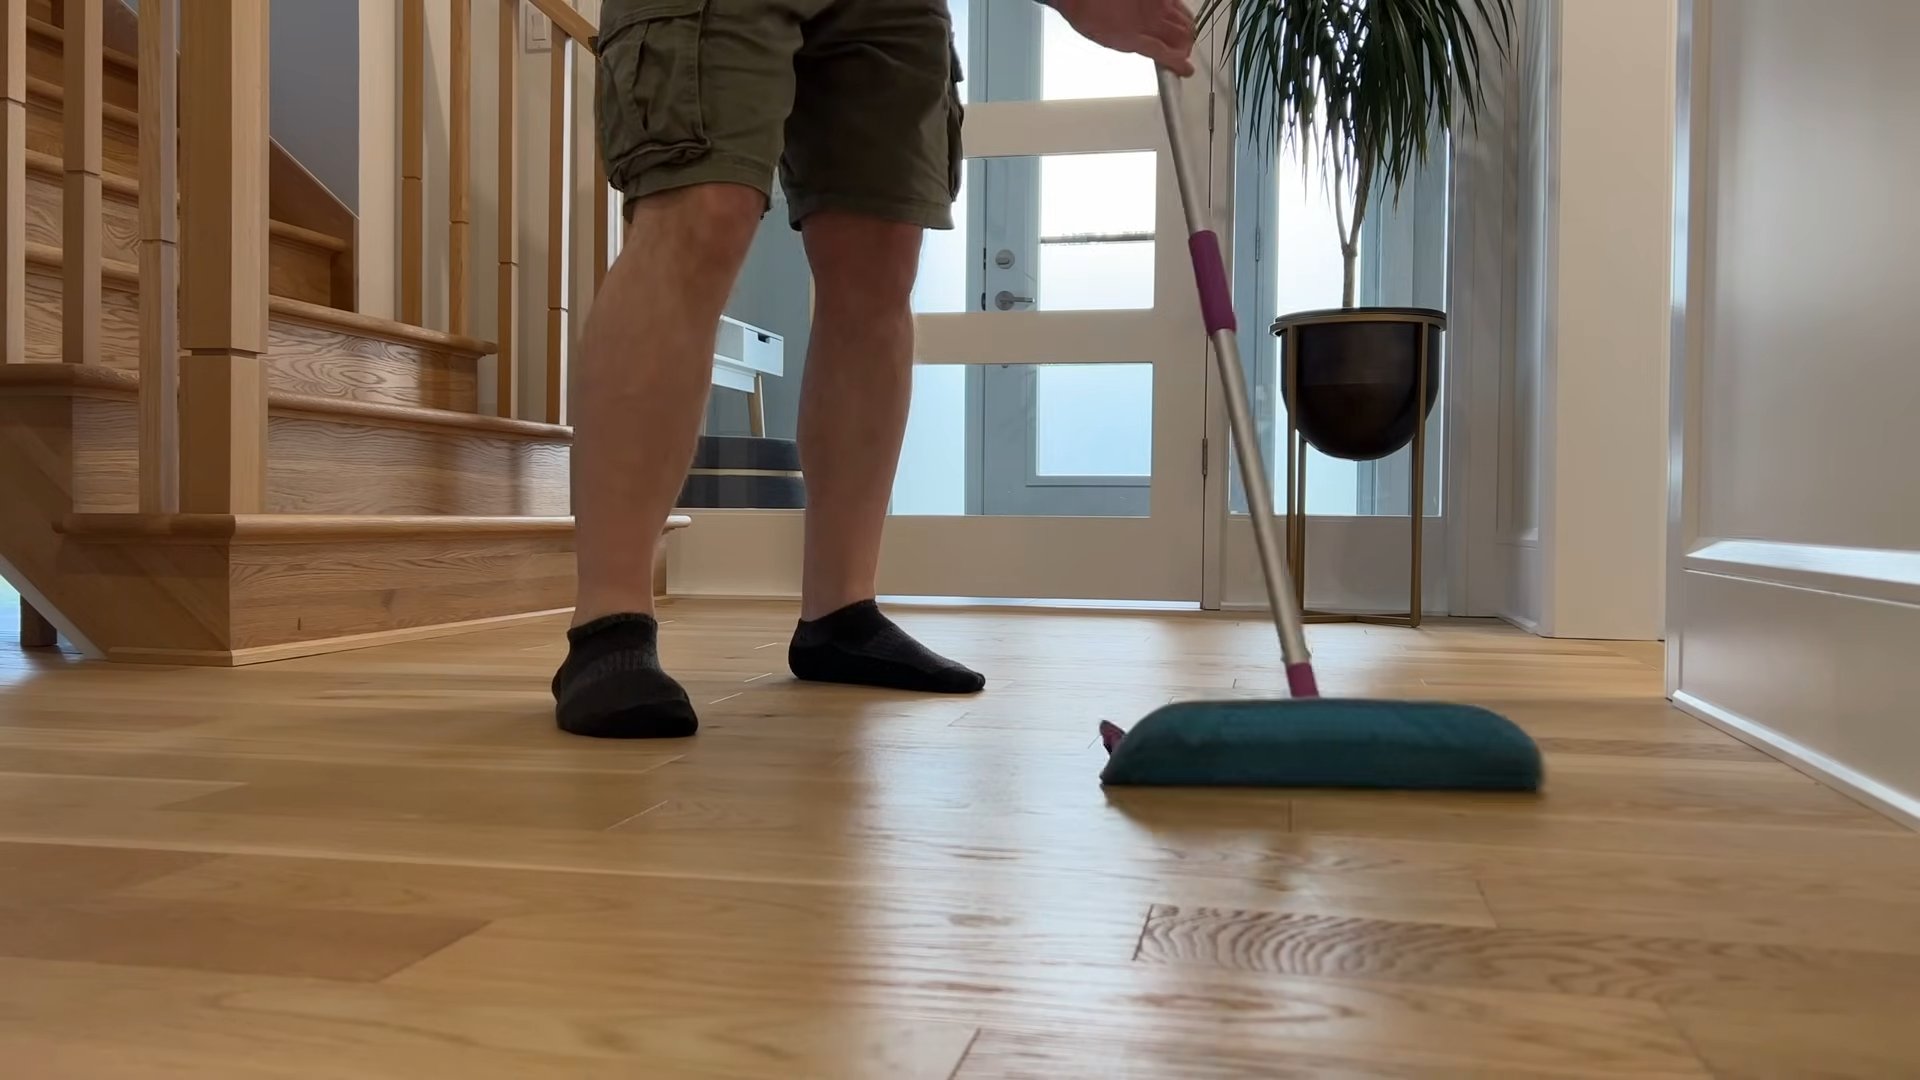
2. **Choose the Right Mop:** A microfiber mop is ideal for most floor types. It’s absorbent, gentle, and effective at picking up dirt. Avoid using string mops, as they can leave streaks.
3. **Damp Mop, Don’t Soak:** Wring out your mop thoroughly before mopping. You want it to be damp, not soaking wet. Excess water can damage floors, especially hardwood and laminate.
4. **Mop in Sections:** Work in small sections, overlapping each stroke slightly. This ensures that you cover the entire floor surface.
5. **Rinse the Mop Frequently:** Rinse your mop frequently in clean water to remove dirt and grime. This will prevent you from spreading the dirt around.
6. **Dry the Floor (If Necessary):** If your floors are prone to water spots, you can dry them with a clean, dry microfiber cloth after mopping. This is especially important for hardwood and laminate floors.
7. **Ventilate the Room:** Open windows or turn on a fan to help the floor dry faster and prevent moisture buildup.
Dealing with Stubborn Stains
Sometimes, regular mopping isn’t enough to tackle stubborn stains. Here are some tips for dealing with common floor stains:
* **Grease Stains:** Sprinkle baking soda on the stain and let it sit for 15-20 minutes. Then, scrub gently with a damp cloth or sponge.
* **Coffee or Tea Stains:** Mix equal parts white vinegar and water and apply to the stain. Let it sit for a few minutes, then blot with a clean cloth.
* **Pet Stains:** Clean up pet accidents immediately to prevent staining and odor. Use an enzymatic cleaner specifically designed for pet stains.
* **Scuff Marks:** Try rubbing the scuff mark with a clean tennis ball or a pencil eraser.
Maintaining Your Floors: Prevention is Key
The best way to keep your floors clean is to prevent dirt and grime from accumulating in the first place. Here are some tips for floor maintenance:
* **Use Doormats:** Place doormats at all entrances to trap dirt and debris before they enter your home.
* **Take Off Your Shoes:** Encourage family members and guests to remove their shoes at the door.
* **Sweep or Vacuum Regularly:** Sweep or vacuum your floors at least once a week, or more often if you have pets or heavy foot traffic.
* **Clean Up Spills Immediately:** Wipe up spills as soon as they happen to prevent staining and damage.
* **Use Furniture Pads:** Place furniture pads under the legs of your furniture to protect your floors from scratches and dents.
A Note on Safety
While this DIY floor cleaner is generally safe, it’s important to take a few precautions:
* **Keep Out of Reach of Children and Pets:** Store the cleaner in a safe place where children and pets cannot access it.
* **Avoid Contact with Eyes:** If the cleaner gets in your eyes, rinse immediately with plenty of water.
* **Test in an Inconspicuous Area First:** Always test the cleaner in an inconspicuous area before using it on the entire floor.
* **Don’t Mix with Other Cleaners:** Never mix this cleaner with other cleaning products, as this could create harmful fumes.
So there you have it! My go-to DIY floor cleaner recipe and all the tips and tricks I’ve learned along the way. I hope you find it as effective and enjoyable to use as I do. Happy cleaning!
Conclusion
So, there you have it! Ditching the store-bought chemicals and embracing this DIY floor cleaner recipe is more than just a trend; it’s a conscious choice for a healthier home, a happier planet, and a lighter wallet. We’ve walked you through a simple, effective method to create a cleaning solution that’s tough on grime but gentle on your family and the environment.
But why is this DIY approach a must-try? Beyond the cost savings and eco-friendliness, you gain complete control over the ingredients. No more deciphering cryptic labels filled with unpronounceable chemicals. You know exactly what’s going onto your floors, making it a particularly attractive option for households with children, pets, or individuals with sensitivities.
Furthermore, the versatility of this recipe is truly remarkable. Feel free to experiment with different essential oils to create your signature scent. A few drops of lavender can promote relaxation, while lemon or orange oil can invigorate your senses. For tougher stains, consider adding a tablespoon of washing soda to the mix for an extra cleaning boost. Just remember to test it in an inconspicuous area first to ensure it doesn’t damage your flooring.
Another variation you might consider is adjusting the vinegar-to-water ratio depending on the type of flooring you have. For sealed hardwood floors, a slightly diluted solution is generally recommended to prevent any potential damage to the finish. For tile or laminate, you can typically use a stronger concentration. Always err on the side of caution and test a small area first.
This isn’t just about cleaning; it’s about creating a healthier and more sustainable living space. It’s about taking control of the products you use in your home and making informed choices that benefit both your family and the environment. The satisfaction of knowing you’re cleaning your floors with a solution you made yourself, using natural and readily available ingredients, is truly rewarding.
We wholeheartedly encourage you to give this DIY floor cleaner recipe a try. It’s simple, effective, and customizable to your specific needs and preferences. Once you experience the difference 鈥?the sparkling clean floors, the fresh, natural scent, and the peace of mind knowing you’re using a safe and eco-friendly product 鈥?you’ll never go back to store-bought cleaners again.
Don’t just take our word for it! We’re eager to hear about your experiences. Share your results, variations, and tips in the comments below. Let’s build a community of DIY enthusiasts who are passionate about creating healthier and more sustainable homes. What essential oil blends did you find most effective? Did you discover any unique tricks for tackling stubborn stains? Your insights could be invaluable to others who are just starting their DIY cleaning journey. Let’s learn and grow together!
Now, go forth and conquer those dirty floors with your newfound DIY cleaning power! You’ll be amazed at how easy and rewarding it is to create a clean and healthy home using simple, natural ingredients.
Frequently Asked Questions (FAQ)
Is this DIY floor cleaner safe for all types of flooring?
This is a crucial question! While this DIY floor cleaner recipe is generally safe and effective for many types of flooring, including tile, laminate, and sealed hardwood, it’s essential to exercise caution and test it in an inconspicuous area first. The acidity of vinegar can potentially damage certain types of flooring, such as unsealed hardwood, marble, or stone. For these more delicate surfaces, consider using a milder cleaning solution, such as a mixture of warm water and a few drops of dish soap. Always consult the manufacturer’s recommendations for your specific type of flooring before using any cleaning product, DIY or otherwise. If you are unsure, it is always best to err on the side of caution and test in a hidden area.
What essential oils are best to use in this DIY floor cleaner?
The beauty of this DIY floor cleaner recipe lies in its customizability, and that includes the essential oils you choose to add. The best essential oils are those that not only smell great but also possess antibacterial, antiviral, or antifungal properties. Some popular choices include:
* **Lemon:** A natural degreaser with a bright, uplifting scent.
* **Tea Tree:** Known for its powerful antibacterial and antifungal properties.
* **Lavender:** Provides a calming and relaxing aroma while also possessing antiseptic qualities.
* **Eucalyptus:** Offers a refreshing scent and can help to disinfect surfaces.
* **Peppermint:** A stimulating scent that can also help to repel insects.
* **Orange:** Similar to lemon, it’s a great degreaser and has a cheerful aroma.
Feel free to experiment with different combinations to find your favorite scent blend. A good starting point is to use 10-20 drops of essential oil per gallon of cleaning solution. Remember to use pure, high-quality essential oils for the best results.
How often should I use this DIY floor cleaner?
The frequency with which you use this DIY floor cleaner recipe will depend on your lifestyle and the amount of foot traffic your floors receive. For most households, cleaning floors once or twice a week is sufficient. However, if you have pets or children, or if your floors are prone to getting dirty quickly, you may need to clean them more frequently. Pay attention to the appearance of your floors and clean them as needed. Regular cleaning will help to prevent the buildup of dirt and grime and keep your floors looking their best.
Can I use this DIY floor cleaner on grout?
Yes, this DIY floor cleaner recipe can be used on grout, but you may need to take some extra steps to effectively clean it. For stubborn grout stains, consider making a paste of baking soda and water and applying it to the grout lines. Let it sit for a few minutes, then scrub with a stiff brush. Rinse thoroughly with water. You can then follow up with your DIY floor cleaner to clean the rest of the floor. For heavily soiled grout, you may need to repeat this process several times.
How should I store the DIY floor cleaner?
Store your DIY floor cleaner recipe in a clean, airtight container, such as a spray bottle or a bucket with a lid. Be sure to label the container clearly so that you don’t accidentally mistake it for something else. Keep the cleaner out of reach of children and pets. It’s best to store the cleaner in a cool, dark place to prevent the essential oils from degrading. The cleaner should last for several weeks, but it’s always a good idea to make a fresh batch every month or so to ensure its effectiveness.
What if I don’t have vinegar? Can I substitute it with something else?
While vinegar is a key ingredient in this DIY floor cleaner recipe due to its cleaning and disinfecting properties, you can substitute it in a pinch. A good alternative is lemon juice, which also contains citric acid and has similar cleaning capabilities. Use the same amount of lemon juice as you would vinegar. Another option is rubbing alcohol (isopropyl alcohol), which is a disinfectant and can help to remove grease and grime. However, rubbing alcohol can be harsh on some surfaces, so be sure to test it in an inconspicuous area first. If you’re using rubbing alcohol, dilute it with water before using it to clean your floors.
My DIY floor cleaner leaves streaks. What am I doing wrong?
Streaking can be frustrating, but it’s usually an easy fix. Here are a few reasons why your DIY floor cleaner recipe might be leaving streaks:
* **Too much cleaner:** Using too much cleaner can leave a residue that causes streaks. Try using less cleaner and see if that helps.
* **Dirty mop or cloth:** Make sure your mop or cloth is clean before you start cleaning. A dirty mop will simply spread dirt around, leaving streaks.
* **Hard water:** Hard water can leave mineral deposits on your floors, which can cause streaks. Try using distilled water instead of tap water to make your cleaner.
* **Not rinsing properly:** If you’re using a mop and bucket, be sure to rinse your mop frequently to remove dirt and grime. You may also need to rinse your floors with clean water after cleaning them with the DIY cleaner.
By addressing these potential issues, you should be able to eliminate streaks and achieve sparkling clean floors.

Leave a Comment