
DIY Vertical Garden Watering: Tired of lugging around a watering can and struggling to reach those plants perched high in your beautiful vertical garden? I totally get it! I’ve been there, done that, and ended up with more water on myself than on my leafy friends. That’s why I’m so excited to share some game-changing DIY watering tricks that will make your vertical gardening experience a breeze.
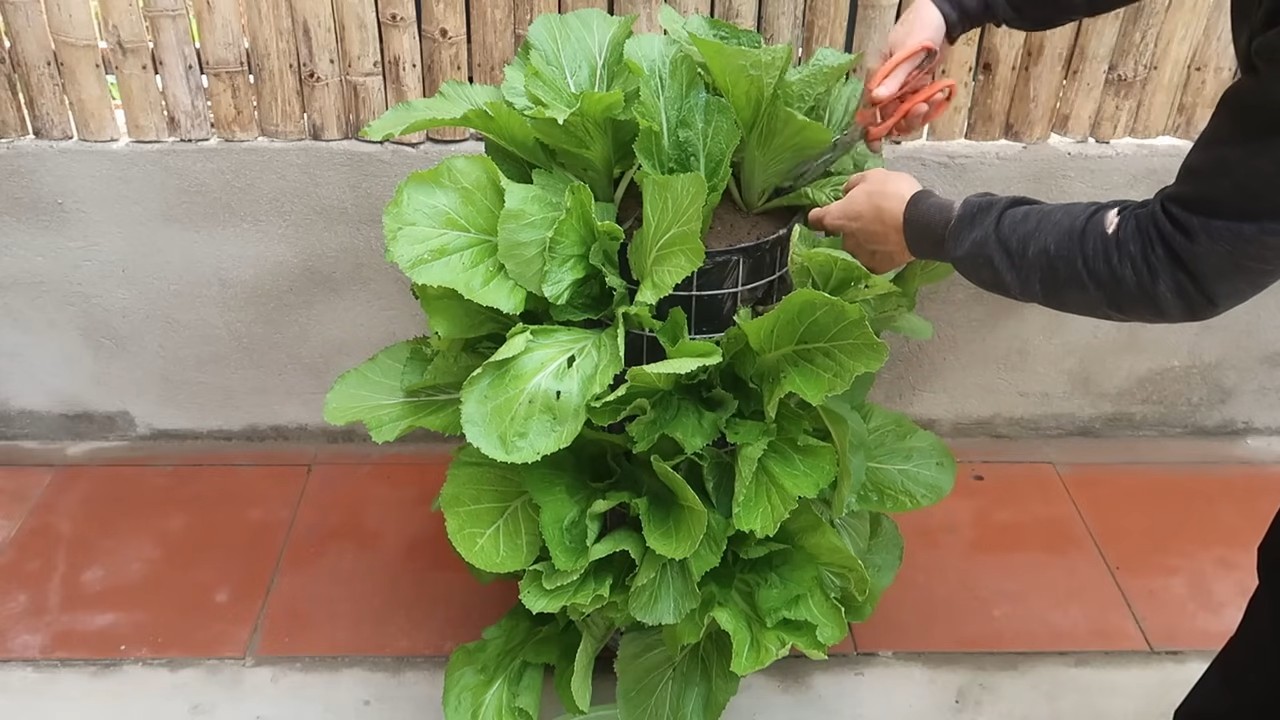
Vertical gardens, also known as living walls, have a surprisingly rich history. While modern iterations are relatively new, the concept dates back to ancient civilizations, like the Hanging Gardens of Babylon – one of the Seven Wonders of the Ancient World! Today, they’re a fantastic way to bring greenery into small spaces, beautify urban environments, and even grow your own food. But let’s face it, watering them can be a real pain.
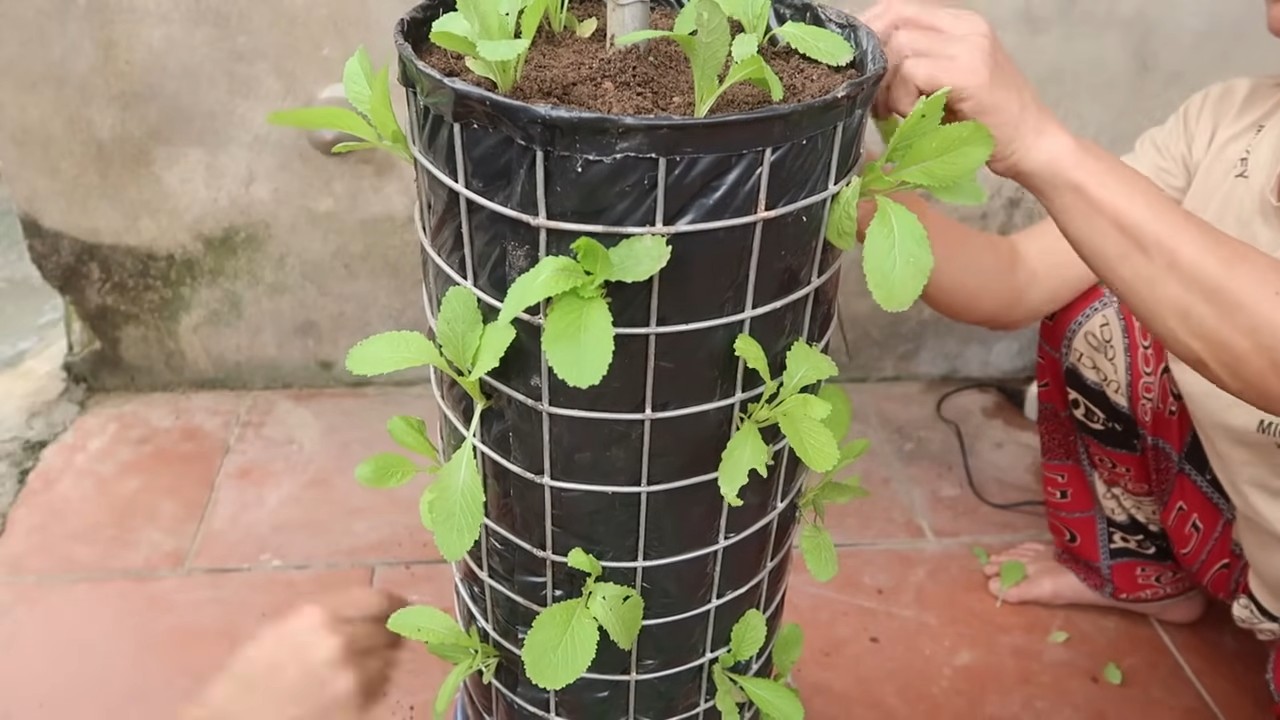
That’s where these DIY hacks come in. Imagine effortlessly keeping your vertical garden thriving without the backaches and the messy spills. We’ll explore simple, cost-effective solutions that you can easily implement using readily available materials. From repurposed plastic bottles to clever irrigation systems, these DIY vertical garden watering techniques will save you time, water, and a whole lot of frustration. Get ready to transform your vertical garden from a chore into a joy!
DIY Vertikale Gartenbewässerung: Dein automatisches Bewässerungssystem für die grüne Wand
Hey Pflanzenfreunde! Habt ihr auch so eine Leidenschaft für vertikale Gärten, aber der Gedanke ans tägliche Gießen lässt euch verzweifeln? Keine Sorge, ich habe die Lösung! In diesem Artikel zeige ich euch, wie ihr ein automatisches Bewässerungssystem für euren vertikalen Garten selber bauen könnt. Das ist nicht nur super praktisch, sondern auch nachhaltig und spart euch jede Menge Zeit. Lasst uns loslegen!
Was du für dein DIY Bewässerungssystem brauchst
Bevor wir starten, hier eine Liste aller Materialien und Werkzeuge, die du benötigen wirst. Keine Sorge, vieles davon hast du wahrscheinlich schon zu Hause!
* Bewässerungspumpe: Eine kleine Tauchpumpe, die für Aquarien oder Zimmerbrunnen geeignet ist. Achte auf die Förderhöhe, sie sollte ausreichend sein, um das Wasser bis zum höchsten Punkt deines vertikalen Gartens zu pumpen.
* Zeitschaltuhr: Eine digitale Zeitschaltuhr, mit der du die Bewässerungszeiten programmieren kannst.
* Bewässerungsschlauch: Ein flexibler Schlauch (z.B. 4mm oder 6mm Innendurchmesser), der für Bewässerungssysteme geeignet ist. Die Länge hängt von der Größe deines vertikalen Gartens ab.
* Tropfer oder Micro-Sprinkler: Je nachdem, wie du deine Pflanzen bewässern möchtest, benötigst du Tropfer oder Micro-Sprinkler. Tropfer sind ideal für Pflanzen, die eine gezielte Bewässerung benötigen, während Micro-Sprinkler eine größere Fläche abdecken.
* Verbinder und T-Stücke: Um die Schläuche miteinander zu verbinden und zu verzweigen, benötigst du Verbinder und T-Stücke, die zum Durchmesser deiner Schläuche passen.
* Wasserbehälter: Ein Eimer, eine Wanne oder ein anderer Behälter, der groß genug ist, um ausreichend Wasser für mehrere Bewässerungszyklen zu speichern.
* Filter: Ein kleiner Filter, der zwischen Pumpe und Schlauchsystem installiert wird, um Verstopfungen durch Schmutzpartikel zu vermeiden.
* Kabelbinder oder Schlauchschellen: Um die Schläuche an den Pflanzen oder am Rahmen des vertikalen Gartens zu befestigen.
* Bohrmaschine (optional): Wenn du Löcher für die Schläuche in den Pflanzgefäßen bohren musst.
* Schere oder Messer: Zum Zuschneiden der Schläuche.
* Maßband: Zum Abmessen der Schlauchlängen.
* Gießkanne: Zum Befüllen des Wasserbehälters.
* Optional: Dünger-Injektor: Wenn du deinen Pflanzen regelmäßig Flüssigdünger zuführen möchtest.
Schritt-für-Schritt Anleitung: So baust du dein automatisches Bewässerungssystem
Jetzt geht’s ans Eingemachte! Folge diesen Schritten, um dein eigenes automatisches Bewässerungssystem für deinen vertikalen Garten zu bauen.
1. Planung ist alles: Die Konzeption deines Bewässerungssystems
Bevor du loslegst, nimm dir etwas Zeit, um dein Bewässerungssystem zu planen.
1. Messe deinen vertikalen Garten aus: Bestimme die Höhe und Breite deines vertikalen Gartens, um die benötigte Schlauchlänge zu berechnen.
2. Bestimme die Anzahl der Pflanzen: Zähle die Anzahl der Pflanzen, die du bewässern musst, um die Anzahl der Tropfer oder Micro-Sprinkler zu bestimmen.
3. Lege die Anordnung der Schläuche fest: Überlege dir, wie du die Schläuche verlegen möchtest, um alle Pflanzen optimal zu erreichen. Zeichne am besten eine Skizze, um den Überblick zu behalten.
4. Wähle die Bewässerungsmethode: Entscheide dich, ob du Tropfer oder Micro-Sprinkler verwenden möchtest, je nach den Bedürfnissen deiner Pflanzen.
2. Die Installation der Pumpe und des Wasserbehälters
1. Platziere den Wasserbehälter: Stelle den Wasserbehälter an einem geeigneten Ort in der Nähe deines vertikalen Gartens auf. Achte darauf, dass er stabil steht und vor direkter Sonneneinstrahlung geschützt ist, um Algenbildung zu vermeiden.
2. Installiere die Pumpe: Tauche die Bewässerungspumpe in den Wasserbehälter ein. Achte darauf, dass sie vollständig mit Wasser bedeckt ist, bevor du sie einschaltest.
3. Befestige den Filter: Verbinde den Filter mit dem Auslass der Pumpe. Dies verhindert, dass Schmutzpartikel in das Schlauchsystem gelangen und es verstopfen.
3. Das Verlegen der Schläuche und Anbringen der Tropfer/Sprinkler
1. Schneide die Schläuche zu: Schneide den Bewässerungsschlauch in die benötigten Längen zu. Verwende eine scharfe Schere oder ein Messer, um saubere Schnitte zu erhalten.
2. Verbinde die Schläuche: Verbinde die Schläuche mit den Verbindern und T-Stücken, um das Schlauchsystem zu erstellen. Achte darauf, dass alle Verbindungen dicht sind, um Lecks zu vermeiden.
3. Bringe die Tropfer/Sprinkler an: Befestige die Tropfer oder Micro-Sprinkler an den Enden der Schläuche, die zu den einzelnen Pflanzen führen. Stelle sicher, dass sie richtig positioniert sind, um die Pflanzen optimal zu bewässern.
4. Befestige die Schläuche am vertikalen Garten: Verwende Kabelbinder oder Schlauchschellen, um die Schläuche am Rahmen des vertikalen Gartens oder an den Pflanzgefäßen zu befestigen. Achte darauf, dass die Schläuche nicht geknickt oder gequetscht werden.
5. Optional: Löcher bohren: Wenn nötig, bohre kleine Löcher in die Pflanzgefäße, um die Schläuche hindurchzuführen.
4. Die Programmierung der Zeitschaltuhr
1. Schließe die Pumpe an die Zeitschaltuhr an: Stecke den Stecker der Bewässerungspumpe in die Zeitschaltuhr.
2. Programmiere die Bewässerungszeiten: Stelle die Zeitschaltuhr so ein, dass sie die Pumpe zu den gewünschten Zeiten einschaltet. Die Bewässerungsdauer hängt von den Bedürfnissen deiner Pflanzen ab. Beginne mit kurzen Bewässerungszyklen (z.B. 1-2 Minuten) und erhöhe die Dauer bei Bedarf.
3. Teste das System: Schalte die Zeitschaltuhr ein und beobachte, ob alle Pflanzen ausreichend bewässert werden. Passe die Bewässerungszeiten und die Position der Tropfer/Sprinkler bei Bedarf an.
5. Feintuning und Wartung
1. Überprüfe regelmäßig die Schläuche und Verbindungen: Kontrolliere regelmäßig, ob die Schläuche und Verbindungen dicht sind und keine Lecks aufweisen.
2. Reinige den Filter: Reinige den Filter regelmäßig, um Verstopfungen zu vermeiden.
3. Fülle den Wasserbehälter auf: Fülle den Wasserbehälter regelmäßig auf, um sicherzustellen, dass immer ausreichend Wasser vorhanden ist.
4. Passe die Bewässerungszeiten an: Passe die Bewässerungszeiten an die Jahreszeit und die Bedürfnisse deiner Pflanzen an. Im Sommer benötigen die Pflanzen in der Regel mehr Wasser als im Winter.
5. Optional: Dünger hinzufügen: Wenn du einen Dünger-Injektor verwendest, fülle ihn regelmäßig mit Flüssigdünger auf.
Zusätzliche Tipps und Tricks für dein Bewässerungssystem
* Verwende Regenwasser: Sammle Regenwasser in einem Behälter und verwende es für dein Bewässerungssystem. Das ist nicht nur umweltfreundlich, sondern auch gut für deine Pflanzen, da Regenwasser weicher ist als Leitungswasser.
* Achte auf den pH-Wert des Wassers: Der pH-Wert des Wassers sollte idealerweise zwischen 6 und 7 liegen. Du kannst den pH-Wert mit einem Teststreifen überprüfen und bei Bedarf anpassen.
* Verwende eine Zeitschaltuhr mit mehreren Programmen: Eine Zeitschaltuhr mit mehreren Programmen ermöglicht es dir, unterschiedliche Bewässerungszeiten für verschiedene Pflanzen oder Jahreszeiten einzustellen.
* Experimentiere mit verschiedenen Tropfern/Sprinklern: Probiere verschiedene Tropfer und Micro-Sprinkler
Conclusion
So, there you have it! Creating your own DIY vertical garden watering system isn’t just a fun project; it’s a game-changer for anyone looking to cultivate a thriving green wall without the constant hassle of manual watering. We’ve walked you through a simple, effective method that can be adapted to suit gardens of all shapes and sizes.
Why is this DIY trick a must-try? Because it offers a trifecta of benefits: convenience, cost-effectiveness, and sustainability. Imagine reclaiming your weekends from the chore of watering, knowing that your plants are receiving consistent hydration, even when you’re away. Think about the money you’ll save on expensive, pre-made watering systems, and the satisfaction of knowing you built something yourself. And consider the environmental impact – reducing water waste by delivering moisture directly to the roots, minimizing runoff, and promoting healthier plant growth.
But the beauty of this DIY approach lies in its adaptability. Feel free to experiment with different materials. Instead of plastic bottles, you could repurpose old glass jars for a more rustic aesthetic. For larger vertical gardens, consider connecting multiple watering lines to a single reservoir for increased capacity. You can also integrate a timer to automate the watering process further, ensuring your plants receive the perfect amount of water at the optimal times.
Another variation to consider is incorporating a fertilizer injector into your watering system. This allows you to deliver diluted liquid fertilizer directly to the roots, providing your plants with the nutrients they need to flourish. Just be sure to use a fertilizer specifically formulated for drip irrigation systems to prevent clogging.
Don’t be afraid to get creative with the design of your watering system. You can paint the bottles or containers to match your garden’s aesthetic, or even add decorative elements like pebbles or shells. The possibilities are endless!
Ultimately, this DIY vertical garden watering system is about empowering you to take control of your gardening experience. It’s about creating a beautiful, thriving green space that requires minimal effort and maximizes enjoyment.
We wholeheartedly encourage you to give this DIY project a try. It’s easier than you might think, and the rewards are well worth the effort. Once you’ve built your own watering system, we’d love to hear about your experience! Share your photos, tips, and variations in the comments below. Let’s build a community of DIY gardeners who are passionate about creating sustainable and beautiful green spaces. Your insights could inspire others to embark on their own vertical gardening adventures. Remember, the best gardens are those that are nurtured with love, creativity, and a little bit of DIY ingenuity. So, grab your tools, gather your materials, and get ready to transform your vertical garden with this simple yet effective watering solution. Happy gardening!
Frequently Asked Questions (FAQ)
What type of bottles are best to use for the DIY watering system?
The best bottles to use are sturdy plastic bottles, such as those from water, soda, or juice. Avoid using thin, flimsy bottles as they may collapse under the weight of the water or be easily damaged by the sun. Clear or translucent bottles are ideal because you can easily monitor the water level. Make sure to thoroughly clean the bottles before using them to remove any residue that could harm your plants. Consider using bottles of similar size for a more uniform and balanced watering system.
How often should I refill the water bottles?
The frequency of refilling depends on several factors, including the size of your plants, the type of plants, the climate, and the size of the bottles. As a general rule, check the water levels every few days and refill when the bottles are about half empty. During hot, dry weather, you may need to refill more frequently. Observe your plants closely for signs of overwatering or underwatering and adjust the watering schedule accordingly. A good practice is to insert your finger into the soil near the base of the plants to check the moisture level. If the soil feels dry, it’s time to refill the bottles.
Can I use this system for all types of plants?
While this DIY watering system is versatile, it’s not suitable for all types of plants. Plants that prefer dry soil, such as succulents and cacti, may not thrive with this system, as it provides consistent moisture. Plants that require a lot of water, such as ferns and tropical plants, may benefit greatly. Consider the specific watering needs of your plants before implementing this system. You may need to adjust the size of the holes in the bottles or the frequency of refilling to accommodate different plant types. Researching the specific watering requirements of each plant in your vertical garden is crucial for success.
How do I prevent the system from clogging?
Clogging can be a common issue with DIY watering systems, especially if you’re using tap water that contains minerals or debris. To prevent clogging, use filtered water or rainwater whenever possible. You can also add a small amount of vinegar to the water to help dissolve mineral buildup. Regularly inspect the holes in the bottles and clean them with a small brush or needle if necessary. Avoid using fertilizers that are not specifically designed for drip irrigation systems, as they can often cause clogging. Flushing the system with clean water periodically can also help prevent buildup.
What if the water is dripping too fast or too slow?
The rate of water dripping can be adjusted by changing the size or number of holes in the bottles. If the water is dripping too fast, try covering some of the holes with tape or adding a layer of fabric over the holes to slow down the flow. If the water is dripping too slow, try making the holes slightly larger or adding more holes. Experiment with different hole sizes and configurations until you achieve the desired drip rate. The goal is to provide a consistent and even flow of water to the roots of your plants without overwatering or underwatering.
Can I automate this DIY vertical garden watering system?
Yes, you can automate this system to make it even more convenient. The easiest way to automate it is by connecting the water reservoir to a timer-controlled pump. The pump will then deliver water to the bottles at predetermined intervals. You can purchase a small, inexpensive submersible pump and a digital timer from most hardware stores. Be sure to choose a pump that is appropriate for the size of your vertical garden and the length of the watering lines. Experiment with different timer settings to find the optimal watering schedule for your plants.
How do I winterize the system?
If you live in an area with freezing temperatures, it’s essential to winterize your DIY vertical garden watering system to prevent damage. Before the first frost, drain all the water from the bottles and the reservoir. Disconnect the watering lines and store them in a dry place. If you’re using plastic bottles, you can leave them in place, but be sure to remove any water that may have accumulated inside. If you’re using more delicate materials, such as glass jars, it’s best to bring them indoors for the winter. Protecting your watering system from freezing temperatures will ensure that it’s ready to use again in the spring.
Is this DIY vertical garden watering system environmentally friendly?
Absolutely! This DIY project is a great way to reduce waste and promote sustainability. By repurposing plastic bottles or other containers, you’re giving them a new life and preventing them from ending up in landfills. The system also helps conserve water by delivering moisture directly to the roots of the plants, minimizing runoff and evaporation. Using rainwater or filtered water further enhances the environmental benefits. This DIY approach allows you to create a beautiful and thriving vertical garden while minimizing your environmental impact.
Leave a Comment