
Double pepper yields – imagine harvesting twice the bounty from your pepper plants this season! Are you tired of your pepper plants producing only a handful of peppers? Do you dream of a garden overflowing with colorful, flavorful peppers for all your culinary creations? Well, you’re in the right place! For centuries, gardeners have sought ways to maximize their harvests, and the quest for bigger, better yields is as old as agriculture itself. From ancient fertilization techniques to modern grafting methods, the pursuit of abundance is a timeless tradition.
In this article, I’m going to share some simple yet incredibly effective DIY tricks and hacks that will help you achieve double pepper yields, or even more! These aren’t complicated, time-consuming projects; they’re practical tips that anyone, regardless of their gardening experience, can implement. We’ll explore everything from optimizing soil conditions and proper pruning techniques to clever watering strategies and natural pest control methods. Why settle for a meager pepper harvest when you can easily transform your garden into a pepper paradise? Let’s dive in and unlock the secrets to a pepper-packed season!
Doppelte Paprika-Ernte: Mein DIY-Geheimnis für eine reiche Ernte
Hallo liebe Gartenfreunde! Habt ihr euch jemals gefragt, wie ihr mehr Paprika von euren Pflanzen ernten könnt? Ich habe da ein paar Tricks auf Lager, die ich gerne mit euch teilen möchte. Es geht nicht nur um Glück, sondern um ein paar einfache DIY-Maßnahmen, die wirklich einen Unterschied machen können. Lasst uns gemeinsam in die Welt der Paprika-Optimierung eintauchen!
Die Grundlagen: Was Paprika wirklich brauchen
Bevor wir mit den eigentlichen Hacks beginnen, ist es wichtig, die Grundlagen zu verstehen. Paprika sind kleine Diven, wenn es um ihre Bedürfnisse geht. Sie brauchen:
* Sonne: Mindestens 6-8 Stunden direkte Sonneneinstrahlung pro Tag.
* Guten Boden: Gut durchlässigen, nährstoffreichen Boden mit einem pH-Wert zwischen 6,0 und 6,8.
* Regelmäßige Bewässerung: Gleichmäßig feuchten Boden, aber keine Staunässe.
* Ausreichend Nährstoffe: Regelmäßige Düngung mit einem ausgewogenen Dünger.
* Schutz vor Schädlingen und Krankheiten: Regelmäßige Kontrolle und gegebenenfalls Behandlung.
Wenn diese Grundlagen stimmen, habt ihr schon mal eine gute Basis für eine reiche Ernte geschaffen.
DIY Hack 1: Der “Paprika-Pusher” – Gezielte Düngung für mehr Blüten
Paprika sind Starkzehrer, das heißt, sie brauchen viele Nährstoffe, um gut zu wachsen und viele Früchte zu produzieren. Hier kommt mein “Paprika-Pusher” ins Spiel – eine spezielle Düngermischung, die ich selbst herstelle.
Was ihr braucht:
* Hornspäne (langsam freisetzender Stickstoffdünger)
* Kompost (für organische Substanz und Nährstoffe)
* Holzasche (Kalium für die Fruchtbildung)
* Eierschalen (Kalzium gegen Blütenendfäule)
* Gießkanne
* Gartenschaufel
Schritt-für-Schritt-Anleitung:
1. Die Mischung vorbereiten: Mischt in einem Eimer 2 Teile Hornspäne, 3 Teile Kompost, 1 Teil Holzasche und zerstoßene Eierschalen (von ca. 6 Eiern). Die Eierschalen vorher gut reinigen und trocknen lassen.
2. Den Boden vorbereiten: Lockert den Boden rund um eure Paprikapflanzen vorsichtig auf. Achtet darauf, die Wurzeln nicht zu beschädigen.
3. Den Dünger ausbringen: Gebt pro Pflanze etwa eine Handvoll der Mischung in den Boden rund um die Pflanze.
4. Einarbeiten und gießen: Arbeitet den Dünger leicht in den Boden ein und gießt die Pflanzen anschließend gründlich.
Warum das funktioniert:
* Hornspäne: Liefern Stickstoff, der für das Wachstum der Pflanze wichtig ist.
* Kompost: Verbessert die Bodenstruktur und liefert wichtige Nährstoffe.
* Holzasche: Enthält Kalium, das für die Fruchtbildung unerlässlich ist.
* Eierschalen: Liefern Kalzium, das Blütenendfäule vorbeugt, einer häufigen Krankheit bei Paprika.
Ich wiederhole diese Düngung alle 4-6 Wochen während der Wachstumsperiode. Ihr werdet sehen, eure Paprikapflanzen werden es euch mit einer üppigen Blütenpracht danken!
DIY Hack 2: Das “Geheimnis der Geiztriebe” – Richtiges Ausgeizen für mehr Ertrag
Ein weiterer wichtiger Punkt für eine reiche Paprika-Ernte ist das richtige Ausgeizen. Was sind Geiztriebe? Das sind die kleinen Triebe, die in den Blattachseln (zwischen Haupttrieb und Blatt) wachsen. Wenn man sie nicht entfernt, können sie der Pflanze unnötig Kraft rauben und die Fruchtbildung beeinträchtigen.
Was ihr braucht:
* Eine scharfe Gartenschere oder eure Finger (wenn die Triebe noch klein sind)
Schritt-für-Schritt-Anleitung:
1. Regelmäßige Kontrolle: Kontrolliert eure Paprikapflanzen regelmäßig auf Geiztriebe. Am besten einmal pro Woche.
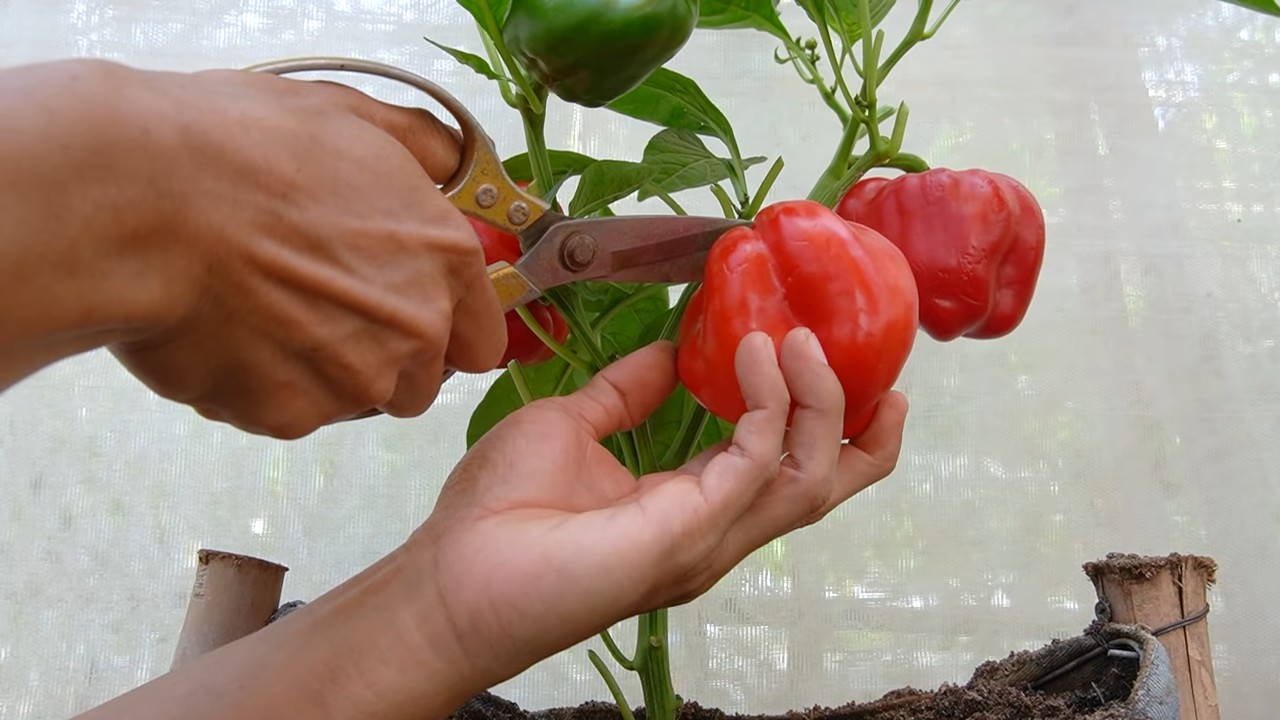
2. Geiztriebe entfernen: Brecht oder schneidet die Geiztriebe vorsichtig ab, sobald sie eine Länge von etwa 2-3 cm erreicht haben. Achtet darauf, den Haupttrieb nicht zu beschädigen.
3. Die richtige Technik: Wenn die Triebe noch klein sind, könnt ihr sie einfach mit den Fingern abbrechen. Bei größeren Trieben ist eine scharfe Gartenschere besser, um die Pflanze nicht unnötig zu verletzen.
4. Die ersten Triebe: Entfernt die ersten Blütenansätze und Geiztriebe bis zur ersten Verzweigung. Das fördert ein kräftiges Wachstum der Pflanze.
Warum das funktioniert:
Durch das Ausgeizen lenkt ihr die Energie der Pflanze in die Haupttriebe und die Fruchtbildung. Die Pflanze kann sich besser auf die Entwicklung der Paprika konzentrieren, was zu einer größeren und reicheren Ernte führt.
DIY Hack 3: “Sonnenbad für Paprika” – Optimale Sonneneinstrahlung durch Drehen
Paprika lieben die Sonne, aber nicht alle Teile der Pflanze bekommen gleich viel davon ab. Um eine gleichmäßige Reifung und eine optimale Ernte zu gewährleisten, drehe ich meine Paprikapflanzen regelmäßig.
Was ihr braucht:
* Eure Hände
* (Optional) Markierungen für die Töpfe
Schritt-für-Schritt-Anleitung:
1. Regelmäßiges Drehen: Dreht eure Paprikapflanzen alle paar Tage um etwa 90 Grad.
2. Markierungen (optional): Wenn ihr euch nicht merken könnt, welche Seite der Pflanze gerade zur Sonne stand, könnt ihr die Töpfe mit Markierungen versehen.
3. Beobachtung: Achtet darauf, wie die Pflanzen auf das Drehen reagieren. Wenn sie Anzeichen von Stress zeigen (z.B. hängende Blätter), dreht sie seltener.
Warum das funktioniert:
Durch das Drehen der Pflanzen bekommen alle Teile der Pflanze ausreichend Sonne ab. Das fördert eine gleichmäßige Reifung der Früchte und verhindert, dass einige Paprika blass und unreif bleiben. Außerdem sorgt es für eine bessere Luftzirkulation, was das Risiko von Pilzkrankheiten verringert.
DIY Hack 4: “Der Paprika-Schutzschild” – Natürlicher Schutz vor Schädlingen
Schädlinge können eine Paprika-Ernte schnell ruinieren. Anstatt zu chemischen Mitteln zu greifen, setze ich auf natürliche Methoden, um meine Pflanzen zu schützen.
Was ihr braucht:
* Neemöl
* Schmierseife
* Wasser
* Sprühflasche
Schritt-für-Schritt-Anleitung:
1. Die Mischung vorbereiten: Mischt 1 Liter Wasser mit 1 Teelöffel Neemöl und 1 Teelöffel Schmierseife. Die Schmierseife hilft dabei, das Neemöl im Wasser zu emulgieren.
2. Die Pflanzen besprühen: Besprüht eure Paprikapflanzen gründlich mit der Mischung, besonders die Blattunterseiten, wo sich Schädlinge gerne verstecken.
3. Regelmäßige Anwendung: Wiederholt die Behandlung alle 7-10 Tage, besonders nach Regen.
Warum das funktioniert:
* Neemöl: Ist ein natürliches Insektizid, das gegen viele Schädlinge wirksam ist, darunter Blattläuse, Weiße Fliege und Spinnmilben. Es wirkt, indem es die Fortpflanzung der Schädlinge stört.
* Schmierseife: Hilft dabei, das Neemöl im Wasser zu verteilen und wirkt zusätzlich gegen Blattläuse.
Zusätzliche Tipps:
* Nützlinge fördern: Lockt Nützlinge wie Marienkäfer und Florfliegen in euren Garten. Sie fressen Schädlinge und helfen, das Gleichgewicht zu halten.
* Regelmäßige Kontrolle: Kontrolliert eure Pflanzen regelmäßig auf Schädlinge. Je früher ihr sie entdeckt, desto einfacher ist es, sie zu bekämpfen.
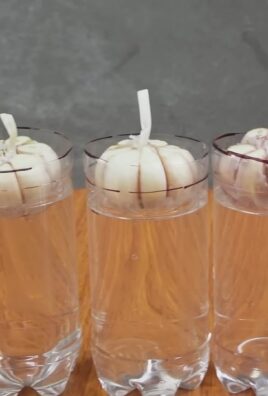
DIY Hack 5: “Die Paprika-Massage” – Bestäubungshilfe für mehr Früchte
Manchmal brauchen Paprikapflanzen ein bisschen Hilfe bei der Bestäubung,
Conclusion
So, there you have it! Mastering the art of creating a double pepper yield in your garden is not just a fun experiment; it’s a game-changer for any pepper enthusiast. Imagine the possibilities: twice the peppers for your favorite salsas, sauces, and spicy dishes. Think of the satisfaction of knowing you’ve maximized your garden’s potential with a simple, yet effective technique.
This isn’t just about quantity; it’s about quality too. By providing your pepper plants with the optimal conditions and care, you’re not only increasing the yield but also enhancing the flavor and vibrancy of your peppers. A healthier plant produces better fruit, and that’s a win-win for everyone.
But the beauty of gardening lies in its adaptability. Feel free to experiment with different pepper varieties to see which ones respond best to this method. Perhaps you’ll discover that your jalapeños thrive with extra support and targeted feeding, or maybe your bell peppers explode with color and size when given a little extra love. Don’t be afraid to tweak the process to suit your specific growing environment and pepper preferences.
Consider these variations to further personalize your approach:
* Grafting: For the truly adventurous gardener, explore grafting techniques. Grafting a high-yielding pepper variety onto a more robust rootstock can create a super-productive plant capable of bearing an astonishing amount of fruit.
* Hydroponics: If you’re short on space or live in an area with poor soil, consider growing your peppers hydroponically. This method allows for precise control over nutrients and environmental factors, leading to potentially even higher yields.
* Companion Planting: Strategically plant companion plants like basil, marigolds, or carrots near your peppers. These plants can deter pests, attract beneficial insects, and even improve the flavor of your peppers.
* Vertical Gardening: Maximize space by growing your peppers vertically using trellises, cages, or hanging baskets. This not only increases yield but also improves air circulation and reduces the risk of disease.
The key to success is observation and adaptation. Pay close attention to your plants, monitor their growth, and adjust your techniques as needed. Gardening is a journey of continuous learning, and every season brings new opportunities to refine your skills.
We wholeheartedly encourage you to try this DIY trick for achieving a double pepper yield. It’s a rewarding experience that will not only fill your pantry with delicious peppers but also deepen your connection to the natural world.
And most importantly, we want to hear about your experiences! Share your successes, your challenges, and your unique variations in the comments below. Let’s create a community of pepper-growing enthusiasts who are passionate about maximizing their harvests and sharing their knowledge with others. Your insights could be invaluable to someone else who is just starting out. So, get your hands dirty, experiment with confidence, and let’s grow some amazing peppers together!
Frequently Asked Questions (FAQ)
What type of peppers benefit most from this double yield technique?
While most pepper varieties can benefit from improved growing conditions, some tend to respond more dramatically than others. Bell peppers, jalapeños, and cayenne peppers are known for their ability to produce significantly higher yields when given extra support, proper fertilization, and consistent watering. However, don’t hesitate to experiment with other varieties to see what works best in your specific garden. Heirloom varieties, in particular, can be surprisingly productive when given the right care.
How often should I fertilize my pepper plants to achieve a double pepper yield?
The frequency of fertilization depends on the type of fertilizer you’re using and the stage of growth your pepper plants are in. Generally, you should start fertilizing seedlings with a diluted starter fertilizer once they have their first true leaves. Once transplanted into the garden, fertilize every 2-3 weeks with a balanced fertilizer or one specifically formulated for peppers. As the plants begin to flower and fruit, switch to a fertilizer higher in phosphorus and potassium to promote fruit development. Always follow the instructions on the fertilizer label and avoid over-fertilizing, as this can damage your plants.
What are the signs that my pepper plants are not getting enough nutrients?
Several signs can indicate nutrient deficiencies in pepper plants. Yellowing leaves, especially older ones, can suggest a nitrogen deficiency. Purple leaves or stems may indicate a phosphorus deficiency. Stunted growth and curled leaves can be signs of a potassium deficiency. If you notice any of these symptoms, test your soil to determine the specific nutrient deficiencies and adjust your fertilization accordingly.
How important is pruning for increasing pepper yield?
Pruning can play a significant role in increasing pepper yield, especially for certain varieties. Removing suckers (the small shoots that grow between the main stem and branches) can help direct the plant’s energy towards fruit production. Pruning also improves air circulation, which reduces the risk of disease. However, avoid excessive pruning, as this can reduce the plant’s overall leaf area and limit its ability to photosynthesize.
What are the best ways to protect my pepper plants from pests and diseases?
Preventing pests and diseases is crucial for achieving a double pepper yield. Start by choosing disease-resistant varieties and practicing good garden hygiene. Remove any diseased or infested plants promptly to prevent the spread of problems. Use organic pest control methods such as insecticidal soap, neem oil, or Bacillus thuringiensis (Bt) to control common pests like aphids, whiteflies, and caterpillars. Encourage beneficial insects like ladybugs and lacewings to prey on pests. Proper watering and fertilization can also help strengthen your plants and make them more resistant to disease.
Can I use this technique for growing peppers in containers?
Yes, this technique can be adapted for growing peppers in containers. Choose a large container (at least 5 gallons) with good drainage. Use a high-quality potting mix and provide adequate support for the plants. Container-grown peppers may require more frequent watering and fertilization than those grown in the ground. Be sure to monitor the soil moisture and nutrient levels regularly and adjust your care accordingly.
What is the ideal soil pH for growing peppers?
Peppers thrive in slightly acidic soil with a pH between 6.0 and 6.8. Test your soil pH before planting and amend it as needed to achieve the optimal range. You can use lime to raise the pH or sulfur to lower it.
How much sunlight do pepper plants need to produce a double pepper yield?
Pepper plants need at least 6-8 hours of direct sunlight per day to produce a bountiful harvest. Choose a sunny location in your garden or provide supplemental lighting if necessary.
What is the best time to harvest peppers for optimal flavor and yield?
The best time to harvest peppers depends on the variety and your personal preference. Generally, peppers are ready to harvest when they have reached their mature size and color. For bell peppers, wait until they are fully colored and firm to the touch. For hot peppers, you can harvest them when they are green or wait until they turn red for a hotter flavor. Regular harvesting encourages the plant to produce more fruit.
How can I store my harvested peppers to keep them fresh for longer?
Store harvested peppers in the refrigerator in a plastic bag or container. They will typically last for 1-2 weeks. You can also freeze peppers for longer storage. Simply wash, dry, and chop the peppers, then spread them out on a baking sheet and freeze them until solid. Transfer the frozen peppers to a freezer bag or container and store them in the freezer for up to 6 months. You can also pickle, can, or dry peppers for long-term storage.
Leave a Comment