
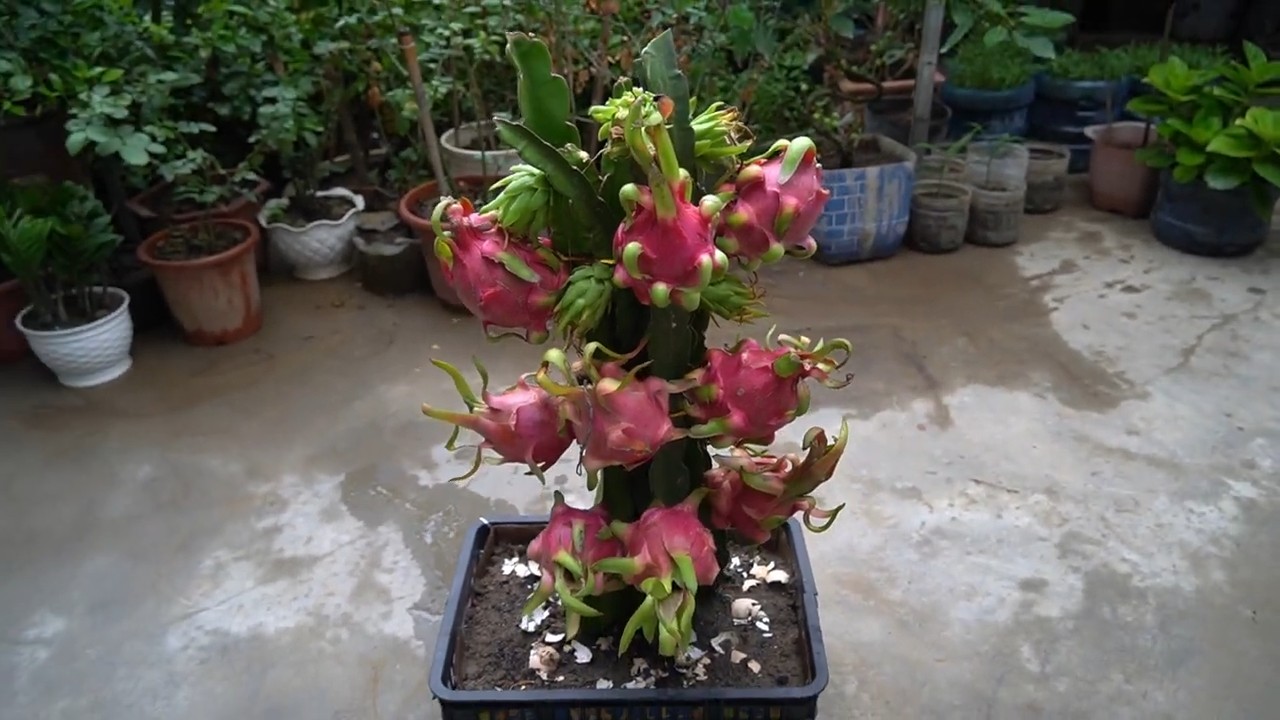
Dragon Fruit Propagation Cuttings: Ever dreamed of having your own exotic dragon fruit vine cascading with vibrant, otherworldly fruit? I know I have! Forget the grocery store prices and the mystery of where your fruit came from. This guide is your passport to cultivating your own dragon fruit paradise, and it’s easier than you think, especially with cuttings!
Dragon fruit, also known as pitaya, isn’t just a trendy superfood; it boasts a rich history rooted in Central and South America. For centuries, indigenous cultures have revered this stunning fruit, not only for its delicious taste but also for its medicinal properties. Now, you can bring a piece of that history to your own backyard.
Why propagate dragon fruit from cuttings? Well, for starters, it’s incredibly cost-effective! Buying mature plants can be expensive, but with a few cuttings from a friend or a local grower, you can quickly expand your dragon fruit collection. Plus, it’s a rewarding experience to nurture a plant from a simple cutting to a thriving, fruit-bearing vine. In this article, I’ll walk you through the entire process of dragon fruit propagation cuttings, from selecting the perfect cutting to planting and caring for your new dragon fruit plant. Get ready to unleash your inner gardener and enjoy the sweet taste of success!
Drachenfrucht vermehren: So ziehst du deine eigenen Pflanzen aus Stecklingen
Hey Pflanzenfreunde! Habt ihr auch so eine Faszination für Drachenfrüchte wie ich? Diese exotischen Schönheiten sind nicht nur lecker, sondern auch unglaublich dekorativ. Und das Beste: Ihr könnt sie ganz einfach selbst vermehren! Ich zeige euch heute, wie ihr aus Stecklingen neue Drachenfruchtpflanzen zieht. Keine Angst, es ist einfacher als ihr denkt!
Was du brauchst:
* Drachenfrucht-Stecklinge: Am besten von einer gesunden, etablierten Pflanze. Sie sollten mindestens 20-30 cm lang sein.
* Scharfes Messer oder Gartenschere: Für saubere Schnitte.
* Bewurzelungshormon (optional): Beschleunigt die Wurzelbildung.
* Töpfe: Mit guter Drainage.
* Kakteenerde oder eine gut durchlässige Erdmischung: Drachenfrüchte mögen es nicht, wenn ihre Wurzeln im Wasser stehen.
* Wasser: Zum Befeuchten der Erde.
* Sprühflasche: Um die Stecklinge feucht zu halten.
* Geduld: Die Wurzelbildung kann einige Wochen dauern.
* Handschuhe: Zum Schutz vor den Stacheln.
Die Vorbereitung der Stecklinge
Bevor wir mit dem Einpflanzen loslegen, müssen wir die Stecklinge vorbereiten. Das ist ein wichtiger Schritt, um sicherzustellen, dass sie gut anwachsen.
1. Stecklinge auswählen: Sucht euch gesunde, kräftige Triebe aus. Sie sollten keine Anzeichen von Krankheiten oder Schädlingen aufweisen. Am besten sind Triebe, die bereits etwas verholzt sind.
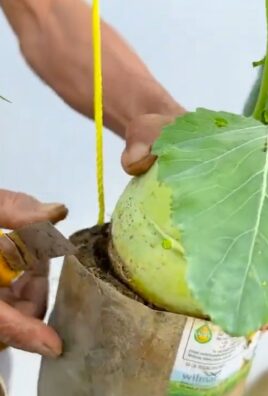
2. Stecklinge schneiden: Mit einem scharfen Messer oder einer Gartenschere schneidet ihr die Triebe ab. Achtet darauf, einen sauberen, geraden Schnitt zu machen. Die Stecklinge sollten, wie gesagt, etwa 20-30 cm lang sein.
3. Trocknen lassen: Lasst die Stecklinge nach dem Schneiden ein paar Tage (ca. 3-7 Tage) an einem trockenen, schattigen Ort trocknen. Dadurch bildet sich an der Schnittstelle eine Kallus (eine Art Narbengewebe), die das Eindringen von Krankheitserregern verhindert und die Wurzelbildung fördert. Das ist ein super wichtiger Schritt!
4. Blätter entfernen: Entfernt die unteren Blätter oder Dornen (falls vorhanden) von den Stecklingen, damit sie nicht im Boden verrotten.
Das Einpflanzen der Stecklinge
Jetzt kommt der spannende Teil: das Einpflanzen!
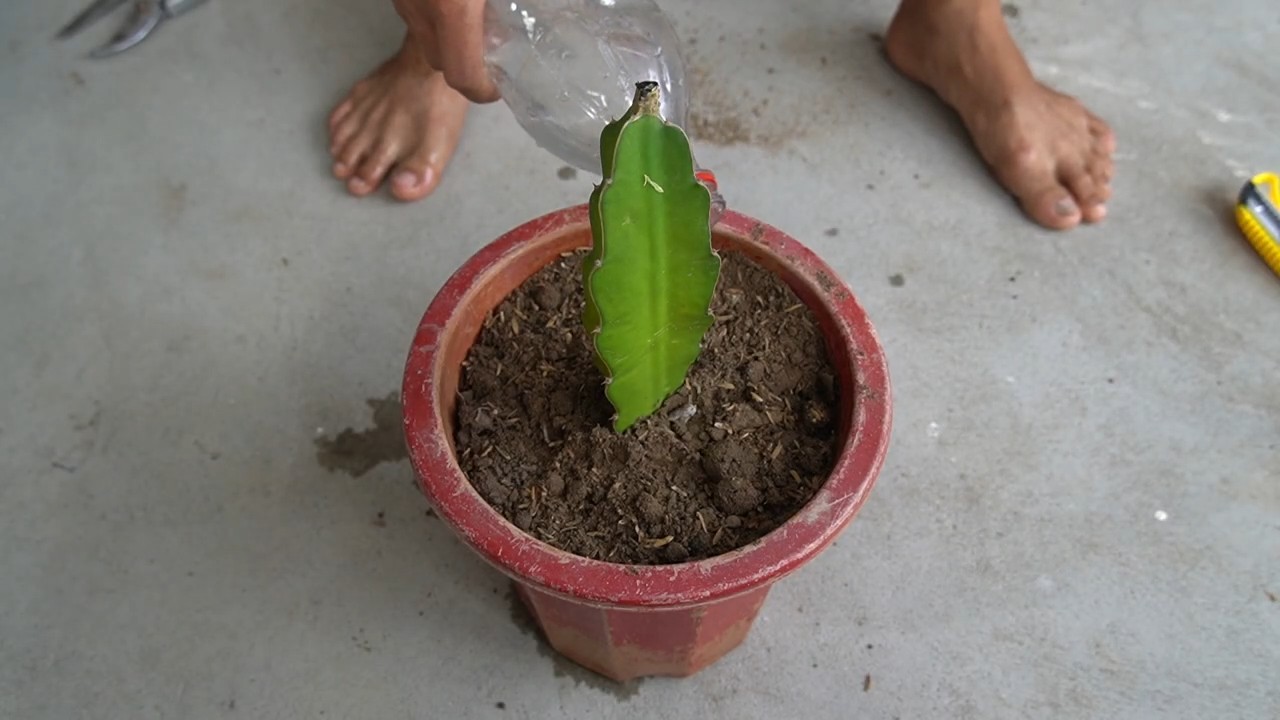
1. Töpfe vorbereiten: Füllt die Töpfe mit Kakteenerde oder einer gut durchlässigen Erdmischung. Achtet darauf, dass die Töpfe eine gute Drainage haben, damit das Wasser gut ablaufen kann.
2. Bewurzelungshormon (optional): Wenn ihr möchtet, könnt ihr die Schnittstelle der Stecklinge in Bewurzelungshormon tauchen. Das ist aber kein Muss, es beschleunigt nur die Wurzelbildung.
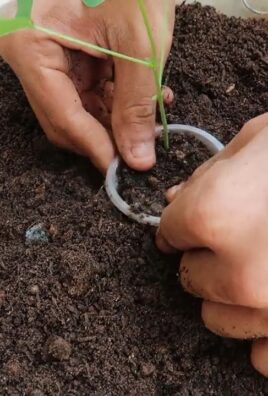
3. Stecklinge einpflanzen: Steckt die Stecklinge etwa 5-7 cm tief in die Erde. Achtet darauf, dass die Schnittstelle gut mit Erde bedeckt ist.
4. Angießen: Gießt die Stecklinge vorsichtig an, sodass die Erde feucht, aber nicht nass ist.
5. Standort wählen: Stellt die Töpfe an einen hellen, warmen Ort, aber nicht in die pralle Sonne. Ein Ost- oder Westfenster ist ideal.
Die Pflege der Stecklinge
Die richtige Pflege ist entscheidend für den Erfolg.
1. Feuchtigkeit: Haltet die Erde feucht, aber nicht nass. Am besten sprüht ihr die Stecklinge regelmäßig mit Wasser ein, um die Luftfeuchtigkeit zu erhöhen.
2. Temperatur: Die ideale Temperatur für die Wurzelbildung liegt zwischen 20 und 25 Grad Celsius.
3. Belüftung: Sorgt für eine gute Belüftung, um Schimmelbildung zu vermeiden.
4. Geduld: Die Wurzelbildung kann einige Wochen dauern. Habt Geduld und gebt nicht auf!
Anzeichen für erfolgreiche Wurzelbildung
Wie erkennt man, ob die Stecklinge Wurzeln gebildet haben?
* Neues Wachstum: Wenn ihr neues Wachstum an den Stecklingen seht, ist das ein gutes Zeichen.
* Widerstand: Wenn ihr vorsichtig an den Stecklingen zieht, solltet ihr einen leichten Widerstand spüren. Das bedeutet, dass sie Wurzeln gebildet haben.
Umpflanzen
Sobald die Stecklinge gut bewurzelt sind, könnt ihr sie in größere Töpfe umpflanzen. Verwendet dafür wieder Kakteenerde oder eine gut durchlässige Erdmischung.
Zusätzliche Tipps und Tricks
* Mini-Gewächshaus: Um die Luftfeuchtigkeit zu erhöhen, könnt ihr über die Töpfe eine Plastiktüte stülpen oder ein Mini-Gewächshaus verwenden. Achtet aber darauf, regelmäßig zu lüften, um Schimmelbildung zu vermeiden.
* Heizmatte: Eine Heizmatte unter den Töpfen kann die Wurzelbildung beschleunigen.
* Verschiedene Substrate: Ihr könnt auch verschiedene Substrate ausprobieren, wie z.B. Perlit oder Vermiculit, um die Drainage zu verbessern.
* Geduld ist der Schlüssel: Manchmal dauert es etwas länger, bis die Stecklinge Wurzeln bilden. Gebt nicht auf und experimentiert mit verschiedenen Methoden, bis ihr die richtige für euch gefunden habt.
Häufige Probleme und Lösungen
* Stecklinge faulen: Das passiert meistens, wenn die Erde zu nass ist oder die Belüftung nicht ausreichend ist. Reduziert das Gießen und sorgt für eine bessere Belüftung.
* Stecklinge bilden keine Wurzeln: Das kann verschiedene Ursachen haben. Überprüft, ob die Temperatur und Luftfeuchtigkeit stimmen. Verwendet eventuell Bewurzelungshormon.
* Schädlinge: Achtet auf Schädlinge wie Wollläuse oder Spinnmilben. Bekämpft sie gegebenenfalls mit einem geeigneten Mittel.
Langfristige Pflege deiner Drachenfruchtpflanze
Sobald deine Drachenfruchtpflanze angewachsen ist, benötigt sie regelmäßige Pflege, um gesund und produktiv zu bleiben. Hier sind einige Tipps:
* Bewässerung: Drachenfrüchte sind sukkulente Pflanzen und speichern Wasser in ihren Stängeln. Gieße sie daher nur, wenn die Erde trocken ist. Im Winter benötigen sie noch weniger Wasser.
* Düngung: Während der Wachstumsperiode (Frühling und Sommer) solltest du deine Drachenfruchtpflanze regelmäßig düngen. Verwende einen Kakteendünger oder einen ausgewogenen Dünger.
* Licht: Drachenfrüchte benötigen viel Licht, um zu wachsen und Früchte zu tragen. Stelle sie an einen sonnigen Standort.
* Unterstützung: Drachenfrüchte sind Kletterpflanzen und benötigen eine Unterstützung, an der sie hochwachsen können. Du kannst einen Pfahl, ein Spalier oder ein Rankgitter verwenden.
* Beschneidung: Regelmäßiges Beschneiden fördert das Wachstum und die Fruchtbildung. Entferne abgestorbene oder beschädigte Triebe.
* Überwinterung: Drachenfrüchte sind nicht winterhart und müssen frostfrei überwintert werden. Stelle sie an einen hellen, kühlen Ort (ca. 10-15 Grad Celsius) und gieße sie nur sehr wenig.
Warum Drachenfrucht-Vermehrung so lohnenswert ist
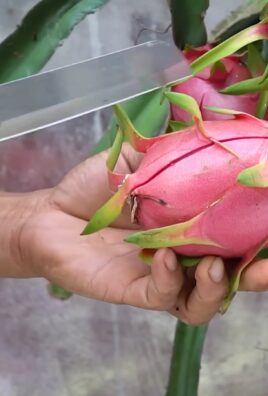
Die Vermehrung von Drachenfrüchten aus Stecklingen ist nicht nur eine kostengünstige Möglichkeit, deine Sammlung zu erweitern, sondern auch eine sehr befriedigende. Es ist faszinierend zu sehen, wie aus einem einfachen Steckling eine neue Pflanze entsteht. Außerdem kannst du so sicherstellen, dass du immer Nachschub hast, falls mal eine Pflanze eingeht. Und wer weiß, vielleicht hast du ja bald so viele Drachenfruchtpflanzen, dass du deine eigenen Früchte ernten kannst!
Ich hoffe, diese Anleitung hat euch geholfen und inspiriert, eure eigenen Drachenfruchtpflanzen zu vermehren. Viel Erfolg und viel Spaß beim Gärtnern! Lasst mich wissen, wenn ihr Fragen habt oder eure Erfahrungen teilen möchtet. Ich freue mich darauf, von euch zu hören!
Conclusion
So, there you have it! Mastering dragon fruit propagation from cuttings is not just a fun gardening project; it’s a gateway to a bountiful harvest of this exotic and nutritious fruit right in your own backyard. We’ve walked you through the simple yet effective steps, from selecting the perfect cutting to nurturing it into a thriving plant.
Why is this DIY trick a must-try? Because it’s incredibly rewarding, cost-effective, and allows you to expand your dragon fruit collection without breaking the bank. Imagine the satisfaction of harvesting your own dragon fruit, knowing you nurtured it from a simple cutting! Plus, propagating from cuttings ensures you’re getting a plant that’s genetically identical to the parent, preserving its desirable traits like fruit size, color, and sweetness.
But the adventure doesn’t stop there! Feel free to experiment with different variations. For instance, try using rooting hormones to accelerate the process, or explore different potting mixes to find what works best for your climate and growing conditions. You could even try grafting your dragon fruit cuttings onto a different, more robust rootstock for enhanced disease resistance and vigor. Consider experimenting with different types of containers, from traditional pots to hanging baskets, to create a visually stunning display of your dragon fruit plants.
Don’t be afraid to get creative and personalize your dragon fruit propagation journey. The beauty of gardening lies in the experimentation and the joy of discovering what works best for you. Remember to document your progress, take notes on what you’ve learned, and share your successes (and even your failures!) with fellow gardening enthusiasts.
We wholeheartedly encourage you to try this DIY trick and experience the magic of dragon fruit propagation firsthand. It’s a simple, rewarding, and sustainable way to grow your own delicious fruit. Once you’ve successfully propagated your dragon fruit cuttings, you’ll be amazed at how easy it is to expand your collection and share the bounty with friends and family.
So, grab your gardening gloves, select your cuttings, and embark on this exciting adventure. We’re confident that you’ll be delighted with the results. And most importantly, don’t forget to share your experiences with us! We’d love to hear your tips, tricks, and success stories in the comments below. Happy growing! Let’s all become dragon fruit propagation pros!
Frequently Asked Questions (FAQ)
1. What is the best time of year to propagate dragon fruit from cuttings?
The ideal time to propagate dragon fruit from cuttings is during the warmer months, typically in spring or early summer. This is when the plant is actively growing, and the cuttings will root more readily. The warmer temperatures and longer daylight hours provide the optimal conditions for root development. Avoid propagating during the colder months, as the cuttings may take longer to root or may not root at all. If you live in a region with mild winters, you may be able to propagate dragon fruit cuttings year-round, but spring and summer are generally the most successful times.
2. How long does it take for dragon fruit cuttings to root?
The time it takes for dragon fruit cuttings to root can vary depending on several factors, including the temperature, humidity, and the health of the cutting. Generally, you can expect to see roots developing within 2 to 4 weeks. However, it may take longer in cooler conditions or if the cutting is not as healthy. To speed up the rooting process, you can use rooting hormone and maintain a consistently moist environment. Be patient and avoid disturbing the cuttings too frequently, as this can hinder root development.
3. What type of soil is best for rooting dragon fruit cuttings?
A well-draining potting mix is essential for rooting dragon fruit cuttings. A mix of perlite, peat moss, and vermiculite is a good option. You can also use a cactus or succulent potting mix, as these mixes are specifically formulated to provide good drainage. Avoid using heavy soils that retain too much moisture, as this can lead to root rot. The goal is to provide a medium that is both well-draining and able to retain some moisture to support root development.
4. How often should I water dragon fruit cuttings?
Water dragon fruit cuttings regularly, but avoid overwatering. The soil should be kept consistently moist, but not soggy. Water when the top inch of soil feels dry to the touch. Overwatering can lead to root rot, which is a common problem with dragon fruit cuttings. Ensure that the pot has good drainage to prevent water from accumulating at the bottom. During the warmer months, you may need to water more frequently than during the cooler months.
5. Do dragon fruit cuttings need sunlight to root?
Yes, dragon fruit cuttings need sunlight to root, but they should be protected from direct, intense sunlight. Place the cuttings in a location that receives bright, indirect light. Direct sunlight can scorch the cuttings and hinder root development. A shaded patio or a windowsill with filtered sunlight is a good option. Once the cuttings have rooted and started to grow, you can gradually acclimate them to more direct sunlight.
6. Can I use rooting hormone to propagate dragon fruit cuttings?
Yes, using rooting hormone can significantly increase the success rate of dragon fruit propagation. Rooting hormone contains auxins, which are plant hormones that stimulate root development. To use rooting hormone, dip the cut end of the cutting into the hormone powder or liquid before planting it in the potting mix. Follow the instructions on the rooting hormone package for the correct dosage and application method.
7. How do I know if my dragon fruit cutting has rooted?
You can tell if your dragon fruit cutting has rooted by gently tugging on it. If the cutting resists being pulled out of the soil, it has likely developed roots. You can also check for new growth, such as new leaves or shoots. Another way to confirm rooting is to gently remove the cutting from the pot and inspect the roots. Be careful not to damage the roots during this process.
8. What do I do after my dragon fruit cutting has rooted?
Once your dragon fruit cutting has rooted, you can transplant it into a larger pot or directly into the ground. Choose a location that receives plenty of sunlight and has well-draining soil. Water the newly transplanted dragon fruit plant regularly and fertilize it with a balanced fertilizer. Provide support for the plant to climb, such as a trellis or a post.
9. Can I propagate dragon fruit from seeds instead of cuttings?
Yes, you can propagate dragon fruit from seeds, but it is a much slower and less reliable process than propagating from cuttings. Dragon fruit seeds can take several weeks or even months to germinate, and the resulting plants may not be true to type, meaning they may not produce fruit that is identical to the parent plant. Propagating from cuttings is a faster and more predictable way to obtain dragon fruit plants with desirable traits.
10. My dragon fruit cutting is turning yellow or brown. What should I do?
If your dragon fruit cutting is turning yellow or brown, it could be a sign of overwatering, underwatering, or fungal infection. Check the soil moisture and adjust your watering accordingly. Ensure that the pot has good drainage to prevent water from accumulating at the bottom. If you suspect a fungal infection, treat the cutting with a fungicide. Remove any affected leaves or stems to prevent the spread of the infection. Providing proper care and addressing any issues promptly can help save your dragon fruit cutting. Remember that **dragon fruit propagation** requires patience and attention to detail.
Leave a Comment