
Easy Melon Planting Hack: Who doesn’t love the sweet, juicy taste of a homegrown melon? But let’s be honest, getting those melons from seed to table can sometimes feel like a Herculean task. I know I’ve definitely struggled in the past! That’s why I’m so excited to share this game-changing, incredibly easy melon planting hack that will have you harvesting delicious melons in no time, even if you’re a complete beginner.
Melons have been cultivated for thousands of years, with evidence suggesting their presence in Africa as far back as the second millennium BC. From ancient Egypt, where they were depicted in artwork and offered to royalty, to the sun-drenched fields of modern-day farms, melons have always held a special place in our diets and cultures. But the traditional methods can be tricky, often requiring specific soil conditions and a lot of space.
That’s where this DIY trick comes in! Many gardeners struggle with melon planting because of issues like poor germination rates, vine borers, and lack of space. This simple hack addresses all of these problems, giving your melon plants a head start and protecting them from common pests. Plus, it’s a fantastic way to maximize your garden space, especially if you’re working with a smaller area. So, ditch the frustration and get ready to enjoy a bountiful melon harvest with this simple, yet effective technique!
Easy Melon Planting Hack: Grow More Melons with Less Effort!
Hey there, fellow garden enthusiasts! I’m always on the lookout for ways to make gardening easier and more productive, and I stumbled upon a melon planting hack that I just had to share. If you’re like me and love the taste of homegrown melons but struggle with space or getting a good yield, this is for you! It’s all about creating a mini-greenhouse environment right where you plant your seeds, giving them a head start and protecting them from pests and harsh weather. Let’s get started!
What You’ll Need
Before we dive in, let’s gather our supplies. This hack is super simple, so you probably already have most of these things lying around:
* **Melon Seeds:** Choose your favorite variety! I’m partial to cantaloupe and watermelon, but honeydew is great too. Make sure they are good quality seeds.
* **Empty Plastic Water Bottles (2-liter size is ideal):** You’ll need one bottle per melon plant. Make sure they are clean.
* **Scissors or a Utility Knife:** For cutting the plastic bottles. Be careful!
* **Potting Soil or Compost:** To enrich the soil in your planting area.
* **Gardening Gloves:** To keep your hands clean and protected.
* **Watering Can or Hose:** For watering your newly planted seeds.
* **Optional: Clear Plastic Wrap:** For extra protection in colder climates.
* **Optional: Small Rocks or Pebbles:** To weigh down the plastic bottles if needed.
Preparing the Planting Area
The key to successful melon growing is a sunny location with well-draining soil. Melons are sun-worshippers, so aim for at least 6-8 hours of direct sunlight per day.
* **Choose a Sunny Spot:** Find a spot in your garden that gets plenty of sunshine.
* **Prepare the Soil:** Melons need well-draining soil. If your soil is heavy clay, amend it with compost or other organic matter to improve drainage. Dig a hole about 12 inches wide and 12 inches deep for each melon plant.
* **Enrich the Soil:** Mix some potting soil or compost into the hole to give your melon seeds a nutrient boost. This will help them get off to a strong start.
* **Water the Soil:** Lightly water the prepared soil before planting. This helps settle the soil and provides moisture for the seeds.
Creating Your Mini-Greenhouse
This is where the magic happens! We’re going to transform those empty plastic bottles into mini-greenhouses that will protect your melon seedlings and help them thrive.
* **Cut the Bottoms Off the Bottles:** Using your scissors or utility knife, carefully cut off the bottoms of the plastic water bottles. You want to remove the entire bottom section, leaving you with a cylinder shape. Be extra cautious when using a knife.
* **Remove the Bottle Caps:** Take the caps off the bottles. This will allow for ventilation and prevent the inside from getting too hot.
* **Optional: Prepare Plastic Wrap (for colder climates):** If you live in an area with cool springs or unpredictable weather, cut circles of clear plastic wrap that are slightly larger than the top opening of the bottles. You’ll use these to cover the bottles on cold nights.
Planting the Melon Seeds
Now for the fun part – planting those seeds!
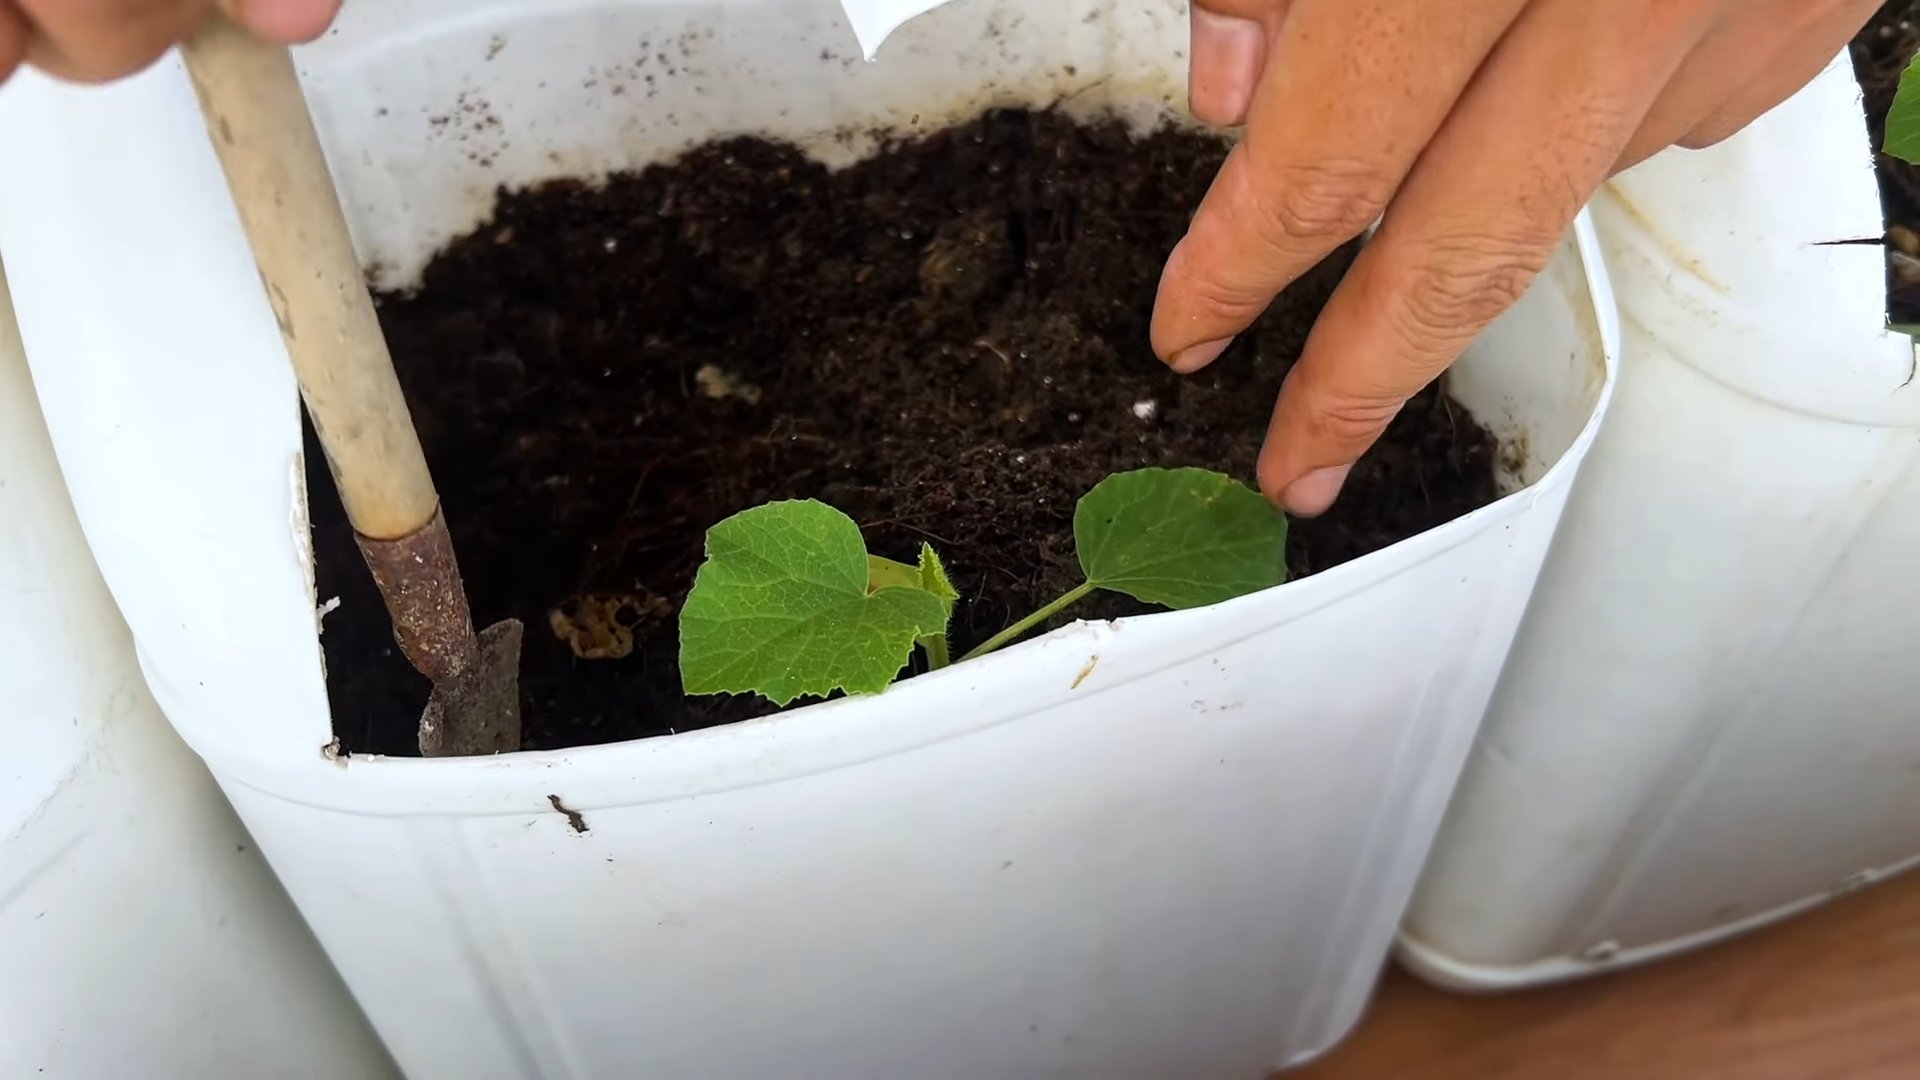
1. **Plant the Seeds:** In the center of the prepared soil, plant 2-3 melon seeds about 1 inch deep. Planting multiple seeds increases the chances of at least one germinating.
2. **Cover the Seeds:** Gently cover the seeds with soil.
3. **Water the Seeds:** Water the area lightly but thoroughly. You want the soil to be moist but not waterlogged.
4. **Place the Plastic Bottle Over the Seeds:** Carefully place the cut plastic bottle over the planted seeds, pushing it slightly into the soil to secure it. This creates a mini-greenhouse effect, trapping warmth and moisture.
5. **Optional: Secure the Bottle (if needed):** If you live in a windy area, you can place a few small rocks or pebbles around the base of the bottle to weigh it down and prevent it from blowing away.
6. **Optional: Cover with Plastic Wrap (for cold nights):** If the forecast calls for a cold night, cover the top of the bottle with your prepared plastic wrap and secure it with a rubber band or string. This will provide extra insulation.
Caring for Your Melon Seedlings
Once your seeds are planted and protected, it’s important to provide them with the right care to ensure they grow into healthy, productive plants.
* **Water Regularly:** Keep the soil consistently moist, but not soggy. Water when the top inch of soil feels dry to the touch. You can water directly into the bottle, allowing the water to seep into the soil.
* **Monitor the Temperature:** On very hot days, the inside of the bottle can get too hot, which can damage the seedlings. If you notice the leaves wilting, remove the bottle for a few hours during the hottest part of the day.
* **Ventilation:** Ensure adequate ventilation, especially on warm days. You can prop up the bottle slightly or remove it entirely for a few hours each day.
* **Thin the Seedlings:** Once the seedlings have emerged and have a few sets of true leaves, thin them to one plant per bottle. Choose the strongest, healthiest-looking seedling and gently snip off the others at the soil line. This will prevent overcrowding and allow the remaining plant to thrive.
Removing the Bottles
As your melon seedlings grow, they’ll eventually outgrow their mini-greenhouses. It’s time to remove the bottles when the plants start to touch the sides or top of the bottle.
* **Harden Off the Seedlings:** Before removing the bottles completely, it’s a good idea to “harden off” the seedlings. This means gradually exposing them to the outdoor environment over a period of several days. Start by removing the bottles for a few hours each day, gradually increasing the amount of time they’re exposed.
* **Remove the Bottles:** Once the seedlings are hardened off, you can remove the bottles completely. Do this on a cloudy day or in the late afternoon to avoid shocking the plants.
* **Mulch Around the Plants:** After removing the bottles, mulch around the base of the plants with straw or wood chips to help retain moisture and suppress weeds.
Ongoing Care
Even after removing the bottles, your melon plants will need ongoing care to produce a bountiful harvest.
* **Water Regularly:** Melons need plenty of water, especially during hot, dry weather. Water deeply and regularly, aiming for about 1-2 inches of water per week.
* **Fertilize:** Feed your melon plants with a balanced fertilizer every few weeks to provide them with the nutrients they need to grow and produce fruit.
* **Control Pests and Diseases:** Keep an eye out for common melon pests and diseases, such as aphids, squash bugs, and powdery mildew. Take action promptly to control any problems that arise.
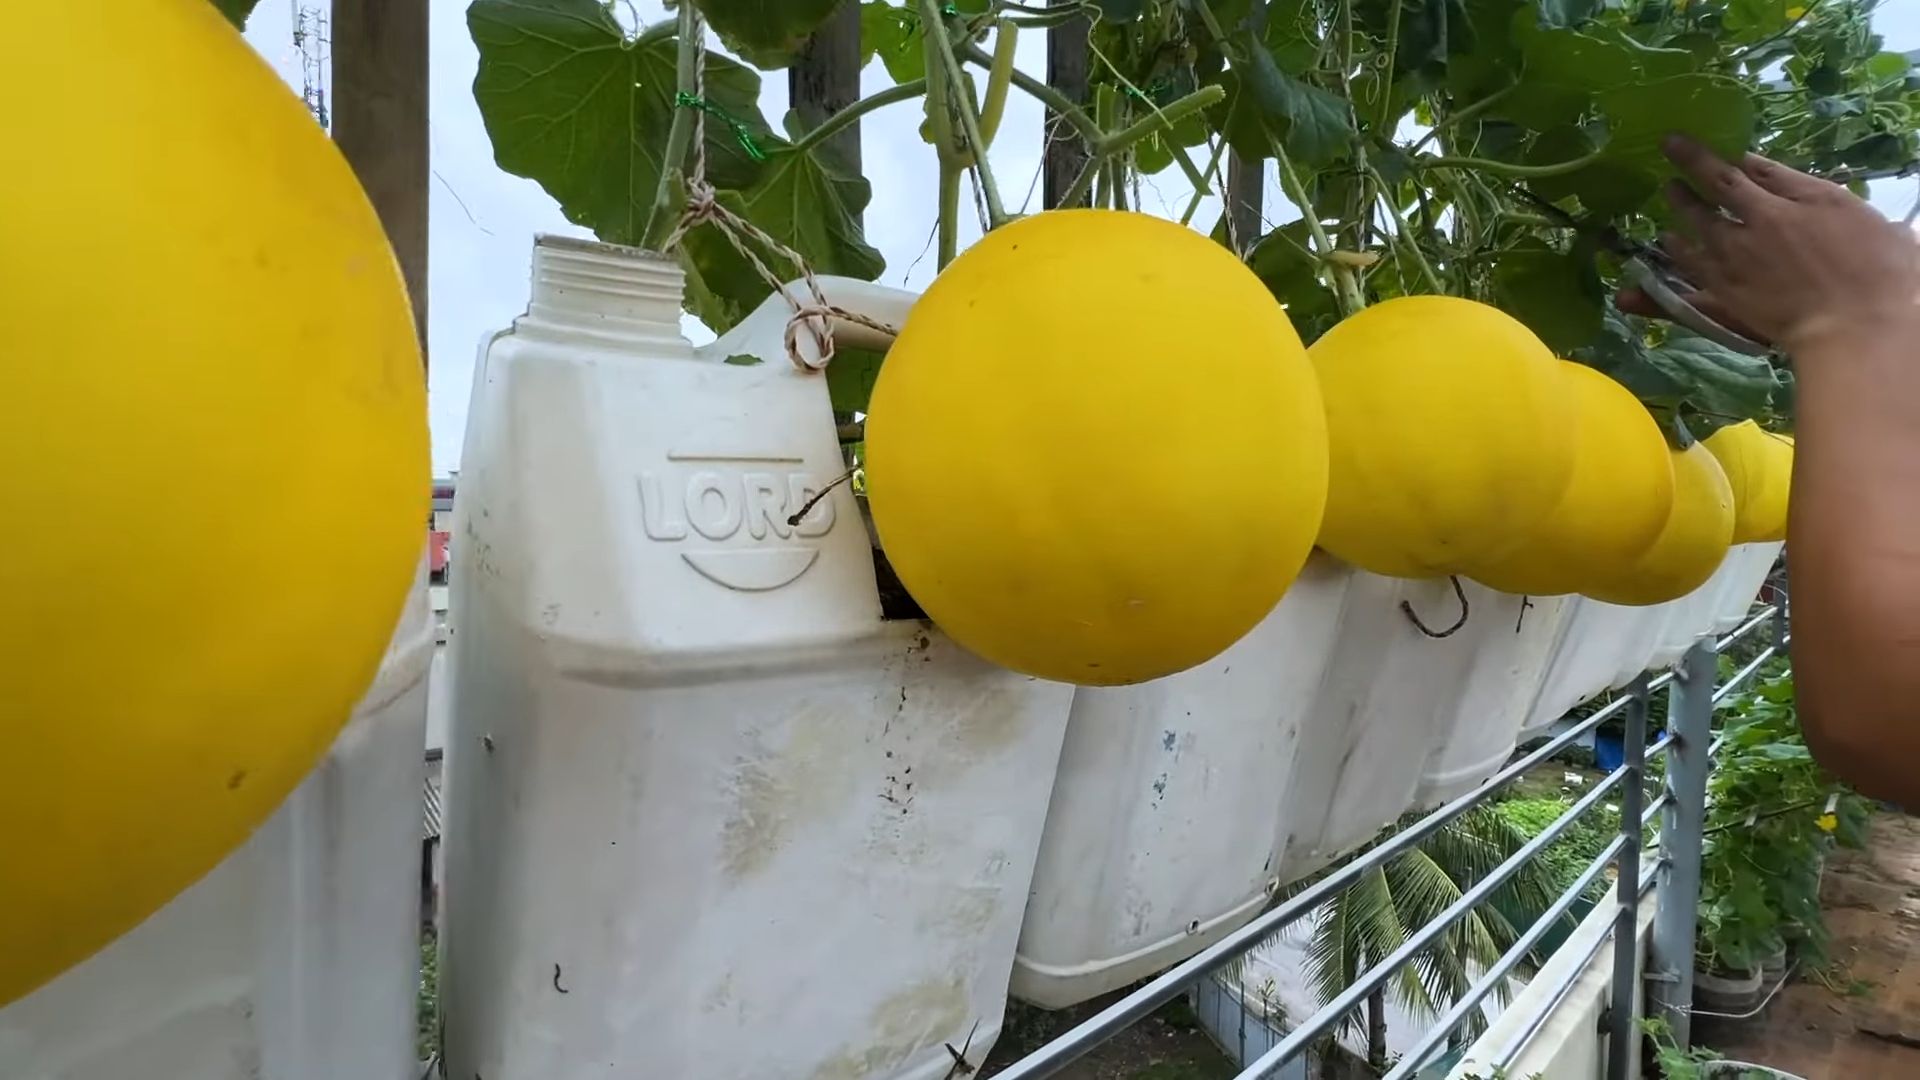
* **Provide Support (for some varieties):** Some melon varieties, such as cantaloupe, may benefit from support, especially if the fruits are heavy. You can use a trellis or sling to support the fruits and prevent them from rotting on the ground.
* **Harvesting:** Melons are typically ready to harvest when they reach their mature size and color, and when the stem starts to separate easily from the fruit. The specific signs of ripeness will vary depending on the variety.
Troubleshooting
Even with the best planning, things can sometimes go wrong. Here are a few common problems you might encounter and how to address them:
* **Seeds Don’t Germinate:** If your seeds don’t germinate, it could be due to several factors, such as poor-quality seeds, soil that is too cold or too wet, or pests eating the seeds. Try planting new seeds in a different location or using a seed-starting mix.
* **Seedlings Damping Off:** Damping off is a fungal disease that can kill young seedlings. To prevent damping off, use sterile potting mix, avoid overwatering, and provide good ventilation.
* **Pests:** Common melon pests include aphids, squash bugs, and cucumber beetles. Use insecticidal soap or other appropriate methods to control these pests.
* **Diseases:** Common melon diseases include powdery mildew and fusarium wilt. Use disease-resistant varieties and practice good sanitation to prevent these diseases.
Enjoy Your Homegrown Melons!
With a little bit of effort and this simple planting hack, you can enjoy a bountiful harvest of delicious, homegrown melons. There’s nothing quite like the taste of a freshly picked melon, and knowing that you grew it yourself makes it even more rewarding. Happy gardening! I hope this helps you grow the best melons ever!
Conclusion
So, there you have it! This easy melon planting hack isn’t just a shortcut; it’s a game-changer for anyone looking to cultivate sweeter, healthier, and more abundant melons. We’ve walked you through the simple steps, highlighting how this method optimizes drainage, warms the soil, and provides a nutrient-rich environment right where your melon plants need it most.
Why is this a must-try? Because it addresses some of the most common challenges faced by melon growers. Poor drainage can lead to root rot, cool soil can stunt growth, and nutrient deficiencies can result in bland, disappointing fruit. This hack tackles all three head-on, giving your melon plants the best possible start. Imagine biting into a juicy, flavorful watermelon, cantaloupe, or honeydew melon, knowing you played a crucial role in its deliciousness thanks to this simple technique.
But don’t stop there! Feel free to experiment with variations to suit your specific needs and preferences. For example, if you live in an area with particularly poor soil, consider adding a layer of compost or well-rotted manure to the planting hole before placing the melon seedling. You could also try using different types of organic matter, such as shredded leaves or grass clippings, to enrich the soil. If pests are a concern, consider adding a layer of diatomaceous earth around the base of the plant to deter slugs and snails.
Another variation involves the type of container you use. While we’ve focused on using a plastic container, you could also try using a terracotta pot or even a biodegradable container made from coconut coir. The key is to choose a container that will provide good drainage and allow the roots to breathe.
Furthermore, consider the specific type of melon you’re planting. Some melon varieties, such as watermelons, are heavy feeders and require more nutrients than others. In this case, you may want to supplement the soil with a slow-release fertilizer or compost tea. Other melon varieties, such as cantaloupes, are more susceptible to powdery mildew. In this case, you may want to choose a disease-resistant variety or apply a fungicide preventatively.
The beauty of this easy melon planting hack lies in its adaptability. It’s a foundation upon which you can build, tailoring the method to your unique growing conditions and the specific needs of your melon plants.
We are confident that this method will significantly improve your melon-growing success. But the real proof is in the pudding (or, in this case, the melon!). We wholeheartedly encourage you to try this easy melon planting hack in your own garden. Plant a few melon seedlings using this method and compare their growth and yield to those planted using traditional methods. We think you’ll be amazed by the results.
Once you’ve given it a try, we’d love to hear about your experience! Share your photos, tips, and results in the comments section below. Let us know what worked well for you, what challenges you encountered, and any variations you tried. Your feedback will not only help other gardeners but also contribute to our collective knowledge of melon growing. Let’s work together to make this the best melon-growing season yet! So go ahead, get your hands dirty, and experience the joy of growing your own delicious melons with this simple, effective, and rewarding technique. Happy planting!
Frequently Asked Questions (FAQ)
What type of container should I use for this melon planting hack?
The best type of container is one that provides good drainage and is large enough to accommodate the melon seedling’s root ball. A plastic container, like a nursery pot or a repurposed bucket, works well because it’s durable and readily available. However, you can also use terracotta pots or biodegradable containers made from coconut coir. The key is to ensure that the container has drainage holes to prevent waterlogging. The size of the container should be at least 6 inches in diameter and 6 inches deep for smaller melon varieties, and larger for watermelons.
What kind of soil should I use in the planting hole?
Melons thrive in well-draining, nutrient-rich soil. A good mix would be equal parts garden soil, compost, and peat moss or coco coir. The compost provides essential nutrients, while the peat moss or coco coir helps retain moisture and improve drainage. Avoid using heavy clay soil, as it can become waterlogged and suffocate the roots. You can also amend your existing garden soil with organic matter to improve its texture and fertility.
How deep should I bury the container in the ground?
Bury the container so that the top rim is level with the surrounding soil. This will prevent water from pooling around the base of the plant and also make it easier to water. Make sure the drainage holes in the container are not blocked by the soil.
How often should I water my melon plants?
Melon plants need consistent moisture, especially during hot weather. Water deeply and regularly, aiming to keep the soil consistently moist but not waterlogged. Check the soil moisture level regularly by sticking your finger into the soil. If the top inch feels dry, it’s time to water. Avoid overhead watering, as it can promote fungal diseases. Instead, water at the base of the plant, using a soaker hose or drip irrigation system.
What kind of fertilizer should I use for my melon plants?
Melons are heavy feeders and benefit from regular fertilization. Start with a balanced fertilizer, such as 10-10-10, at planting time. Once the plants start to flower, switch to a fertilizer that is higher in phosphorus and potassium, such as 5-10-10, to promote fruit development. You can also supplement with organic fertilizers, such as compost tea or fish emulsion. Follow the instructions on the fertilizer label carefully to avoid over-fertilizing, which can damage the plants.
How do I protect my melon plants from pests and diseases?
Melon plants are susceptible to various pests and diseases, including aphids, squash bugs, vine borers, and powdery mildew. To prevent pest and disease problems, choose disease-resistant varieties, practice good sanitation, and monitor your plants regularly. Remove any diseased leaves or fruit promptly. You can also use organic pest control methods, such as insecticidal soap or neem oil, to control aphids and other pests. To prevent powdery mildew, ensure good air circulation around the plants and avoid overhead watering.
Can I use this method for other types of plants?
While this method is particularly well-suited for melons, it can also be used for other plants that prefer well-draining soil and warm conditions, such as tomatoes, peppers, and cucumbers. The key is to adjust the size of the container and the type of soil to suit the specific needs of the plant.
What if I live in a cold climate?
If you live in a cold climate, you can still use this method to grow melons, but you may need to start your seedlings indoors and provide extra protection from frost. You can also use a cold frame or row covers to extend the growing season. The container will help warm the soil around the roots, giving your melon plants a head start.
How does this method help with drainage?
The container acts as a barrier, preventing the surrounding soil from compacting around the roots and restricting drainage. The drainage holes in the container allow excess water to escape, preventing waterlogging and root rot. This is particularly important in areas with heavy clay soil.
Will this method really make my melons sweeter?
While this method doesn’t guarantee sweeter melons, it does create optimal growing conditions that can contribute to improved flavor. By providing good drainage, warm soil, and adequate nutrients, you’re giving your melon plants the best possible chance to produce sweet, juicy fruit. The variety of melon you choose also plays a significant role in its sweetness.
Leave a Comment