
Genius cleaning hacks – who doesn’t want them? Let’s be honest, cleaning isn’t exactly anyone’s favorite pastime. But what if I told you that tackling those stubborn stains and grimy corners could actually be…dare I say…enjoyable? Okay, maybe not *enjoyable*, but definitely less of a chore! For centuries, people have been passing down cleaning tips and tricks, from ancient civilizations using natural remedies to modern-day innovations in cleaning technology. Think about it – our grandmothers probably had a secret weapon for sparkling floors, and now, I’m here to share some of my own!
In today’s busy world, time is precious. We’re all juggling work, family, and everything in between. Spending hours scrubbing and scouring just isn’t feasible. That’s where these genius cleaning hacks come in. They’re designed to save you time, money, and energy, allowing you to reclaim your weekends and actually relax in a clean and comfortable home. I’m going to show you some simple, effective, and often surprising ways to make your cleaning routine a breeze. Get ready to ditch the elbow grease and embrace a smarter, cleaner way of life!
Genius Cleaning Hacks to Make Your Life Easier!
Okay, let’s dive into some seriously clever cleaning hacks that I’ve personally tested and swear by. These aren’t your grandma’s cleaning tips (though, no offense to grandmas!). These are designed to save you time, money, and a whole lot of elbow grease. Get ready to be amazed!
Cleaning Your Microwave Like a Pro (Without Scrubbing!)
This is one of my absolute favorite hacks because it’s so simple and effective. Say goodbye to those stubborn splatters and baked-on food!
- The Problem: Microwaves are notorious for accumulating food splatters that harden and become difficult to remove.
- The Solution: Steam cleaning with vinegar and lemon!
- What You’ll Need:
- 1 cup of water
- 2 tablespoons of white vinegar
- A few lemon slices (optional, but they add a fresh scent!)
- A microwave-safe bowl
Step-by-Step Instructions:
1. Combine Ingredients: In your microwave-safe bowl, mix the water, vinegar, and lemon slices (if using).
2. Microwave Magic: Place the bowl in the microwave and heat on high for 3-5 minutes. You want the mixture to boil and create steam.
3. Let it Sit: Once the timer goes off, DO NOT open the microwave door immediately. Let the steam work its magic for another 5-10 minutes. This is crucial for loosening the grime.
4. Wipe Away: Carefully remove the bowl (it will be hot!). Use a clean cloth or sponge to easily wipe away the loosened food particles. You’ll be amazed at how effortlessly they come off!
5. Final Touches: For any stubborn spots, you can dip your cloth in the remaining liquid in the bowl and scrub gently.
Why this works: The steam softens the dried food, while the vinegar helps to dissolve grease and grime. The lemon adds a pleasant scent and also has some cleaning properties.
Unclogging Drains the Natural Way
Chemical drain cleaners can be harsh and damaging to your pipes. This natural method is just as effective and much safer!
- The Problem: Clogged drains are a common household nuisance, often caused by hair, grease, and soap buildup.
- The Solution: A powerful combination of baking soda, vinegar, and boiling water.
- What You’ll Need:
- 1 cup of baking soda
- 2 cups of white vinegar
- A kettle or pot of boiling water
Step-by-Step Instructions:
1. Pour in the Baking Soda: Carefully pour the baking soda down the clogged drain. Try to get as much of it down the drain as possible.
2. Add the Vinegar: Immediately follow with the vinegar. You’ll hear a fizzing sound – that’s the chemical reaction working to break down the clog.
3. Let it Bubble: Let the mixture fizz and bubble for at least 30 minutes. This allows the baking soda and vinegar to dissolve the buildup. For really stubborn clogs, you can let it sit for a few hours or even overnight.
4. Flush with Boiling Water: After the waiting period, carefully pour the boiling water down the drain. The hot water will help to flush away the loosened debris.
5. Repeat if Necessary: If the drain is still clogged, repeat the process. Sometimes it takes a couple of tries to completely clear a stubborn blockage.
Why this works: The baking soda and vinegar create a chemical reaction that produces carbon dioxide gas, which helps to break down the clog. The boiling water then flushes everything away.
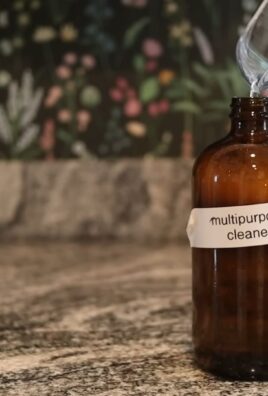
Making Your Own All-Purpose Cleaner
Why spend a fortune on expensive cleaning products when you can make your own effective and eco-friendly cleaner at home?
- The Problem: Store-bought all-purpose cleaners can be expensive and contain harsh chemicals.
- The Solution: A simple and effective homemade cleaner using vinegar, water, and essential oils.
- What You’ll Need:
- 1 part white vinegar
- 1 part water
- 10-20 drops of your favorite essential oil (lemon, lavender, tea tree, and eucalyptus are great choices)
- A spray bottle
Step-by-Step Instructions:
1. Combine Ingredients: In your spray bottle, combine the vinegar and water.
2. Add Essential Oils: Add your chosen essential oils. The essential oils not only add a pleasant scent but also have antibacterial and antiseptic properties.
3. Shake Well: Secure the spray bottle lid and shake well to combine all the ingredients.
4. Spray and Wipe: Spray the cleaner onto surfaces and wipe clean with a cloth or sponge.
Why this works: Vinegar is a natural disinfectant and degreaser. The essential oils add fragrance and additional cleaning power.
Important Note: While vinegar is generally safe, it’s not recommended for use on marble or granite surfaces, as it can etch the stone.
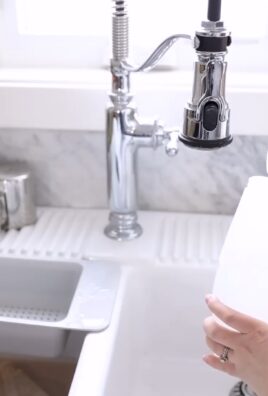
Cleaning Your Showerhead for Better Water Pressure
A clogged showerhead can significantly reduce water pressure and make showering less enjoyable. This simple hack will restore your showerhead to its former glory!
- The Problem: Mineral deposits and buildup can clog showerheads, reducing water pressure.
- The Solution: Soaking the showerhead in vinegar to dissolve the mineral deposits.
- What You’ll Need:
- A plastic bag (a Ziploc bag works well)
- White vinegar
- A rubber band or twist tie
- An old toothbrush (optional)
Step-by-Step Instructions:
1. Fill the Bag: Fill the plastic bag with enough white vinegar to completely submerge the showerhead.
2. Attach the Bag: Carefully attach the bag to the showerhead, ensuring that the showerhead is fully immersed in the vinegar. Secure the bag with a rubber band or twist tie.
3. Soak Overnight: Let the showerhead soak in the vinegar overnight. This allows the vinegar to dissolve the mineral deposits.
4. Remove and Rinse: In the morning, remove the bag and discard the vinegar. Rinse the showerhead thoroughly with water.
5. Scrub if Needed: If there are any remaining mineral deposits, use an old toothbrush to gently scrub them away.
6. Enjoy Improved Water Pressure: Turn on the shower and enjoy the improved water pressure!
Why this works: Vinegar is an acid that effectively dissolves mineral deposits like calcium and lime, which are the main culprits behind clogged showerheads.
Reviving Dingy White Laundry
Is your white laundry looking dull and dingy? This simple trick will brighten your whites and make them look like new again!
- The Problem: White laundry can become dull and dingy over time due to repeated washing and buildup of detergent residue.
- The Solution: Adding baking soda and hydrogen peroxide to your wash cycle.
- What You’ll Need:
- 1 cup of baking soda
- 1 cup of hydrogen peroxide
- Your regular laundry detergent
Step-by-Step Instructions:
1. Add Baking Soda: Add the baking soda to your washing machine along with your regular laundry detergent.
2. Add Hydrogen Peroxide: Pour the hydrogen peroxide into the bleach dispenser of your washing machine.
3. Wash as Usual: Wash your white laundry as usual, using the hottest water setting that is safe for the fabrics.
4. Dry as Usual: Dry your white laundry as usual, either in the dryer or on a clothesline.
Why this works: Baking soda helps to boost the cleaning power of your detergent and neutralize odors. Hydrogen peroxide is a natural bleaching agent that helps to brighten whites without the harshness of chlorine bleach.
Important Note: Always test hydrogen peroxide on a small, inconspicuous area of the fabric before using it on the entire garment to ensure that it doesn’t cause any discoloration.
Cleaning Your Blender Quickly and Easily
Cleaning a blender can be a pain, especially if you’ve just made a thick smoothie or sauce. This hack makes it a breeze!
- The Problem: Blenders can be difficult to clean, especially after blending thick or sticky ingredients.
- The Solution: Self-cleaning with soap and water.
- What You’ll Need:
- Warm water
- Dish soap
Conclusion
So, there you have it! This simple yet incredibly effective DIY cleaning trick is more than just a hack; it’s a game-changer for maintaining a sparkling clean home without breaking the bank or relying on harsh chemicals. We’ve shown you how to harness the power of readily available ingredients to create a potent cleaning solution that tackles grime, eliminates odors, and leaves your surfaces gleaming.
Why is this DIY cleaning trick a must-try? Because it’s economical, eco-friendly, and exceptionally effective. Store-bought cleaners often come with a hefty price tag and a long list of ingredients you can’t even pronounce. This method allows you to control exactly what goes into your cleaning products, ensuring a safer and healthier environment for you and your family. Plus, it significantly reduces your plastic waste, contributing to a more sustainable lifestyle.
But the benefits don’t stop there. This DIY approach is incredibly versatile. Feel free to experiment with different essential oils to customize the scent and add extra cleaning power. For example, a few drops of tea tree oil can boost the antibacterial properties, while lemon oil adds a refreshing citrus aroma and helps cut through grease. You can also adjust the ratios of ingredients to suit your specific cleaning needs. For tougher stains, try increasing the concentration of vinegar or baking soda.
Consider these variations to tailor the cleaning solution to different areas of your home:
* **For bathroom grime:** Add a tablespoon of borax to the mixture for extra scrubbing power on soap scum and hard water stains.
* **For kitchen counters:** Use a diluted solution of white vinegar and water for daily cleaning. Avoid using vinegar on marble or granite surfaces, as it can etch the stone.
* **For floors:** Add a few drops of your favorite essential oil to a bucket of warm water and use a microfiber mop to clean your floors. Always test the solution on an inconspicuous area first to ensure it doesn’t damage the finish.
* **For windows and mirrors:** Mix equal parts white vinegar and water in a spray bottle for streak-free shine. Use a microfiber cloth to wipe the surfaces clean.
This **genius cleaning hack** is not just about saving money; it’s about empowering you to take control of your cleaning routine and create a healthier, more sustainable home. It’s about simplifying your life and achieving remarkable results with minimal effort.
We wholeheartedly encourage you to try this DIY cleaning trick and experience the difference for yourself. Once you’ve given it a whirl, we’d love to hear about your experience! Share your tips, variations, and success stories in the comments below. Let’s build a community of DIY cleaning enthusiasts and inspire each other to create cleaner, healthier homes. Don’t forget to share this article with your friends and family so they can benefit from this amazing cleaning hack too! Let’s ditch the harsh chemicals and embrace the power of natural cleaning!
Frequently Asked Questions (FAQ)
**Q: What exactly is this DIY cleaning trick, and what does it clean?**
A: This DIY cleaning trick involves creating a homemade cleaning solution using common household ingredients like white vinegar, baking soda, water, and optionally, essential oils. This solution is incredibly versatile and can be used to clean a wide range of surfaces, including countertops, sinks, toilets, showers, floors, windows, and mirrors. It’s effective at removing grime, grease, soap scum, hard water stains, and odors.
**Q: Is this DIY cleaning solution safe to use on all surfaces?**
A: While this cleaning solution is generally safe for most surfaces, it’s essential to exercise caution and test it on an inconspicuous area first, especially on delicate materials like marble, granite, or wood. Vinegar, in particular, can etch or damage certain surfaces. For marble and granite, use a pH-neutral cleaner or a solution of mild dish soap and water. For wood, use a cleaner specifically designed for wood surfaces.
**Q: Can I use other types of vinegar besides white vinegar?**
A: White vinegar is the preferred choice for cleaning due to its high acidity and lack of color, which prevents staining. However, you can use apple cider vinegar as a substitute, although it may have a slightly less potent cleaning effect and a stronger odor. Avoid using balsamic vinegar or red wine vinegar, as they can stain surfaces.
**Q: What essential oils are best to use in this DIY cleaning solution?**
A: The best essential oils to use depend on your personal preferences and the desired cleaning properties. Some popular choices include:
* **Lemon:** Adds a refreshing citrus aroma and helps cut through grease.
* **Tea Tree:** Possesses antibacterial and antifungal properties.
* **Lavender:** Provides a calming scent and has antiseptic qualities.
* **Eucalyptus:** Has a strong, invigorating scent and is effective at disinfecting.
* **Peppermint:** Offers a refreshing aroma and can help repel insects.
Always use pure, therapeutic-grade essential oils and add only a few drops to the cleaning solution.
**Q: How long does this DIY cleaning solution last?**
A: This DIY cleaning solution is best used within a few weeks of preparation. Over time, the ingredients may lose their potency. Store the solution in a clean, airtight container in a cool, dark place.
**Q: Can I use this cleaning solution to clean my oven?**
A: Yes, you can use this cleaning solution to clean your oven, but it may require some extra effort. First, sprinkle baking soda generously on the bottom of the oven. Then, spray the baking soda with the vinegar and water solution. Let it sit for several hours or overnight. Finally, scrub the oven with a sponge or brush and wipe clean with a damp cloth.
**Q: Is this DIY cleaning solution safe for pets and children?**
A: This DIY cleaning solution is generally safer than commercial cleaners, as it doesn’t contain harsh chemicals. However, it’s still essential to keep it out of reach of children and pets. Vinegar can be irritating if ingested, and some essential oils can be toxic to pets. Always supervise children when using the cleaning solution and ensure that pets are not exposed to it.
**Q: Can I use this cleaning solution to clean my laundry?**
A: Yes, you can use white vinegar as a natural laundry booster and fabric softener. Add 1/2 cup of white vinegar to the rinse cycle to help remove detergent residue, soften fabrics, and brighten colors. Avoid using vinegar with bleach, as it can create harmful fumes.
**Q: What if I don’t have baking soda? Can I still make this cleaning solution?**
A: While baking soda adds extra cleaning power and deodorizing properties, you can still make a basic cleaning solution with just white vinegar and water. The vinegar will still effectively cut through grime and disinfect surfaces.
**Q: I tried the DIY cleaning trick, but it didn’t work as well as I expected. What could I be doing wrong?**
A: Several factors could affect the effectiveness of the cleaning solution. Make sure you’re using the correct ratios of ingredients. For tougher stains, try increasing the concentration of vinegar or baking soda. Also, ensure that you’re allowing the solution to sit on the surface for a sufficient amount of time before wiping it clean. Finally, use a good quality microfiber cloth for optimal cleaning results. If the stain is particularly stubborn, you may need to repeat the cleaning process or use a more specialized cleaning product.
Leave a Comment