
Genius cleaning shortcuts – who doesn’t want them? Let’s be honest, cleaning isn’t usually anyone’s favorite pastime. We all dream of sparkling homes without spending hours scrubbing and toiling. For generations, people have sought out clever ways to streamline their cleaning routines. Think about it – our grandmothers had their own secret concoctions and time-saving techniques passed down through families. These weren’t just about cleanliness; they were about efficiency, freeing up time for other things, and sometimes, even saving money!
Today, with our busy lives, those time-honored traditions are more valuable than ever. That’s why I’ve compiled a list of my absolute favorite genius cleaning shortcuts that will revolutionize your cleaning game. These aren’t just random tips; they’re tried-and-true methods that I personally use to keep my home looking its best with minimal effort. From tackling stubborn stains to making everyday tasks a breeze, these DIY hacks will help you reclaim your weekends and enjoy a cleaner, happier home. Get ready to say goodbye to endless scrubbing and hello to a smarter, more efficient way to clean!
Genius Cleaning Shortcuts: Making Your Life Easier!
Okay, let’s be honest, cleaning isn’t exactly anyone’s favorite pastime. But a clean home is a happy home, right? So, I’ve compiled some of my absolute favorite cleaning shortcuts that will save you time and effort. These aren’t just surface-level tricks; they’re game-changers that will make your cleaning routine way more efficient. Get ready to reclaim your weekends!
Cleaning Your Microwave in Minutes
This is one of those hacks that makes you wonder why you haven’t been doing it all along. Say goodbye to scrubbing baked-on food splatters!
What You’ll Need:
* 1 cup water
* 1 tablespoon white vinegar or lemon juice
* Microwave-safe bowl
Instructions:
1. Combine Water and Vinegar/Lemon Juice: In your microwave-safe bowl, mix the water and vinegar (or lemon juice). The vinegar or lemon juice helps to loosen the grime.
2. Microwave the Mixture: Place the bowl in the microwave and heat on high for 5-5 minutes. You want the mixture to boil and create steam inside the microwave.
3. Let it Sit: Don’t open the microwave immediately! Let the steam work its magic for another 5-10 minutes. This is crucial for loosening the stubborn food particles.
4. Wipe Clean: Carefully remove the bowl (it will be hot!). Use a clean cloth or sponge to easily wipe away the loosened grime. You’ll be amazed at how effortlessly it comes off.
5. Clean the Turntable: Don’t forget to remove and wash the microwave turntable with warm, soapy water.
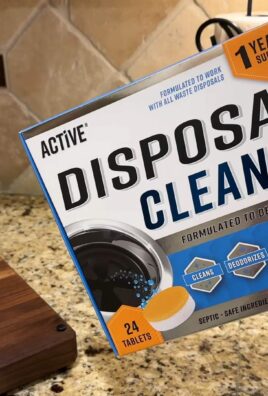
De-Stinking Your Garbage Disposal
A smelly garbage disposal can stink up your whole kitchen. Here’s how to freshen it up quickly and easily.
What You’ll Need:
* Ice cubes
* 1/2 cup coarse salt (sea salt or kosher salt works best)
* Lemon or lime wedges
Instructions:
1. Ice and Salt Combo: Pour the ice cubes and salt into the garbage disposal.
2. Run Cold Water: Turn on the cold water to a medium flow.
3. Grind Away: Turn on the garbage disposal. The ice and salt will scrub the blades and walls of the disposal, dislodging built-up food particles and grime. The salt acts as an abrasive cleaner.
4. Citrus Power: After the ice and salt have been ground, toss in the lemon or lime wedges while the water is still running and the disposal is on. The citrus will help to deodorize and leave a fresh scent.
5. Rinse Thoroughly: Continue running cold water for another minute or so to flush out any remaining debris.
Streak-Free Stainless Steel Cleaning
Stainless steel appliances look fantastic, but those fingerprints and smudges can be a real pain. This simple trick will give you a streak-free shine.
What You’ll Need:
* Microfiber cloth
* White vinegar
* Olive oil
Instructions:
1. Vinegar Wipe Down: Lightly dampen a microfiber cloth with white vinegar. Wipe down the stainless steel surface, following the grain of the metal. Vinegar is a great degreaser and helps to remove fingerprints and water spots.
2. Dry Thoroughly: Use a clean, dry microfiber cloth to thoroughly dry the surface. This step is important to prevent water spots.
3. Olive Oil Polish: Put a tiny amount (seriously, a tiny amount – a few drops!) of olive oil on a clean microfiber cloth. Buff the stainless steel surface, again following the grain of the metal. The olive oil will create a protective layer and give it a beautiful shine.
4. Buff Away Excess: Use a clean section of the microfiber cloth to buff away any excess olive oil. You want a subtle shine, not an oily residue.
Effortless Shower Cleaning
Keeping your shower clean can feel like a constant battle. This daily spray will help prevent soap scum and mildew buildup.
What You’ll Need:
* Spray bottle
* 1 cup white vinegar
* 1 cup water
* A few drops of your favorite essential oil (optional, for fragrance)
Instructions:
1. Mix the Solution: In your spray bottle, combine the white vinegar, water, and essential oil (if using).
2. Daily Spray: After each shower, spray the walls, door, and fixtures with the solution.
3. No Rinsing Required: That’s it! No need to rinse. The vinegar will help to prevent soap scum and mildew from forming. The essential oil will leave a pleasant scent.
4. Weekly Deep Clean (Optional): Even with the daily spray, you may still want to do a deeper clean once a week. You can use the same solution, but let it sit for a few minutes before wiping down the surfaces.
Cleaning Blinds Like a Pro
Cleaning blinds can be tedious, but this method makes it much easier.
What You’ll Need:
* Old sock
* White vinegar
* Spray bottle
* Bowl of warm water
Instructions:
1. Prepare the Sock: Turn an old sock inside out and slip it onto your hand like a glove.
2. Vinegar Solution: In a spray bottle, mix equal parts white vinegar and water. Lightly spray the sock with the vinegar solution.
3. Wipe the Blinds: Starting at the top, pinch each slat of the blind between your thumb and fingers (with the sock on your hand) and wipe across the entire length. The sock will trap the dust and dirt.
4. Rinse and Repeat: Rinse the sock in the bowl of warm water as needed. Re-spray with the vinegar solution and continue cleaning the blinds.
5. Dry the Blinds: Once you’ve cleaned all the slats, use a clean, dry sock to wipe them dry. This will prevent water spots.
Unclogging Drains Naturally
Forget harsh chemicals! This natural method is effective and safe for your pipes.
What You’ll Need:
* 1 cup baking soda
* 2 cups boiling water
* 1 cup white vinegar
Instructions:
1. Baking Soda First: Pour the baking soda down the drain.
2. Vinegar Power: Follow with the white vinegar. You’ll hear fizzing – that’s the chemical reaction working to break down the clog.
3. Let it Sit: Let the mixture sit for at least 30 minutes, or even better, overnight.
4. Flush with Boiling Water: After the waiting period, carefully pour the boiling water down the drain. This will help to flush away the loosened clog.
5. Repeat if Necessary: If the drain is still clogged, repeat the process. For stubborn clogs, you may need to use a plunger after the boiling water.
Reviving Dingy White Laundry
White clothes can easily become dingy over time. Here’s how to brighten them up without bleach.
What You’ll Need:
* 1/2 cup baking soda
* 1/2 cup hydrogen peroxide
* Laundry detergent
Instructions:
1. Add to Washing Machine: Add your white clothes to the washing machine.
2. Baking Soda and Peroxide: Add the baking soda and hydrogen peroxide to the washing machine drum.
3. Laundry Detergent: Add your regular laundry detergent.
4. Wash as Usual: Wash the clothes on the hottest water setting recommended for the fabric.
5. Sun Dry (Optional): If possible, hang the clothes outside to dry in the sun. The sun’s rays have a natural bleaching effect.
Cleaning Your Dishwasher Effectively
A clean dishwasher means cleaner dishes! Here’s how to keep yours running smoothly.
What You’ll Need:
* 1 cup white vinegar
* Baking soda
Instructions:
1. Vinegar Rinse: Place a dishwasher-safe cup filled with white vinegar on the top rack of the empty dishwasher.
2. Run a Hot Cycle: Run the dishwasher on a hot cycle. The vinegar will help to remove grease, grime, and mineral deposits.
3. Baking Soda Refresh: Sprinkle a cup of baking soda on the bottom of the dishwasher.
4. Run a Short Cycle: Run a short cycle. The baking soda will help to deodorize and freshen the dishwasher.
5. Clean the Filter: Don’t forget to remove and clean the dishwasher filter regularly. This is where food particles and debris can accumulate. Rinse it under warm water and scrub with a brush if necessary.
Dusting Like a Pro
Dusting can feel like a never-ending task. Here’s a tip to make it more
Conclusion
So, there you have it! This genius cleaning shortcut isn’t just another fleeting trend; it’s a game-changer that will revolutionize your cleaning routine. We’ve shown you how simple it is to achieve sparkling results with minimal effort and maximum impact. Forget spending hours scrubbing and stressing over stubborn stains. This method is designed to save you time, money, and a whole lot of elbow grease.
Why is this a must-try? Because it’s effective, efficient, and incredibly versatile. It tackles a wide range of cleaning challenges, from grimy grout to dull surfaces, leaving your home feeling fresh and revitalized. Plus, it’s often more eco-friendly than relying solely on harsh chemical cleaners. You’re not just cleaning; you’re contributing to a healthier home and a healthier planet.
But the beauty of this genius cleaning shortcut lies in its adaptability. Feel free to experiment with variations to suit your specific needs and preferences. For instance, if you’re dealing with particularly stubborn stains, consider adding a bit of baking soda to the mixture for extra scrubbing power. Or, if you prefer a more fragrant cleaning experience, a few drops of your favorite essential oil can transform your cleaning solution into an aromatherapy powerhouse. Lavender, lemon, and tea tree oil are all excellent choices for their cleaning and mood-boosting properties.
Don’t be afraid to get creative! The key is to find what works best for you and your home. You can also adjust the ratios of ingredients to achieve the desired consistency and cleaning strength. Remember to always test any cleaning solution on a small, inconspicuous area first to ensure it doesn’t damage the surface.
We are confident that once you try this genius cleaning shortcut, you’ll wonder how you ever lived without it. It’s a simple, effective, and affordable way to keep your home looking its best.
Now, it’s your turn! We encourage you to give this DIY cleaning trick a try and see the amazing results for yourself. Share your experiences with us in the comments below. We’d love to hear your tips, variations, and success stories. Let’s build a community of clean-home enthusiasts who are passionate about finding innovative and effective cleaning solutions.
Let us know what surfaces you tried it on, what variations you experimented with, and what kind of results you achieved. Your feedback is invaluable and will help us continue to refine and improve this cleaning method. Together, we can make cleaning less of a chore and more of a rewarding experience. So, grab your supplies, get cleaning, and share your genius cleaning shortcut success!
Frequently Asked Questions (FAQ)
What exactly makes this cleaning shortcut so “genius”?
This cleaning shortcut is considered “genius” because it combines readily available, often inexpensive household ingredients to create a powerful and versatile cleaning solution. It eliminates the need for multiple specialized cleaning products, saving you money and storage space. Furthermore, it’s often more environmentally friendly than harsh chemical cleaners, making it a sustainable choice for your home. The “genius” lies in its simplicity, effectiveness, and adaptability to various cleaning tasks.
What types of surfaces can I safely use this cleaning shortcut on?
This depends on the specific ingredients used in your DIY cleaning solution. However, as a general rule, it’s safe to use on most non-porous surfaces such as countertops (granite, quartz, tile), sinks, bathtubs, showers, toilets, floors (tile, linoleum, sealed hardwood), and appliances. Always test the solution on a small, inconspicuous area first to ensure it doesn’t damage or discolor the surface. Avoid using it on delicate surfaces like unsealed wood, marble, or natural stone without proper research and caution.
Can I use this cleaning shortcut on clothing or fabrics?
While some ingredients used in this cleaning shortcut, like vinegar or baking soda, are known for their stain-removing properties, it’s crucial to exercise caution when using them on clothing or fabrics. Always test the solution on a hidden area of the fabric first to check for colorfastness. Avoid using harsh chemicals like bleach or ammonia on fabrics, as they can cause irreversible damage. For delicate fabrics or stubborn stains, it’s best to consult a professional cleaner.
How often should I use this cleaning shortcut?
The frequency of use depends on your cleaning needs and the specific area you’re cleaning. For high-traffic areas like kitchens and bathrooms, you may want to use it several times a week. For less frequently used areas, once a week or even less often may suffice. Pay attention to the buildup of dirt and grime and adjust your cleaning schedule accordingly. Remember, regular cleaning is key to preventing stubborn stains and maintaining a clean and healthy home.
What are some common mistakes to avoid when using this cleaning shortcut?
One common mistake is not testing the solution on a small, inconspicuous area first. This can lead to damage or discoloration of the surface you’re cleaning. Another mistake is using too much of a particular ingredient, which can leave a residue or create an unpleasant odor. Always follow the recommended ratios and adjust as needed. Finally, avoid mixing incompatible cleaning agents, such as bleach and ammonia, as this can create dangerous fumes.
Can I add essential oils to this cleaning shortcut? If so, which ones are best?
Yes, adding essential oils to your cleaning solution can enhance its cleaning power and provide a pleasant aroma. Some of the best essential oils for cleaning include lemon, lavender, tea tree, eucalyptus, and peppermint. Lemon oil is a natural degreaser and disinfectant, lavender oil has antibacterial and calming properties, tea tree oil is a powerful antiseptic and antifungal, eucalyptus oil is a natural disinfectant and deodorizer, and peppermint oil has antibacterial and refreshing properties. Add a few drops of your favorite essential oil to the cleaning solution and enjoy the added benefits.
How should I store the cleaning solution made from this shortcut?
Store your DIY cleaning solution in a clean, airtight container, such as a spray bottle or a jar with a lid. Label the container clearly with the ingredients and the date it was made. Store it in a cool, dark place away from direct sunlight and heat. Keep it out of reach of children and pets. Most DIY cleaning solutions have a shelf life of several weeks to several months, depending on the ingredients used. If the solution changes color, develops an odor, or becomes cloudy, discard it.
Is this cleaning shortcut safe for pets and children?
While many of the ingredients used in this cleaning shortcut are considered safe, it’s still important to exercise caution when using them around pets and children. Keep the cleaning solution out of reach of children and pets. Ensure that the area you’re cleaning is well-ventilated. Avoid using harsh chemicals like bleach or ammonia, as they can be harmful if ingested or inhaled. If your pet or child accidentally ingests the cleaning solution, contact a veterinarian or poison control center immediately.
What if the cleaning shortcut doesn’t work on a particular stain or surface?
If the cleaning shortcut doesn’t work on a particular stain or surface, don’t give up! Try adjusting the ratios of ingredients or adding a bit of baking soda for extra scrubbing power. You can also try pre-treating the stain with a paste of baking soda and water before applying the cleaning solution. If the stain persists, you may need to try a different cleaning method or consult a professional cleaner. Remember, some stains are more stubborn than others and may require specialized treatment.

Leave a Comment